
Tattoo Pain Chart by Placement (2026): What Hurts Most?
Two hours before my first appointment I had a photo of the spot pinned to my fridge and a list of placements I would not be getting tattooed. The list was wrong. So here is the short version: the five most painful placements on a tattoo pain chart by placement are the armpit, palm, throat, face and toes, all sitting in the 8 to 9 range, and the least painful are the outer upper arm, outer thigh, buttocks, shoulder blade and outer forearm at 2 to 3.
That is the honest version of a question nobody can answer perfectly for you. Pain tolerance is personal and the same placement can land two places on the scale for two people. What this chart does is let you compare areas, so you can walk into a consultation knowing roughly what you are agreeing to.
Across the placement threads on r/tattooadvice, the most repeated thing people say afterwards is that the dread beforehand was worse than the session itself. That gap between the two is the whole reason a chart like this exists.
Tattoo Pain Chart by Placement: Quick Guide
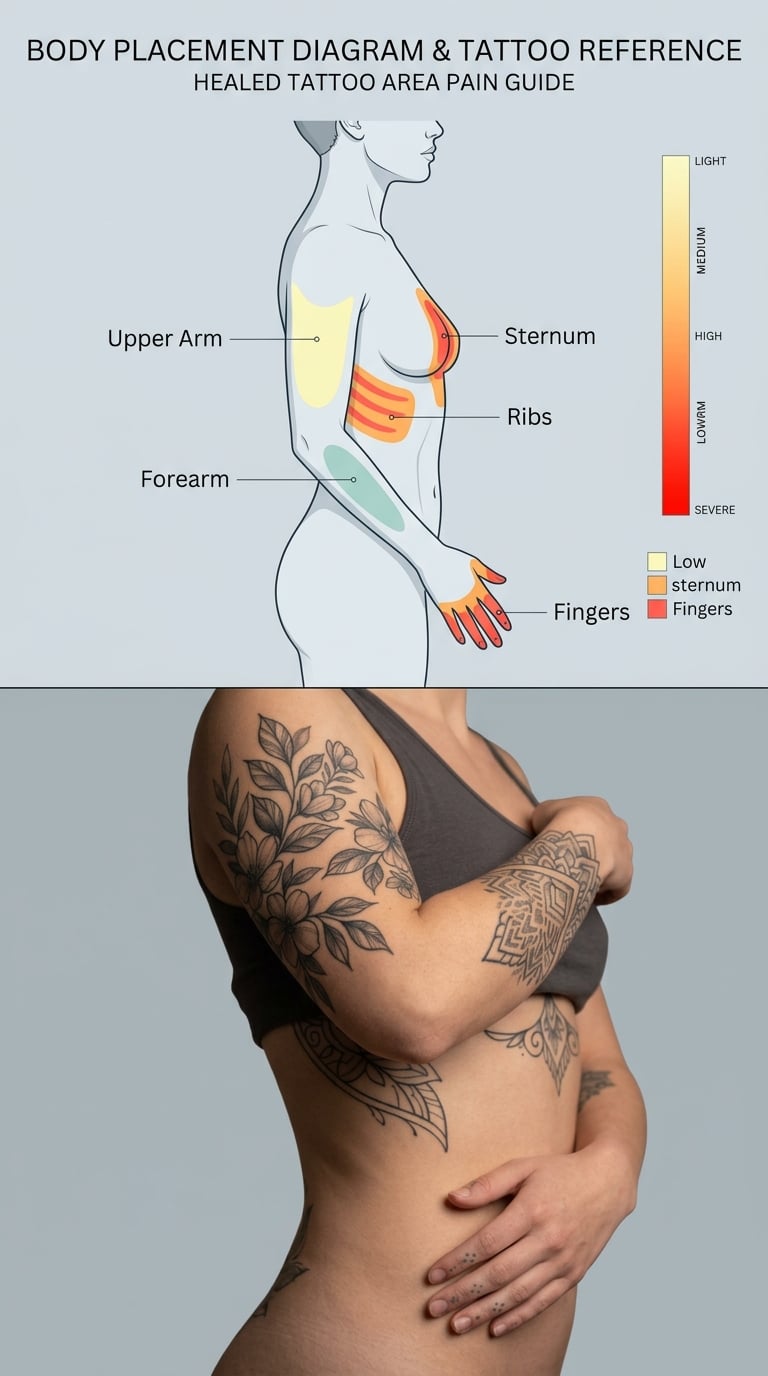
A tattoo pain chart by placement is a reference that rates body areas from 1 to 10 using four anatomical variables: how close bone sits to the skin, how dense the nerve endings are, how thick the skin is, and how much muscle or fat sits under the needle. Scores below are an editorial comparison drawn from anatomy and widely reported experience, not a measurement or a prediction.
Start with the bands, because the number matters less than what it feels like and how long you can sit comfortably in that band.
| Band | Score | What it feels like | Session guidance |
|---|---|---|---|
| Mild | 1 to 3 | Light scratch with a slow heat underneath. You can hold a conversation and barely think about it. | Most people sit for three to four hours here without trouble. |
| Moderate | 4 to 5 | Constant sunburn sting that fades between passes, then returns. | Comfortable to about two hours, then the noise starts to grate. |
| High | 6 to 7 | Sharp sting on contact with bone, ribs or tendon, with a deep ache building behind the area. | Plan one to two hour sessions and ask for breaks early. |
| Severe | 8 to 10 | Bone buzz, electric jolts, or a bruised feeling that can last days afterwards. | Short sessions, frequent breaks, and a strong reason to have a plan. |
Here is the full chart, sorted from least to most painful, with the reason and the healing note attached to each score.
| Placement | Pain (1-10) | Why it feels that way | Healing and upkeep |
|---|---|---|---|
| Upper arm, outer side | 2 | Thick skin over a layer of muscle. Very little bone contact. | Heals easily. Curves with the arm as you age. |
| Outer thigh | 2 | Deep fat and muscle padding between skin and bone. | Heals easily. One of the most forgiving spots for a large piece. |
| Buttocks | 2 | Thick skin and substantial padding, plus privacy that lowers stress. | Heals easily. Watch weight changes and stretching. |
| Shoulder blade and upper back | 3 | Broad flat muscle with moderate thickness. | Heals well. Sun exposure fades it faster here than anywhere covered. |
| Outer forearm | 3 | Rounded muscle mass with skin thick enough to absorb the sting. | Heals easily. Hand and forearm line work can soften with age. |
| Bicep, outer arm | 3 | Soft muscle over a wide radius, minimal bone proximity. | Heals easily. Fades unevenly if it gets a lot of sun. |
| Calf | 3 | Muscle belly gives the needle somewhere to go. | Heals well. A common first choice for a larger design. |
| Deltoid, top of shoulder | 3 | Skin sits over one of the thickest muscle areas on the body. | Heals well. Colour and shading hold up nicely. |
| Stomach | 3 | Soft tissue, though it moves constantly and the surface is sensitive to touch. | Heals well. Stretching during healing distorts lines. |
| Hip and hip bone | 3 | Fat padding over the iliac crest softens the initial contact. | Heals well. Side waist pieces shift with weight and posture. |
| Lower back | 4 | Thin skin over a wide flat area with little muscle between skin and bone. | Heals well. High visibility, which is often the deciding factor. |
| Chest and pectoral | 4 | Pectoral muscle helps, but the skin is thin and constantly in motion with breathing. | Heals well. Experienced collectors often avoid it anyway for visibility reasons. |
| Behind the ear | 4 | Paper-thin skin with the skull right underneath. | Awkward. Hits the pillow every night, so plan for a touch-up. |
| Side of neck | 4 | Surface nerves run shallowly and the skin is thin. | Awkward. Shaving and sun both wear it down fast. |
| Inner forearm | 5 | The ulnar nerve runs close to the surface along this line. | Heals well. Washing and hand use both test it daily. |
| Wrist | 5 | Thin skin over the radius and ulna with visible veins nearby. | Average. Scratching and shaving pull at new ink. |
| Inner thigh | 5 | Soft skin, but movement and proximity to the groin make the session awkward. | Heals well. Friction from clothing can irritate early on. |
| Spine, lower back | 5 | Tissue thins directly over the lumbar bones with almost no padding. | Awkward. Lying down and sitting on it are both a problem for weeks. |
| Side of torso and waist | 5 | Skin stretches and contracts with every breath and every bend. | Average. Shaking hands and stretching affect line weight. |
| Scalp | 5 | Bony with thin skin, but the heat of the machine and the short session offset it. | Heals fast. Very short sessions because of the bone contact. |
| Shin | 6 | The tibia sits just under thin skin along the whole front of the leg. | Average. Full sessions can leave a tender ache that lingers. |
| Collarbone | 6 | The clavicle is a ridge of bone with almost no soft tissue above it. | Heals well. Sun damage shows here faster than on covered skin. |
| Spine, middle back | 6 | Nerve bundles run close to the surface along the spine and the skin is thin. | Awkward. Back sleeping is uncomfortable for a while. |
| Inner elbow ditch | 7 | A tight fold of skin, constant joint movement and shallow nerve paths. | Awkward. Bend and stretch pull at a fresh line. |
| Elbow cap | 7 | The olecranon is bone under skin with no padding at all. | Awkward. Clothes rubbing the point cause constant irritation. |
| Kneecap | 7 | Bone directly beneath a thin, tightly stretched skin surface. | Awkward. Bending and kneeling are both uncomfortable early on. |
| Ribs | 7 | Skin over bone with small dips that catch the needle at a different depth on every pass. | Average. A rib piece can stay tender for two weeks or more. |
| Fingers | 7 | Thin skin stretched over the phalanges with joints and tendons close by. | Difficult. High detail, frequent fading, touch-ups often needed. |
| Top of foot | 7 | Bone and tendon are visible under very thin skin. | Difficult. Swelling in the first week disturbs line work and footwear rubs. |
| Ankle | 7 | The malleolus is a bony bump with tight skin and thin padding. | Difficult. Shoe contact interferes with healing. |
| Achilles | 7 | A tendon under a thin skin layer, and the area flexes constantly. | Awkward. Walking and stretching in early healing is uncomfortable. |
| Sternum | 8 | The breastbone is a hard flat plate under thin skin, and the area moves with every breath. | Heals well. Placement is the bigger decision than healing. |
| Back of the knee | 8 | The popliteal area is a bundle of nerves and a joint that bends with every step. | Awkward. Skin crease means tight lines are hard to keep clean. |
| Throat | 8 | Shallow nerves, constant swallowing motion and very thin skin. | Average. Shaving in the area pulls at fresh ink. |
| Nipple and breast | 8 | Highly nerve-dense skin with light tissue behind it. | Heals well. The nerve endings settle down over several weeks. |
| Groin | 8 | Thin, sensitive skin over a shallow bone at the top of the thigh. | Awkward. Movement and moisture both complicate early healing. |
| Palm | 9 | Thick skin, visible tendons and bones, plus dense pressure sensation. | Difficult. Fades fastest of any placement and needs regular touch-ups. |
| Armpit | 9 | The axillary nerve bundle and lymph nodes sit under paper-thin skin with no padding. | Awkward. Moisture, shaving and friction all work against the ink. |
| Toes | 9 | Small bone and tendon mass under thin, tightly stretched skin. | Difficult. Fine detail blurs and fades within a couple of years. |
| Face | 9 | Thin skin across the cheekbone, jaw and brow with dense nerve supply. | Heals quickly. Visibility and social reaction are the harder factors. |
If you only read one part of the chart, read these two lists.
The five most painful placements
- Armpit, 9 out of 10. Nerve bundle and lymph nodes under thin skin with no muscle padding.
- Palm, 9 out of 10. Tendons and bones are visible through thick, dense skin.
- Toes, 9 out of 10. Tiny surface area over bone, with almost no soft tissue.
- Face, 9 out of 10. Thin skin, dense nerves, and constant awareness of the sensation.
- Throat, 8 out of 10. Shallow nerves plus the involuntary swallow motion every time you swallow.
Groin, sternum and back of the knee sit right behind these at 8. In r/tattooadvice threads the armpit comes up most often as the placement people describe with the most dread, and it is also the one experienced collectors most often steer new clients away from.
The five least painful placements
- Upper arm, outer side, 2 out of 10. Thick skin over muscle, almost no bone contact.
- Outer thigh, 2 out of 10. Deep padding and a large flat canvas.
- Buttocks, 2 out of 10. Thick skin, generous padding, private setting.
- Shoulder blade and upper back, 3 out of 10. Broad muscle with moderate skin thickness.
- Outer forearm, 3 out of 10. Rounded muscle with skin thick enough to absorb the sting.
One first-time client in the r/tattooadvice placement threads described a five inch piece on the outer upper arm as not really painful from start to finish. The same person had been dreading a full back piece. That gap is what the chart is for.
Low-Pain Tattoo Placements
The placements in the 1 to 3 band share one feature: enough tissue between the skin and the bone to absorb the needle’s movement. That is why the outer upper arm, outer thigh and buttocks sit at the bottom of the table, and it is also why a thick build or more body fat usually softens a given placement.
Body composition changes the score rather than defining it, so treat these as strong starting points instead of guarantees.
Arms and shoulders in the mild band
The outer upper arm, outer bicep and deltoid are the classic first-tattoo territory. Skin is thick, muscle is generous, and the needle never taps a ridge of bone, so the sensation stays a light scratch with a warm burn underneath. Small designs like the ones in our tiny anchor tattoo placement guide sit especially well on that outer arm and forearm.
Experienced collectors also rate the shoulder blade and upper back as mild, with the added benefit of a large flat surface for a design that needs room. A back piece at 3 out of 10 is still a long session, but the rating holds across hours far better than most people expect.
The calf and outer forearm also sit at 3. Both have a rounded muscle shape that keeps the needle away from bone, which is exactly the pattern behind every low score on this chart.
Legs and torso in the mild band
The outer thigh is the strongest option if the design is large. Collectors with multiple thigh tattoos consistently describe it as unremarkable, and the padding grows deeper the further down you go toward the mid-thigh.
Stomach and hip sit at 3 as well, though for different reasons. The stomach has adequate soft tissue but constant movement, and the hip has decent fat padding that softens the first contact. Neither is a bad choice, and both are easier than the placements people assume will be easier.
Medium-Pain Tattoo Placements
The 4 to 5 band is where most people stop noticing the tattoo after about ten minutes and start noticing it again around the two hour mark. Sensation here is a steady sunburn sting that fades between passes and returns on the next one, with a dull ache building underneath toward the end of a long session.
These are workable placements for a first tattoo if the design is small or if you book a shorter appointment.
Chest, back and neck in the moderate band
The chest and pectoral sit at 4. The muscle underneath helps, but the skin is thin and moves with every breath, so the artist is constantly adjusting angle. Experienced collectors describe the chest as a placement they have deliberately avoided despite wanting the design, and that has more to do with visibility and social reaction than with pain.
The lower back and side of the torso also sit at 4 to 5. Both are thin-skinned over relatively flat bone, which raises the score, and both move constantly. The side of neck and behind the ear sit at 4, where the skull is directly underneath and shaving or pillow contact affect healing more than the session does.
Arms and wrists in the moderate band
The inner forearm is where the ulnar nerve runs close to the surface, which is why it rates 5 rather than 3 like its outer counterpart. The wrist, at 5, is thin skin over the radius and ulna with veins close to the surface.
Neither is a difficult first tattoo. Both are daily-use areas though, so the healing note matters more than the score: hands, wrists and fingers get washed, scrubbed and flexed constantly in the first two weeks.
High-Pain Tattoo Placements
The 8 to 10 band is defined by thin skin, visible bone or tendon, dense nerve paths, and constant movement. Two of those together is usually what pushes a placement to a 9.
None of these are off limits. They just need a plan, and they are the places where a small design in a short session is a much better idea than a large one in a single sitting.
Joint and bone placements in the severe band
The armpit takes the top spot at 9. The axillary nerve bundle and lymph nodes sit under skin with almost no padding, and the area is moist, mobile and impossible to keep still for long.
The palm, at 9, is a different kind of hard. The skin is thick and dense, with tendons and bones clearly visible underneath, so every pass is a concentrated pressure sensation rather than a light surface sting. Palm tattoos are also the placement most often asked about for upkeep, because they fade faster than anything else on the body.
Toes rate 9 for the same structural reason at a much smaller scale, and size is the deciding factor there. Our toe tattoo sizing and placement guide covers what actually holds up on that little surface. The face rates 9 because the skin is thin, the nerves are dense and you are aware of every pass. Sternum, throat, groin, back of the knee and the inner elbow ditch all land at 7 to 8, where the spine, ribs, kneecap, elbow cap and Achilles carry a constant sharp sting with a deep ache behind it.
Ribs sit at 7 rather than 9 for a structural reason worth knowing. The skin crosses small dips between bone, so the needle changes depth repeatedly across a single pass, and the movement of breathing means no two passes land in exactly the same place.
How Pain Level Changes by Tattoo Size and Style
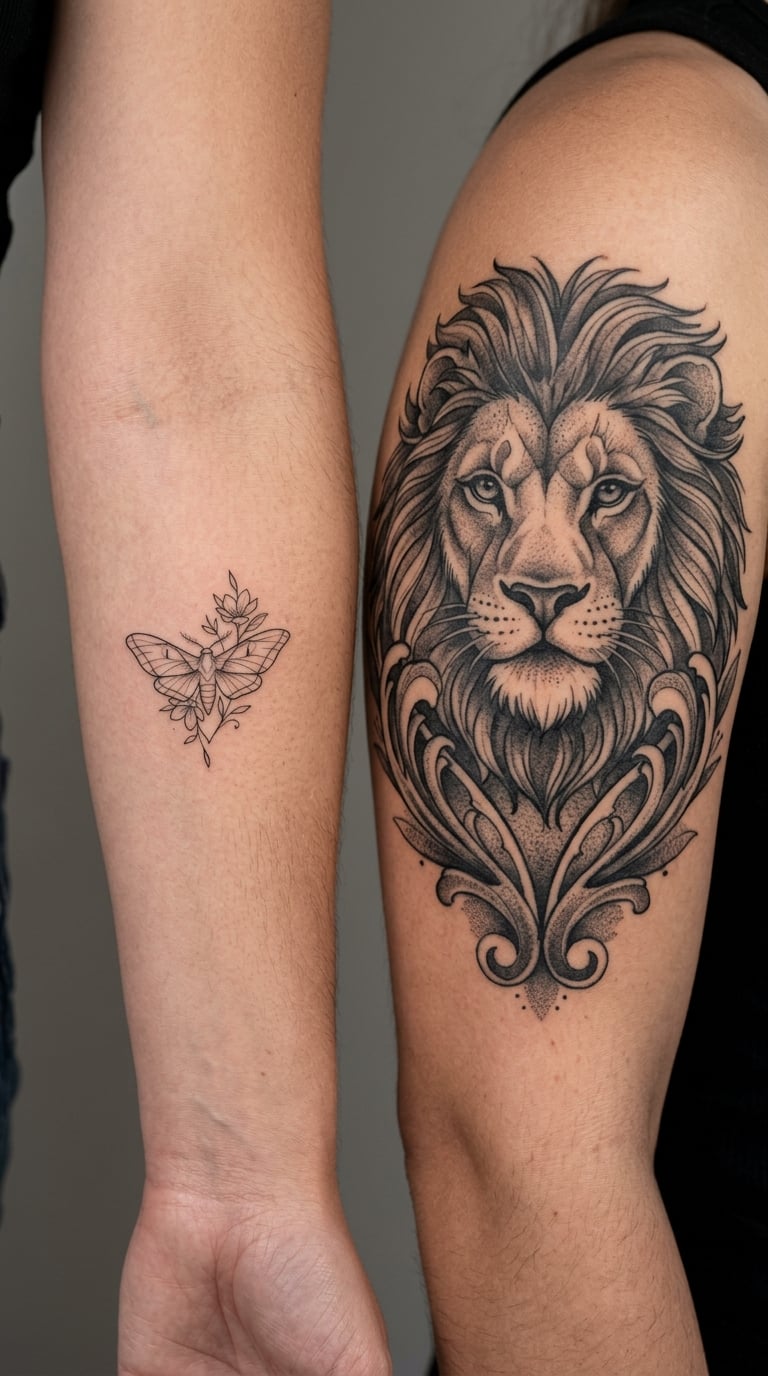
Placement sets the baseline, but size and style decide whether you feel that baseline for forty minutes or for four hours. A small fine-line piece on the inner forearm at 5 and a full shaded forearm sleeve at the same 5 are very different afternoons. If you have not settled on a size yet, how small a tattoo can be walks through the ranges that suit each placement.
| Size and style | Typical session | How it feels compared with a small piece | How long the area stays sensitive |
|---|---|---|---|
| Micro or fine-line, under 1 inch | Under 30 minutes | Baseline score, and you are done before you have time to dread it. | A few hours, sometimes into the next day. |
| Small, 1 to 3 inches | 1 to 2 hours | Baseline score, with the ache starting to build in the final hour. | 1 to 3 days of tenderness. |
| Medium piece, 3 to 6 inches | 2 to 4 hours | Same score at the start, noticeably higher by hour three. Adrenaline fades and you feel it properly. | 3 to 7 days, longer over bone. |
| Large piece or half sleeve, over 6 inches | 4 to 6 hours, often split | Hour four is the real problem, not the placement. Splitting it across two sessions is the standard fix. | 1 to 2 weeks of a bruised feeling, especially over ribs or sternum. |
| Blackwork or solid packing | Same duration, heavier feel | Each pass lays down more ink, so the heat and pressure stay high for longer. Most people rate solid black above line work. | Longest recovery of the styles here. |
| Colour packing | Same duration as shading | Broad colour work feels closer to heavy blackwork than to line work. | Several days of warmth and tightness. |
Line work on its own is usually the easiest work to sit through at any placement, because the machine is over each section briefly. Shading and colour packing hold the needle down longer on the same spot, and that dwell time is what most people notice as heat.
One survey of 1,092 tattooed people published in the International Journal of Environmental Research and Public Health in 2020 found that session duration predicted reported pain more reliably than body region did, which fits what artists see in the chair.
What Factors Affect Tattoo Pain?
Four anatomical variables do most of the work, and everything else shifts the result on top of them.
The four anatomical factors
- Bone proximity. The needle penetrates only one to two millimetres into the dermis and never touches bone. Over the sternum or shin you feel vibration carried into the bone through a very thin layer of tissue, which reads as a sharper buzz than the same work on a padded muscle area.
- Nerve density. Nerves run shallowest at the armpit, groin, throat, neck, fingers and toes. That is why the same needle depth feels mild on the outer arm and electric on the inner elbow.
- Skin thickness. Thin skin transmits movement more directly. The palm and the top of the foot are the extremes, and both are common first tattoos that people underestimate.
- Muscle and fat cushioning. Padding absorbs the movement. This is the whole reason the outer thigh and buttocks sit at 2 and the ankle, which has almost none, sits at 7.
What changes the number on the day
Sleep, food, hydration and alcohol all move the score a band or two in one direction or the other. A night of poor sleep, an empty stomach and a long session is the combination that turns a 5 into a bad afternoon, and it is entirely avoidable.
Artist technique matters as much as anatomy. A light hand, a slower voltage and a change of machine for shading all reduce the sting noticeably, which is why two identical designs on the same person can be tattooed very differently by two different artists.
Numbing cream and lidocaine products come up constantly in forum threads, and the honest answer is to tell your artist before you arrive rather than after. A numbed area can change how the skin takes ink, so an artist who knows can adjust depth and pressure. Applying it without telling anyone risks a patch of ink that sits differently from the rest of the piece.
On the evidence, it is worth being honest about what these numbers are. No controlled study has published pain scores for individual body sites, so every number on this chart, including ours, is an editorial judgement built on anatomy and widely reported experience rather than a measurement. The 2020 survey found body region predicted radiating pain, reported by 83 percent of people tattooed on an upper limb against 72 percent on a lower limb, but it did not significantly predict overall pain intensity. Session length did. Use this chart to compare areas against each other, not to predict what your afternoon will feel like.
How to Use the Tattoo Pain Chart
The chart is a decision tool, not a warning label. Work through it in this order before you book.
Four steps before you book
- Find your placement in the table and note the band. Mild, moderate, high or severe. The band matters more than the exact number.
- Check the healing column before the pain column. A 3 that sits on your pillow every night can be harder to live with than a 7 that heals in a week.
- Match the design size to the band. A moderate placement can take a large piece if you split it. A severe placement is far more manageable as two or three short sittings.
- Compare the score against visibility. Pain and visibility rarely point the same way. A painful spot you can hide is a different decision from a mild one you will explain at work.
Questions worth asking the artist
Ask how the design will be split if it needs more than one session, how long the artist expects this placement to take, and whether they would rather do the piece in three short appointments than one long one. Most artists would honestly rather split it.
Tell them at the start if you want breaks. People in the r/tattooadvice threads make this point over and over: ask before you need one, not after you are already squirming.
If the design wants a joint, a rib or a spine line, say so early. Artists regularly move the same concept to a lower-pain spot without losing the flow of the piece, and an outer thigh or upper back version of a design that was drawn for the ribs often looks better once it is in motion.
Mistakes to Avoid
- Choosing a placement on appearance alone. The spot that fits the artwork is very often one of the higher scores in the chart. Decide with the score in view, not after.
- Underestimating a large design. The most common complaint in placement threads is not that the placement was too painful, it was that hour four was longer than expected. Split the piece.
- Reading a rating as a promise. Two people can sit in the same chair and give the same armpit a 6 and a 9. Use the chart to compare areas, not to argue with your own experience later.
- Forgetting that movement changes everything. The stomach, inner thigh, throat and inner elbow all rate partly on how much they move, and that changes over a long session.
- Ignoring fading on hands and feet. Fingers, palms, toes and the top of the foot rate 7 to 9 and need touch-ups sooner than anywhere else. A painful placement that fades fast is a worse deal than a moderate one that holds.
- Booking a six-hour session as a first appointment. Endurance is a separate skill from tolerance. Your first piece should be short enough that being a beginner does not become the reason it went badly.
Frequently Asked Questions
What is the most painful tattoo placement?
The armpit rates 9 out of 10 on most tattoo pain charts, with the palm, toes and face close behind. The armpit combines an axillary nerve bundle and lymph nodes under paper-thin skin with no muscle padding, and the area is also mobile and moist. A sternum or throat tattoo lands at 8. Individual tolerance varies widely, so treat these as a comparison between areas rather than a prediction of your own session.
Which tattoo placement hurts the least?
The outer upper arm, outer thigh, buttocks, shoulder blade and outer forearm sit at 2 to 3 out of 10. They all share the same feature: enough muscle and fat between the skin and the bone to absorb the needle’s movement. The upper arm is the most common first tattoo for exactly that reason, and a five inch piece there is usually described as mild from start to finish.
Do larger tattoos always hurt more than small tattoos?
Not at the start, but usually by the end. A small piece and a full sleeve on the same placement feel identical during the first twenty minutes. What changes is endurance: a six-hour session ends with a deeper ache, and hour four is where most people say it becomes genuinely difficult. Large pieces over a moderate or high score placement are usually split across two or three shorter appointments.
Does shading or blackwork hurt more than linework?
Most people rate solid blackwork and colour packing above line work at the same placement. The reason is dwell time: line work passes over each section quickly, while shading holds the needle on the same spot longer and the heat builds under it. Blackwork also needs more passes over the same area. A shaded piece at a mild placement can stay comfortable; the same shading over ribs or the sternum will not.
How long does tattoo pain usually last?
A small piece usually feels tender for a few hours and settles by the next day. Medium pieces stay sore for three to seven days, and anything over bone such as the ribs or sternum can stay tender for two weeks. Larger pieces that cover a lot of ground often feel bruised for a week or more. If pain is increasing rather than fading after a few days, say so to your artist rather than waiting it out.
Can I ask my tattoo artist to take breaks during a session?
Yes, and you should ask at the start rather than halfway through. Artists plan around breaks, and telling them before the session begins means they can build them into the schedule instead of stopping mid-pass. People in the r/tattooadvice placement threads make this point constantly, usually because the worst part of a long session is not knowing when relief is coming. A five minute break every hour or two makes a high score placement far more manageable.
Final Advice
Read across the chart, not down it. Pick the two or three placements that suit the design, check their band, their healing column and how visible they will be, and let the three together decide.
Then talk it through with the artist before you book. A good consultation will tell you honestly whether that placement suits the piece, whether the design should be moved or split, and how they would handle breaks. The number in the chart is a starting point for that conversation, not the end of it.