
20 Tiny Anchor Tattoo Ideas and Placement Tips (2026)
A tiny anchor tattoo is a miniature nautical anchor, usually one to two inches tall, inked in fine or single-line blackwork on a small area like the wrist, inner forearm, finger or behind the ear. The anchor reads as steadiness, hope and safety, and it stays legible at small sizes, which makes these tiny anchor tattoo ideas a good first piece or a quiet addition to a bigger collection.
These designs suit anyone who likes nautical symbols, service members, sailors, coastal families, and people who want a meaningful tattoo without a large commitment on their skin. What makes a small anchor work is restraint: fewer details, a heavier line, and a spot where the skin does not move much while the design heals.
Early autumn is when people start planning again, and a small anchor fits neatly into a thirty-day window before colder weather. If you are still deciding, a temporary transfer gives you a week to see how it sits.
Quick Guide
| Idea | Style | Best placement | Size | Pain |
|---|---|---|---|---|
| 1. Single-line anchor | Minimalist | Inner wrist | 1 to 1.5 inch | Medium |
| 2. Rope anchor | Fine line | Outer wrist | 1.5 to 2 inch | Medium |
| 3. Solid blackwork anchor | Blackwork | Inner forearm | 1 to 1.5 inch | Medium |
| 4. Old-school anchor | Traditional | Ankle | 2 to 2.5 inch | Medium |
| 5. Anchor with a heart | Fine line | Finger knuckle | 0.5 to 0.75 inch | High |
| 6. Anchor and star | Minimalist | Collarbone | 1.5 to 2 inch | Medium |
| 7. Cross anchor | Fine line | Shoulder blade | 1.5 to 2 inch | Low |
| 8. Infinity anchor | Minimalist | Behind the ear | 1 inch | Medium |
| 9. Chain-link anchor | Fine line | Side of a finger | 0.5 to 0.75 inch | High |
| 10. Distressed anchor | Grunge | Upper arm | 2 to 2.5 inch | Low |
| 11. Eucalyptus anchor | Botanical | Inner forearm | 2 to 2.5 inch | Medium |
| 12. Dotwork anchor | Dotwork | Sternum | 2 to 3 inch | High |
| 13. Compass rose anchor | Traditional | Inner bicep | 2 inch | Low |
| 14. Nautical star and anchor | Black and grey | Outer calf | 2 to 2.5 inch | Medium |
| 15. Outline anchor | Minimalist | Nape of the neck | 1 inch | Low |
| 16. Anchor in a life ring | Colour | Shoulder cap | 2 to 2.5 inch | Low |
| 17. Two stars and a micro anchor | Minimalist | Ribs | 0.75 inch | High |
| 18. Serpent-wrapped anchor | Illustrative | Outer forearm | 2.5 to 3 inch | Medium |
| 19. Plain outline anchor | Fine line | Back of the hand | 1 inch | High |
| 20. Matching pair of anchors | Fine line | Both ankles | 1 inch each | Medium |
1. Single-Line Anchor on the Inner Wrist
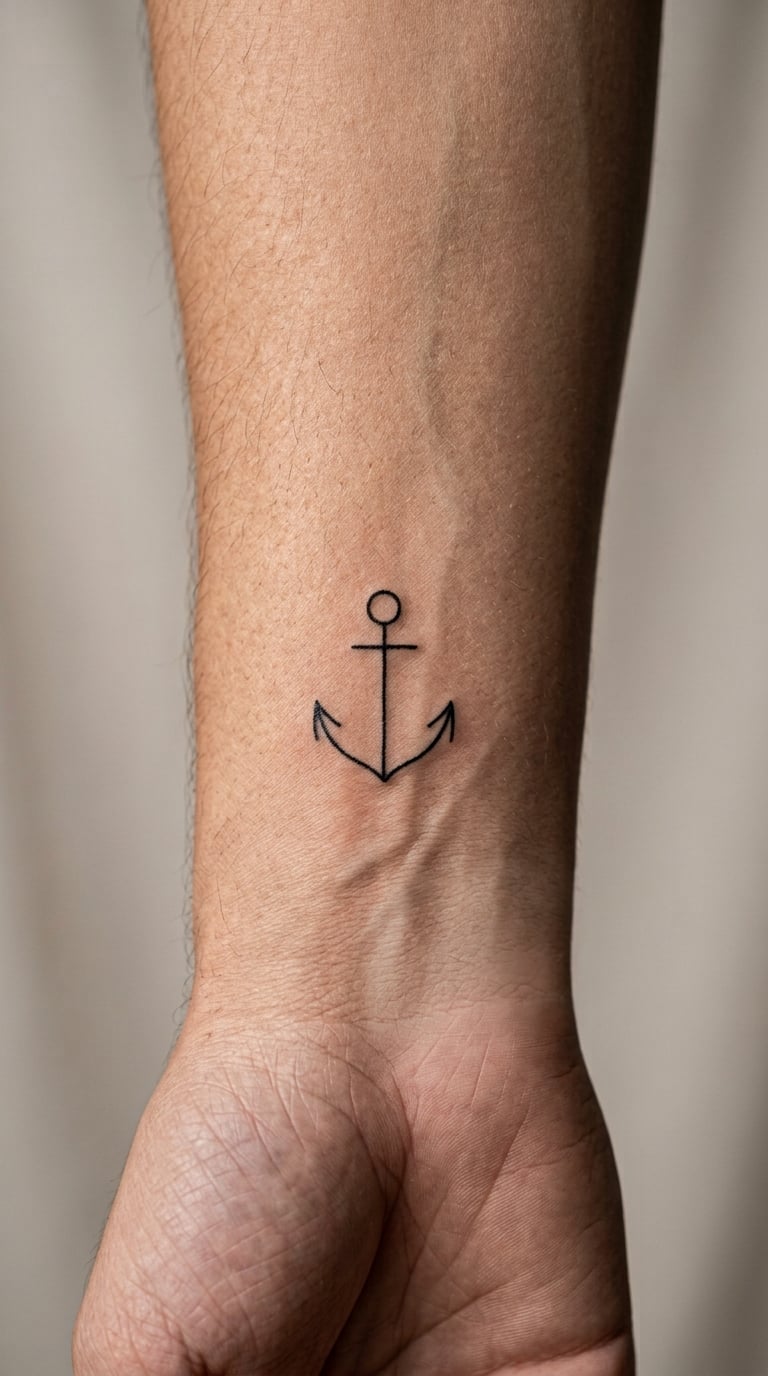
The simplest version is drawn in one continuous line: a straight shank, a curved crown, two flukes, no shading and no fill. Because there is nothing to shade, there is nothing to blur, which is why this is the safest first anchor to get small.
People choose it for the meaning first and the size second. It also works as the first element of a larger wrist piece later, if you ever want it.
Placement: inner wrist, a finger-width above the crease. Size: 1 to 1.5 inch tall, 0.5 inch wide. Style: minimalist single line. Pain: medium, and the wrist crease area feels sharper than the forearm. Make it yours: add the year in tiny numerals curving under the flukes.
2. Fine-Line Rope Anchor on the Outer Wrist
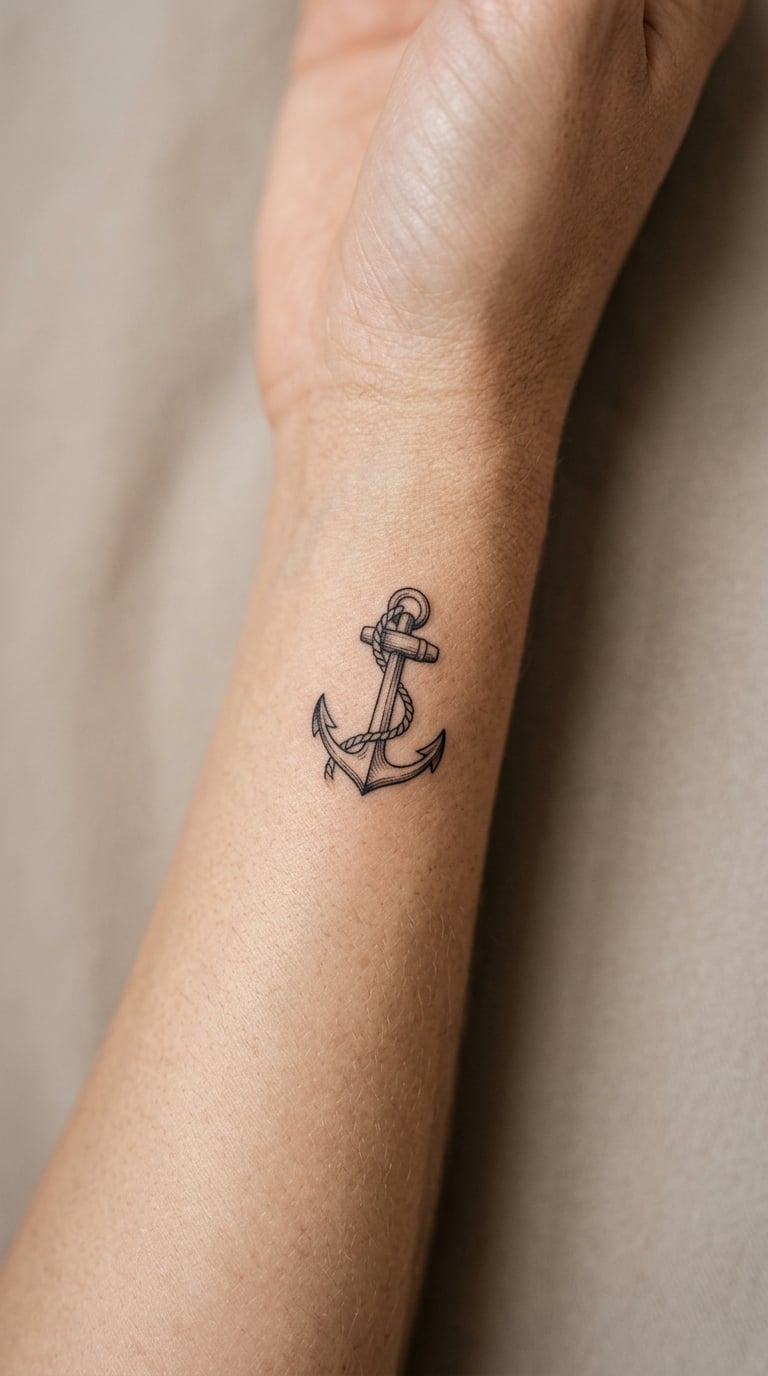
Here the shank is drawn as a twisted rope rather than a plain line, with a few strands wrapping through the top ring. The extra texture makes it read as a nautical object instead of a symbol, and it is the version to pick if you want something with a bit of craft to it.
The rope detail needs a slightly larger anchor than a plain outline. Anything under an inch turns the twist into a smudge as it heals.
Placement: outer wrist or lower forearm, where sleeves and jackets do not rub constantly. Size: 1.5 to 2 inch. Style: fine line with light hatching on the rope. Pain: medium, and the outer forearm is one of the easier spots to sit through. Make it yours: have the rope end in a small loop that matches a bracelet you already own.
3. Solid Blackwork Anchor on the Inner Forearm
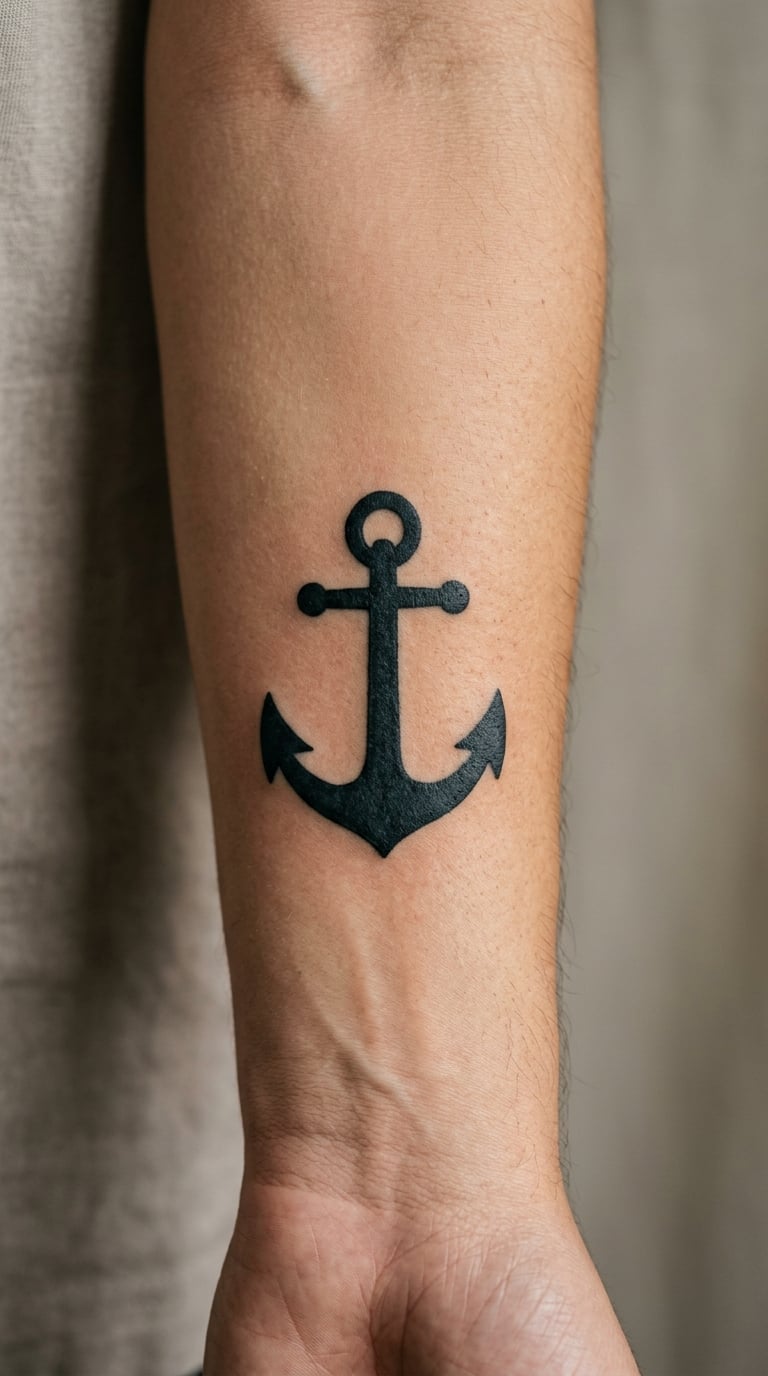
Blackwork here means the whole silhouette is filled in solid, crown and flukes and shank, with a thin line of skin left as negative space to separate the parts. Solid ink holds up better than hairline work, so this is the option if fading over five or ten years is your main worry.
It looks heavier than the other designs here, so most people place it a little larger than the word tiny suggests.
Placement: inner forearm, two inches above the wrist. Size: 1 to 1.5 inch. Style: blackwork with negative-space detail. Pain: medium. Make it yours: keep a hairline line of skin running down the centre of the shank as a dividing seam.
4. Old-School Traditional Anchor on the Ankle
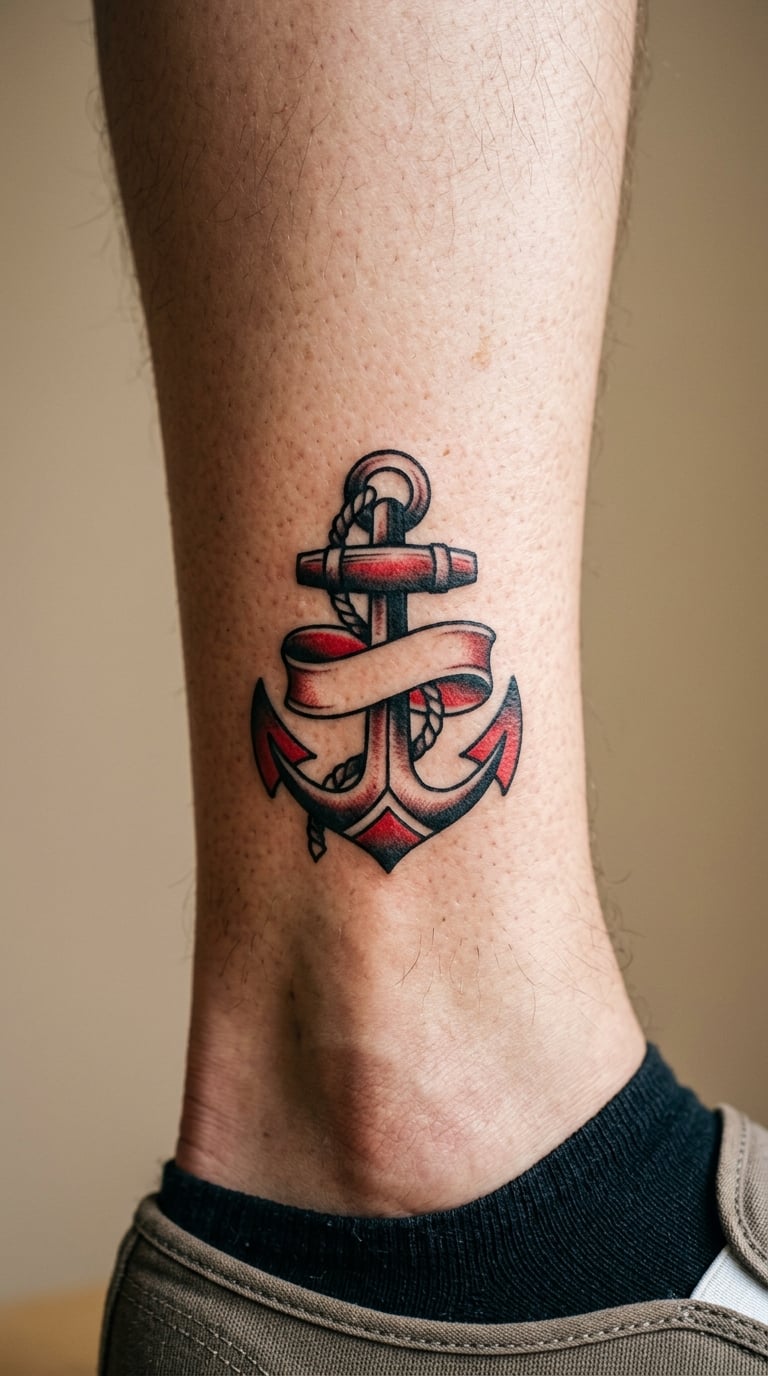
Traditional anchors come straight from sailor tattoos: thick outlines, flat red or green fill, a banner ribbon across the shank and a rope looping through the ring. The bold outlines and saturated colour are forgiving at small scale, which makes this the most reliable coloured option here.
It suits people with family or service background in the navy, and it is the anchor most people picture first.
Placement: ankle, just above the bone on the inner side. Size: 2 to 2.5 inch, the smallest size where banner lettering still reads. Style: traditional. Pain: medium, and the ankle bone is the sensitive part. Make it yours: put a date or short word on the banner instead of decoration.
5. Anchor with a Heart on a Finger Knuckle
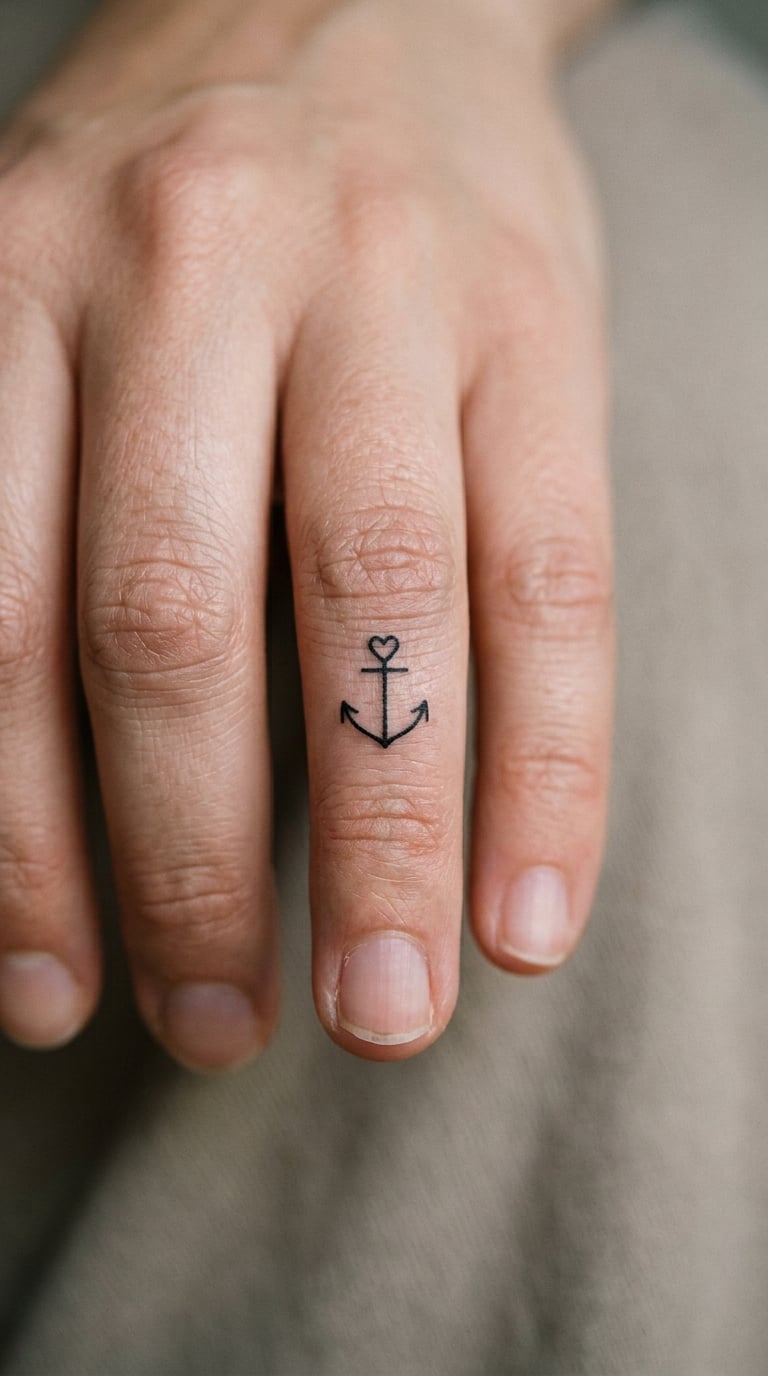
The anchor is drawn at half an inch with a small heart sitting inside the top ring, and the two elements share a line so nothing looks stuck on. It reads as the person you belong to, without writing anything down.
Finger work fades faster than forearm work because hands get sun, soap and friction. Plan on a touch-up every few years.
Placement: side of a finger or the knuckle, aligned with the bone. Size: 0.5 to 0.75 inch, one of the smallest workable anchors. Style: fine line. Pain: high, and knuckles and finger sides are among the more sensitive spots. Make it yours: use a heart outline in the ring rather than a filled one, so it holds more ink detail.
6. Anchor and Star on the Collarbone
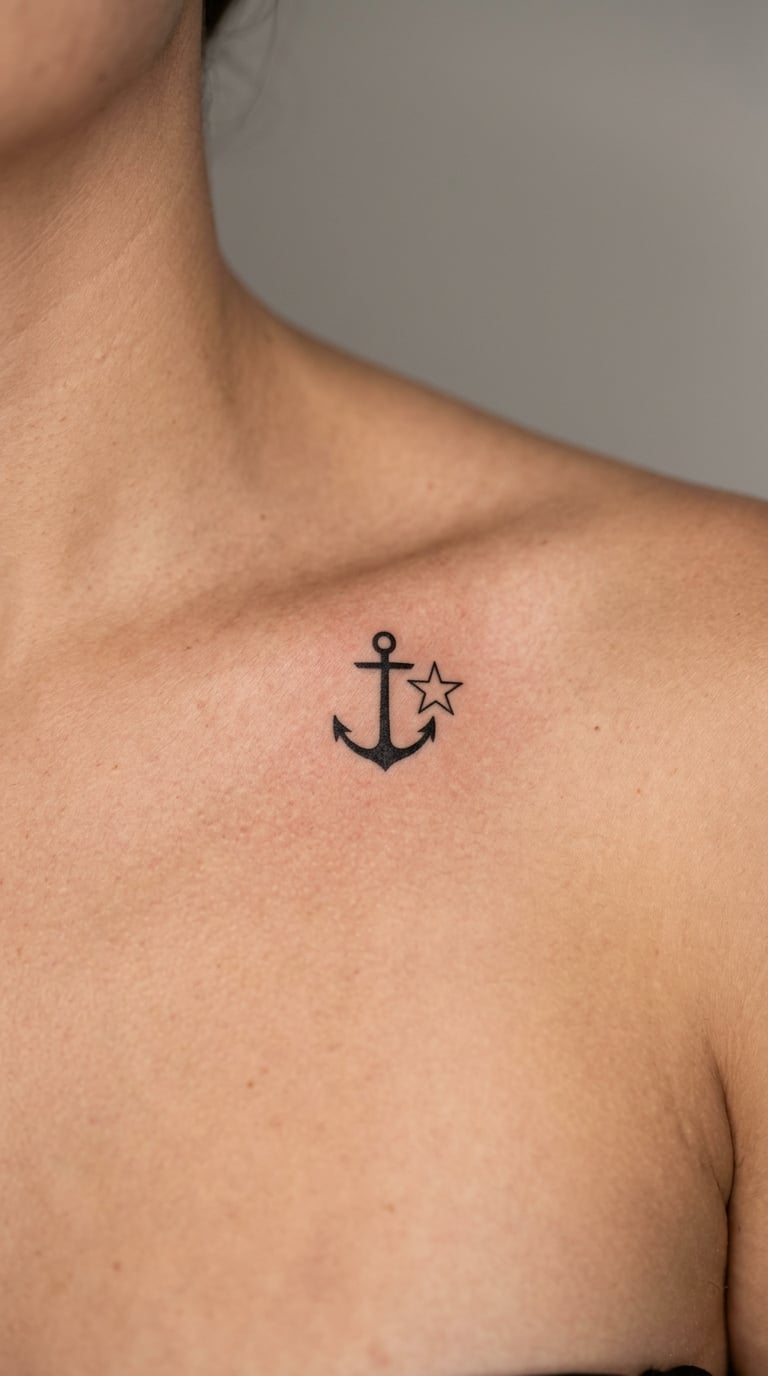
Two elements sit side by side here: a small anchor and a five-pointed star about the same height. The star balances the composition without adding detail, and the pair is one of the most requested tiny anchor tattoo ideas on the board.
It is a popular matching layout, because the same star can be repeated on a partner’s arm or on a second finger.
Placement: collarbone, following the bone’s curve. Size: 1.5 to 2 inch for the pair. Style: minimalist fine line. Pain: medium, and the collarbone is bony with thin skin. Make it yours: angle the pair with the bone instead of straight across it.
7. Cross Anchor on the Shoulder Blade
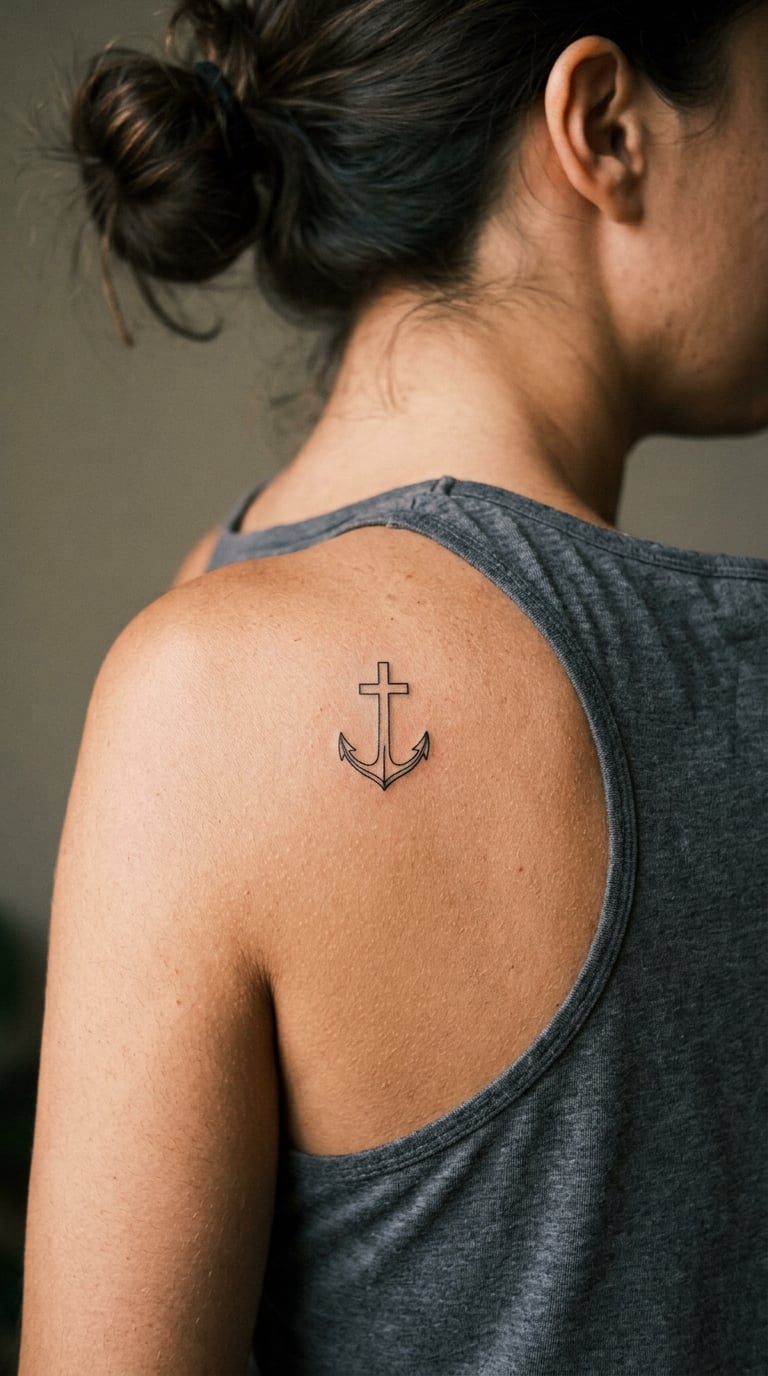
The cross replaces the usual ring at the top of the shank, so the whole shape stays a single readable silhouette. It is the version most tied to a faith reading of the anchor, and the Hebrews line about hope being the anchor of the soul is the quote usually paired with it.
A full verse does not fit at this scale, so people shorten it to a few words or the reference alone.
Placement: upper back near the shoulder blade, where the skin is flat and steady. Size: 1.5 to 2 inch. Style: fine line. Pain: low to medium, and it is one of the easier placements to sit through. Make it yours: put the reference in small numerals underneath in the same line weight.
8. Infinity Anchor Behind the Ear
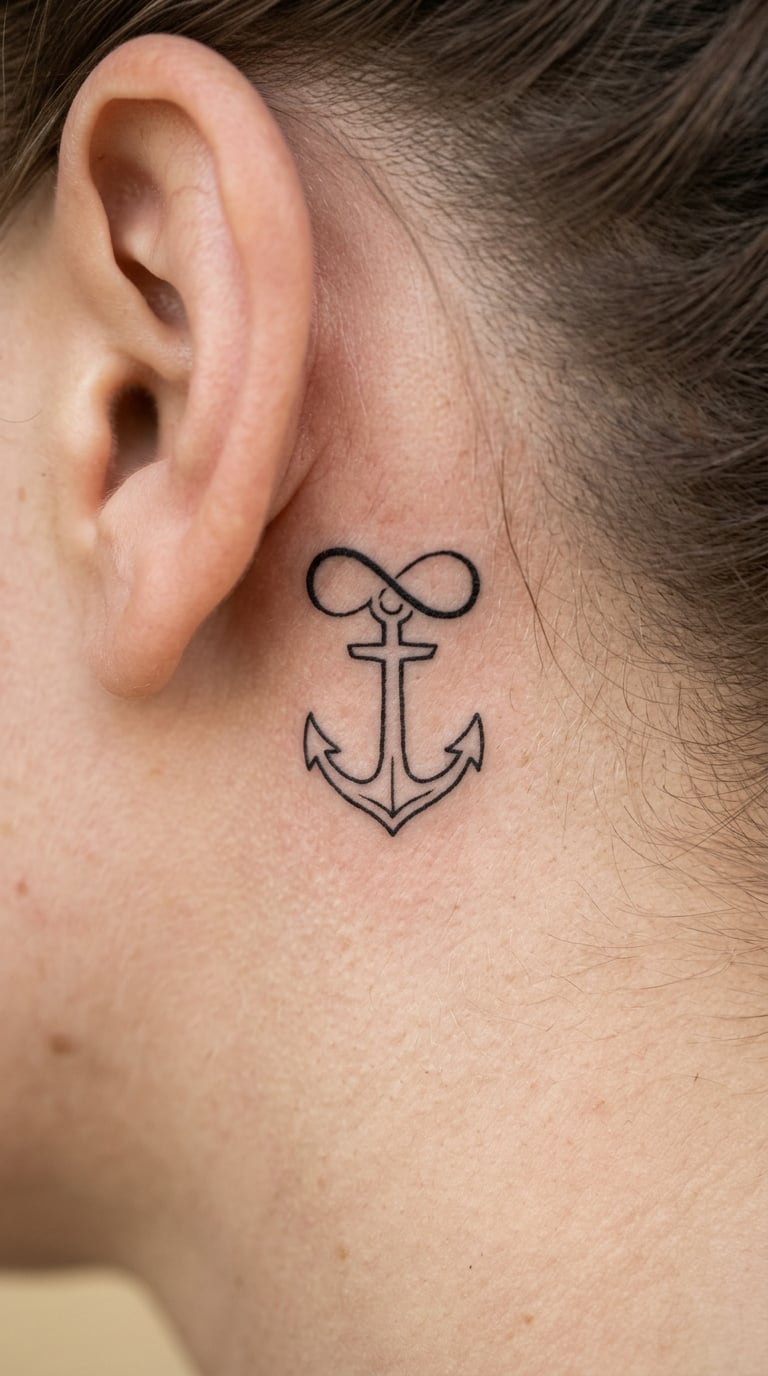
The top ring is drawn as an infinity loop rather than a circle, which turns the symbol into two readings in one mark: the anchor and endlessness. Behind the ear placement keeps it nearly private, which is part of why this layout gets chosen.
Hair regrowth around the ear can partly cover it, so think about whether you want it visible or hidden.
Placement: just behind the ear, an inch above the lobe. Size: about 1 inch. Style: minimalist single line. Pain: medium, and thin skin there feels every pass. Make it yours: tilt the anchor five degrees off vertical so it follows the curve behind the ear.
9. Chain-Link Anchor on the Side of a Finger
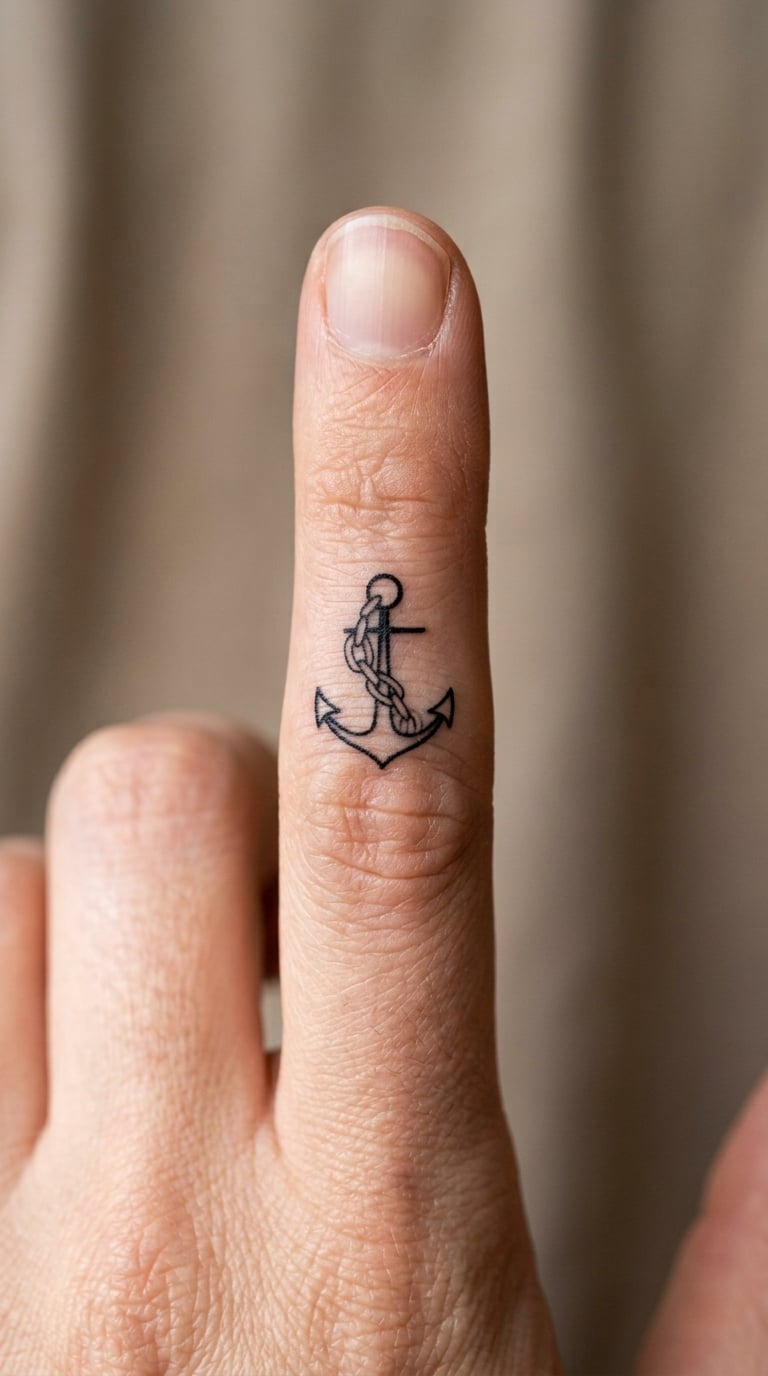
Two interlocking links sit along the shank, and the bottom fluke doubles as the last link so the chain reads as continuous. It is a jewellery reference rather than a nautical one, and the version that works best is heavy-lined enough to survive the scale.
It sits naturally next to a signet or a wedding band, which is usually the point.
Placement: side of the index or ring finger, or the outer edge of the hand. Size: 0.5 to 0.75 inch. Style: fine line with reinforced links. Pain: high. Make it yours: have the links drawn as a chain style you already own.
10. Distressed Worn Anchor on the Upper Arm
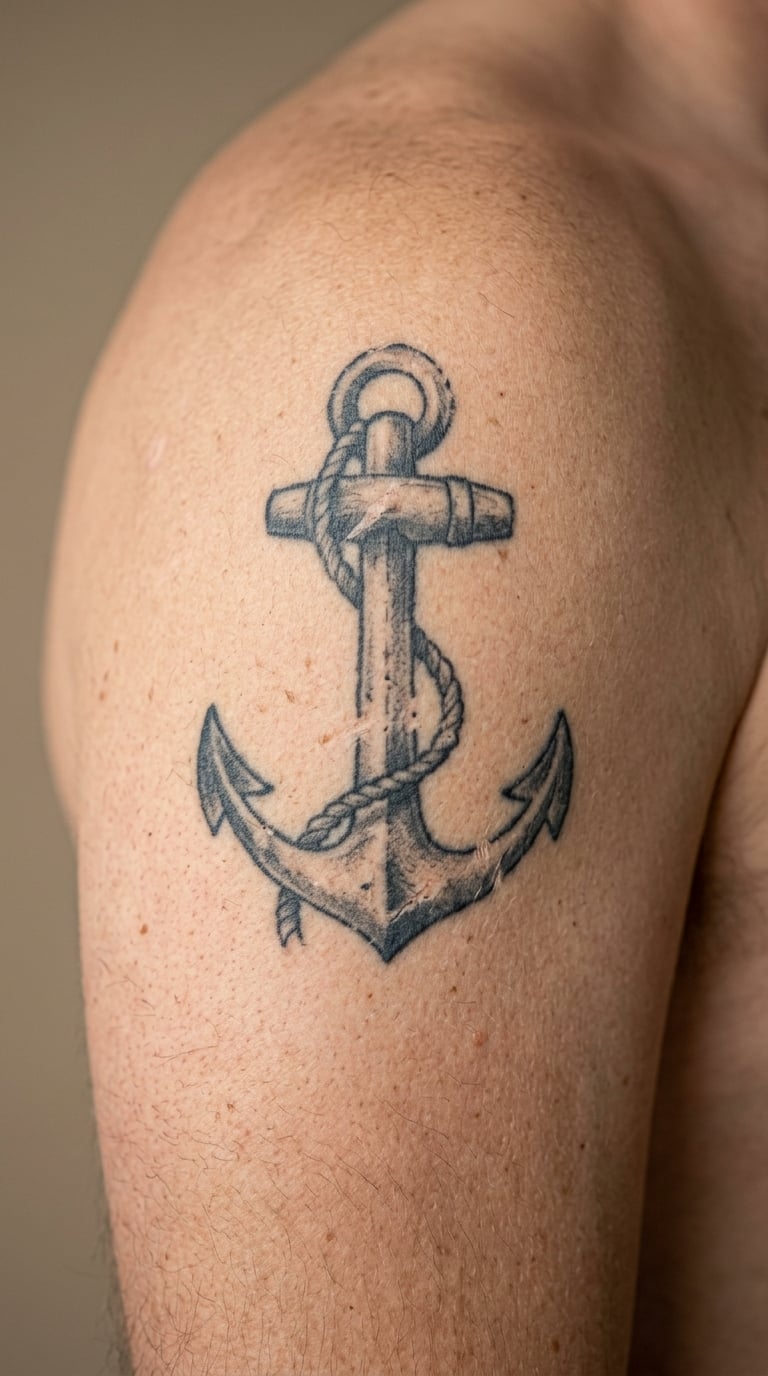
This one is drawn weathered: the black outline is broken and patchy, with grey wash bleeding outside the line as if the ink has worn away. The worn look actually helps, because small imperfections in the ink read as intentional distress instead of sloppy healing.
It is a good match for someone who wants something with a bit of grit and does not want a crisp emblem.
Placement: outer upper arm or shoulder cap, a large flat surface that takes the texture well. Size: 2 to 2.5 inch. Style: grunge, black and grey. Pain: low, and the upper arm is the most forgiving spot on the list. Make it yours: let a few scratches run past the outline, as if the design continues beyond the frame.
11. Eucalyptus Anchor on the Inner Forearm
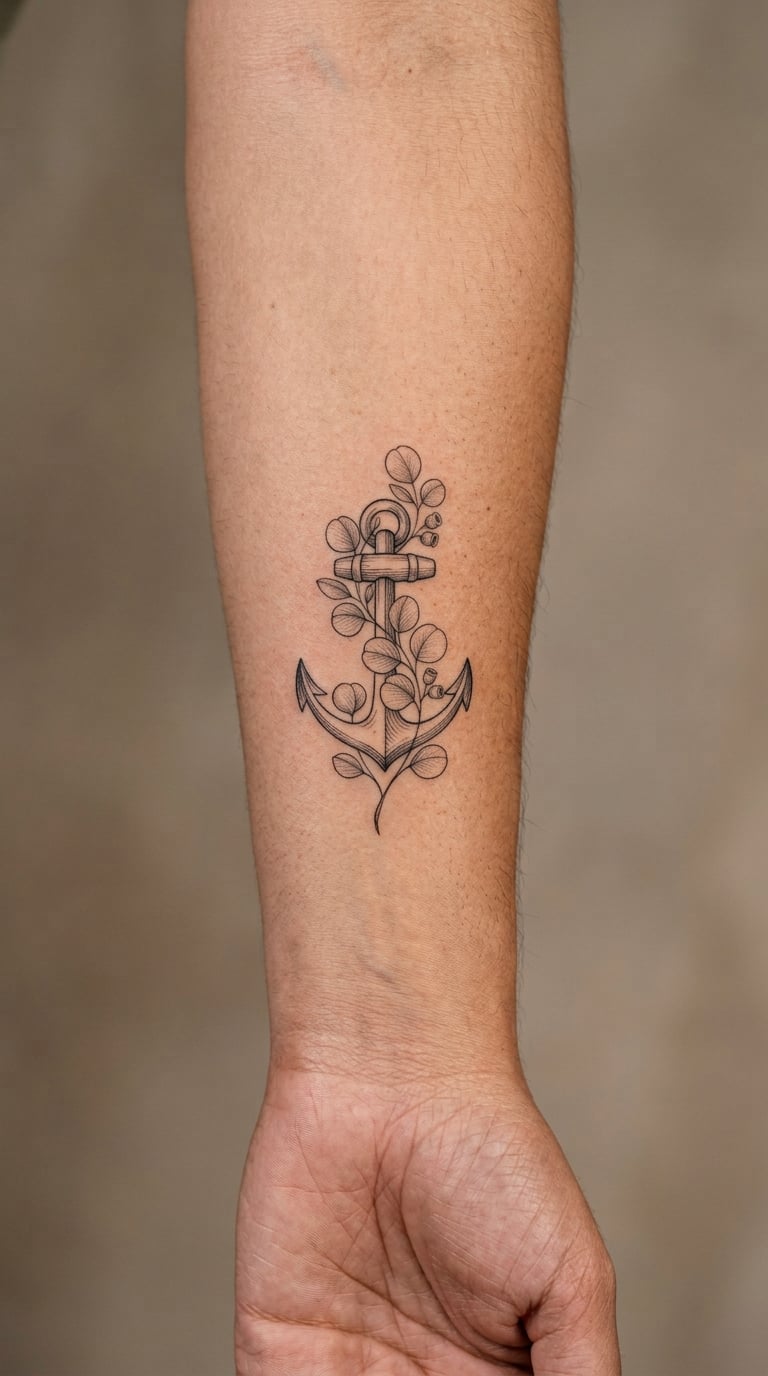
Sprigs of eucalyptus wrap around the shank and curl toward the flukes, with each leaf drawn as a simple almond shape and a single vein. Greenery is the most natural addition to an anchor, and it turns a flat symbol into something that looks grown rather than stamped.
More leaves means a larger design. Below an inch the leaves merge into a grey blur.
Placement: inner forearm, where the arm is straight and the design can run lengthwise. Size: 2 to 2.5 inch. Style: botanical fine line. Pain: medium. Make it yours: use a plant that means something to you, or one from where your family is from.
12. Dotwork Anchor on the Sternum
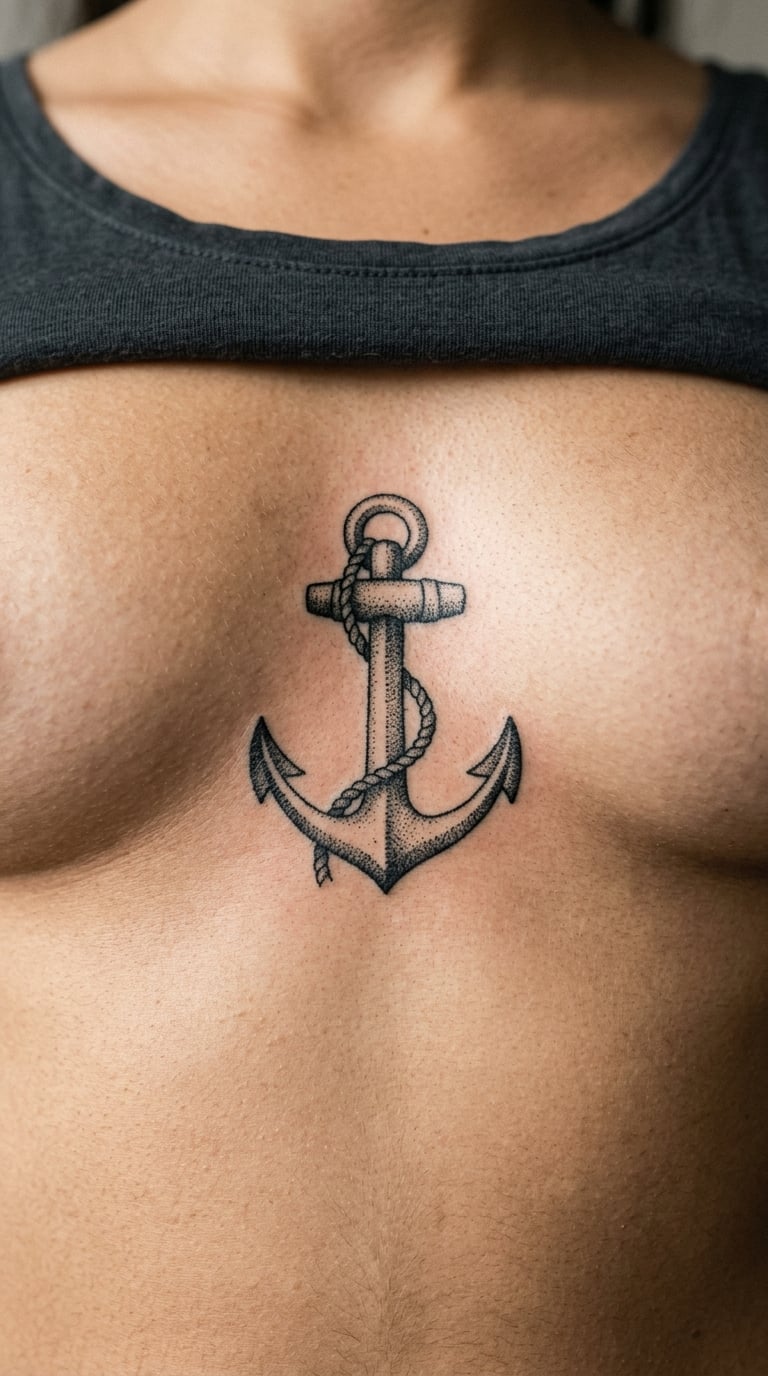
The anchor is built entirely from dots, with density standing in for shading: tightly packed dots inside the shank, looser ones fading out at the edges. It is a style that suits curved skin, because the dot pattern bends with the body instead of fighting it.
Dotwork takes longer to tattoo than line work, so a session on the sternum can run past an hour for a small design.
Placement: sternum, centred between the pecs, or slightly off to one side. Size: 2 to 3 inch. Style: dotwork. Pain: high, because breastbone skin is thin and sensitive. Make it yours: fade the dot density to nothing at the bottom fluke so the design dissolves downward.
13. Compass Rose Anchor on the Inner Bicep
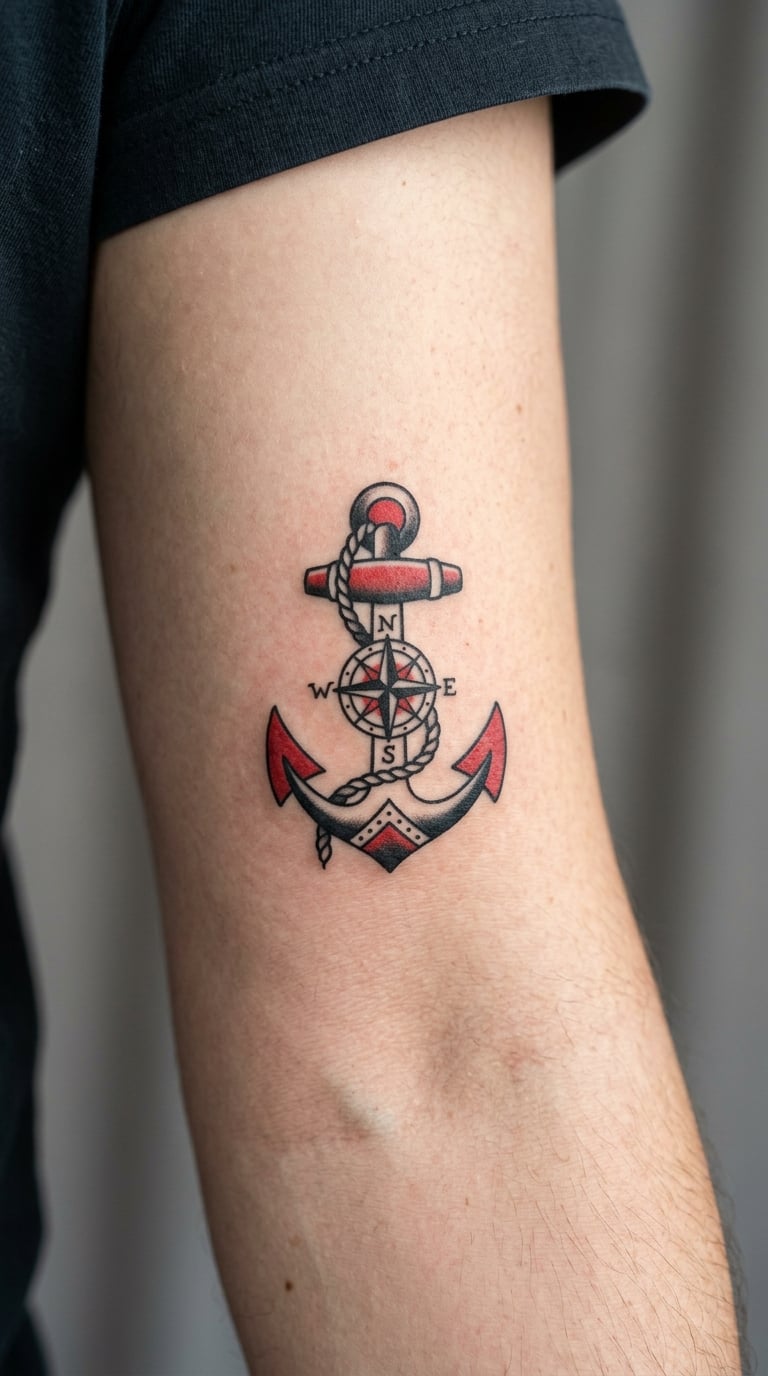
The anchor is drawn traditional, with a small eight-point compass rose set into the shank, and a thin red line picked out in the crown. Both objects come from the same working vocabulary of charts and navigation, so the pairing feels native rather than added.
The inner bicep is a spot people forget, and it is one of the least painful places to get this done.
Placement: inner upper arm, tucked in the crease. Size: about 2 inch. Style: traditional with a red accent. Pain: low. Make it yours: have the compass needle point in a direction that means something, like a hometown.
14. Nautical Star and Anchor on the Outer Calf
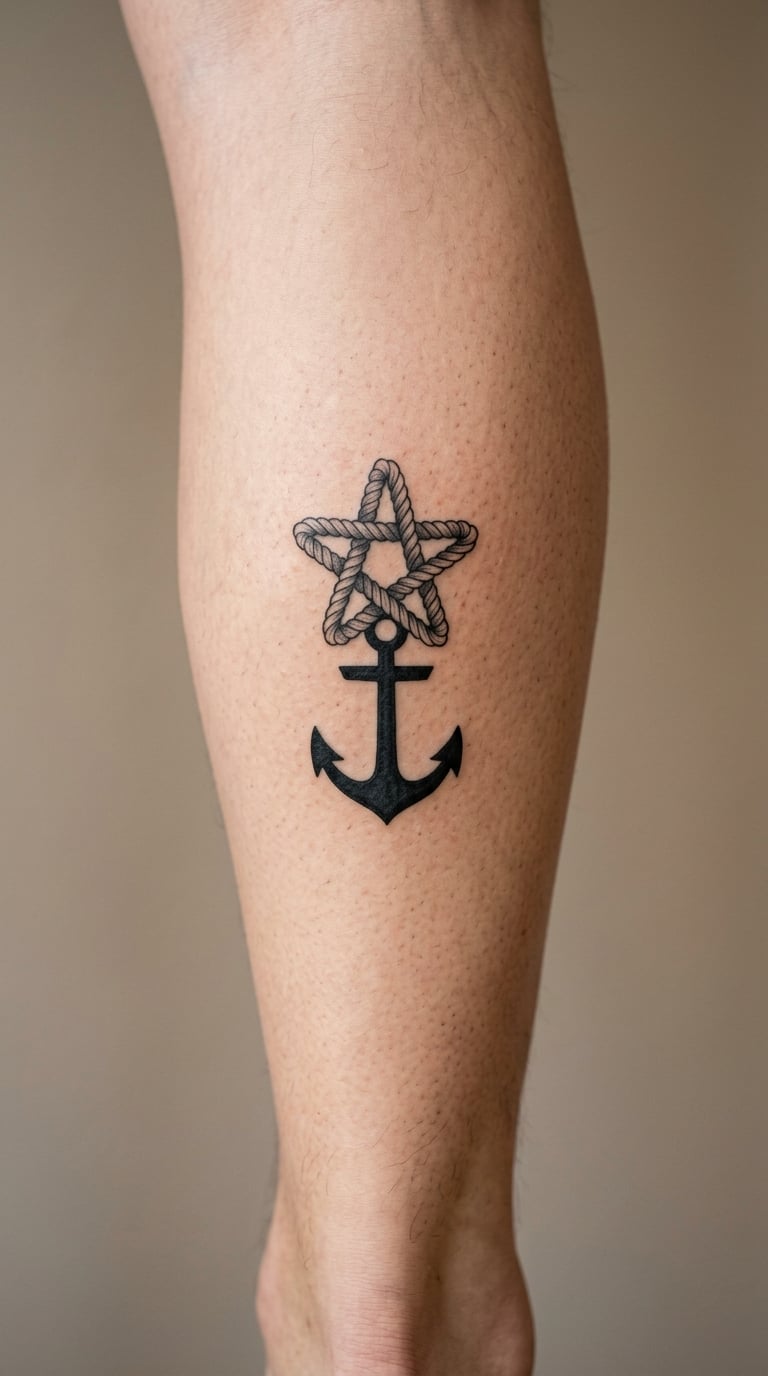
A rope star sits above a small anchor, both drawn in black and grey with soft shading where the rope overlaps the metal. Traditional sailor tattoos put the star and anchor together often, and this version keeps the pairing vertical so it reads as one tall design.
The calf gives a flat enough area to fit a taller design than a forearm will, and it stays covered most of the year.
Placement: outer calf, centred on the muscle. Size: 2 to 2.5 inch tall for both elements. Style: black and grey with soft shading. Pain: medium. Make it yours: ink the star as a solid black shape and leave the anchor as a line, so the two styles separate clearly.
15. Outline Anchor on the Nape of the Neck
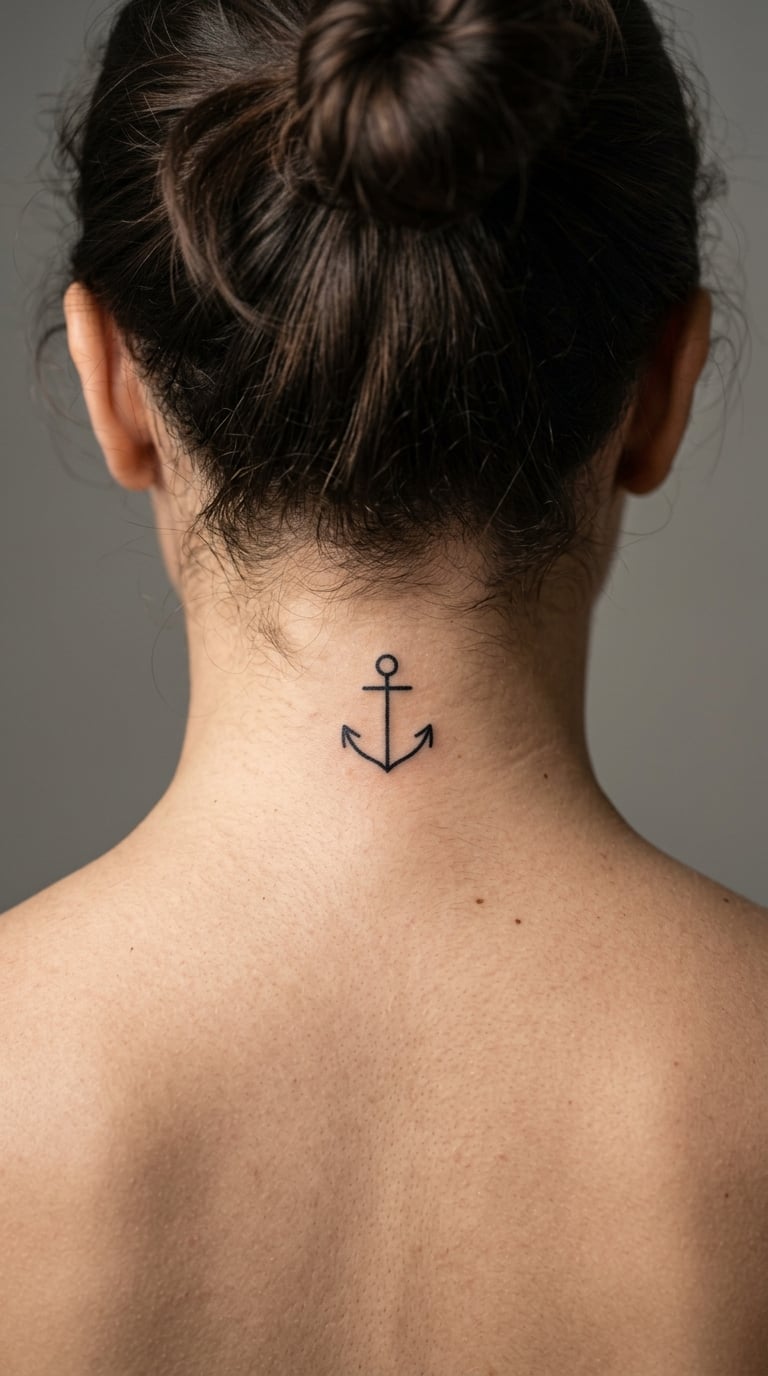
A plain outline anchor sits centred on the nape, a finger’s width below the hairline, and can be slightly tilted to follow the curve of the neck. It is visible when your hair is up and invisible when it is down, which is why it turns up so often as a first back-of-neck piece.
Hair regrowth, shampoo and pillow friction all reach this spot, so it needs more attention in the first two weeks than a forearm piece does.
Placement: nape of the neck, below the hairline. Size: 1 inch. Style: minimalist outline. Pain: low to medium. Make it yours: add a second, smaller anchor on the other side for a mirrored pair.
16. Anchor Inside a Life Ring on the Shoulder Cap
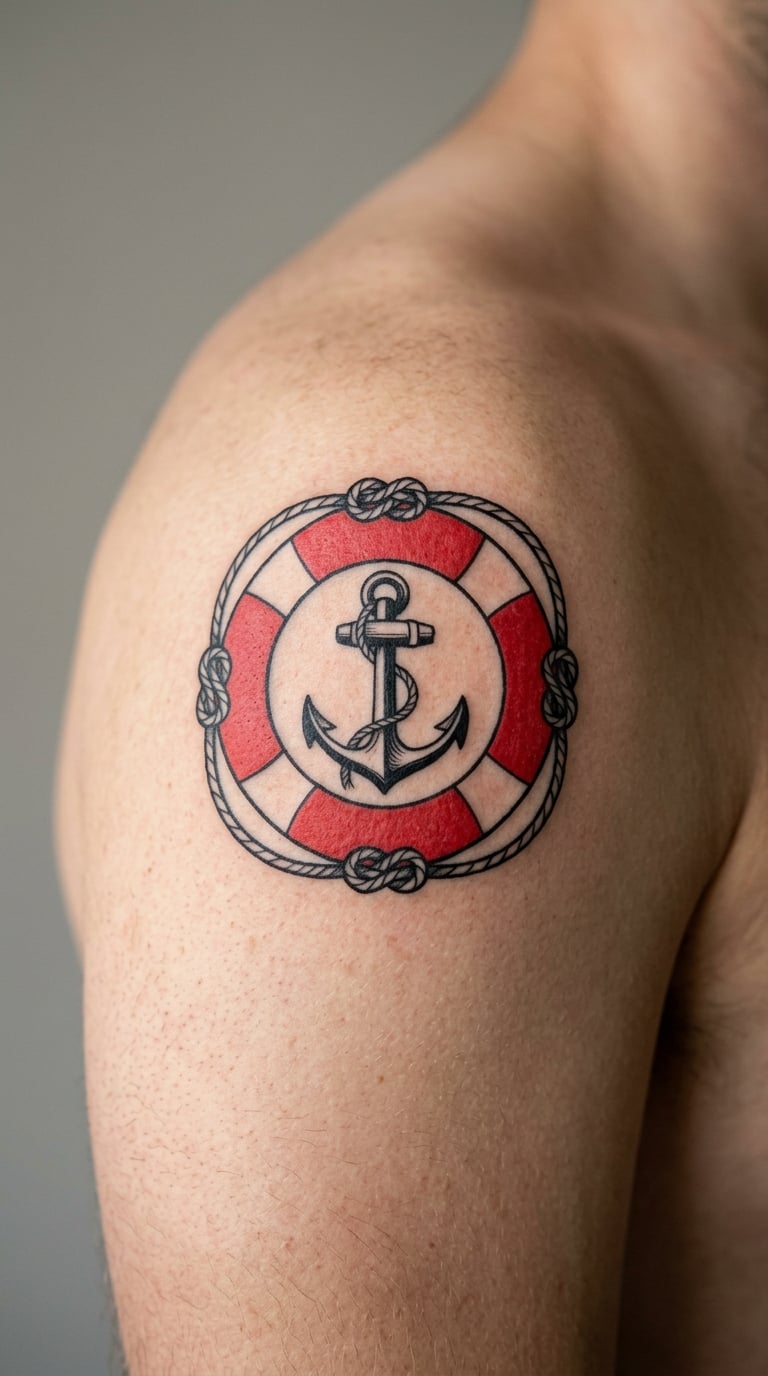
The anchor sits in the middle of a life ring drawn in red and white segments with black outlines, the ring slightly larger than the anchor so the centre stays open. Colour makes this the boldest option here, and the circular frame means the whole design still reads from across a room.
Red ink on a shoulder cap is exposed to sun in summer, so expect the colour to soften first and the black outlines to hold.
Placement: shoulder cap or upper deltoid, on the rounded surface where the ring can sit level. Size: 2 to 2.5 inch across. Style: colour with bold outline. Pain: low. Make it yours: use the ring’s segment colours for something personal, like a team or a flag.
17. Two Stars Framing a Micro Anchor on the Ribs
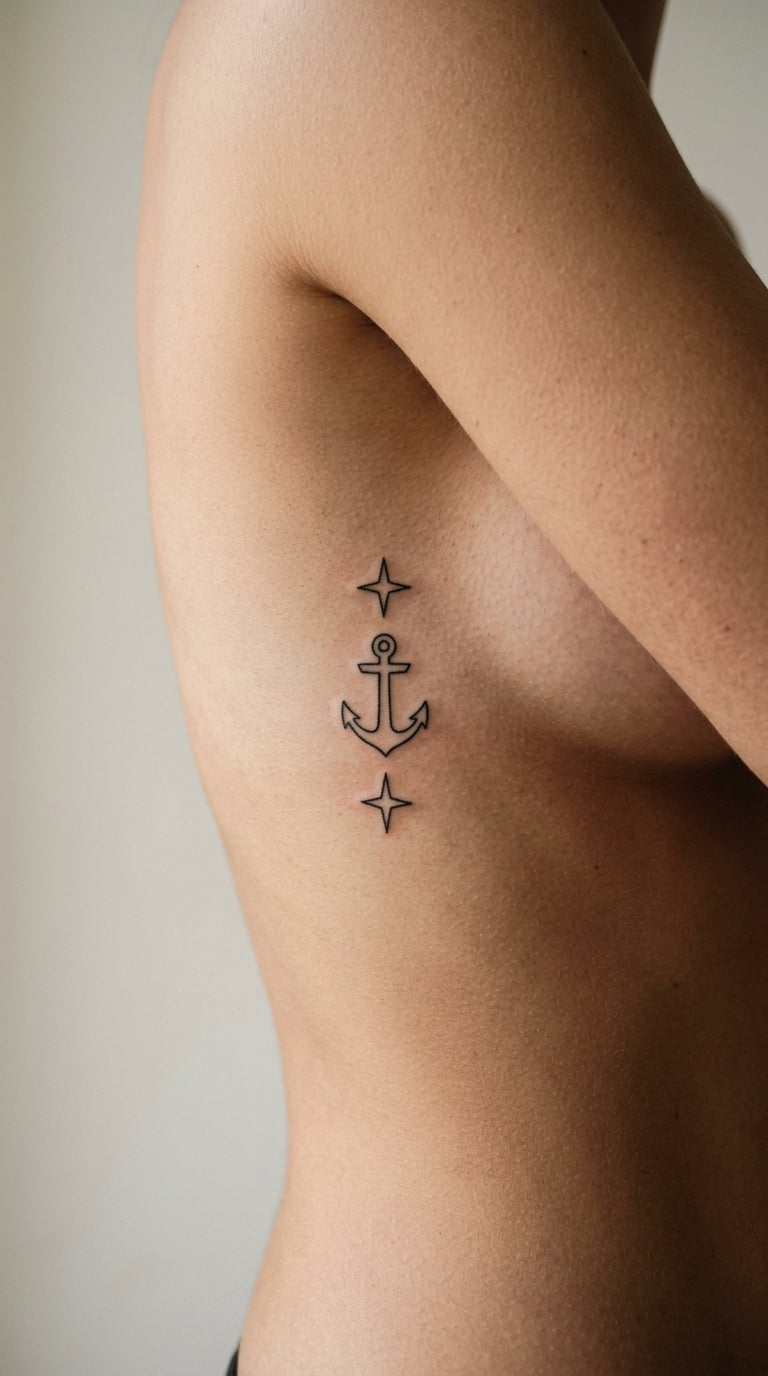
The anchor here is the smallest on the list, roughly three-quarters of an inch, with a small four-pointed star above and below it to frame the shape. The stars exist for a practical reason: they add visual weight so the tiny anchor does not look lost in the middle of the ribs.
Rib skin stretches and moves with breathing, so anything there needs short, confident lines rather than long thin ones.
Placement: side of the ribs, along the curve, not over the bone itself. Size: 0.75 inch for the anchor. Style: minimalist fine line. Pain: high, and ribs are among the most sensitive placements on the body. Make it yours: curve the three elements along an arc so the design follows the rib line.
18. Serpent-Wrapped Anchor on the Outer Forearm
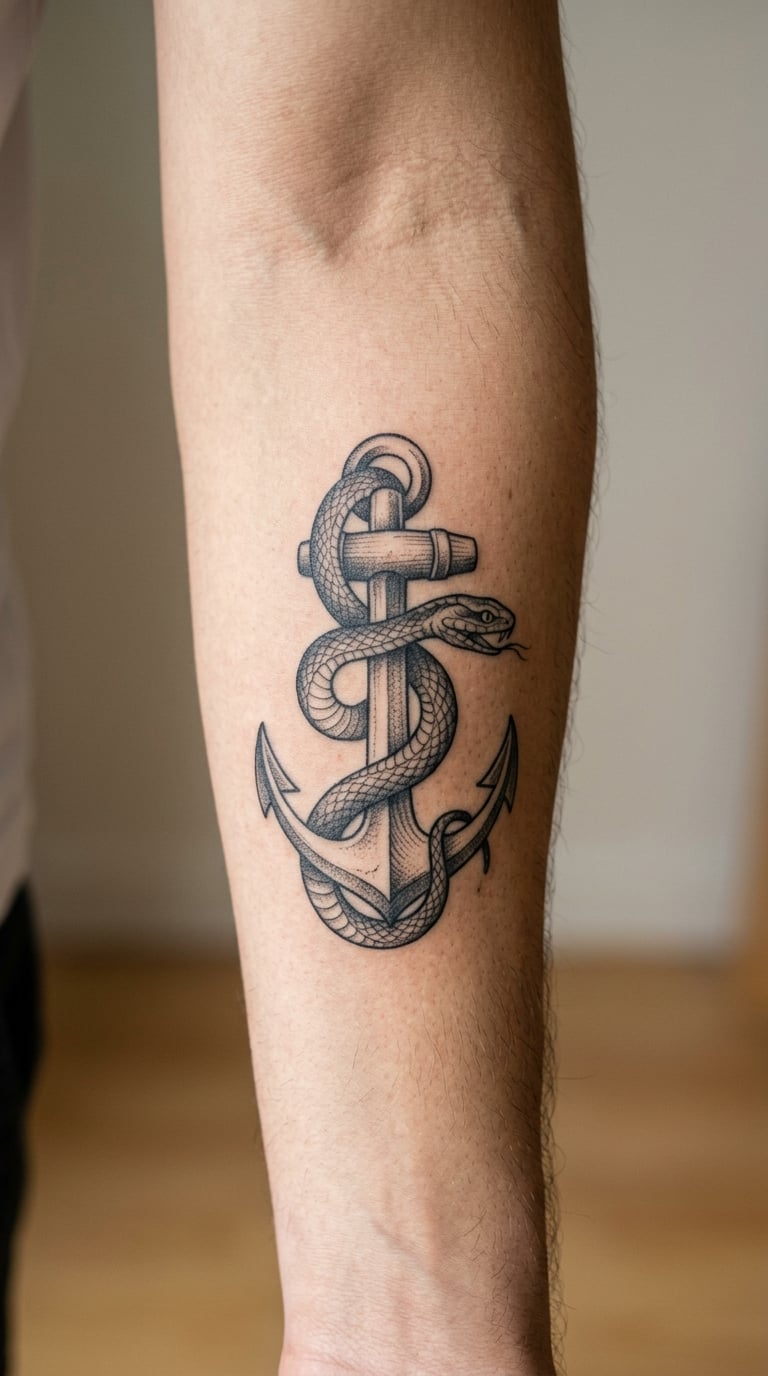
A snake coils twice around the shank, with the head resting near the crown and scales picked out in fine grey shading. This is the one idea on the list that is really an illustration rather than a symbol, and it needs the most room of any tiny anchor tattoo idea to stay readable.
Two snakes meeting at the centre of an anchor is a traditional emblem of balance and renewal, and it is often the reason people choose it.
Placement: outer forearm, lengthwise, so the coil has room to run. Size: 2.5 to 3 inch. Style: illustrative black and grey. Pain: medium. Make it yours: swap the second snake for a second anchor, which is a more personal and common pairing.
19. Plain Outline Anchor on the Back of the Hand
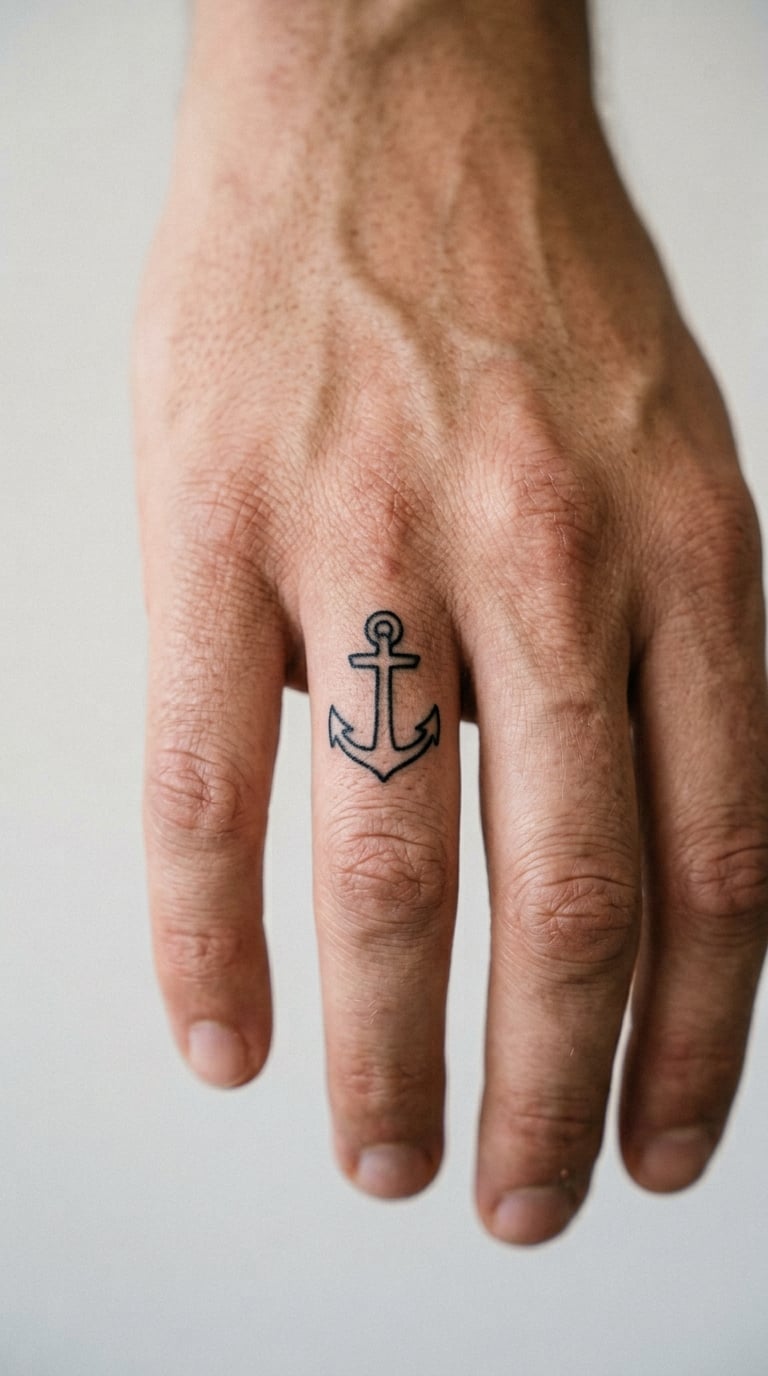
One clean outline, no shading, no fill, placed between the knuckles on the back of the hand. It looks smaller on the hand than the same design on the forearm, so ask for a size around an inch and expect it to read as a delicate mark rather than a statement.
Hands take the most daily contact of any placement: washing, weather, gym bags, desk work. A one-needle outline survives that better than a detailed one.
Placement: back of the hand, centred between the knuckles. Size: 1 inch. Style: fine line outline. Pain: high, because knuckles and tendons stand up under the skin. Make it yours: place it on the hand you write with, or mirror it on both hands.
20. Matching Pair of Anchors, One Per Ankle
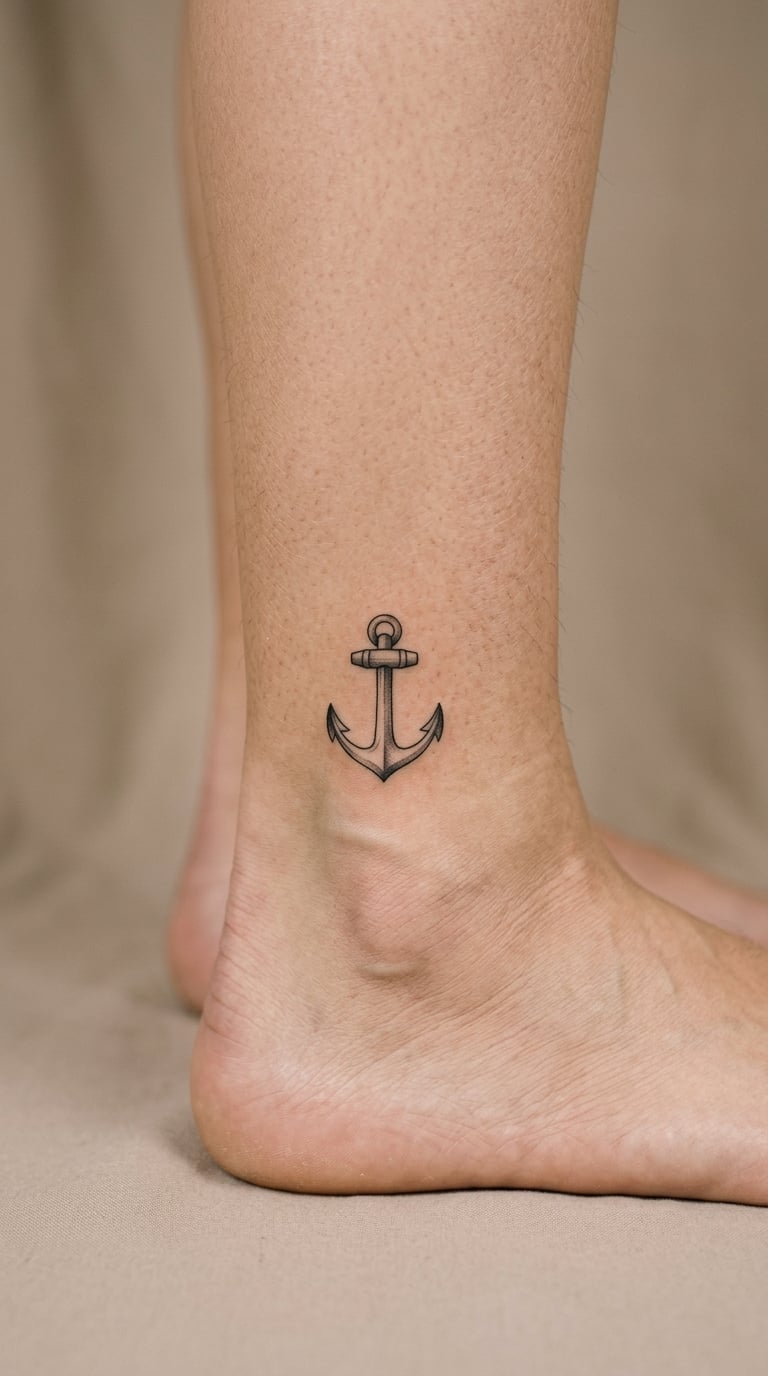
One anchor on each inner ankle, both drawn identically so they line up when you stand with your feet together. Matching pieces are how most people build a small nautical set without committing to a sleeve, and the ankle keeps each one about an inch.
Two appointments mean two healing windows. Staggering them a couple of weeks apart keeps one fresh while the other is still settling.
Placement: inner ankle, just above the bone. Size: 1 inch each. Style: fine line with light grey shading. Pain: medium. Make it yours: have each anchor face the other so the pair reads correctly when your feet are together.
Where to Place a Tiny Anchor Tattoo
Placement matters more than size for a small anchor. The same design looks deliberate on flat skin and accidental on a joint or a crease, so here is how the common spots compare.
| Placement | Visibility | Pain | Fade risk | Best for |
|---|---|---|---|---|
| Inner forearm | Seen by you, close to others | Medium | Low | A first anchor with room to grow |
| Outer forearm | Visible in most photos | Medium | Medium, sun exposed | Something others read straight away |
| Inner wrist | Constantly visible to you | Medium | Medium | Minimalist line work |
| Collarbone | Visible in low tops | Medium | Medium, sun exposed | A pair design like anchor and star |
| Finger or knuckle | Visible in hand close-ups | High | High | Jewellery-scale detail |
| Behind the ear | Private by default | Medium | Low | Something only close people see |
| Ankle | Seasonal | Medium | Low | Traditional nautical work |
| Upper arm | Mostly hidden | Low | Low | Larger or textured designs |
| Nape of the neck | Only when hair is up | Low to medium | Medium, friction | Quiet symmetrical pieces |
Inner forearm or outer forearm?
This is the question that comes up most often for a small anchor, usually from someone planning a piece around two inches and trying to picture it. The inner forearm is quieter, warmer, better covered by long sleeves and slightly protected from sun, which makes it the better choice for a line-work design you want to keep crisp.
The outer forearm is where other people see it, so a bolder or traditional design lands better there. The trade-off is real: outer forearm skin takes more sun, and fine line fades faster on it than on the inner arm.
One objection comes up a lot, that a small inner forearm piece wastes the space for a future larger one. It only wastes it if you want a forearm piece later. Plenty of people plan a full collection elsewhere and keep the inner arm for small quiet anchors forever.
Wrist tattoos and daily life
A wrist anchor sits where watches, bracelets, laptop sleeves and gym straps all land, and it is the placement people second-guess most during healing. It is a good spot when you want to see your own tattoo often, and a poor one if you type all day or wear a watch on that wrist every day.
For anything on the wrist, the practical question is what touches it. Give it a few weeks before a watch goes back on, and expect the skin to feel tight and itchy for two or three days around the fourth or fifth day, which is normal.
Fingers, knuckles and hidden spots
Finger and knuckle work is the most painful and the most likely to need a touch-up later, because hands get sun and friction daily. It also disappears easily under gloves or in a pocket, which some people prefer and others find frustrating.
Behind the ear and the nape are the opposite trade: barely any sun and a flat surface, so they keep detail well. The catch is visibility, and hair that can partly cover a nape piece.
How to Choose the Right Design
The word tiny covers a lot of ground here, from three-quarters of an inch to three. Figuring out which one you are getting matters more than the style you pick, because it decides how much detail the design can hold.
- Under 1 inch: outline only, one or two elements, heavy line. Any shading turns to grey haze.
- 1 to 1.5 inch: room for a rope, a small star or a heart in the ring. The sweet spot for most first anchors.
- 1.5 to 2 inch: a pair design, light hatching, or a banner with a short word.
- 2 inch and up: full traditional colour, wreath, snake, dotwork or a life ring.
Line weight is the other half of the decision. Ask your artist what gauge and line weight they plan to use, and ask to see healed examples of that line weight on a similar body part. A one-needle outline looks crisp and delicate in fresh photos and blurred two years later if the artist stretched it too thin.
Reference images help more than adjectives. Bring three, and make them different: one simple line drawing, one from a healed tattoo you have seen in person, and one with the detail level you want. Artists read reference much faster than a folder of saved mood boards.
Placement follows size. Anything under an inch belongs on flat skin, and anything above two inches needs an area that will not distort it. That pairing matters more than which style you are drawn to.
Cost and Session Time
Small does not mean cheap. Most studios charge a shop minimum that covers the artist’s time, the setup and the sterilization, and a one-inch anchor often costs that minimum, because the work is fiddly rather than quick.
Hourly rate is the other half of it, so a design that needs three hours at the bench is priced accordingly even though the finished mark is tiny. What moves a small anchor up the range: an artist whose style is fine line or micro work rather than traditional, a custom drawing instead of a stock design, a placement that needs a stencil fitted to moving skin, and colour rather than blackwork.
On time, a plain single-line anchor is often a short sitting, while dotwork, colour or anything with two or three elements runs longer. Ask for the estimate at the consultation rather than assuming small means quick.
Aftercare Basics
Follow your artist’s aftercare instructions first, since they will know how their own work sits in the skin. The general shape of it goes like this.
- Keep the area clean and gently washed, then pat dry rather than rub.
- Leave the skin film alone while it works. Picking or scratching is what causes most early damage.
- Skip tight clothing and accessories on the spot. A watch, bracelet or tight shoe cuff rubbing a fresh wrist or ankle anchor is the commonest avoidable problem.
- Keep it out of direct sun while it heals, and skip pools, hot tubs and saunas until it has closed over.
- Expect the first few days to be red and slightly raised, then a flaking, itchy stage around days four to seven as the skin sheds.
- For a small piece, the surface is usually settled in two to three weeks, and the full heal of the deeper layers runs four to six weeks.
- Book a free check-in if the edges of a fine-line piece look patchy at week two, and expect a touch-up on hairline work later on.
Two details specific to small anchors. The edges wear first, since a small design has more perimeter per square inch of ink, so a flaking stage takes proportionally longer to clean up. And if the placement is a finger or the back of the hand, plan the touch-up into your budget early, because those are the spots that fade first.
Frequently Asked Questions
What does a tiny anchor tattoo mean?
A tiny anchor tattoo means steadiness, hope and safety, and it is one of the oldest nautical symbols. People choose it to mark a person they are anchored to, to honour maritime or service background, or simply because the shape stays readable at a very small size. The meaning is personal rather than fixed.
Where is the best placement for an anchor tattoo?
The inner forearm suits a small anchor best for most people: warm, partly covered by sleeves and less exposed to sun, so fine line holds up. The outer forearm is more visible to other people but fades faster. Wrist, ankle, behind the ear and the nape all work well for specific design types. Pick flat skin over joints and creases.
How small is too small for an anchor tattoo?
Below about three-quarters of an inch an anchor stops reading as an anchor and becomes a smudge. Between three-quarters of an inch and 1.5 inch you can hold an outline, a rope or a small companion shape. Under 1 inch, keep it to single line work with no shading, and ask your artist to thicken the lines to suit the size.
Do tiny anchor tattoos fade faster than larger ones?
Yes, mostly because line work is thin rather than because the tattoo is small. A one-needle outline has less ink in the skin to begin with, so it softens sooner. Exposure makes a bigger difference: fingers, the back of the hand and the outer forearm fade fastest because of sun and friction, while covered inner arm and ankle work holds longest.
How long do small wrist tattoos take to heal?
The surface of a small wrist tattoo is usually settled in two to three weeks, and the deeper layers finish healing in four to six weeks. The flaking, itchy stage tends to land around days four to seven, which is normal and not a sign of a problem. Give it those full weeks before putting a watch back on that wrist.
How painful is a wrist anchor tattoo to get?
Most people rate a wrist anchor as medium, roughly 3 or 4 out of 10. The wrist crease and the inner forearm feel sharper than the outer arm because the skin there is thin and the nerves sit closer to the surface. A one-inch outline takes minutes rather than an hour, so the discomfort is brief as well as noticeable.
Where to Start With Your First Tiny Anchor
If this is your first tattoo, the single-line anchor on the inner forearm at about an inch and a half is the safest place to begin. Flat skin, modest pain, a short sitting and a design simple enough that it will still read in five years.
Going the other way, someone adding to a nautical collection can take the traditional or dotwork options, which reward an artist with more range. Either way, bring three references, ask what line weight they plan to use, and check the healed work, not the fresh photos.