
20 Best Tattoo Ideas for Cyclists: Road & Gravel (September 2026)
Tattoo ideas for cyclists usually come down to one question: does the design look like a bike, or does it look like riding? The twenty below split into both camps, from a fine-line road bike on the inner forearm to a blackwork chainring the size of a dinner plate.
They suit road racers, gravel riders, mountain bikers, track cyclists, commuters and anyone whose week is built around a long loop and a coffee stop. Updated for September 2026, every entry below includes the practical part too: where it sits, how big it should be, which style holds up best, and what it will feel like.
If you are browsing on your phone and a design stops you, jump to that section. The forearm band tattoo ideas for men and shin tattoo ideas for men guides are useful if you already know the placement and just need a shape that fits it.
One note before you start: no artist can read your mind, and no sketch in a gallery survives contact with skin the way the real thing does. Bring references, not instructions.
Tattoo Ideas for Cyclists: Quick Guide
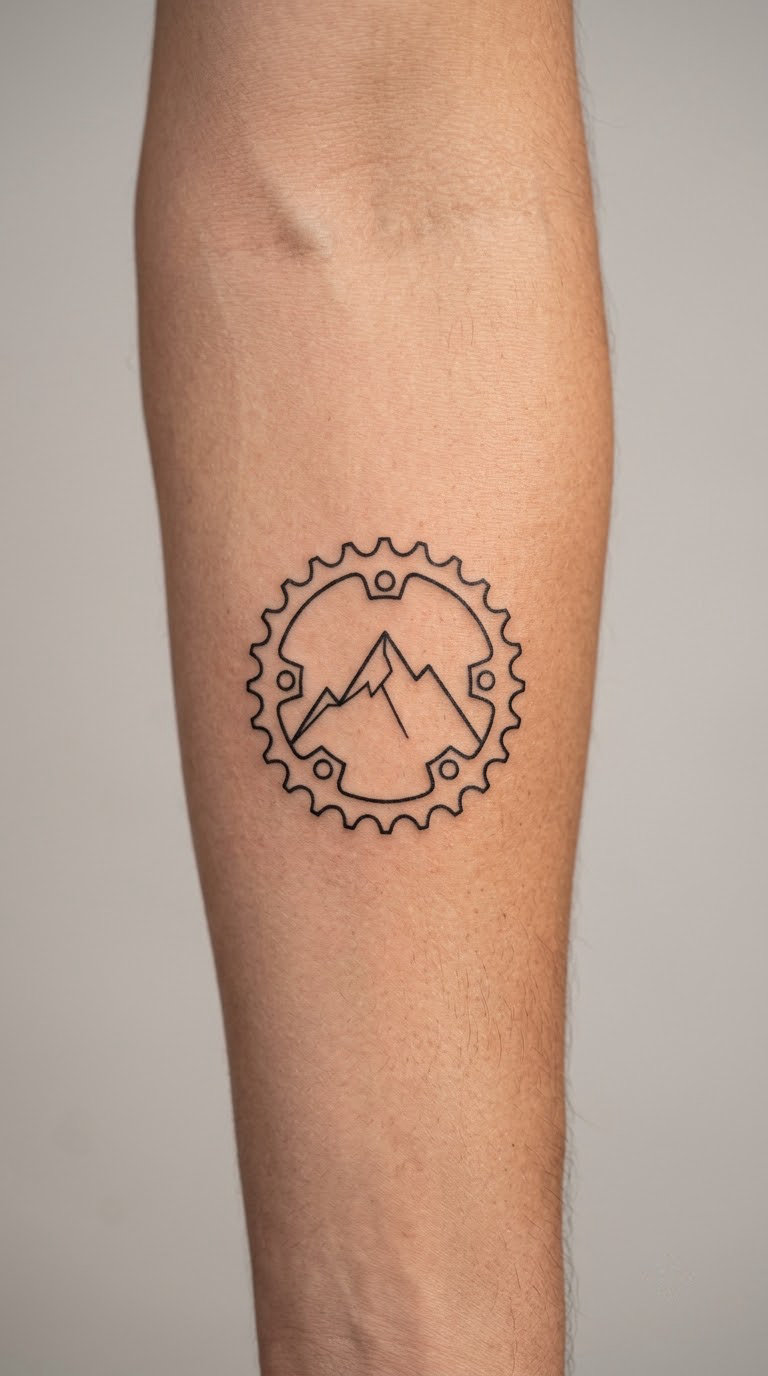
The table below matches the twenty sections that follow, in the same order, so you can jump straight to the one that fits your riding and your body.
| Idea | Style | Best placement | Size | Pain |
|---|---|---|---|---|
| Fine-line road bike | Fine line | Inner forearm | 2.5-3.5 in | Low to medium |
| Gravel bike with map line | Fine line, grey wash | Outer forearm | 3-4 in | Medium |
| Vintage racing bicycle | Faded blackwork | Calf | 4-5 in | Medium |
| Track bike chainring | Micro-realism | Forearm | 1.5-2 in | Medium |
| MTB silhouette at the ankle | Bold silhouette | Outer ankle | 2-2.5 in | High |
| Chain links in dotwork | Dotwork | Forearm band | band, 1 in wide | Medium |
| Spoke pattern | Fine line | Behind the ear | 1.5 in | Low |
| Pine forest trail map | Fine line | Forearm or calf | 3-4 in | Medium |
| Watercolour peaks and bike | Watercolour | Upper arm | 3-4 in | Low |
| Race number and line | Bold linework | Outer upper arm | 2-2.5 in | Medium |
| Repair tool composition | Traditional illustrative | Forearm | 3-4 in | Medium |
| Bicycle bell and wildflowers | Fine line botanical | Wrist or inner arm | 2 in | Low to medium |
| Blackwork chainring | Blackwork | Upper arm or thigh | 4-6 in | High |
| Route-profile heartbeat | Single line | Inner forearm | 3 in | Low |
| Cyclist and mountains | Blackwork | Outer calf | 3-4 in | Medium |
| Endomorph bicycle ornament | Ornamental engraving | Inner arm | 4 in | Medium |
| Pedal and spoke symbol | Micro fine line | Finger | 0.75 in | High |
| Coastal cliff road | Watercolour | Shoulder | 4-5 in | Low |
| Component sleeve | Black and grey geometric | Upper arm | half sleeve | High |
| Compass rose and wheels | Fine line, symmetrical | Upper arm or chest | 4-5 in | Medium |
1. Fine-Line Road Bike on the Forearm
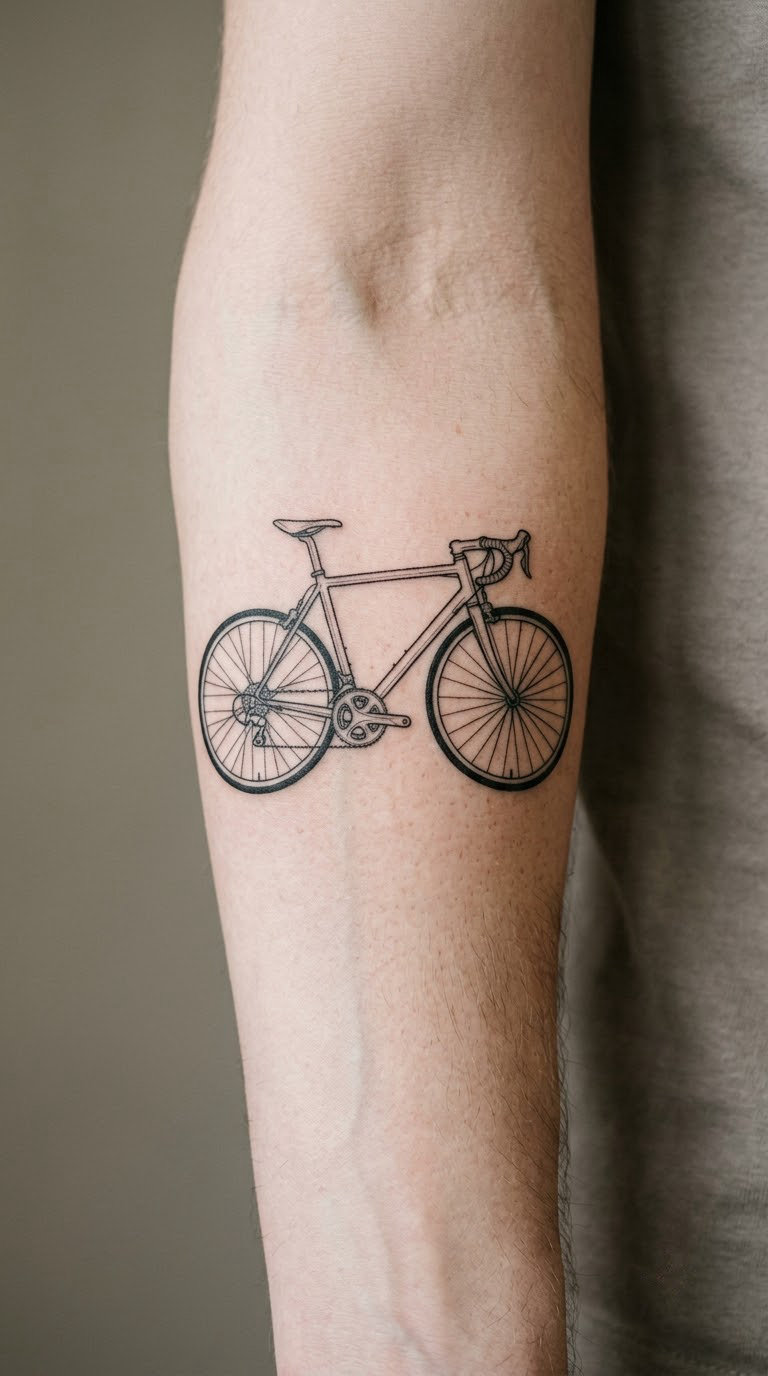
A road bike drawn in a single black line weight, side-on, with the drop bars and the deep-section wheels left as simple arcs. Nothing is shaded, and that restraint is the point: the whole design is outline, and the frame geometry does the work.
Road riders usually choose this one because it reads as a bike to anyone who knows bikes, and stays recognisable to everyone else. It is the most common first cycling tattoo, and it sits well next to a watch or a forearm band.
Placement: inner forearm, parallel to the wrist crease. Size: 2.5 to 3.5 inches (6 to 9 cm) wide. Style: fine line. Pain: low to medium, a scratchy heat rather than a sharp hurt.
Ageing note: single-needle line on the inner arm softens noticeably within five years, so a slightly heavier line pays off.
Make it yours: add the year of your first road bike in small numerals under the top tube.
2. Gravel Bike with Handlebar-Drop Map
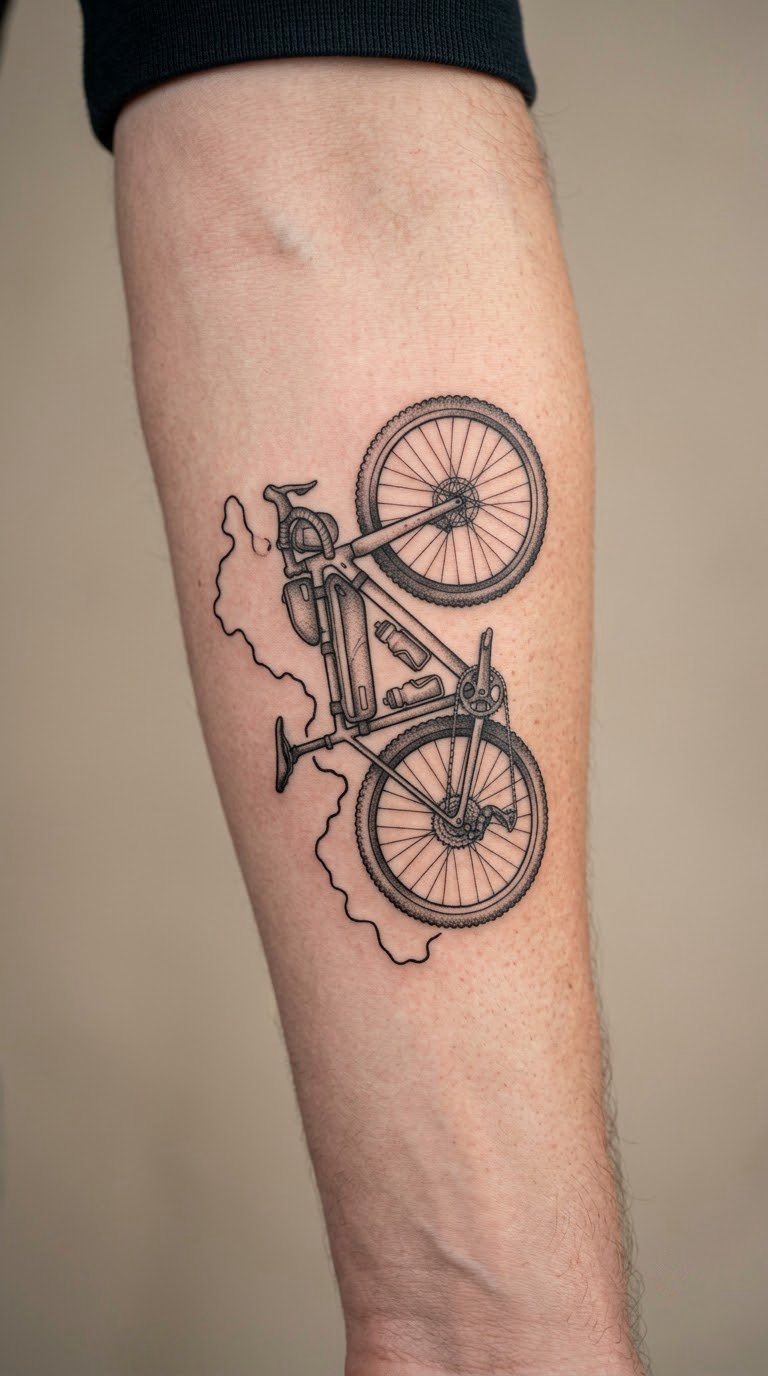
The bike is drawn in fine black outline, but this time a thin grey route line leaves the handlebar, loops down through the frame and out beneath the rear wheel. The map is deliberately abstract: a few bends, no street names, no coordinates.
It is the gravel rider’s version of the road bike, and it says something the plain outline cannot, which is that the riding happens far from a town. Riders who do long days with a full bib and a bar bag tend to gravitate here.
Placement: outer forearm, angled slightly with the wrist. Size: 3 to 4 inches (7.5 to 10 cm). Style: fine line with a light grey wash. Pain: medium, more on the bony side of the forearm.
Ageing note: keep grey shading behind the frame, not on the route line, and the thin line will survive longer.
Make it yours: have the route line trace the real shape of a loop you ride most weeks.
3. Vintage Racing Bicycle on the Calf
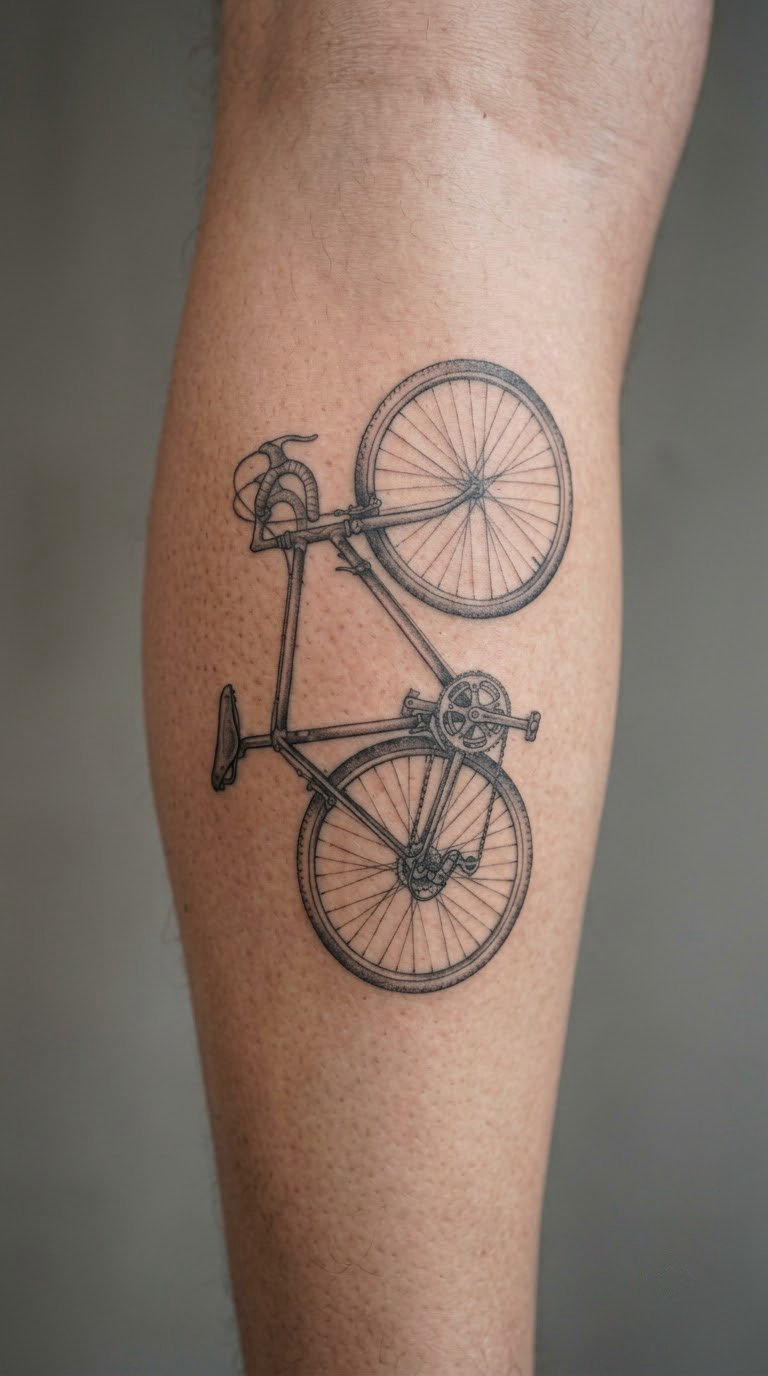
Classic geometry: a small front wheel, a large rear wheel, a horizontal top tube and a leather-look saddle. The linework is black with soft grey shading, and it is deliberately a little faded, closer to a poster than a photograph.
Choosing a vintage frame instead of a modern one is usually a statement about taste rather than about riding, though plenty of riders pair it with a heritage or randonneur setup. It reads as a proper piece of cycling history, and it suits a leg that can carry the scale.
Placement: outer calf, running vertically from below the knee. Size: 4 to 5 inches (10 to 13 cm) long. Style: faded blackwork. Pain: medium, and the calf tightens when you flex it, so ask for a break halfway.
Ageing note: calf skin stretches with riding and with age, so ask the artist to leave a little breathing room in the frame lines.
Make it yours: put your birth year on the down tube in a serif face rather than a script.
4. Track Bike Chainring in Micro-Realism
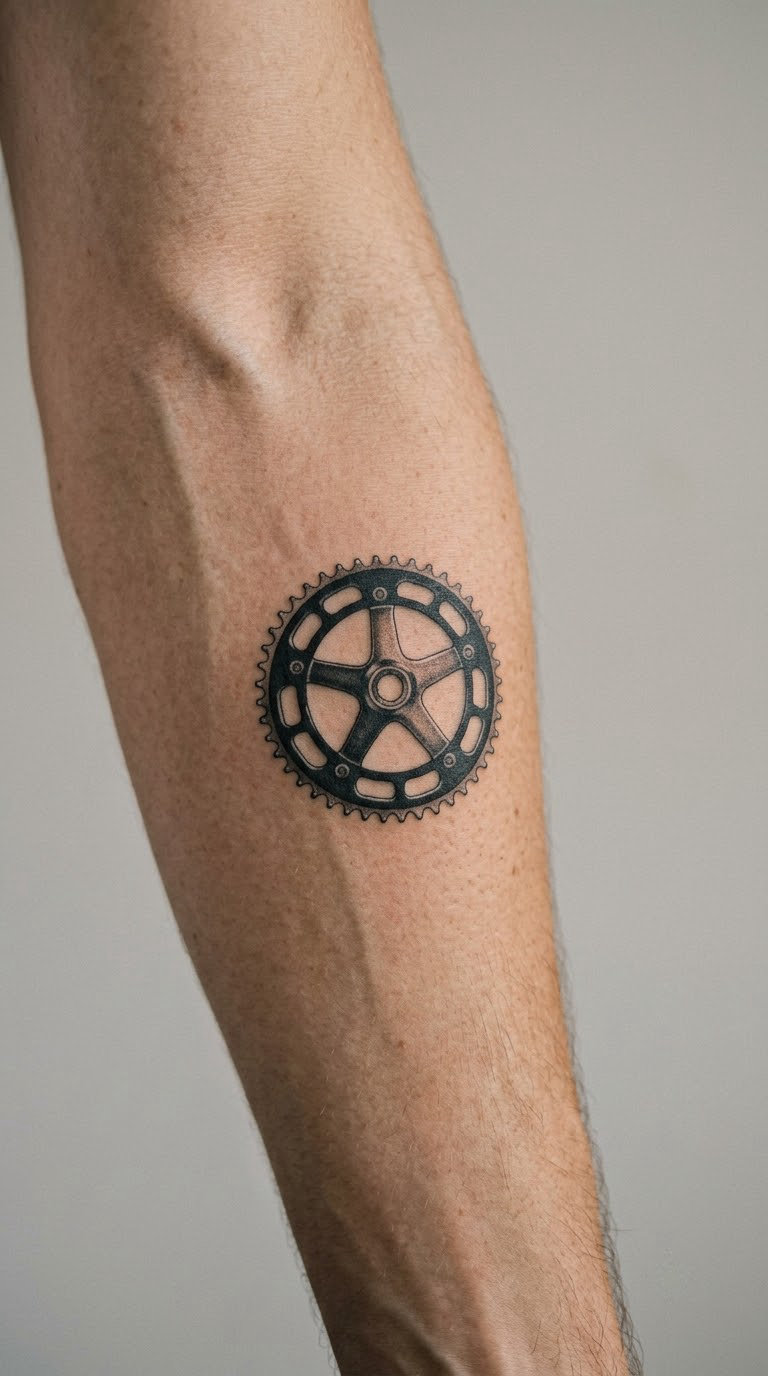
A single chainring, tooth by tooth, rendered close to how it looks in a photograph. The teeth are sharp, the arms of the spider are correct, and a small amount of grey shading gives the metal a rounded surface. No bike around it.
The chainring is the most popular component tattoo in cycling, and a track rider’s version tends to be the tightest and most precise. It works as a standalone piece that most people will read as a piece of machinery before they read it as cycling.
Placement: forearm, or the flat of the upper arm. Size: 1.5 to 2 inches (4 to 5 cm) across. Style: micro-realism. Pain: medium; the detail means a longer pass over the same small area.
Ageing note: micro detail softens faster than bold work, so keep the tooth count honest and the line weight up.
Make it yours: ask for your actual chainring tooth count rather than a generic 50.
5. Mountain Bike Silhouette Wrapping the Ankle
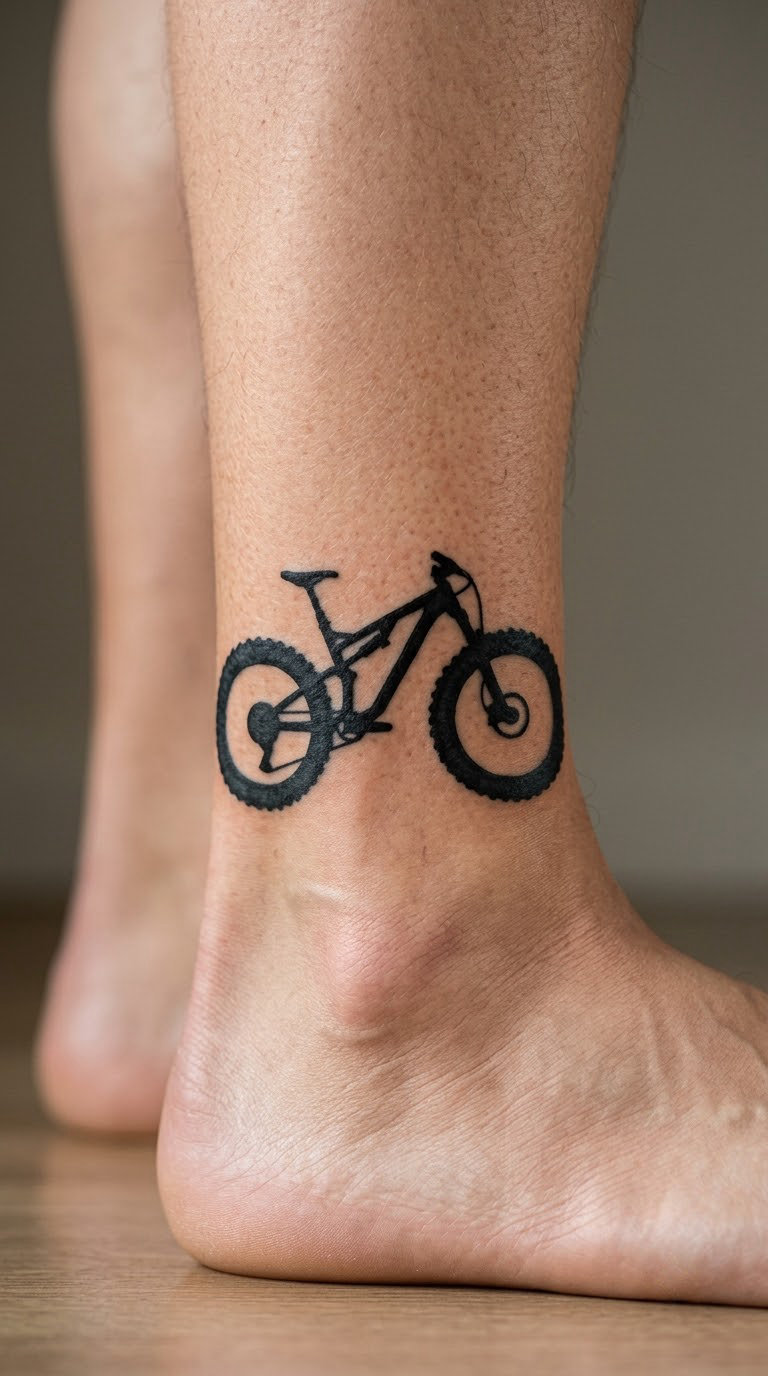
A solid black silhouette with fat tyres, a suspension fork suggested by two thick strokes, and a compact frame. The bike is not perspective-correct; it is arranged to follow the curve of the ankle, which is the whole trick of the placement.
Trail riders tend to pick this because the shape survives being small and because it sits exactly where a boot strap or a low sock lands. It is a discreet piece that only shows when you want it to.
Placement: outer ankle, wrapping slightly above the bone. Size: 2 to 2.5 inches (5 to 6 cm). Style: bold silhouette. Pain: high; ankle bone and the thin skin over it are among the sharper spots on the body.
Ageing note: solid black stays solid, so this one is a good choice if you already have fine line that has blurred.
Make it yours: match the fork travel of your actual bike with two or three thicker strokes.
6. Bicycle Chain Links in Dotwork
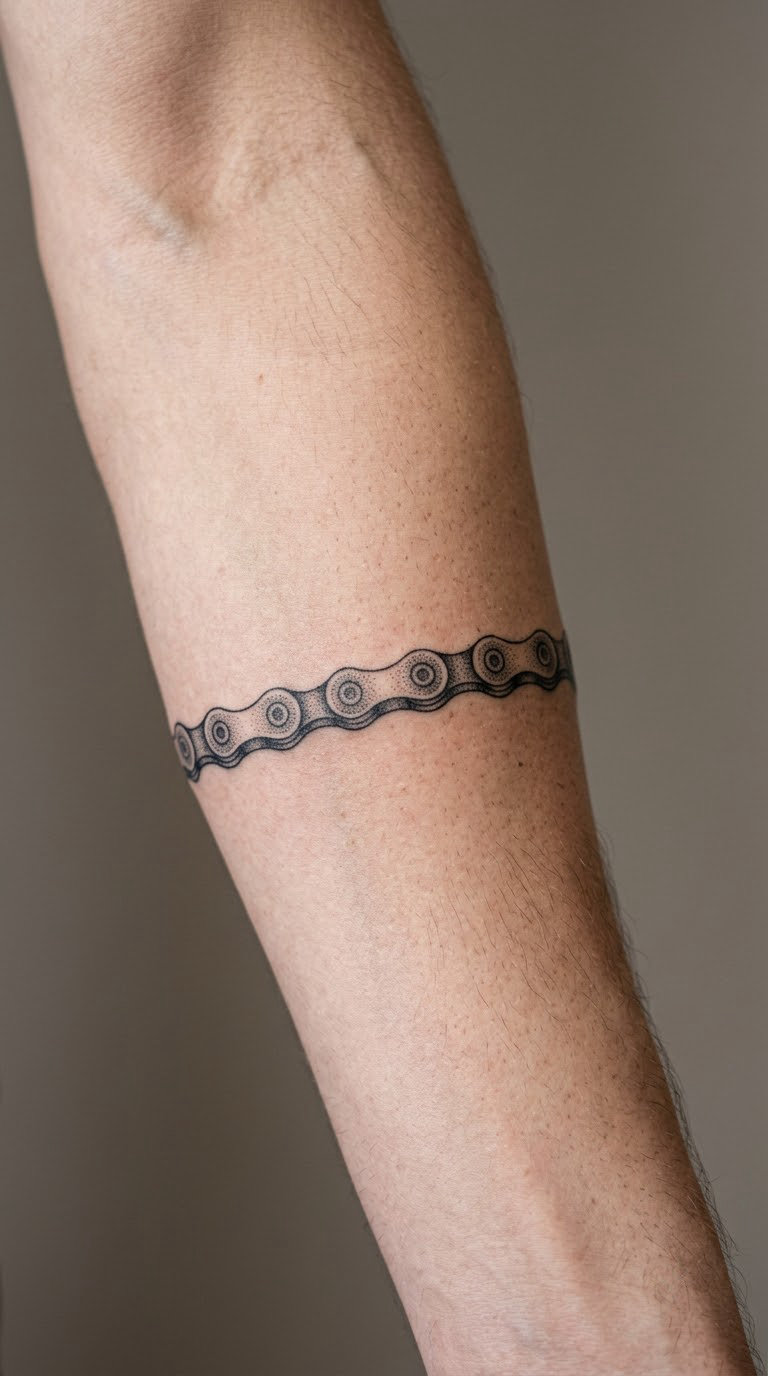
Interlocking links repeated in a curve, each one built from evenly spaced dots, with the shading graduated so the chain looks like it is turning in and out of the skin. The repetition is the point: it echoes the cadence of pedalling without drawing a bike at all.
Dotwork suits riders who like structure and repetition, and a chain band takes a long placement well because it has no centre and no wrong end. It is one of the more comfortable designs to extend later.
Placement: forearm band, or a narrow wrap around the upper arm. Size: band roughly 1 inch (2.5 cm) wide, length to taste. Style: dotwork. Pain: medium, with a persistent deep itch rather than sharp pain.
Ageing note: dotwork holds its shape well in black and grey, and it is a good style to add a small accent of colour to later.
Make it yours: count the links to the distance of a ride you are fond of, and tell the artist the number.
7. Minimal Spoke Pattern Behind the Ear
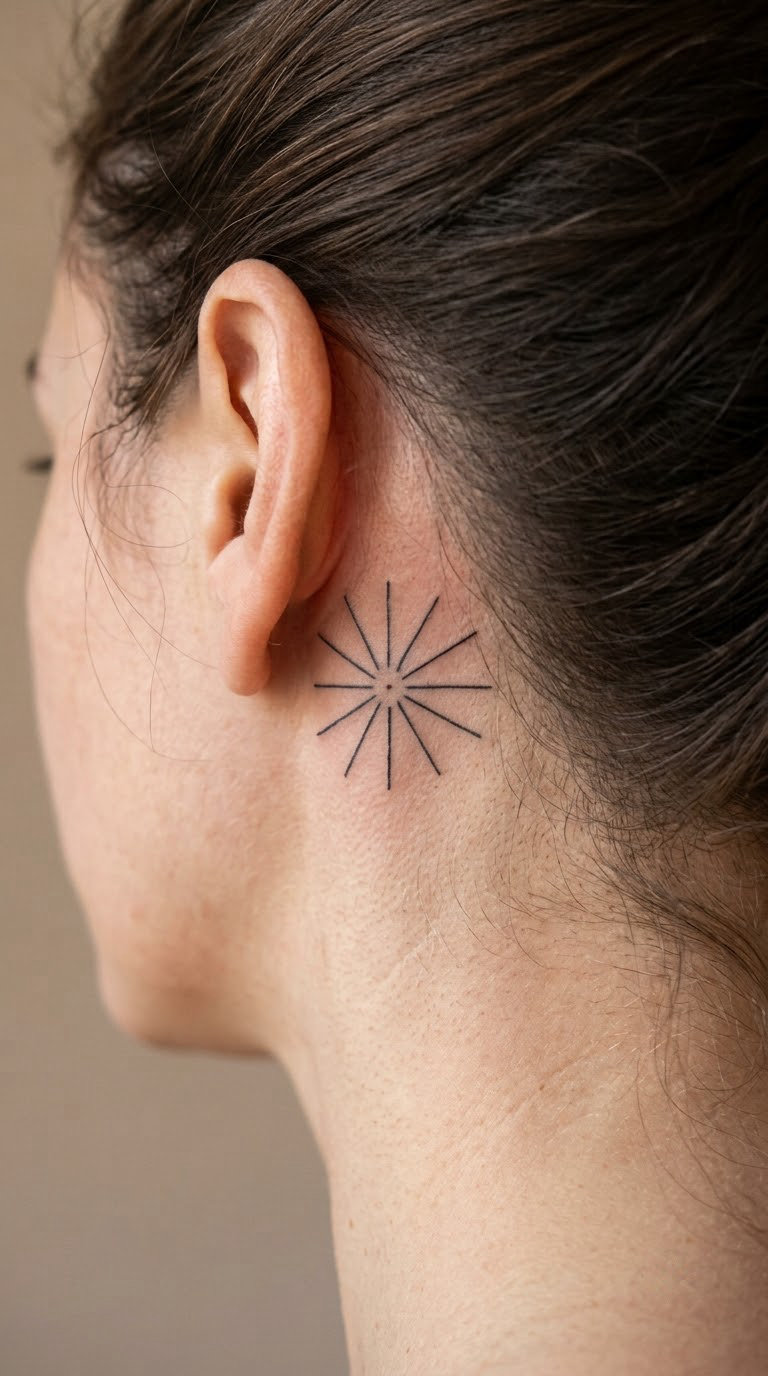
Six to ten thin lines radiating from a small centre point, with a short curved arc suggesting the rim. From a distance it is a sunburst; up close it is the top of a wheel. That double reading is the whole appeal.
It is the quietest design in the list, chosen by riders who want the cycling reference without announcing it. Placed behind the ear it catches light when you turn your head, and it stays completely hidden under a cap or a helmet strap.
Placement: behind the ear, or high on the inner arm. Size: 1.5 inches (4 cm) across. Style: fine line. Pain: low, one of the easier spots, though the skin moves a lot when you talk or chew.
Ageing note: this is the design most likely to blur, because fine line behind the ear fades faster almost anywhere. A slightly heavier needle is worth asking for.
Make it yours: have the hub replaced with a tiny compass needle pointing at home.
8. Pine Forest Mountain-Bike Trail Map
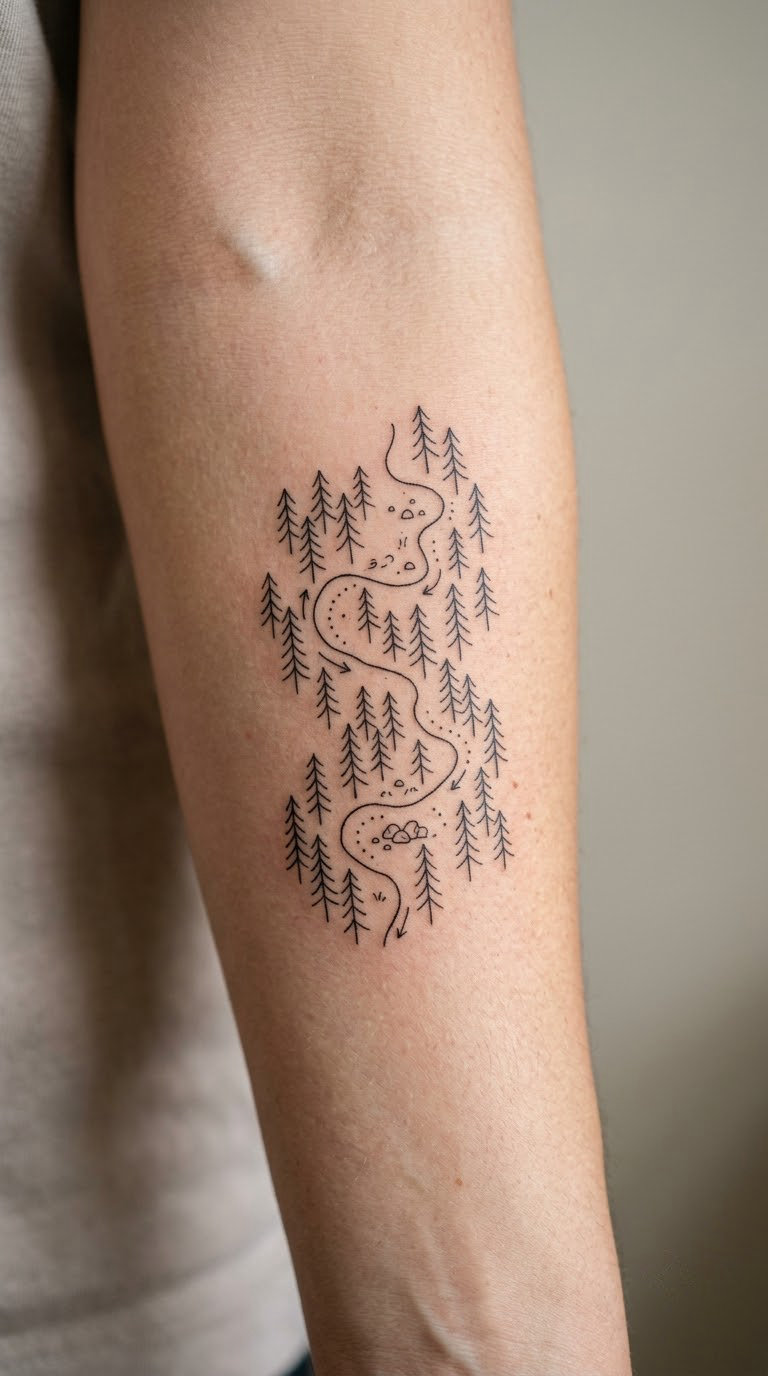
A single line that doubles as a trail, looping through a handful of simple pine trees, with contour ticks or tiny trail markers along the way. The trees are stylised to two or three strokes each so the map stays the hero.
Trail riders tend to choose it because it encodes a place rather than an object, and specificity is what people want from a cycling tattoo. It also hides a lot of white space, which makes a long thin design look deliberate.
Placement: forearm or calf, following the line of the limb. Size: 3 to 4 inches (7.5 to 10 cm). Style: fine line. Pain: medium, and the inner forearm bleeds more here than most designs.
Ageing note: very thin contour lines are the first to disappear, so keep the trail line heavier than the tree lines.
Make it yours: send your GPX file and have the real trail shape used as the line.
9. Watercolour Mountain Range and Bike
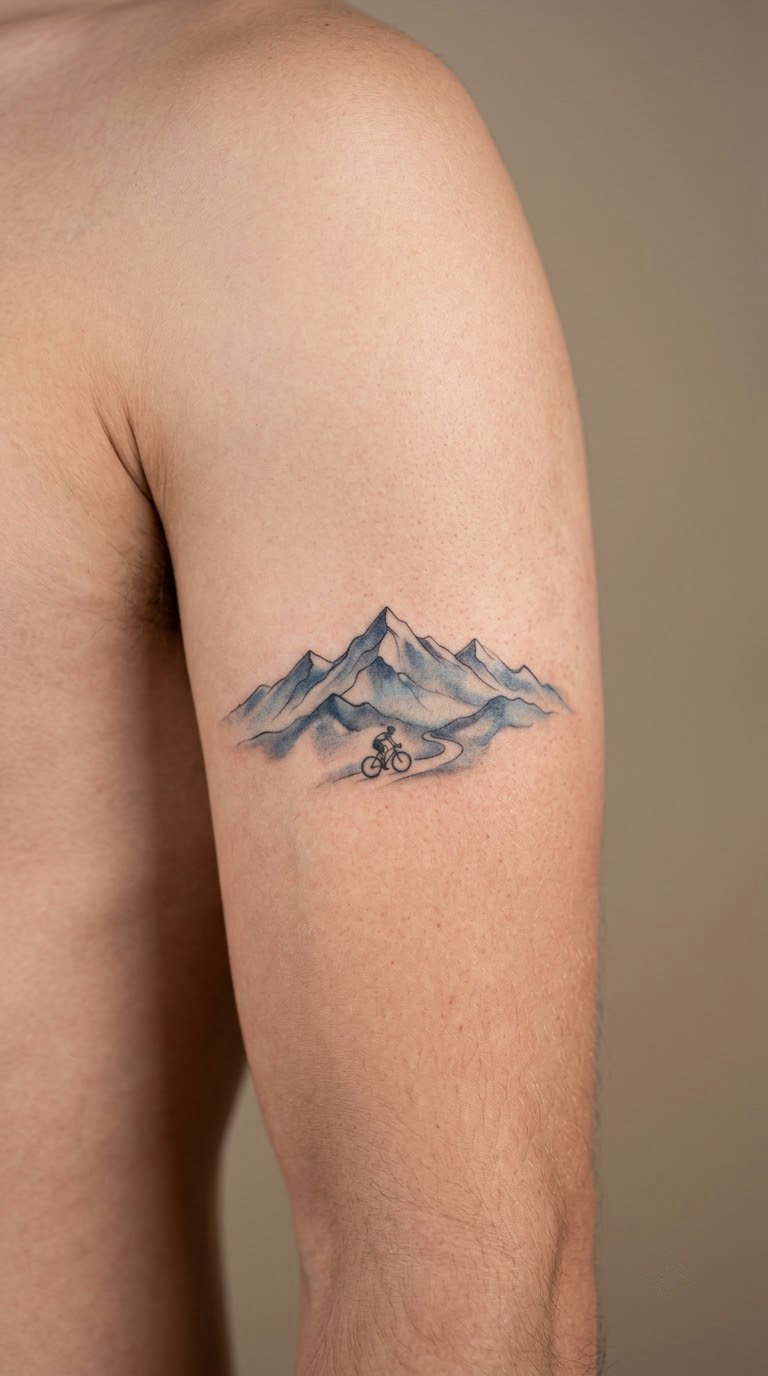
Soft washes of blue and grey for a row of peaks, edges left to bleed the way wet ink does, with a very small bicycle tucked underneath. The bike is almost an afterthought, maybe half an inch tall, and that is what makes the piece work.
It is the scenic choice, aimed at riders who care about where the road goes rather than about the machine. Watercolour suits a soft, colourful tattoo and it hides small imperfections better than a hard black outline.
Placement: upper arm or shoulder. Size: 3 to 4 inches (7.5 to 10 cm) wide. Style: watercolour. Pain: low, and the colour passes are quick.
Ageing note: blue on a sun-exposed arm fades first, so ask for a deeper tone and plan on a refresh every few years.
Make it yours: swap the generic peaks for the ridgeline of the climb you ride most.
10. Race Number and Finishing Line
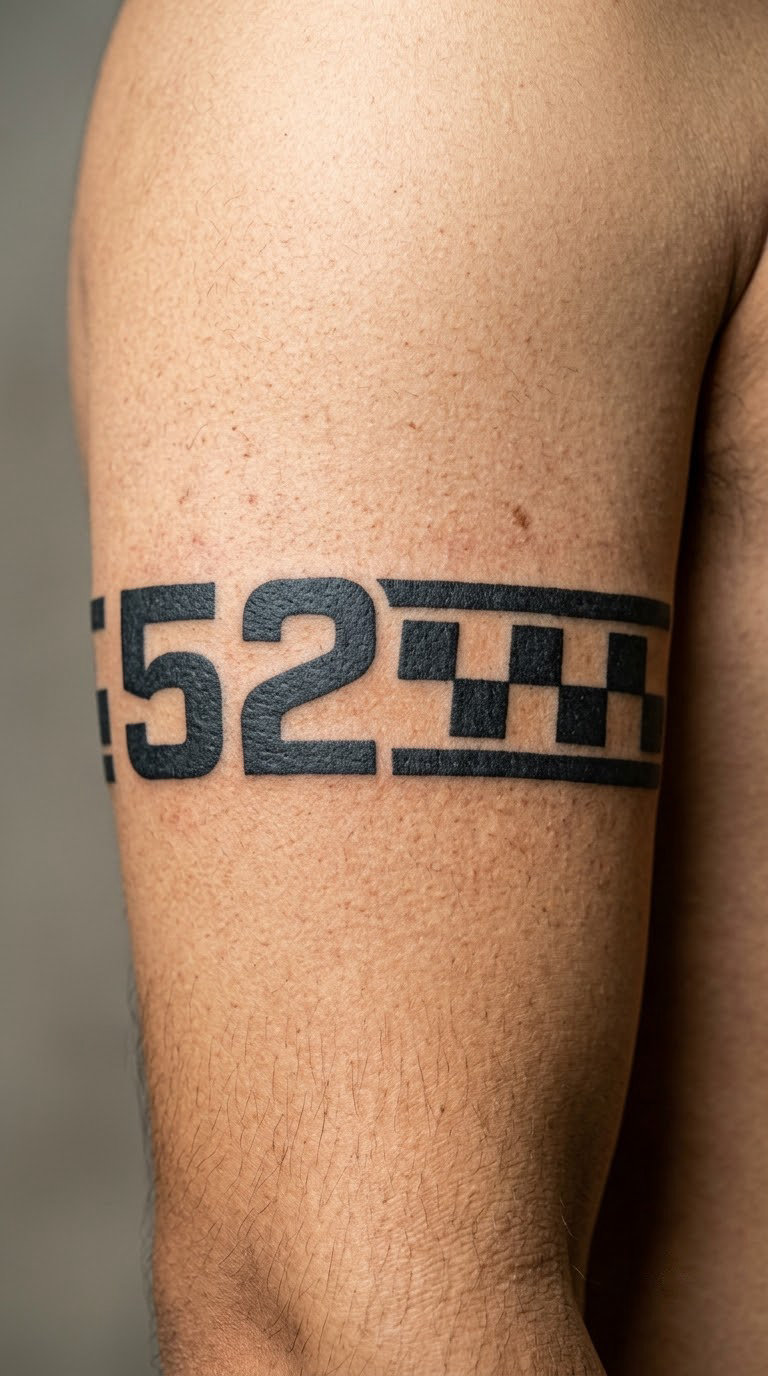
A single number in a condensed block face, set above a horizontal stripe broken into alternating blocks, the way a finish banner reads. The stripe is the only decorative element and it is what stops the design looking like a locker-room label.
Gran fondo riders, club racers and anyone who finishes an event they were nervous about tend to want this. It is personal without being sentimental, which is why it travels well to a first tattoo.
Placement: outer upper arm, or the calf. Size: 2 to 2.5 inches (5 to 6 cm) wide. Style: bold linework. Pain: medium on the arm, more on the shin.
Ageing note: block lettering is durable. Outlined numerals hold their shape far better than filled ones, so let the artist outline rather than block in.
Make it yours: use your bib number and add the event year underneath in half the size.
11. Old Bicycle Repair Tool Composition
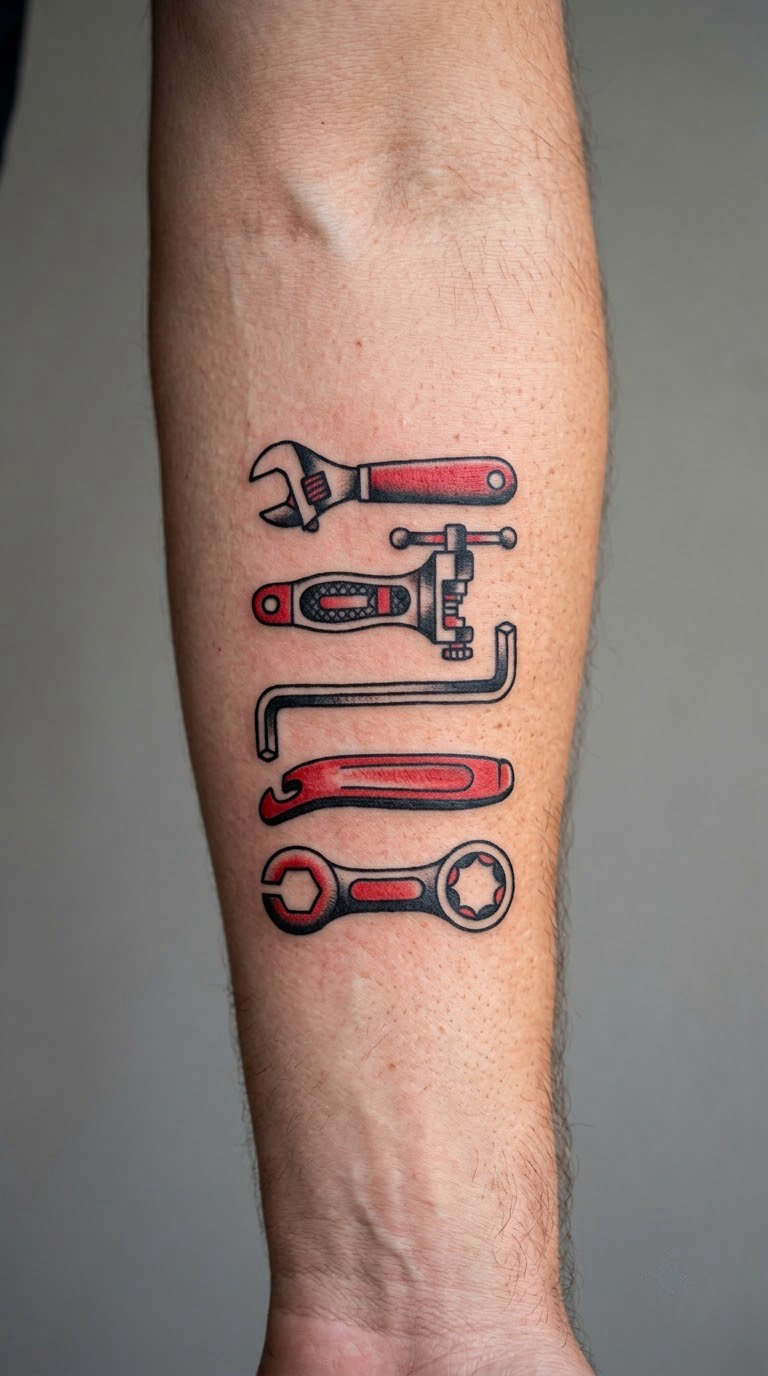
A repair stand, a chain tool and a wrench arranged in a vertical column, drawn with steady outlining and one restrained colour. The style is illustrative rather than photoreal: thick outer line, thin interior line, red used sparingly on the tool handles.
This is for the riders who fix their own bikes. Road cyclists who carry a multitool and adjust their own brakes recognise it instantly, and it says self-sufficiency rather than speed.
Placement: forearm, stacked vertically. Size: 3 to 4 inches (7.5 to 10 cm) long. Style: traditional illustrative. Pain: medium, with the wrist crease at the end of the session the worst part.
Ageing note: red on the inner forearm fades faster than on the bicep, so keep the colour to small accents and expect a touch-up.
Make it yours: add a fourth tool that only you carry, such as a tubeless plug tool.
12. Bicycle Bell and Wildflower Line Art
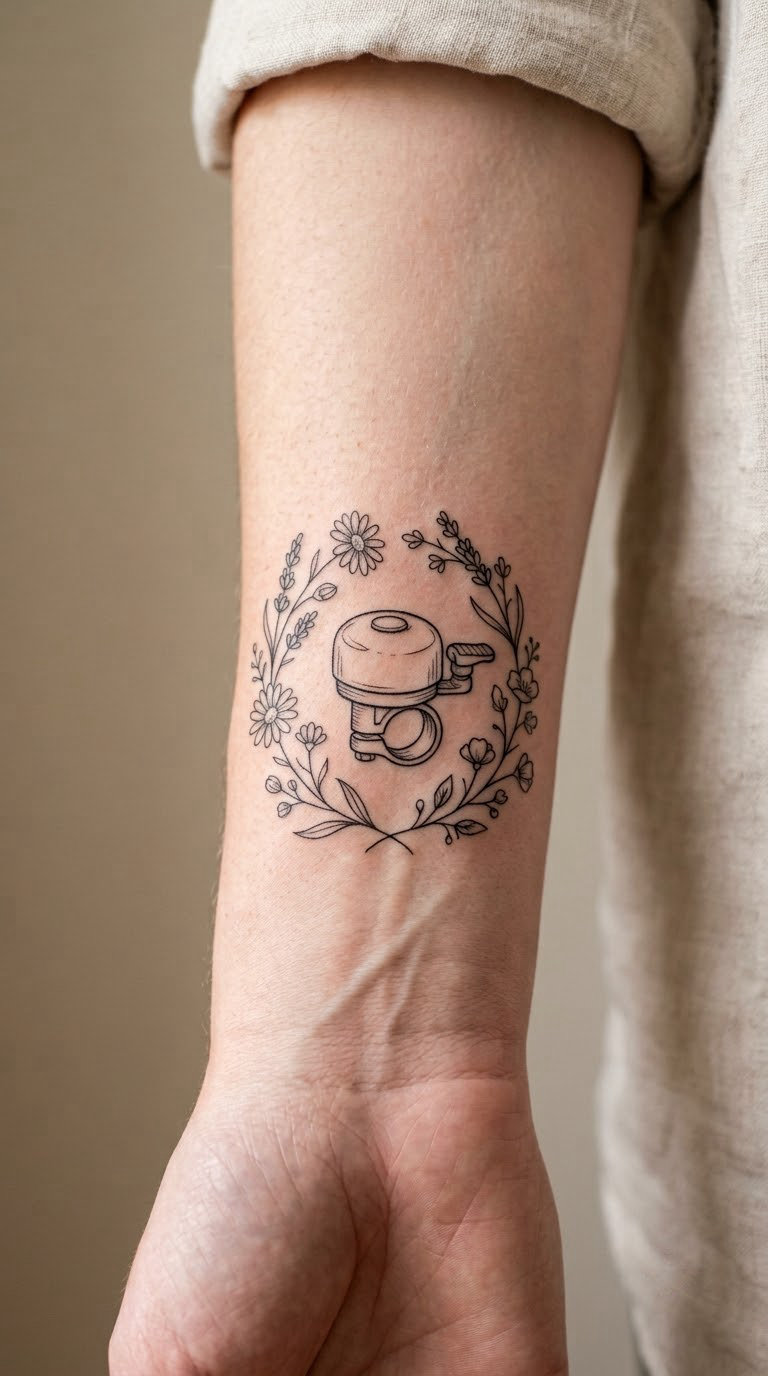
A domed bicycle bell drawn in outline, ringed by a handful of small wildflowers, stems and leaves included but kept thin. No frame, no wheels. It is the least technical design in this list and it works for riders who cycle for the ride rather than the training.
Commuters, garden riders and anyone who wants a bike reference that is not read as motorsport tend to choose it. Because there is a lot of small curved detail, it suits an artist with a steady hand rather than a fast one.
Placement: inner wrist or inner arm. Size: 2 inches (5 cm) across. Style: fine line botanical. Pain: low to medium; the wrist is sensitive but shallow.
Ageing note: wrist and hand fine line fades fastest of all on the body, so expect more touch-ups here than anywhere else.
Make it yours: use the wildflowers of the route you ride, or three stems for a tandem you share.
13. Blackwork Chainring as a Circular Element
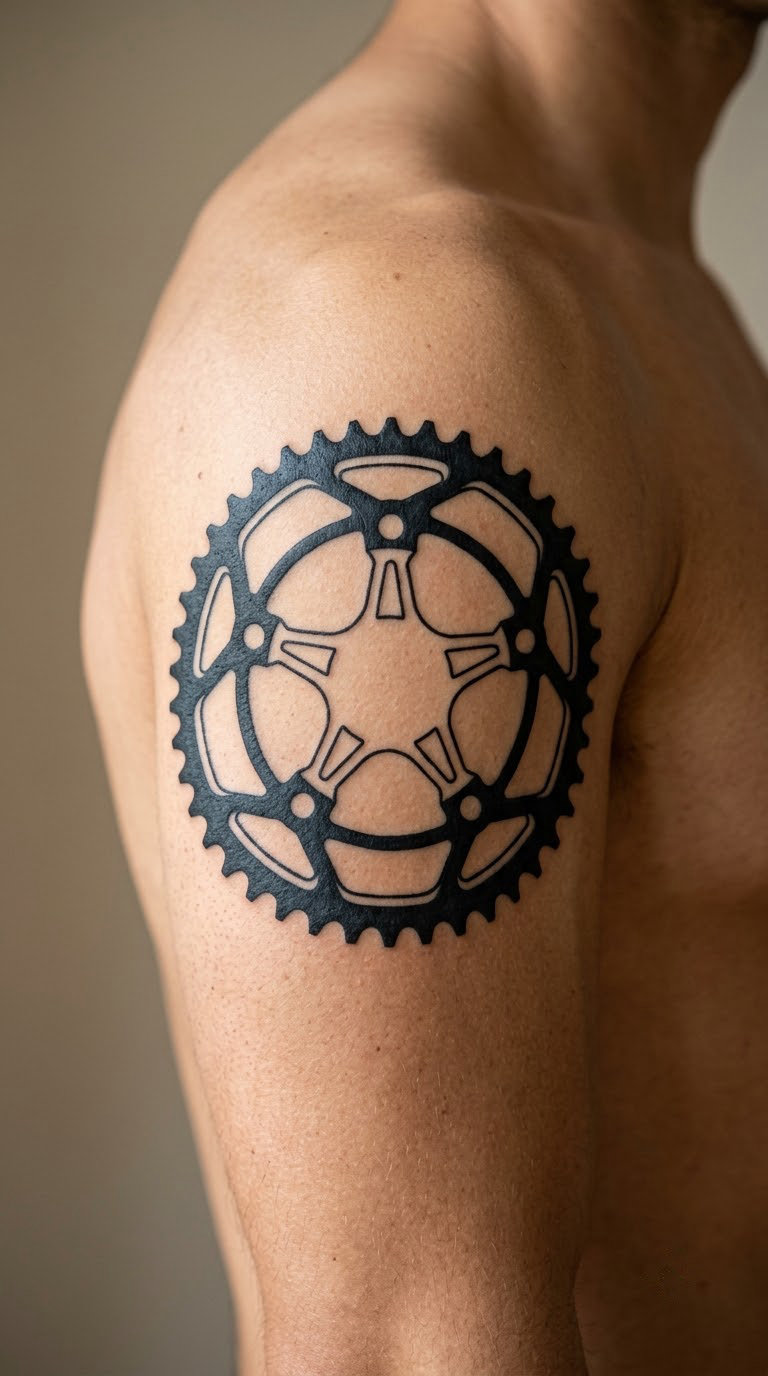
A single chainring at 5 inches across, the teeth filled solid black, the interior of the spider and the cut-outs left as open skin. Nothing else in the design. The negative space is what keeps a piece this large from turning into a black blot.
It is the boldest option for someone with a bike-shaped hole in the plan already, and it pairs naturally with a matching ring on the other arm. Solid black holds its edges better than almost any other approach.
Placement: upper arm, outer thigh, or calf. Size: 4 to 6 inches (10 to 15 cm) across. Style: blackwork. Pain: high, and this is a long sitting, so plan a break.
Ageing note: filled black is the most durable option available, though very large solid areas on the arm can feel heavy as the body changes.
Make it yours: use a chainring with a distinctive cut-out pattern instead of a standard spider.
14. Route-Profile Heartbeat Line
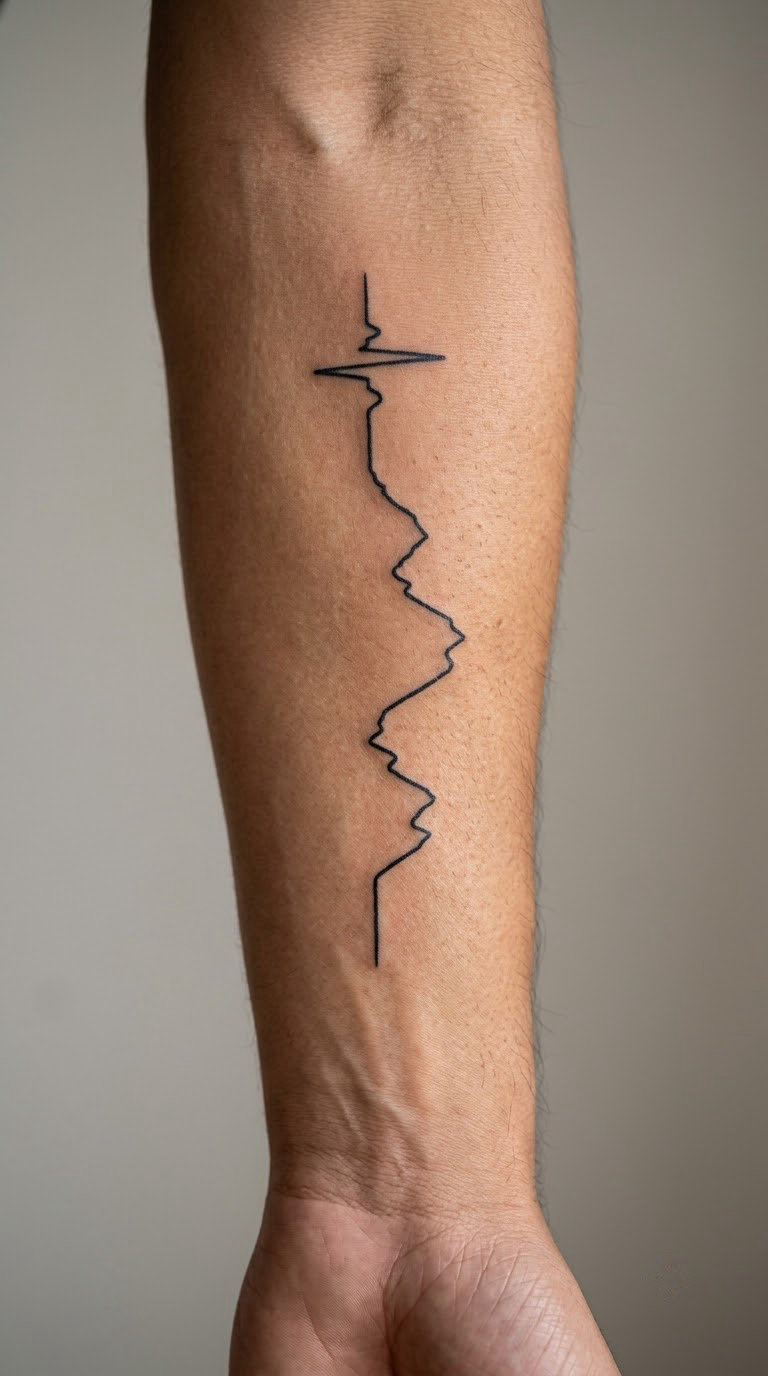
One continuous line that starts flat, climbs, plateaus, drops, climbs again, and finally settles into a steady even rhythm like a pulse reading. It is the most personal design in the list, because the shape is your route and nothing else.
Anyone who has a favourite climb, a first century, or a gran fondo they keep returning to chooses this. It is also the design that ages best of anything here, because a single bold line has nothing to blur into.
Placement: inner forearm, following the wrist. Size: 3 inches (7.5 cm) long. Style: single-line continuous. Pain: low, and quick.
Ageing note: a single-line piece can be retouched cleanly in fifteen years, which makes it a safe first choice for a first-timer.
Make it yours: give the artist your actual elevation profile and let them draw it as one line.
15. Cyclist and Mountain Silhouette in Blackwork
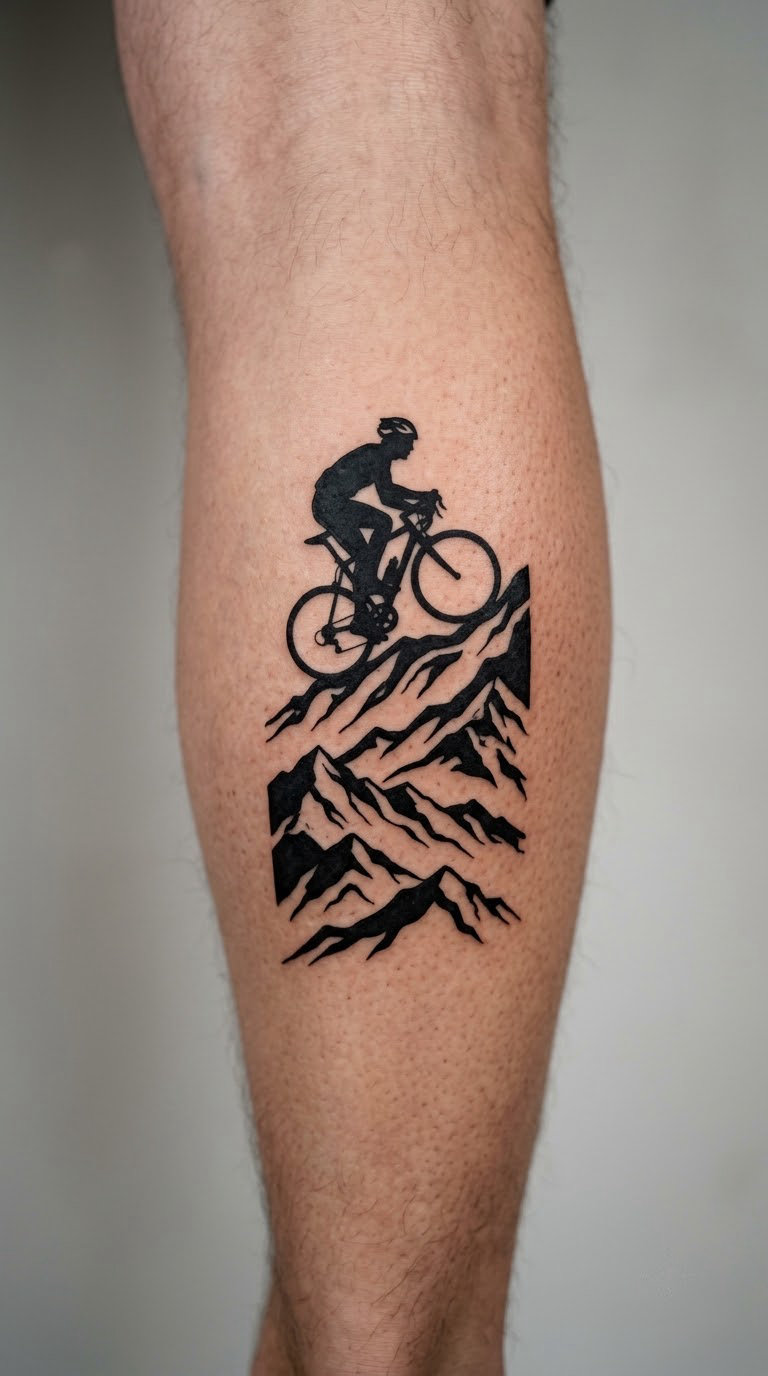
A rider in a forward position, drawn as a clean black silhouette, set beneath two or three overlapping mountain shapes that are also solid black but separated by slivers of skin. The figure is small, maybe an inch tall, and the mountains do the heavy lifting.
It is about effort and getting out of town, which suits long-distance and bikepacking riders. The layered peaks also give the artist an easy way to make a tall design work on a narrow limb.
Placement: outer calf or the back of the upper arm. Size: 3 to 4 inches (7.5 to 10 cm) tall. Style: blackwork. Pain: medium on the calf, high on the inner bicep.
Ageing note: keep a thin gap of skin between each black shape, or the layers merge into one mass within a decade.
Make it yours: have the rider’s posture matched to your own position on the hoods or the bars.
16. Vintage Endomorph Bicycle Ornament
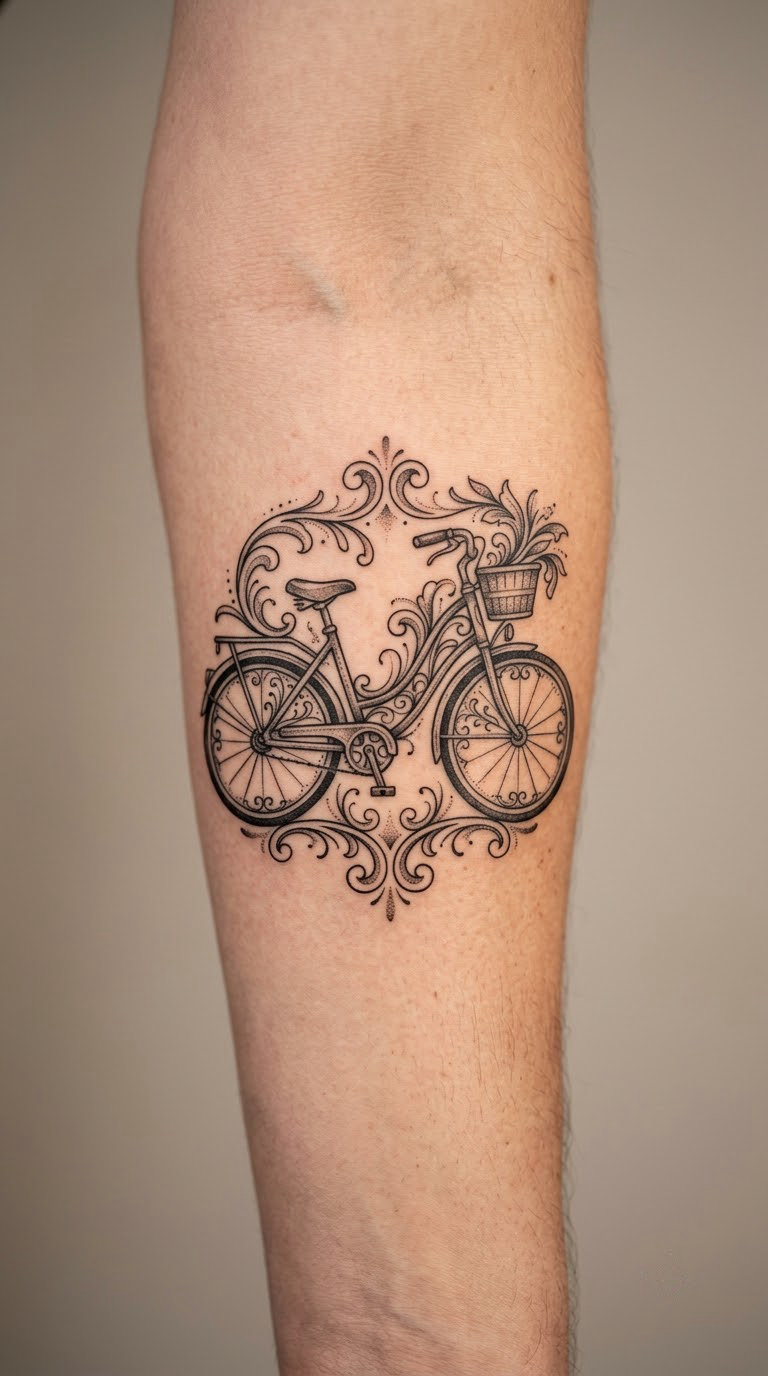
A curved-frame road bicycle from the early 1900s, with a large front wheel, a chainring picked out in fine shading, and a pair of unhurried flourishes curling away from the frame. The arrangement is symmetrical and decorative rather than mechanical.
It is the right answer for a rider who wants something that reads as art first and as cycling second. Ornamental work takes longer to tattoo and needs an artist who draws well, not one who tattoos quickly.
Placement: inner arm, or centred on the chest. Size: 4 inches (10 cm) wide. Style: ornamental engraving, fine black. Pain: medium, and the detailing means a longer sitting than the size suggests.
Ageing note: engraving-style detail needs a steady hand and will soften, so it suits an arm that is not in constant sun.
Make it yours: have the flourishes drawn as two small route names, curved to follow the ornament.
17. Small Pedal and Spoke Symbol on the Finger
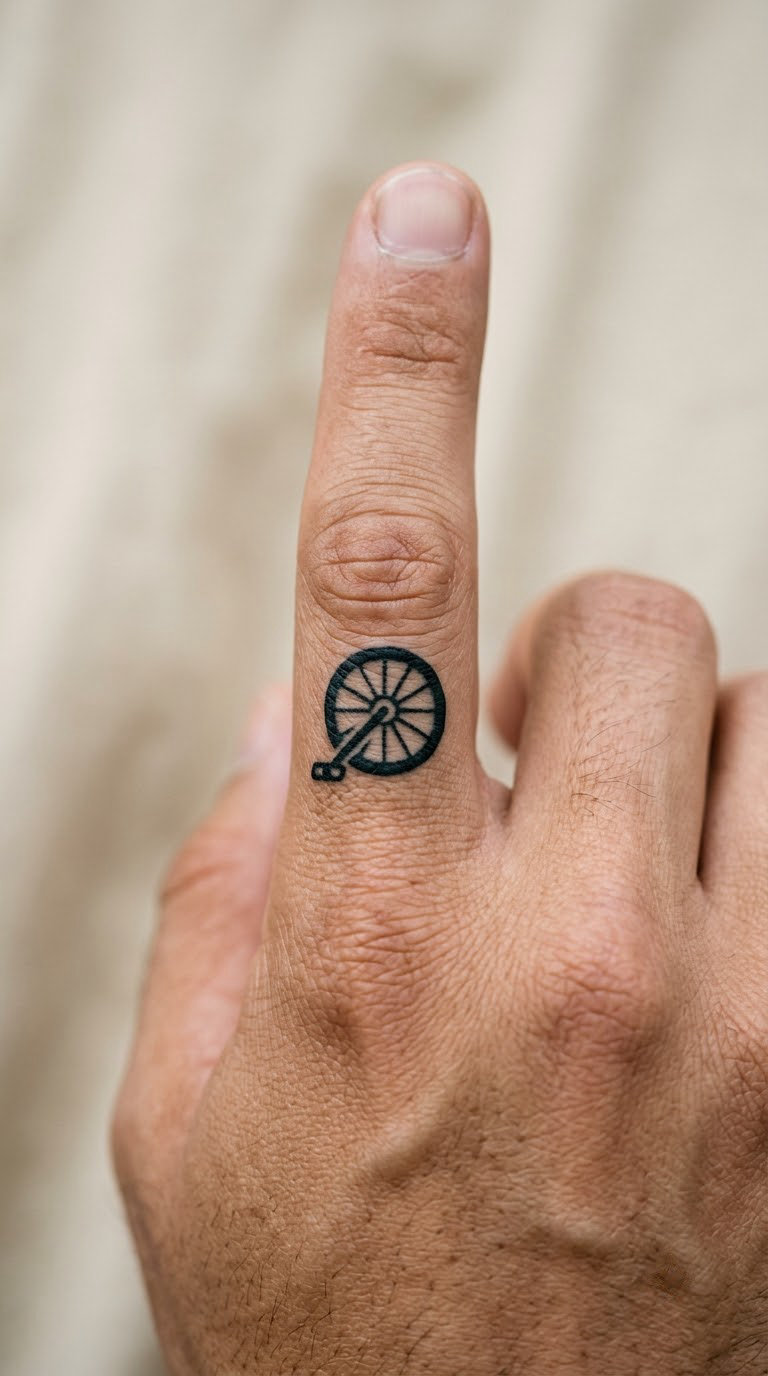
A simplified pedal body with two or three spokes radiating from it, drawn with lines heavy enough to survive the scale. At three quarters of an inch, this is closer to a symbol than a picture, and it works because of that.
Finger tattoos are a commitment rather than a decision, since the skin stretches with every knuckle movement. Riders who already have a finger piece tend to return for the second one on the other hand.
Placement: side of the finger, or beside the thumb. Size: 0.75 inches (2 cm) across. Style: micro fine line. Pain: high; the fingers are among the most sensitive areas to work on.
Ageing note: hands and fingers fade and blur fastest, and the design distorts as the hand changes over the years. Accept that before you book.
Make it yours: use the cage shape of your own clipless pedal rather than a generic one.
18. Coastal Cliff Road in Watercolour
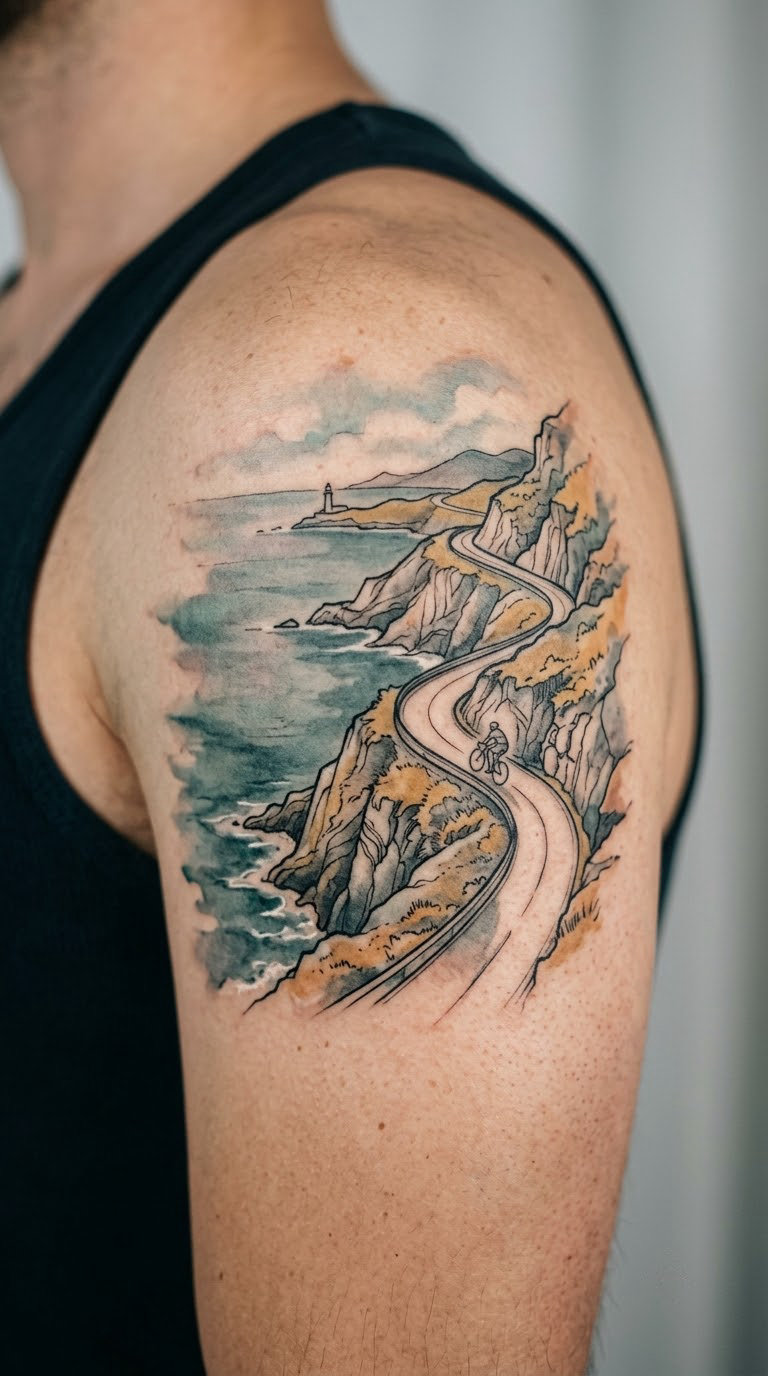
A road curving along a cliff edge with water below it, painted in transparent washes of teal, grey and a little ochre, and a small bicycle on the road. The washes run slightly outside the lines, which is the point of the style and also what makes it forgiving.
Climbers, coastal riders and anyone whose favourite road has a view tend to pick this one. It is a good companion piece to a small mechanical design elsewhere on the body, because the two styles contrast well.
Placement: shoulder, upper arm or ribs. Size: 4 to 5 inches (10 to 13 cm) wide. Style: watercolour. Pain: low on the shoulder, high on the ribs.
Ageing note: colour on a bare shoulder is the fastest-fading combination there is, so either cover it in sun or plan on a refresh.
Make it yours: have the road turn match the real switchback of a climb you have done.
19. Bicycle Components as Geometric Sleeve Elements
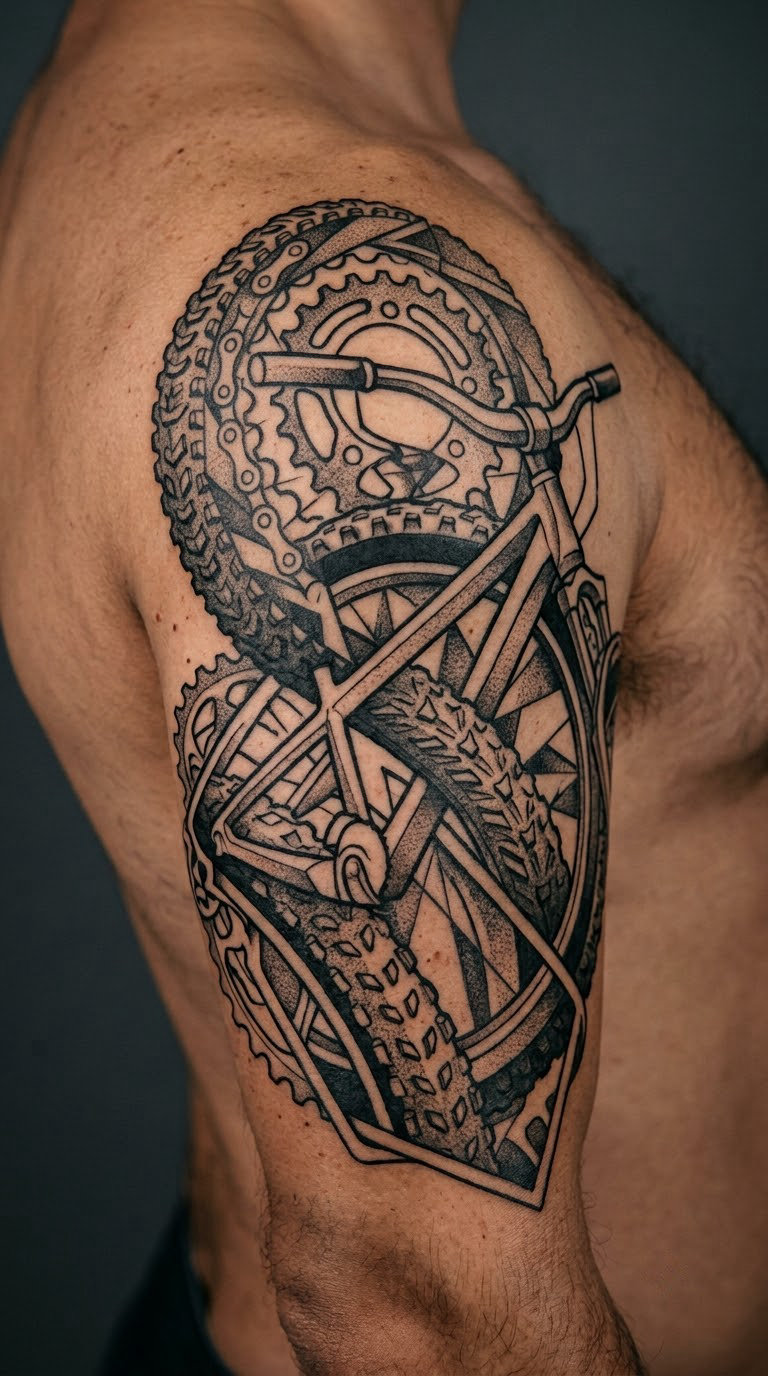
A half sleeve built from component shapes cut into geometric sections: a tyre arc here, a cassette circle there, a drop-bar curve through the middle, each in black and grey with a hard edge between them. It is abstract by design, and no complete bike appears anywhere.
This is the project for a rider with several years of ink already. Sleeves take multiple sessions and months, and they need a design that can be paused and resumed, which is why the panels here are modular.
Placement: upper arm, shoulder to elbow. Size: half sleeve, roughly 8 to 10 inches (20 to 25 cm) long. Style: black and grey geometric. Pain: high, and the inner elbow is the section everyone underestimates.
Ageing note: hard-edged black and grey ages better than soft shading, and a sleeve can be refreshed panel by panel rather than redone.
Make it yours: choose a component per panel from bikes you have actually owned, and keep a list so the artist works from the same reference.
20. Compass Rose with Bicycle Wheels
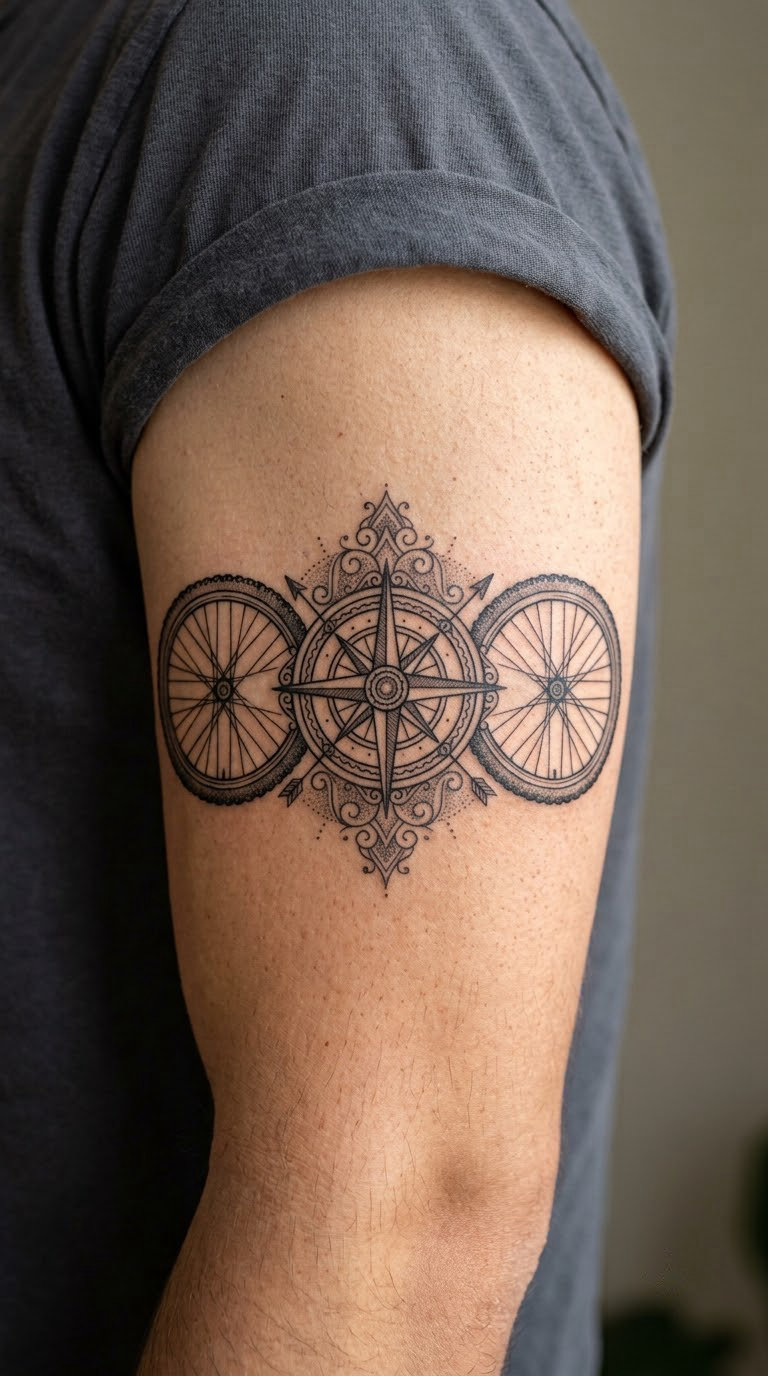
A compass rose in fine black line, symmetrical, with a pair of spoked wheels flanking it left and right. The point of the rose aims up, and the wheels are drawn in profile at a matching size so the whole thing reads as a single balanced object.
It is about route-finding and having the freedom to pick a new road, which suits tourers, bikepacking riders and anyone who plans holidays around where they can ride. It also works as a chest piece.
Placement: outer upper arm or the chest, centred. Size: 4 to 5 inches (10 to 13 cm) wide. Style: fine line, symmetrical. Pain: medium, and the chest is more sensitive than most people expect.
Ageing note: symmetry is unforgiving, so a slight shift in the wheel sizes is normal and the artist will balance it on the body rather than on paper.
Make it yours: replace the north point with a tiny bearing to a town you have ridden to.
How to Choose the Right Design
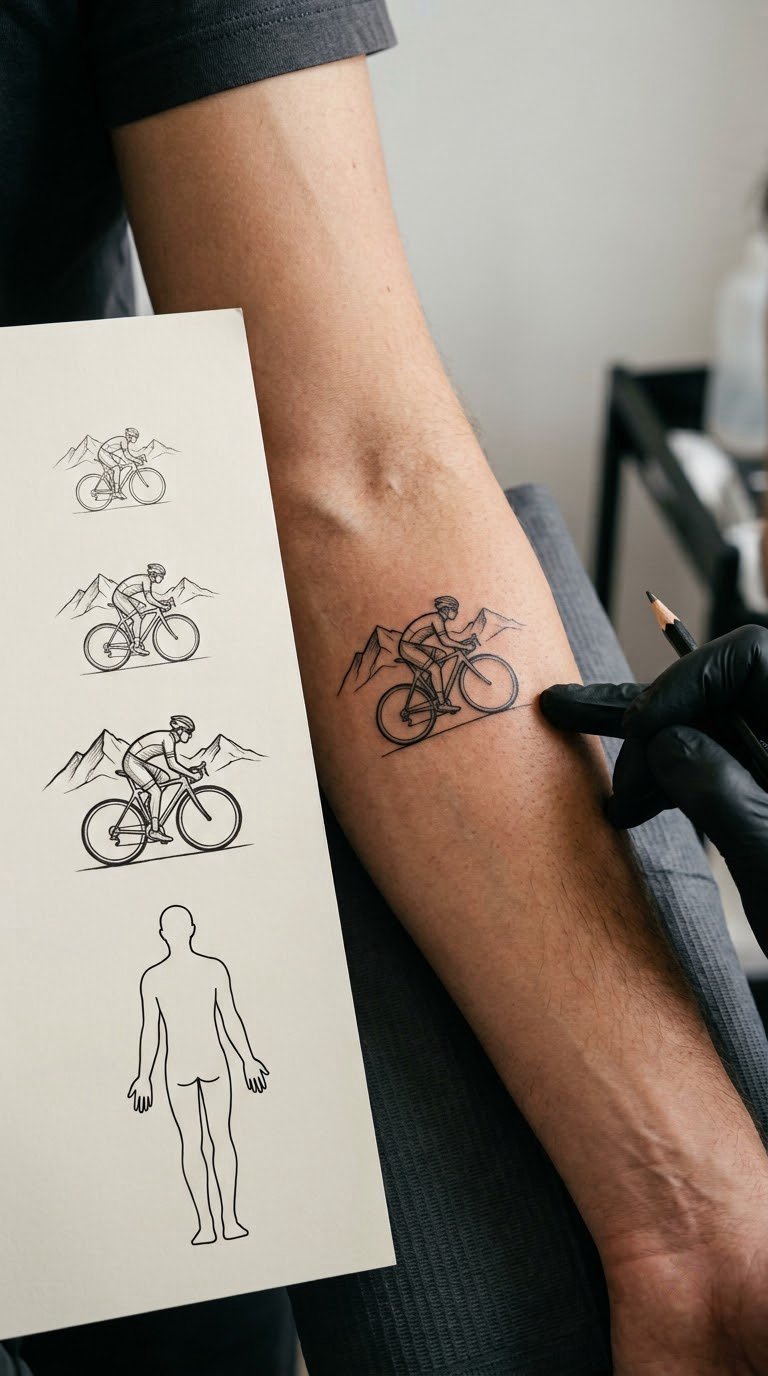
Most disappointing cycling tattoos are good ideas in the wrong hands. Here is how to narrow the field before you book.
Picking Tattoo Ideas for Cyclists by Discipline
A road bike, a mountain bike and a gravel bike do not read the same at small sizes, and trying to draw all the detail of your own bike is the most common mistake I see in reference photos. The drop bar says road, the fat tyre and fork say mountain, the mid-length bar says gravel.
Pick the discipline first, then simplify. An artist who draws blackwork and realism well may be the wrong person for a two-inch fine-line bike, and a fine-line specialist may be the wrong person for a sleeve.
Match Line Weight to Placement
Line weight is a technical decision, not a style preference. Fine single-needle lines look beautiful on the inner arm and disappear on the knuckles, the fingers and anywhere in daily sun.
If you are under 40 and want delicate work, fine line is a reasonable bet. If you are older, travelling somewhere with hard sun, or already have tattoos that have blurred, black and grey will age better.
Think About Visibility While You Ride
This is the question riders ask most and galleries never answer. A design on the upper arm is invisible in a standard jersey sleeve; one on the lower back shows only in a low-cut bib. The forearm, the outer calf and the ankle are the placements most often visible in kit.
For placements and how designs read on different body parts, the thigh tattoo ideas for men guide covers larger panels in detail.
Check the Biker Misread
A lot of riders worry that a black bike on skin reads as a motorcycle rather than a bicycle. It is a fair concern, and the fix is design, not size: drop bars, a chainring, a cassette and a narrow tyre all signal cycling. A chunky black silhouette alone can go either way.
Ask the artist to confirm the motif reads as a bicycle. They see it every day and will know immediately whether a sketch is ambiguous.
Leave Room to Grow Into It
Everyone changes shape. Calves that were solid in your twenties are not the same in your forties, and a design stretched across a changing limb distorts in a way no touch-up fixes.
A first-timer at 62 is a common story in mountain biking forums, and the advice from those threads is consistent: choose a size and a placement that will still sit properly in twenty years, and accept that a first piece should not be the most ambitious thing you ever get.
Cost and Session Time
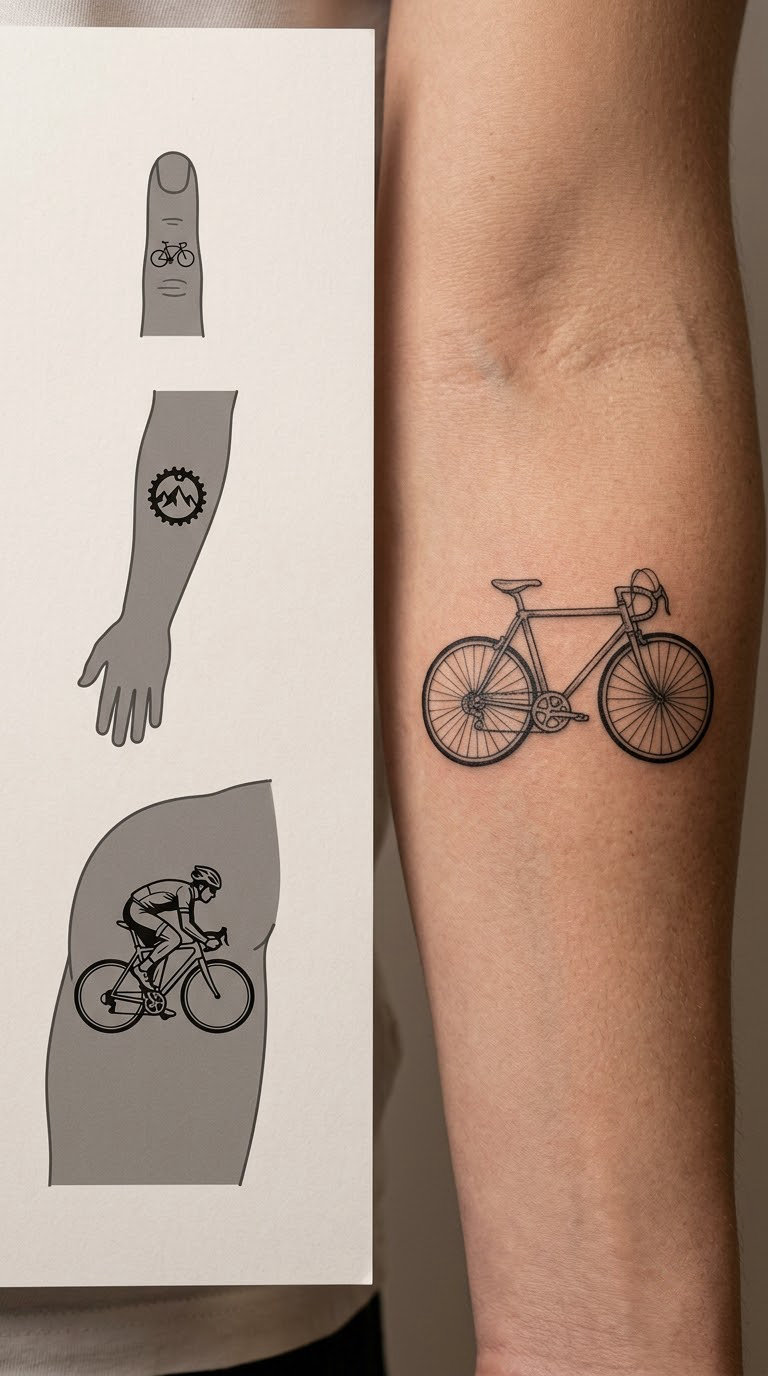
Cost scales with size, detail, placement and the hourly rate of the artist you book. These are US ranges you can sanity-check a quote against, not fixed prices.
- Small pieces under roughly 1.5 inches, such as the spoke motif or the finger pedal, usually run $80 to $200. Most shops set a minimum charge of $100 to $150, so a very small piece often costs the minimum rather than the work itself.
- Medium pieces of 2 to 4 inches, which is most of this list, sit around $200 to $600 for a single sitting of one to three hours, depending on how much fine detail is involved.
- Large pieces of 5 inches and up, such as the blackwork chainring, generally land between $600 and $1,500 and are more often split across two sessions so the artist can keep detail consistent.
- Sleeve-scale work like the geometric component piece runs $2,000 to $5,000 and up, measured in half-days rather than hours, with a design or drawing fee of a few hundred dollars often charged on top.
Two things move a quote more than riders expect. The first is colour: any shade beyond black and grey adds time, and watercolour passes are the slowest per inch. The second is placement, because ribs, the inner elbow and the inner bicep take longer per inch than a flat outer thigh.
Traveling to a well-regarded artist is a normal choice for a piece you will carry for decades, and the top of each range is what that usually looks like. Local is fine for a small fine-line design, since the skill required is much narrower.
Aftercare Basics
Follow your artist’s aftercare instructions first. Everything below is general, and the sheet your artist gives you wins where the two differ.
- Wash gently. Clean the area as directed with clean water and unscented soap, then pat it dry rather than rubbing it.
- Moisturise thinly. A thin layer of whatever product your artist recommends, several times a day, keeps the skin from drying out and flaking.
- Protect it from the sun. Fresh tattoos and sun do not mix. Cover the area on the first rides back and use sunscreen once it is healed.
- Wear loose clothing. Cyclists specifically should avoid a tight jersey, a bib waistband or a sock cuff pressing on a healing piece.
- Let the healing run. The first two weeks are the sensitive window. Expect itching, flaking and a raised texture before it settles.
- Ride gently at first. Short easy rides are usually comfortable; a long hot ride in a lycra sleeve against fresh ink is not.
Frequently Asked Questions
What does a bicycle tattoo symbolize?
Most bicycle tattoos mean effort, freedom and commitment to a sport that takes time away from everything else. Riders usually pick a motif that names their discipline, such as drop bars for road or fat tyres for mountain biking, or a specific place, such as a favourite climb or route map. For many it is simply the thing they spend most of their free time on, worn where other people can ask about it.
Can you ride with a new tattoo?
You can ride with a fresh tattoo, but plan the first weeks carefully. Most riders keep the first few days off the bike, then ride short and easy. The bigger issues are sweat, sun and pressure: avoid sun exposure on a healing piece, do not ride in a tight sleeve or bib waistband over it, and skip anything that makes you sweat heavily until the skin has stopped flaking. Follow your artist’s aftercare sheet above all of it.
Do bike tattoos fade over time?
They do, and how fast depends almost entirely on style and sun exposure. Fine line on the inner arm softens noticeably within five years, while solid blackwork holds its edges far better. Outdoors on a forearm or calf, ultraviolet light is the main culprit, so cover up or use sunscreen. A single bold line is the easiest design to retouch cleanly later, which makes it the safest choice for a first tattoo.
Where should I get a bike tattoo?
The most visible placements while riding are the forearm, the outer calf and the ankle, because standard jerseys leave them clear. The upper arm disappears under a sleeve, and the lower back only shows in a low-cut bib. Whatever you choose, avoid ribs, the inner elbow and the fingers for a first piece: they are the most painful and they age fastest. Ask for a stencil on the body before any line is committed.
How much does a cycling tattoo cost?
Cost follows size, detail, placement and the hourly rate of the artist, not the subject. A small fine-line bike is one short session, while a large blackwork chainring or a sleeve is a multi-session project with a design fee on top. Colour adds time, and awkward placements such as ribs and the inner elbow take longer per inch. Shop minimums vary widely, so ask about them before booking a small piece.
If this is your first tattoo and you are not sure how much you want to commit to, the route-profile line is my pick. One bold stroke, small enough for a single sitting, and it can be retouched in fifteen years without anyone being able to tell.
If you already have a sleeve or a settled collection, the geometric component piece or the large blackwork chainring is the one that keeps the set interesting. Bring references, let the artist adjust for your body, and check the placement under a jersey before you commit.