
20 Illustrative Tattoo Ideas for Fine-Line & Blackwork Art (2026)
Illustrative tattoos are drawings on skin. They use fine lines, a readable outline and shading built from stippling, cross-hatching or grey wash, so the finished piece looks hand-drawn from a sketchbook, a storybook plate or an old engraving rather than photographed or rendered solid. The fox is a drawing of a fox, not a photo of one, and the line is the point.
These 20 illustrative tattoo ideas cover the styles people actually book: fine-line pieces small enough for behind the ear, blackwork scenes with real negative space, colour work that needs an artist’s mixing table, and micro-realism that has to survive contact with a moving arm. Most people book in early autumn and want to be healed before winter, so it is worth reading the sizing notes on every entry rather than picking on looks alone. If you want a quieter direction, our cat silhouette tattoo ideas for minimalists cover a different end of the detail scale.
Illustrative Tattoo Ideas: Quick Guide
Every design below appears here with its style, its best placement, a realistic size and the pain you should expect. Sizes are the artist’s finished measurement on skin, not the drawing.
| Idea | Style | Best placement | Size | Pain |
|---|---|---|---|---|
| Fine-Line Paper Plane | Fine line | Outer ear, upper neck | 1.5 in | Low |
| Watercolor Botanical Branch | Watercolor | Inner forearm, calf, shoulder | 4 in | Medium |
| Blackwork Mountain Range | Blackwork | Outer forearm, upper arm, ribs | 6 in | Medium |
| Miniature City Skyline | Fine line, black and grey | Inner forearm, calf | 3 in | Low |
| Celestial Moon and Stars | Blackwork with color | Shoulder, upper back, ankle | 2.5 in | Medium |
| Peacock Feather | Color illustration | Forearm, thigh, upper arm | 5 in | Medium |
| Traditional Koi | Traditional | Calf, thigh, upper arm | 4 in | Medium |
| Lighthouse and Breaking Waves | Black and grey with color | Inner forearm, calf | 3.5 in | Medium |
| Hot Air Balloon over Hills | Fine line | Upper arm, shoulder, back | 4 in | Low |
| Fox Emerging from Foliage | Illustrative realism | Outer upper arm, thigh | 3 in | Medium |
| Hummingbird and Flower | Micro-realism | Wrist, inner arm | 2 in | Low |
| Dotwork Dragonfly | Dotwork | Forearm, calf | 2.5 in | Medium |
| Vintage Teacup and Saucer | Engraving-inspired | Wrist, forearm, ankle | 2 in | Low |
| Compass Rose | Fine line, geometric | Chest, forearm, upper back | 3 in | Medium |
| Minimalist Sailboat | Minimal fine line | Inner arm, ankle | 2.5 in | Low |
| Blackwork Raven | Blackwork | Outer forearm, throat, upper arm | 4 in | Medium |
| Open Book with a Moth | Fine line illustrative | Forearm, inner arm | 3 in | Low |
| Layered Rose and Dagger | Traditional illustrative | Upper arm, thigh, back | 4 in | Medium |
| Illustrated Globe with Routes | Black and blue illustrative | Forearm, calf, back | 3 in | Medium |
| Vintage Butterfly in a Jar | Color illustration | Forearm, thigh, upper arm | 3 in | Low |
1. Fine-Line Paper Plane Behind the Ear
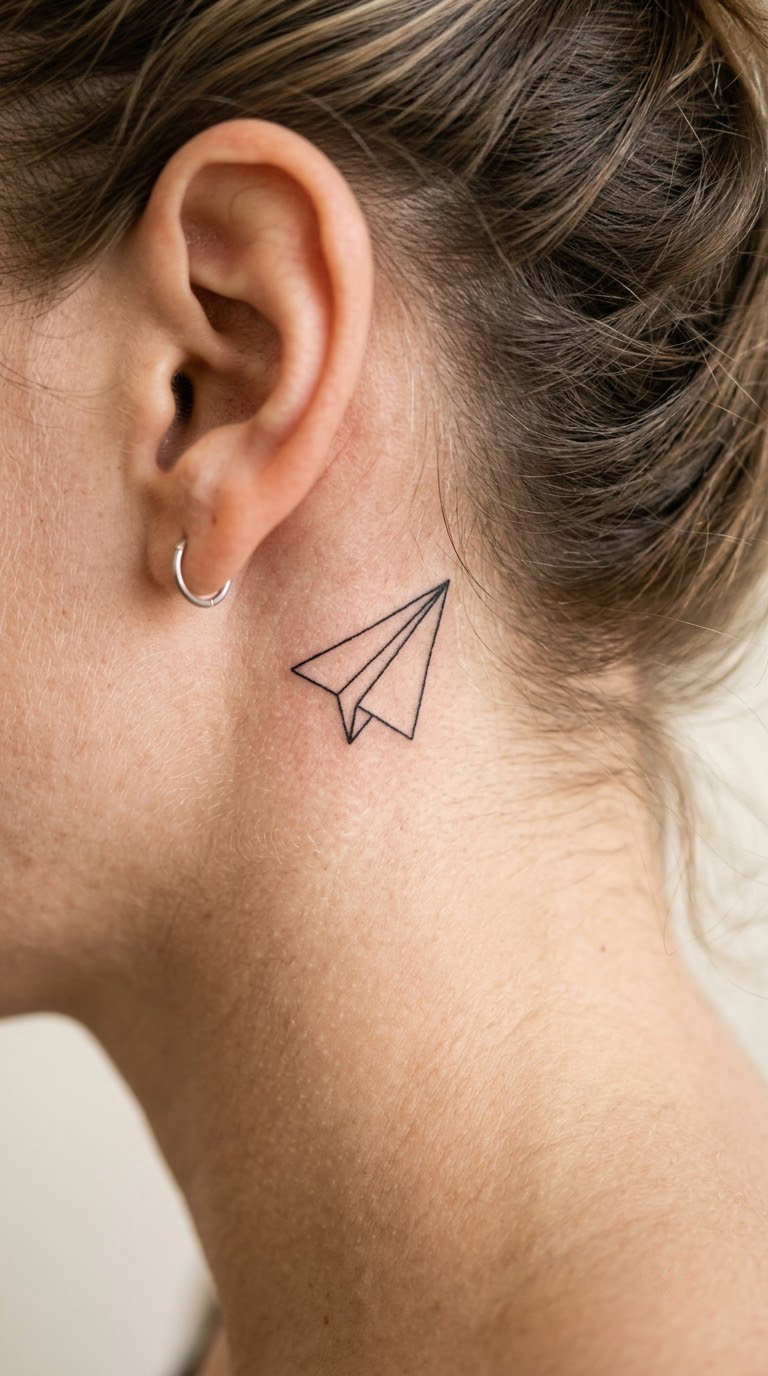
A paper plane drawn with four or five directional lines, the fold marked by one thin accent stroke and the shadow suggested by a few short parallel lines under the body. No outline box, no background, just the plane angled upward.
People choose it for movement rather than symbolism. A small object that appears to be flying away from the neck reads as someone setting something down, and it sits well under a shirt collar or beside short hair.
Illustrative Tattoo Ideas for Fine-Line Detail
Fine line is where most illustrative designs go wrong, because a single-needle line has no margin for error. The fix is simple: build a strong silhouette first, then add only the detail that carries meaning. These 20 ideas all follow that rule, whether the artist is using a whisper-thin line, solid black, or a full mixing palette.
Placement: Behind the ear, upper neck, or the soft area under the earlobe. Size: 1 to 1.5 inches. Style: Fine line. Pain: Low, and it is over in about 15 minutes. Behind the ear sits on thin skin over bone, so expect a scratchy sensation rather than a dull ache. Ageing note: neck and inner-arm lines fade fastest, so this is usually a touch-up piece after two or three years.
Make it yours: Add a single thin trail line behind the plane, or place it so the trail points toward a second small piece on the opposite side of the body.
2. Watercolor Botanical Branch
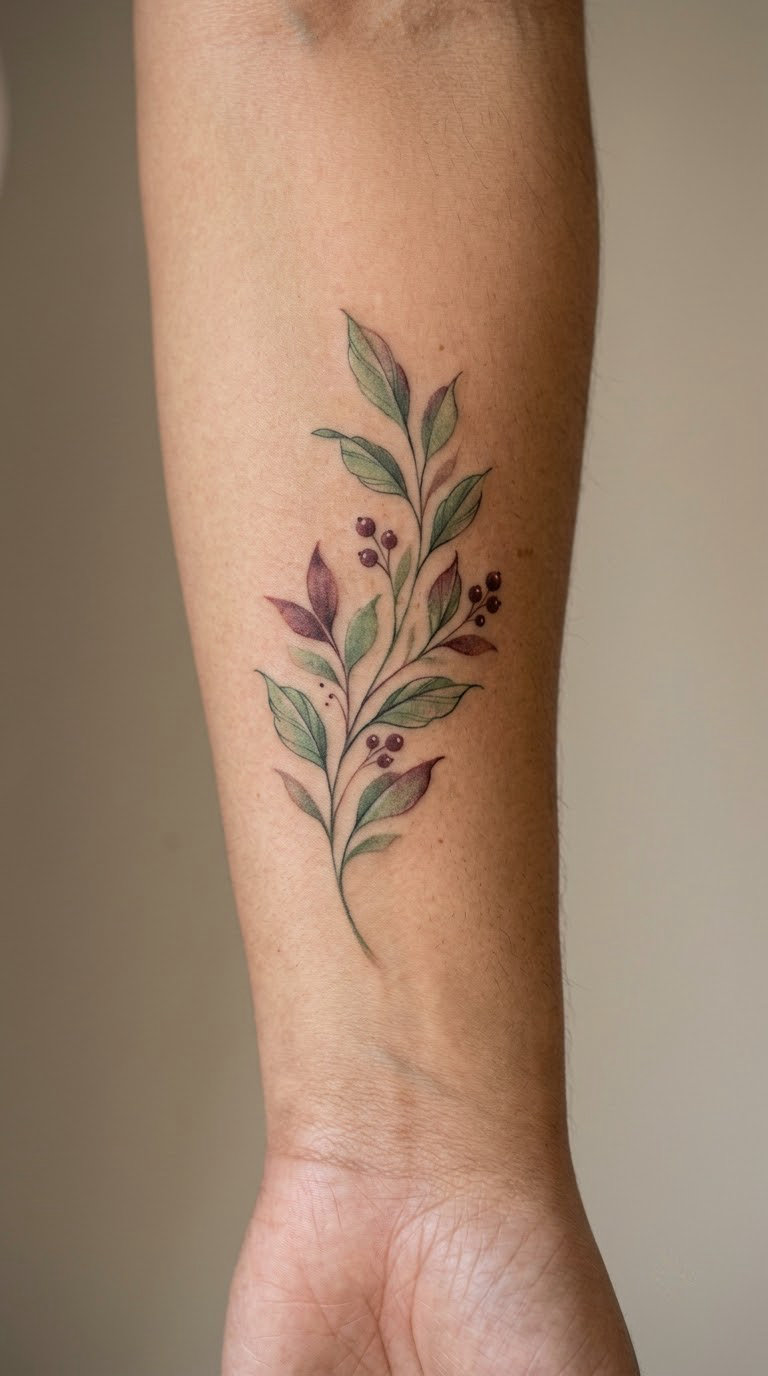
A single branch with loosely painted leaves, the color pooling and feathering at the edges the way wet pigment does on paper. Translucent washes sit in the background and the veins in each leaf stay crisp where the artist pulled the ink back out.
It appeals to anyone who wants color without a hard black outline. The wash reads as soft and grown, and it is an easy design to extend later into a full botanical sleeve because new branches can be added at either end.
Placement: Inner forearm, calf, or the shoulder where a curved surface lets the branch arc. Size: 3 to 4 inches. Style: Watercolor. Pain: Medium; long color sessions on the inner arm are an endurance test more than a sharp one. Ageing note: soft washes have no line to hold them, so the color softens noticeably in the first few years.
Make it yours: Specify the plant by name. A quince branch, a eucalyptus stem and an olive branch all look similar in a portfolio but mean different things.
3. Blackwork Mountain Range
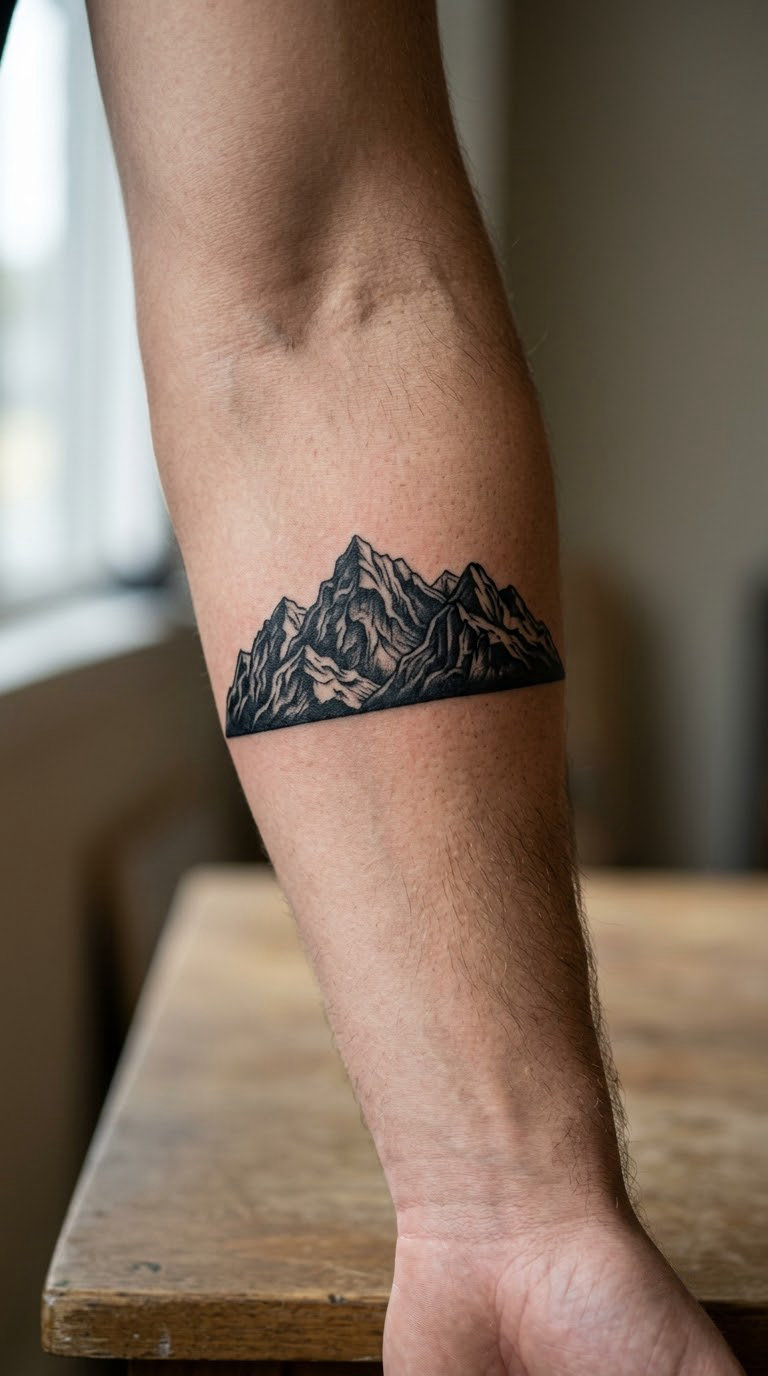
Layered peaks filled with solid black, a clean horizon line under the lowest ridge, and sky left as bare skin. The trick is the negative space: the ranges get darker and denser as they come forward, so the whole scene reads with only two or three values.
Mountains are the most common request I see from people living near a range they grew up in. It is a landscape subject with a built-in horizon, which makes it forgiving to place and easy to scale.
Placement: Outer forearm, outer upper arm, or across the ribs if you want the range to follow the body. Size: 5 to 6 inches. Style: Blackwork. Pain: Medium on the arm, high over ribs because the skin is thin and moves constantly. Ageing note: solid black holds its edge well, so this style ages better than most illustrative work.
Make it yours: Give the artist a photograph of your own view. The distinctive shapes of a real range are what make it yours rather than a stock mountain.
4. Miniature City Skyline
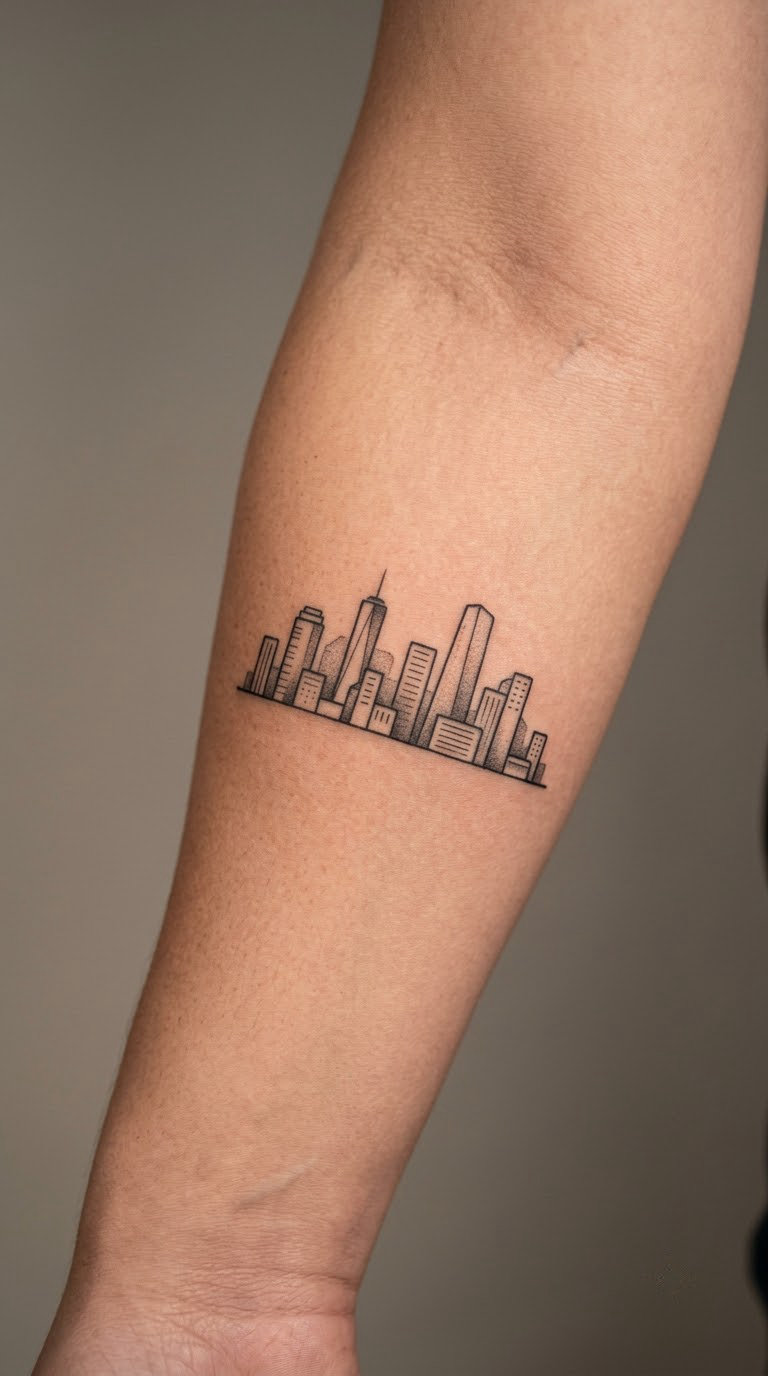
A compressed row of buildings with no brand names or signage, drawn in fine line with a light grey wash in the windows and a few rooftop details. Each building is simplified to a shape, a roofline and one or two windows.
It is a piece about place rather than landmark. Ask for the neighborhood you grew up in instead of a famous skyline and the design becomes yours in a way a postcard version never is.
Placement: Inner forearm or calf, always horizontal. Size: 2.5 to 3.5 inches. Style: Fine line with black and grey. Pain: Low to medium. Ageing note: the smallest windows are the first things to blur, so ask the artist to keep window detail above roughly a quarter inch.
Make it yours: Add one building at a different scale, drawn from your own photo, so the artist builds it into the row in exact perspective.
5. Celestial Moon and Stars
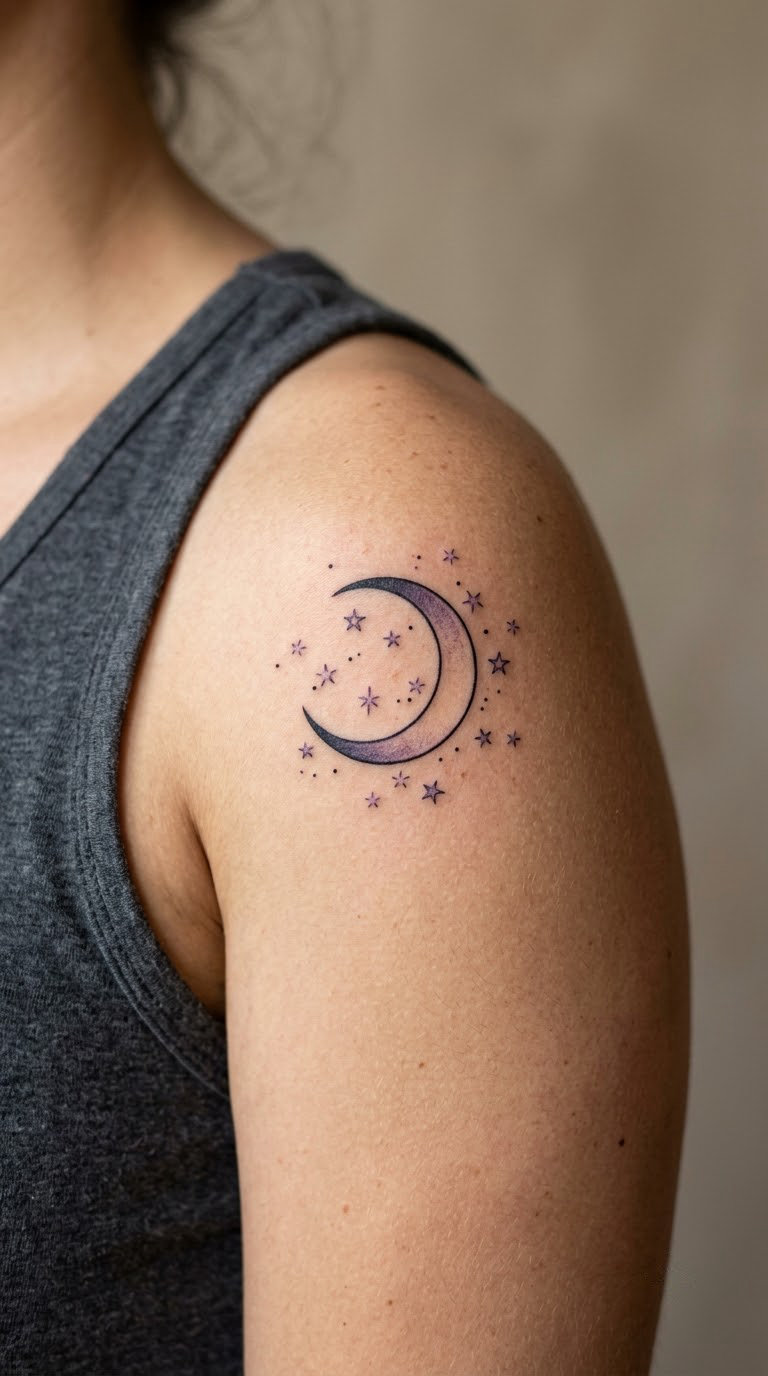
A crescent or half-lit moon with stippled shading on the shadowed curve and a scatter of four-point stars around it, each with a fine line trailing off. Some artists add a thin horizon or a few dots for distance, which stops the composition floating.
Celestial work is the one subject where people expect a meaning, and usually the meaning is the moon phase at the time it was done. If you want a specific phase, say so before the stencil goes down, because a full moon and a crescent are very different pieces.
Placement: Outer shoulder, upper back, or ankle bone. Size: 2 to 3 inches. Style: Blackwork with a single color accent. Pain: Medium; the shoulder is a bony spot and ankle bone is no better. Ageing note: violet and blue pigment fade fastest, so lean on black for the structure. Readers who like this direction usually also browse our sun moon and rising sign tattoo ideas.
Make it yours: Place the moon at the exact phase on a date that matters, and ask for the phase shadow to be stippled rather than solid.
6. Peacock Feather in Color
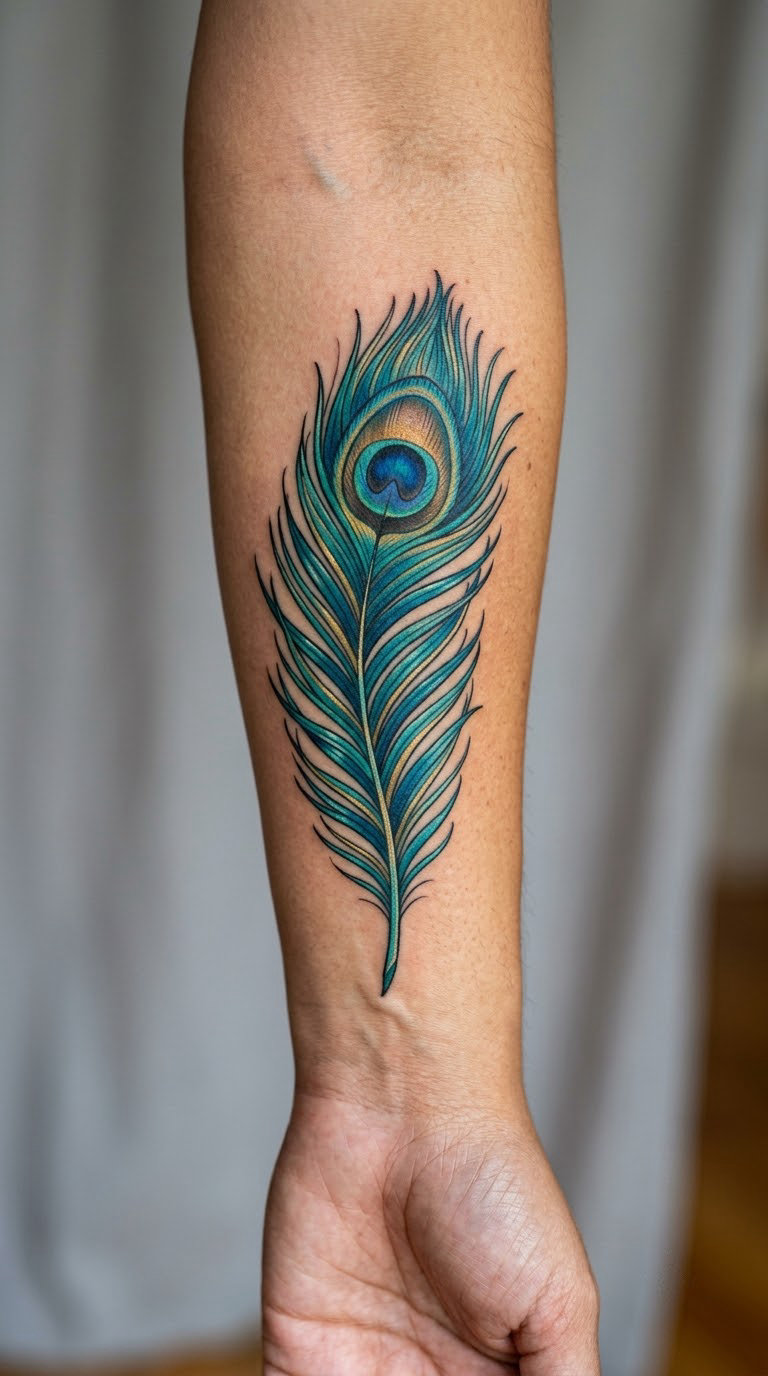
One long feather with a detailed eye at the top and barbs drawn as fine individual strands running the full length. The color shifts across the eye from deep teal to blue to a warm gold at the center, and the quill tapers to a hairline.
It is one of the highest-effort color illustrations on this list because the eye has to be mixed and layered rather than filled in. Give an artist who works in realistic color a pearlescent palette and the result is close to iridescent.
Placement: Outer forearm, thigh, or upper arm running vertically. Size: 4 to 5 inches. Style: Color illustration. Pain: Medium, and the session runs long because the color needs building up. Ageing note: turquoise is one of the first pigments to cloud over, so expect a touch-up on the eye every few years.
Make it yours: Ask for the barbs to trail off into fine lines at the bottom instead of stopping at a hard edge.
7. Traditional Koi in Motion
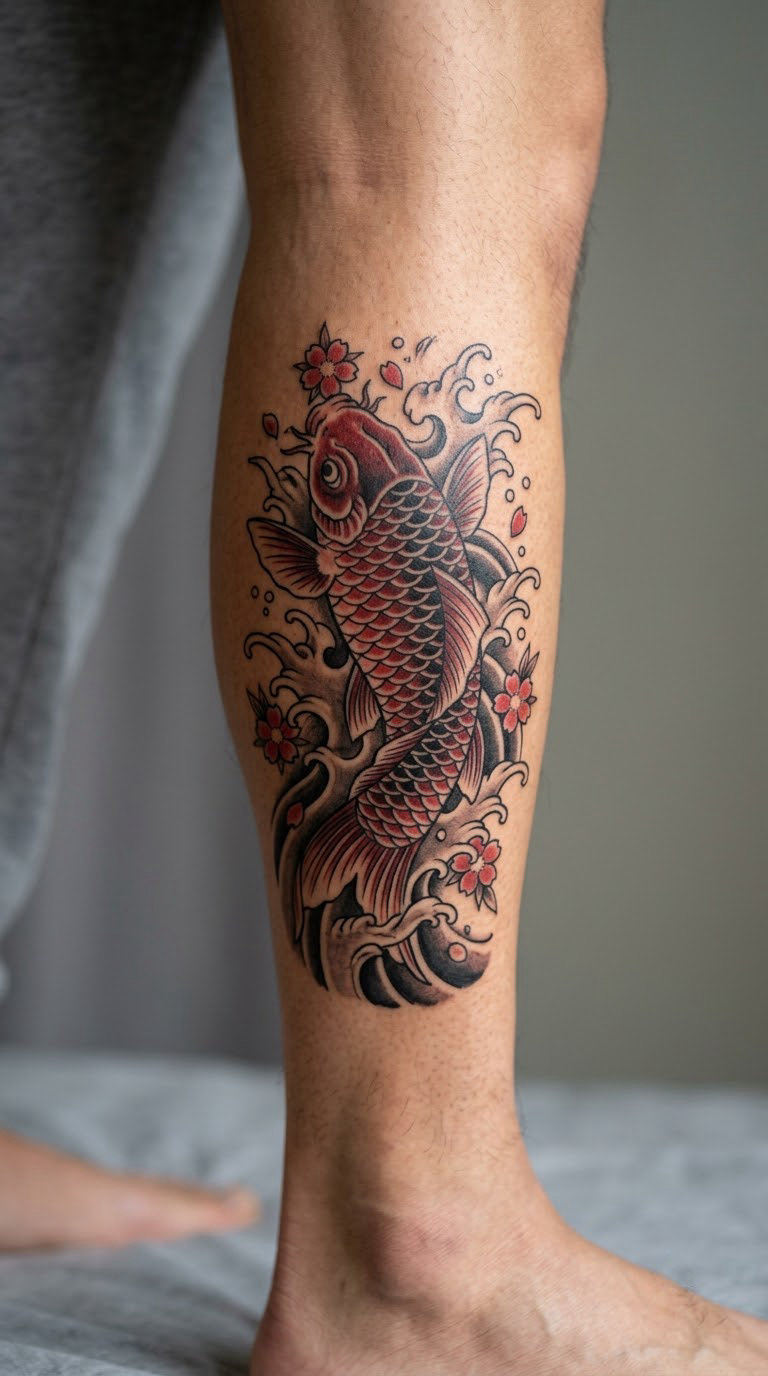
A koi with a curved spine, fins swept back as if it is swimming, and scales suggested by a few deliberate lines rather than drawn one by one. Red and black with a single white highlight is the classic version; grey wash under the belly gives it depth.
Koi traditionally represent perseverance and the point of moving forward against a current, which is the usual reason people pick this subject. A traditional koi stays traditional as long as the outline weight and color blocks hold, even with looser scale detail.
Placement: Calf, thigh, or upper arm. Size: 3.5 to 4.5 inches. Style: Traditional or neo-traditional. Pain: Medium; the calf is fleshy and forgiving, the outer bicep is the sensitive one. Ageing note: red fades toward orange, so a touch-up keeps it from going flat.
Make it yours: Ask for no scales at all, just the body and the fins. Less detail reads as a modern take and holds up longer.
8. Lighthouse and Breaking Waves
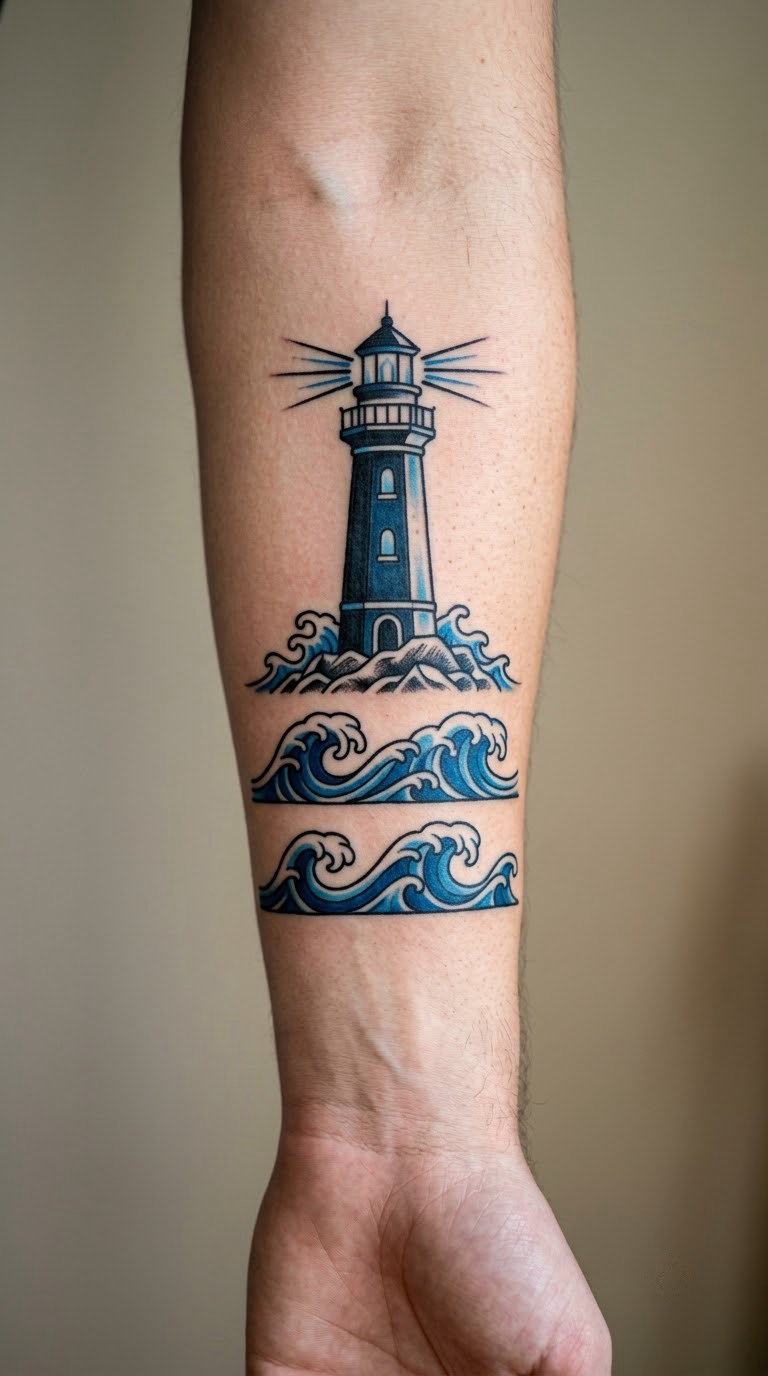
A straight lighthouse tower with a striped band and a small lamp room, standing on two simple breaking-wave bands drawn as curved white gaps. The palette is usually black, one blue and bare skin, which keeps the whole scene to three values.
Coastal scenes work well for people who want a story in a small space. A lighthouse gives a vertical anchor, and the waves give the composition a base without needing a full background.
Placement: Inner forearm or calf, vertical, with the waves following the limb’s curve. Size: 3 to 3.5 inches. Style: Black and grey with color. Pain: Medium on the inner arm, higher on the calf. Ageing note: the fine white gaps between the wave bands can soften, so keep the foam shapes chunky rather than foamy.
Make it yours: Ask for a beam of light or a single set of gulls, and name the coastline the scene is based on.
9. Hot Air Balloon over Rolling Hills
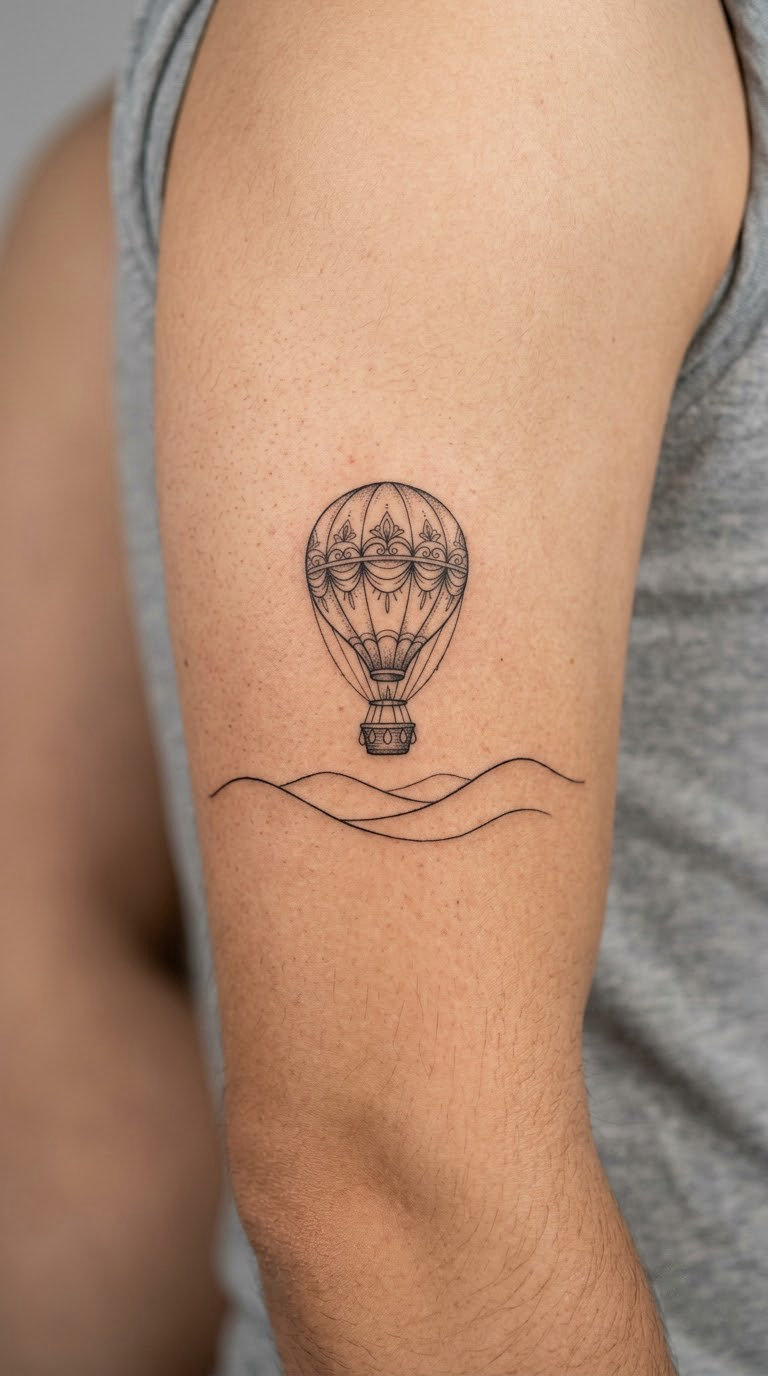
A balloon drawn with a clean envelope divided into panels, a small basket hanging below, and two or three low hills underneath it. Most of the composition stays empty, which is what makes the balloon feel like it is floating rather than stuck to the arm.
The airy negative space is the whole design, and it is why this scene suits an upper arm or a shoulder where there is room to leave skin alone. People also use it to mark a first flight, a proposal, or a move.
Placement: Upper arm, shoulder, or upper back. Size: 3.5 to 4 inches. Style: Fine line. Pain: Low, since most of the session is the short hills at the base. Ageing note: the panel lines on the envelope are the vulnerable part, so ask for them slightly heavier than feels necessary.
Make it yours: Give the artist a basket detail, a small date on the envelope panel, or a single cloud line under the hills.
10. Fox Emerging from Foliage
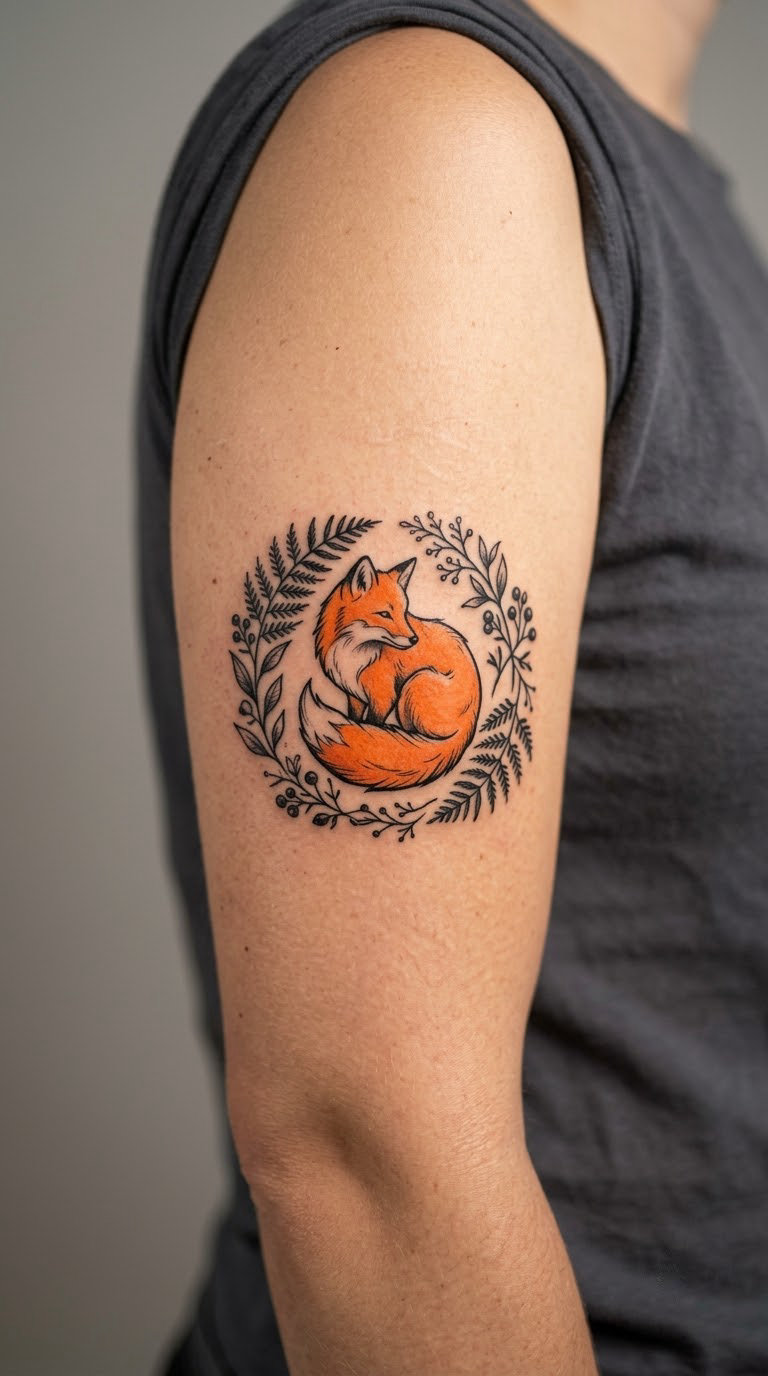
A fox head and shoulders pushed forward through leaves, drawn with realistic fur texture in short directional strokes, with the surrounding leaves in flat black. A single orange or rust accent on the face keeps it illustrative instead of turning it into a photo.
Foxes get chosen for cleverness and for their link to rural places. A dark foliage frame is useful too, because the black mass is easier to tattoo evenly than a full-color scene and it hides minor line spread later.
Placement: Outer upper arm, outer thigh, or a forearm if the design is redrawn flatter. Size: 2.5 to 3.5 inches. Style: Illustrative realism. Pain: Medium. Ageing note: the thin fur strokes on the muzzle blur first, so ask for a slightly bolder value range in the face.
Make it yours: Have the foliage frame come from a plant that means something to you, a bramble or a fern from a specific place.
11. Realistic Hummingbird and Flower
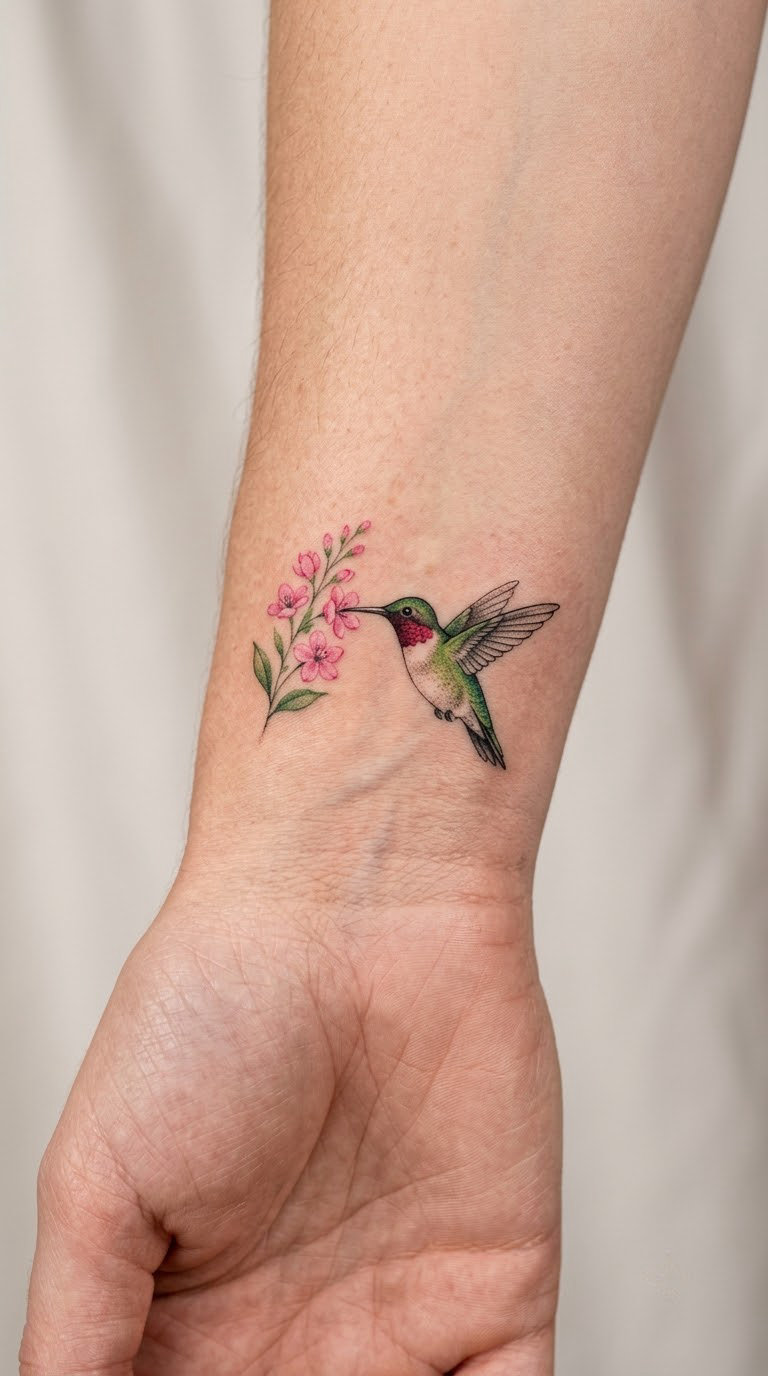
A hummingbird in hover with the wings drawn as a translucent blur rather than individual feathers, the beak entering a single flower, and the background left as bare skin. The whole point is the contrast between the sharp body and the soft wings.
It is a favorite for a wrist because the bird hovers rather than perches, which lets the design sit in a small square of skin. Buyers usually come in with a reference photo of a specific bird, often one they have watched in a garden.
Placement: Inner wrist, inner forearm, or behind the ear. Size: 1.5 to 2 inches. Style: Micro-realism. Pain: Low in length, high in concentration; two inches of micro-detail can take an hour. Ageing note: this is the design most likely to need a touch-up at year three, especially on the wrist.
Make it yours: Use a flower that blooms where you are from, or match the color to an existing piece rather than adding a fourth new color.
12. Dotwork Dragonfly
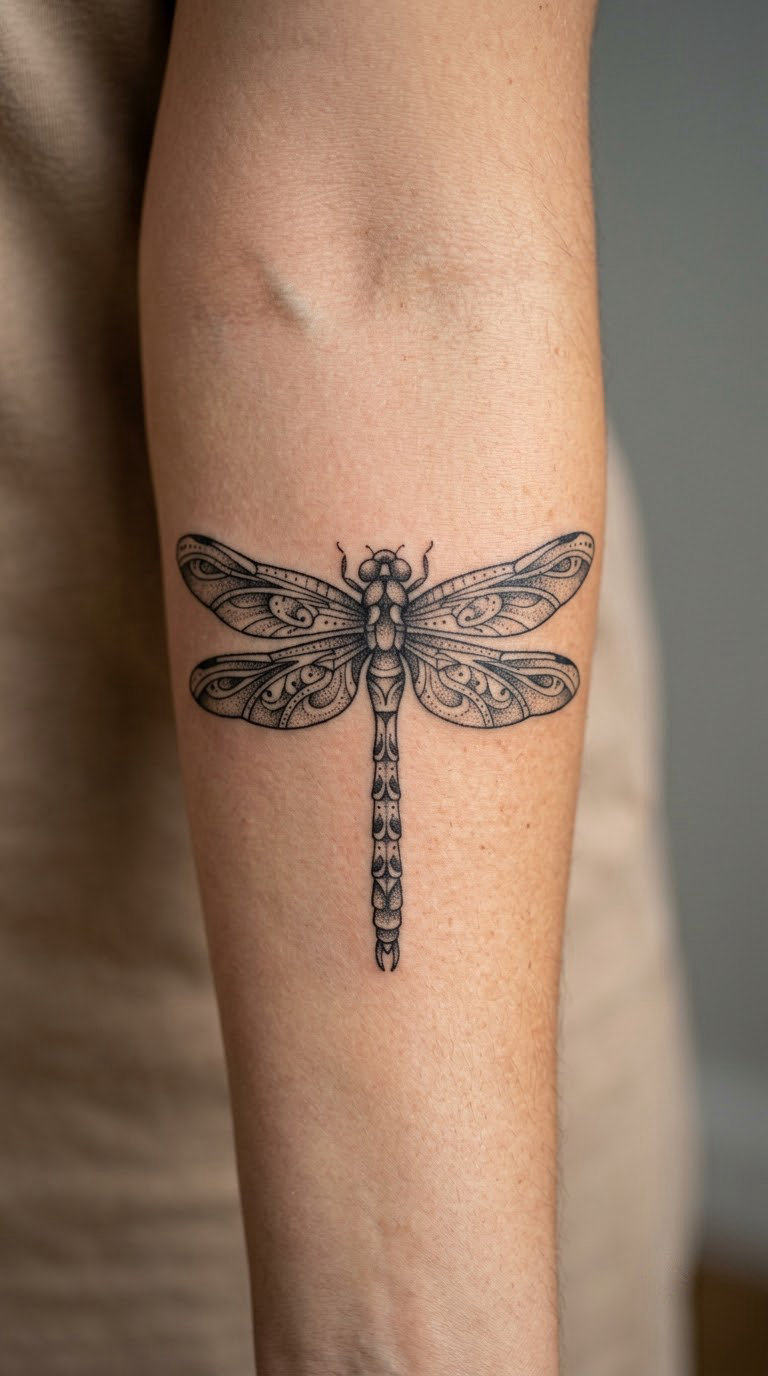
A dragonfly built from graduated dot patterns, with two restrained wings per side and a slim body tapering to the tail. The dots get denser toward the outer edge of each wing, so the shape holds up even when the smallest dots soften.
Dotwork is the most common shading technique inside the illustrative style, and the dragonfly is its most forgiving subject because the body is essentially a long empty shape. Plenty of people get one as a first piece and a second on the other arm later.
Placement: Forearm or calf, running vertically along the limb. Size: 2.5 to 3 inches. Style: Dotwork. Pain: Medium; a long pass of single-needle dots in one area gets sore around the 90-minute mark. Ageing note: the smallest dots in the wing edges are the first to disappear, so the artist should build the wing shape with mid-tone dots too.
Make it yours: Ask for the dot density to be a deliberate map, such as a real distribution pattern or the count of days that mattered to you.
13. Vintage Teacup with Saucer
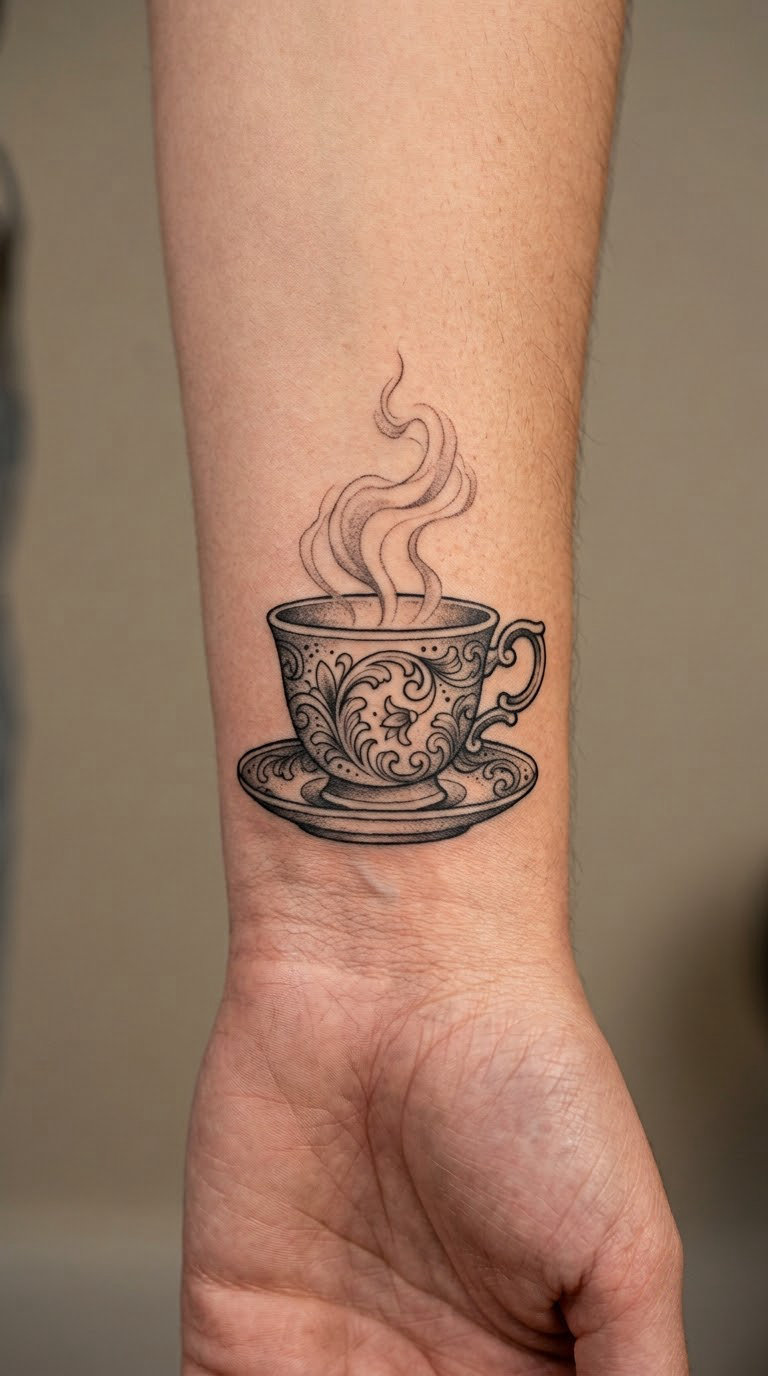
A teacup on its saucer in profile, with a curved handle, three thin steam lines and a light stipple shadow under the cup. The linework imitates a nineteenth-century engraving, which means visible parallel hatching rather than smooth gradient shading.
Still life objects age better than faces because there is no likeness to lose. A teacup also carries a quiet, domestic meaning that people like to keep to themselves.
Placement: Wrist, inner forearm, or ankle. Size: 1.5 to 2 inches. Style: Engraving-inspired linework. Pain: Low. Ageing note: the steam lines are the most fragile part of this design, so ask for them to be fewer and heavier rather than four wispy ones.
Make it yours: Add a small floral motif on the cup itself, taken from a china pattern your family owns.
14. Compass Rose with Cardinal Points
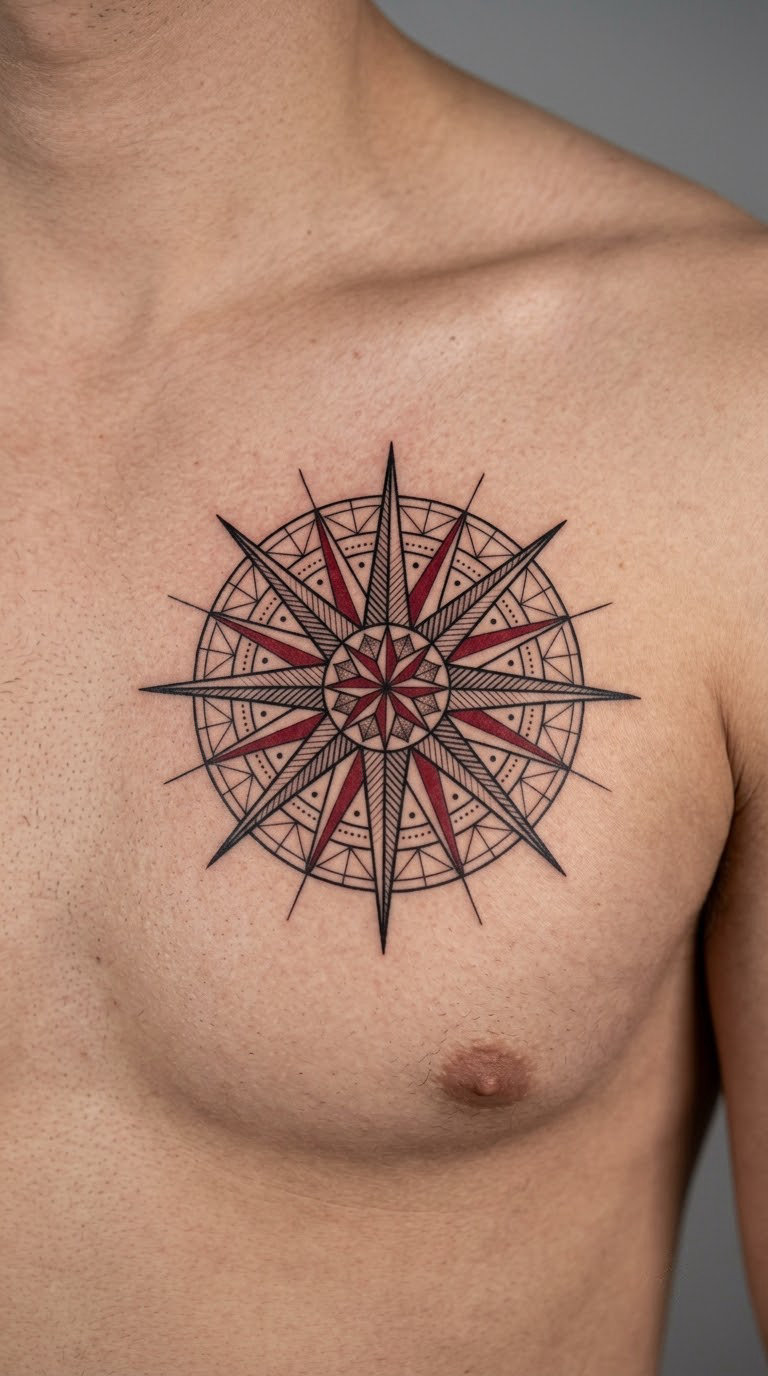
A compass rose with four long cardinal points, four shorter secondary points, and fine geometric rays filling the diagonals. A small needle or lettered marker at the center gives it a reason to exist, and one color accent keeps it from becoming a geometry tattoo.
Compasses are the most functional of the symbols on this list, so people tend to point them at a place that matters. The chest is the most popular spot because there is a flat area to run it across, and the sternum version works smaller.
Placement: Upper chest, inner forearm, or upper back. Size: 2.5 to 3.5 inches. Style: Fine line and geometric. Pain: Medium; the chest feels sharper than the arm even though the session is short. Ageing note: the fine diagonal rays fade out of alignment fastest, so the artist should let the cardinal points carry the shape.
Make it yours: Add a single degree marker or a coordinate at the tip, set to the location you are pointing at.
15. Minimalist Sailboat at Sea
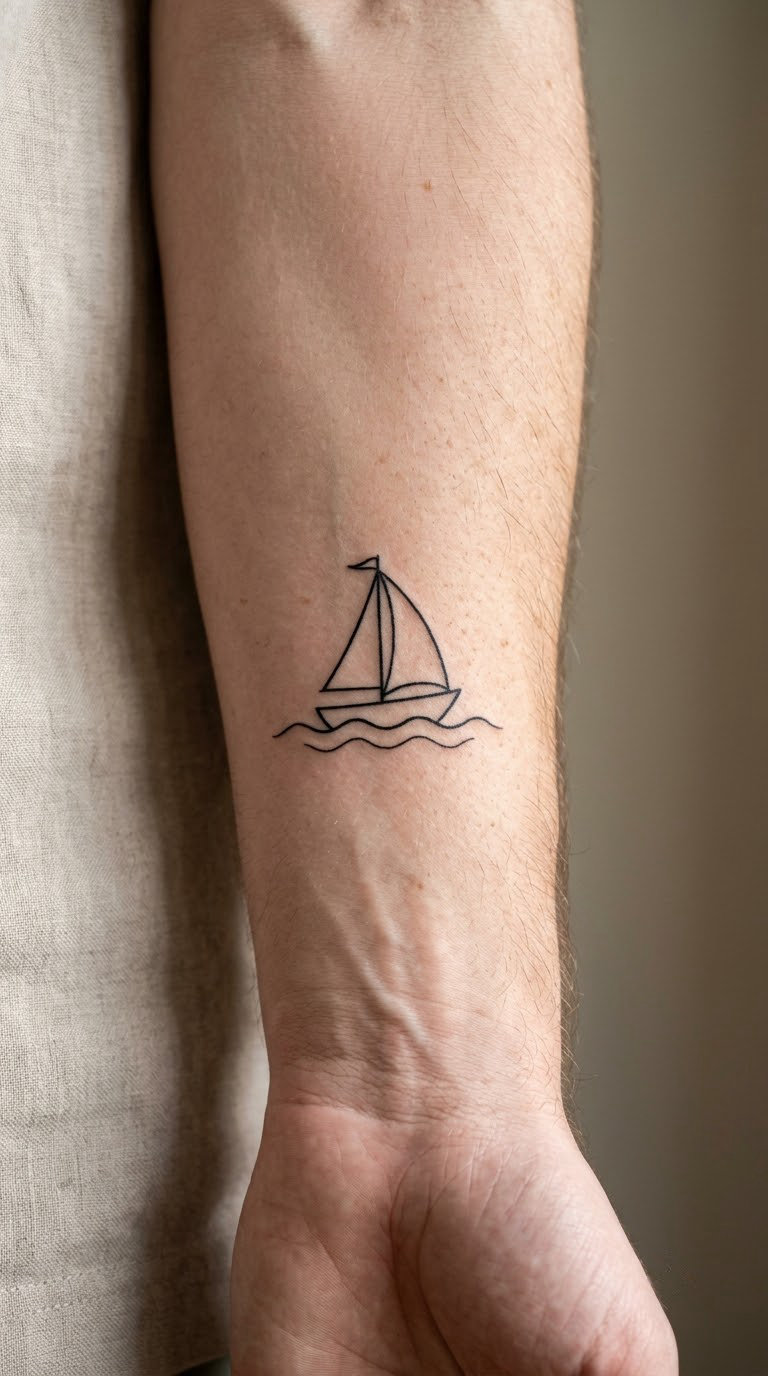
Two triangular sails on a curved hull, sitting above two simple wave lines with plenty of bare skin around everything. There is no shading at all, which is what keeps it minimal and also what makes it the least demanding piece on this list.
Most people choose a first tattoo that has meaning but no face, no shading and no small detail to lose. This is the one I point beginners toward when they want a first piece that still looks considered a decade later.
Placement: Inner arm, ankle, or behind the ear at a smaller size. Size: 2 to 2.5 inches. Style: Minimal fine line. Pain: Low, usually 20 to 30 minutes. Ageing note: thick minimal lines are the most durable work in this article, so let the artist go slightly heavier than looks right in a drawing.
Make it yours: Set the number of sails to a family count, or add a small name under the hull in matching line weight.
16. Blackwork Raven in Profile
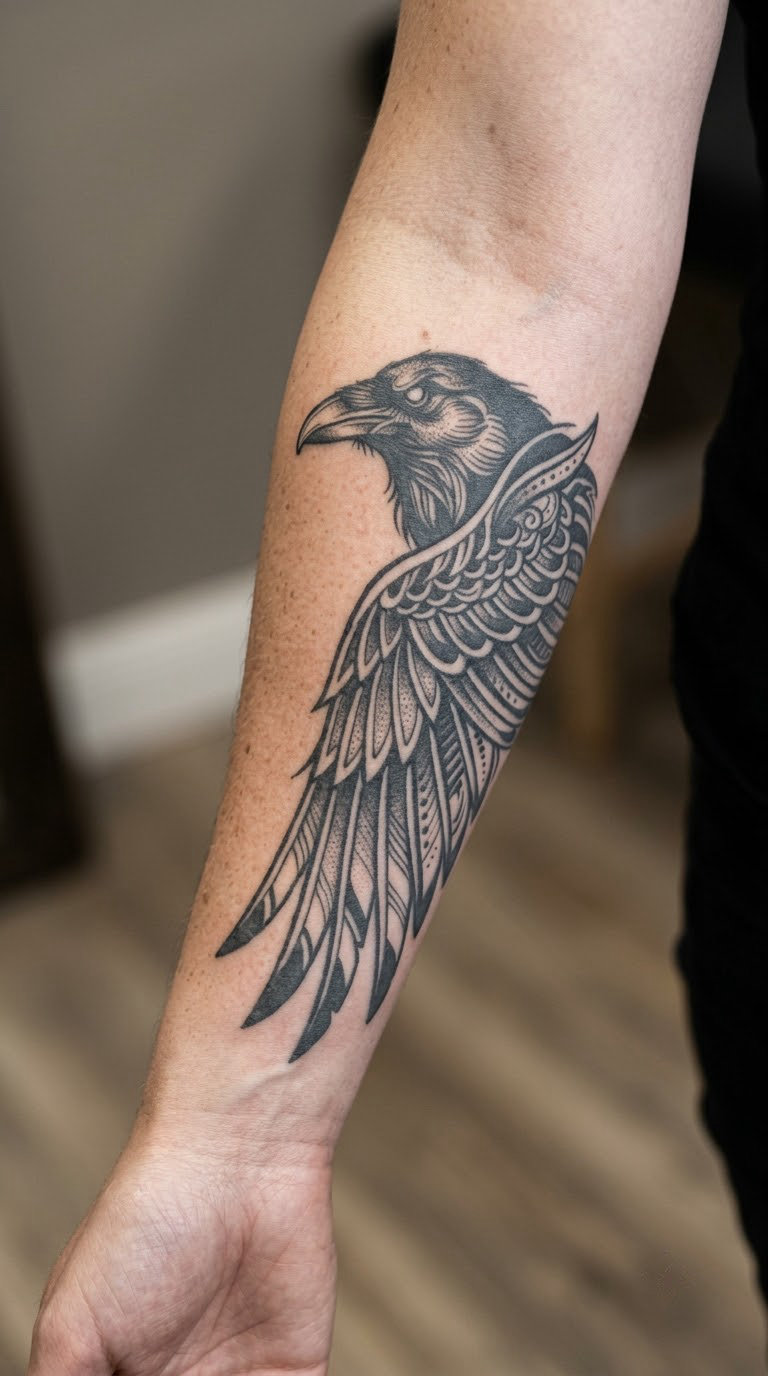
A raven head in profile with a clean curved beak, the eye left as a single white gap, and the wing laid in as layered black shapes with a few white lines separating the feather groups. Solid black masses do the work that shading would do in a softer style.
Corvids sit at the center of dark art and engraving work because of the printmaking tradition of drawing them in black ink on white paper. Ask for the feather groups as clear shapes rather than individual feathers and the piece stays readable at any size.
Placement: Outer forearm, throat, or upper arm. Size: 3.5 to 4.5 inches. Style: Blackwork. Pain: Medium, and the throat is the sensitive option if you want the bird at eye level. Ageing note: blackwork holds contrast well, and the white gaps between feathers are the only real aging risk.
Make it yours: Have the eye left blank with no pupil, and add a small sprig in the beak if you want a narrative.
17. Open Book with a Moth
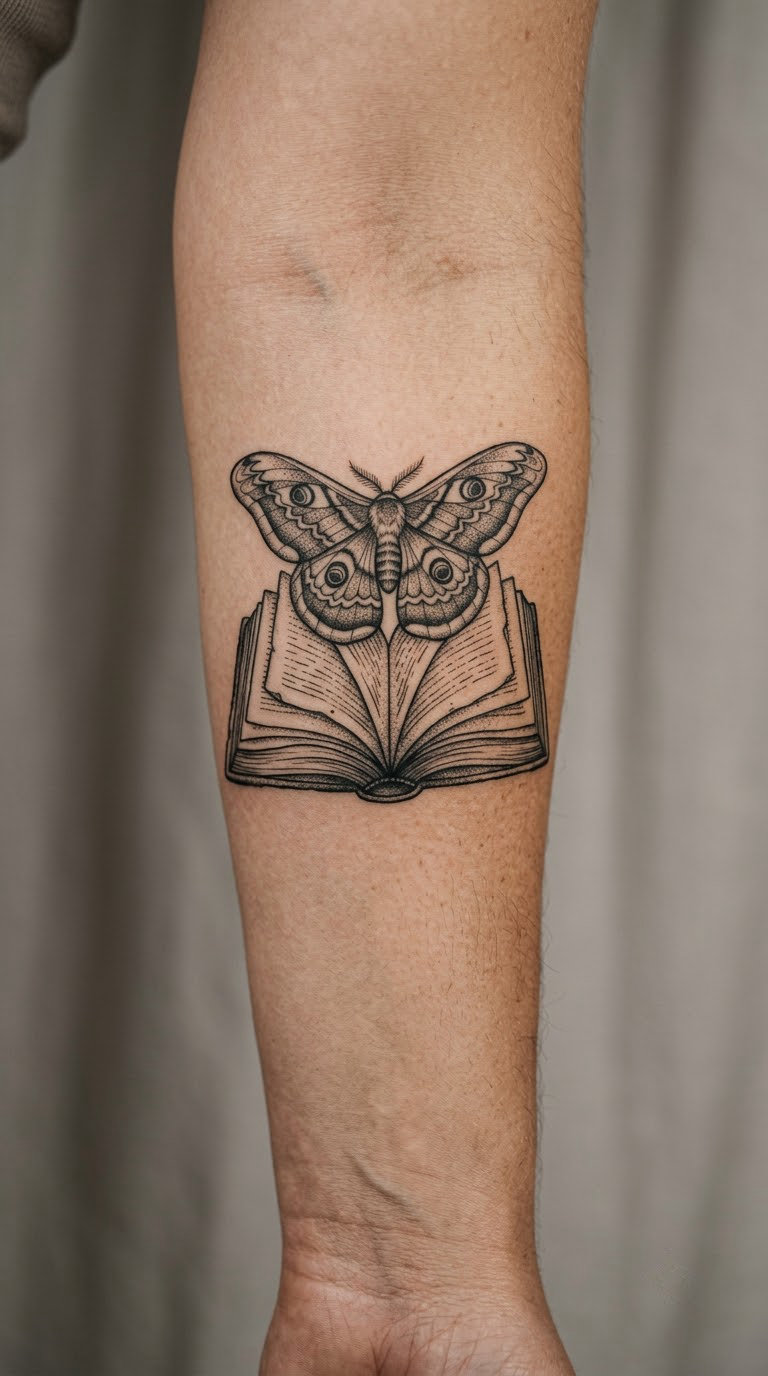
An open book in three-quarter view with a turning page, and a moth lifting off the gutter with fine antennae and lightly scaled wings. The book is drawn in line and light grey, the moth carries a little more contrast so it stays the focal point.
Book lovers ask for this more than almost anything else, and there is a real cluster of people collecting literary tattoos who want the actual cover rather than a symbol of one. If yours is a specific edition, bring the jacket image.
Placement: Forearm, inner arm, or upper back. Size: 3 inches. Style: Fine line illustrative. Pain: Low to medium, and the wings make the session longer than the book alone would. Ageing note: the page edges and the moth’s antennae are the two fragile elements, so keep the page count low.
Make it yours: Use the real cover art of your edition, or a single line from the book rendered small under the open pages. Related reading sits with our fingerprint tattoo ideas for memorial pieces if the subject is a person rather than a book.
18. Layered Rose and Dagger
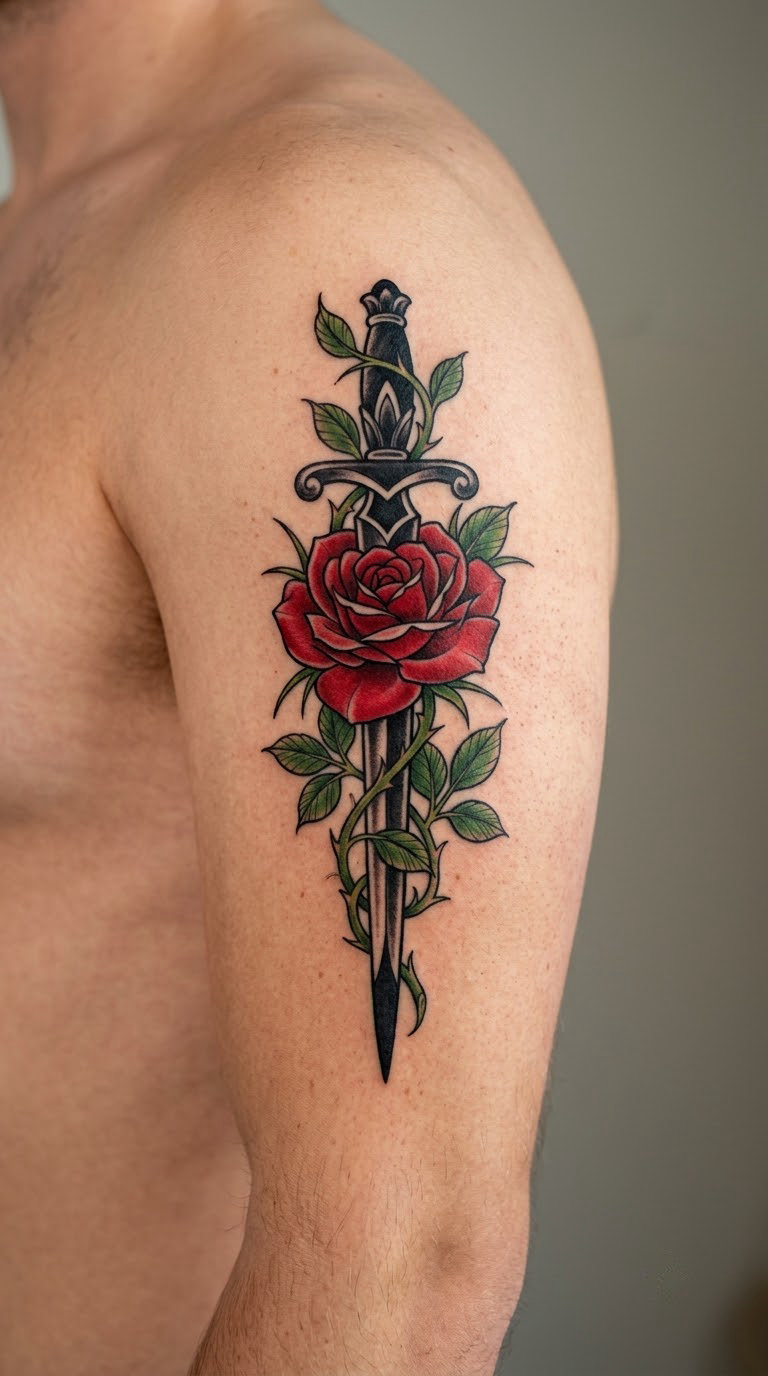
A blooming rose with layered petals shading from deep red at the center to a pale edge, the stem and leaves wrapping around a dagger with a solid black blade. The red stays on the flower and the black stays on the metal, which keeps the two subjects from muddying each other.
It is a classic motif that a lot of people want as their first large piece, and a good version keeps the rose at three quarter size and the dagger partly hidden rather than crossing both fully in view.
Placement: Upper arm, outer thigh, or back. Size: 3.5 to 4.5 inches. Style: Traditional illustrative. Pain: Medium, and the red shading is the long part. Ageing note: green leaves are the weak point in this palette, so many people drop them and let the stem run bare.
Make it yours: Add a date along the blade, or change which element sits in front so the design reads as your version of the motif.
19. Illustrated Globe with Route Lines
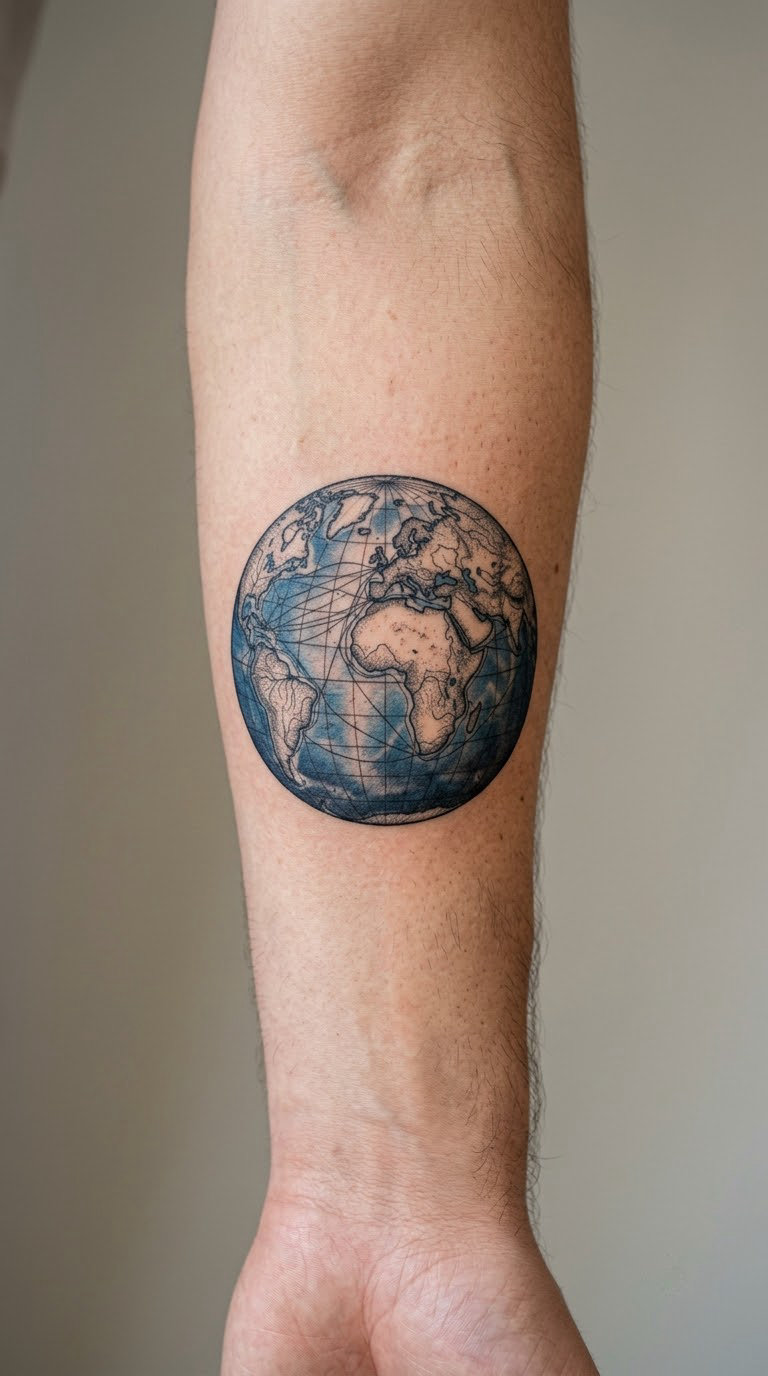
A simplified globe with clear latitude and longitude lines, a single continent outline, and two or three route lines marked with dots running across the surface. The drawing is a diagram rather than a map, which is what makes it illustrative instead of navigational.
Travel tattoos usually end up as a list of coordinates nobody can read. Drawing the routes instead gives the same information with a graphic shape, and it suits people who collect places rather than countries.
Placement: Forearm, calf, or a shoulder. Size: 2.5 to 3.5 inches. Style: Black and blue illustrative. Pain: Medium; the line work is shallow but the session covers a lot of small lines. Ageing note: the continent outline softens before the latitude lines do, so ask for that outline at full contrast.
Make it yours: Draw your actual routes, then have the artist mark three or four of them with dots and leave the rest as clean lines.
20. Vintage Butterfly in a Jar
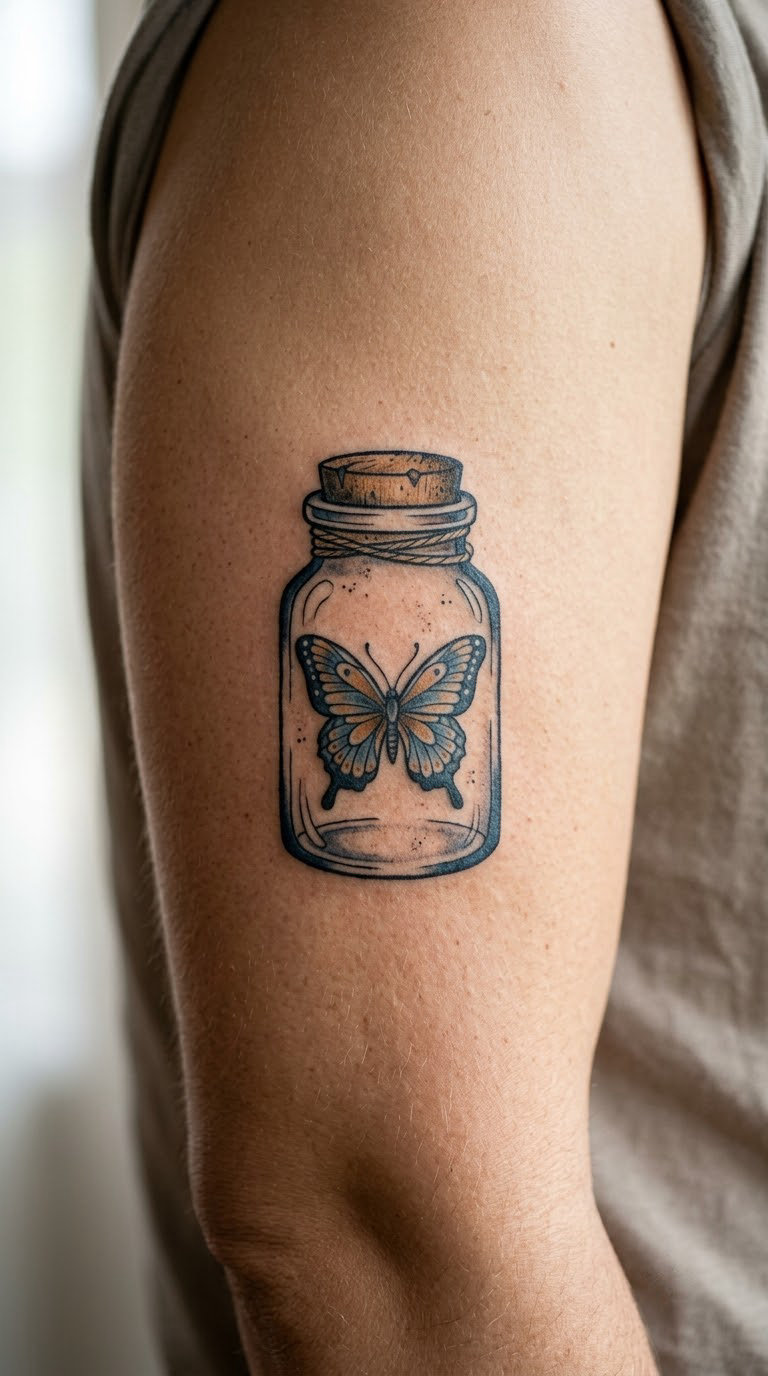
A butterfly with patterned wings pinned inside a simple jar, the glass indicated by one or two highlight lines and a soft amber wash suggesting a wooden table behind it. The palette is deliberately limited so the wings stay the most detailed part.
It has a nostalgic quality that people like without needing it to mean anything specific. The jar also solves a real design problem, giving a flat small design a frame so it can sit on a shoulder or a thigh without floating.
Placement: Upper arm, outer thigh, or forearm. Size: 2.5 to 3.5 inches. Style: Color illustration, limited palette. Pain: Low to medium. Ageing note: pale yellow and light blue in the background wash fade first, so keep the butterfly darker than the jar in every value.
Make it yours: Use a species you have actually seen, identified from a photo, and name the field guide the plate is based on.
How to Choose the Right Design
Most disappointments in this style are not talent problems. They are a design chosen at the wrong scale, or an artist whose portfolio does not hold that subject. Work through these six questions in order and you will have a shortlist worth booking.
- Start with the subject, not the style. Decide what the piece is about, then look for an artist who has drawn that subject before. A botanical illustrator and a dark art specialist are both illustrators, and their skills barely overlap.
- Match detail to size honestly. A drawing that reads at 8 inches will turn to mud at 1.5. Count the elements in your design and divide by the number of inches. Fewer elements at a larger size always looks better than a crowded small piece.
- Let the body contour decide the placement. A horizontal design belongs on a forearm, calf or ribs; a vertical one belongs along a limb, the sternum or the spine. If a design has a direction, tattooing it sideways to fit a flat spot usually shows.
- Look only at healed work. Ask to see pieces at least a year old, not the fresh work on the wall. More artists post only new tattoos, so a portfolio dated in 2026 tells you very little about how the work holds up. Needle depth, line weight and how evenly a solid black is laid down are all visible in healed pieces and hidden in fresh ones.
- Think about the fourth piece, not the first. Decide now whether the design can grow into a sleeve or a series, because a composition that closes in on itself cannot be extended. The globe and the botanical branch both extend; a framed jar does not.
- Ask plainly for what you want. People on r/tattooadvice worry about requesting something simpler than an artist’s signature style. The straightforward answer is that asking is normal and welcome, and if an artist is not the right fit you can simply choose one whose portfolio already matches.
One more practical note: dense black illustrative work is regularly used to cover older tattoos, because solid black and heavy shapes are easier to fit over a busy area than fine line. A search on r/AskSeattle turned up someone wanting an illustrative heavy black floral sleeve for exactly that reason. If you already have work you dislike, say so at the consultation before the design is drawn.
Cost and Session Time
Cost follows four things: how big the design is, how much detail sits inside it, how many sessions it takes, and what the artist charges per hour. The style label barely matters. Hourly rates vary widely by city and by an artist’s reputation, and most shops set a minimum charge that covers a short booking, so a tiny piece costs more per inch than a large one.
Expect roughly these session lengths, all of them easy to change once the artist sees your reference material:
- Under 2 inches: 30 to 60 minutes. A minimalist sailboat, a hummingbird, a teacup.
- 2 to 4 inches: 1 to 2 hours. Most of the ideas in the quick guide, including the dotwork dragonfly and the compass rose.
- 4 to 6 inches: 2 to 3 hours. The peacock feather, the mountain range, the rose and dagger.
- Larger scenes and sleeves: several sessions, usually booked weeks apart. A design with a background almost never fits into one sitting.
Ask for two numbers before you book: the hourly rate and the estimated number of sessions. Artists who give both up front are the ones whose drawings survive to the finished stage. Custom illustrative work also usually adds a design fee on top of the session, and that fee is sometimes credited against the tattoo if you go ahead with them.
Aftercare Basics
Healing is mostly doing less than you want to. Six habits cover almost everything.
- Follow your artist’s aftercare instructions first, before anything on this list. They know the needle depth and the style they used on your skin.
- Wash it gently twice a day with lukewarm water and unscented soap, then pat dry with a clean towel or paper towel rather than rubbing.
- Keep the area clean and dry for the first few hours, and avoid soaking, swimming or covering it tightly in fabric while it settles.
- Ask before applying ointment. A thick layer can trap heat and ink under the skin, and most artists prefer nothing or a very thin coat.
- Let scabs finish on their own and never pick them, and wash your hands before you touch the area.
- If redness, swelling or discomfort gets worse over several days instead of settling, contact the studio first and your doctor if it keeps going.
Frequently Asked Questions
What are illustrative style tattoos?
Illustrative tattoos reproduce the look of a hand-made drawing: fine lines, a readable outline, and shading built from stippling, cross-hatching or grey wash instead of solid color blocks. The design is usually adapted from a sketch, a storybook plate or an old engraving, so it reads as artwork on skin rather than a photograph or a bold traditional emblem. The visible line is the whole point.
What size should an illustrative tattoo be?
Give a drawing with three or four elements a minimum of 2 inches on its longest side, and give a scene with a horizon or background 4 to 6 inches. Anything thinner loses line detail within a few years. The other half of the answer is body contour: a design drawn to follow the curve of the forearm reads far better than a round piece forced onto a flat area.
Do fine-line illustrative tattoos fade over time?
Yes, and it comes down to sun, placement and line weight. Single-needle lines on the inner arm, the wrist and the neck fade fastest because that skin turns over constantly and takes the most sun. Interior upper-arm and thigh placements hold up better. Fine detail also blurs as lines spread, so fewer, slightly heavier strokes age more gracefully than dense miniature work.
Is realism more expensive than illustrative work?
Not as a rule. Cost follows size in inches, detail density, how many sessions a piece needs, the artist’s hourly rate and the shop minimum, so the style label matters less than the work itself. A large illustrative sleeve often costs more than a small realistic portrait because of the hours involved, not the category. Ask for an hourly rate and a session estimate before you commit.
How long does a small illustrative tattoo take?
A piece between 1 and 3 inches usually takes 30 to 90 minutes, depending on how much shading and color is involved. Anything 6 inches or larger with a background is often split across two sessions. If you are building a collection, a small companion piece fits comfortably into an appointment you have already booked rather than needing its own.
Is it rude to ask an artist for illustrative work?
No. Artists would rather hear a clear idea than guess at one. On r/tattooadvice people regularly worry about asking for something simpler than an artist’s signature style, and the practical answer is simple: you can always ask, and you can always choose an artist whose portfolio already matches what you want. Bring a small reference board and be clear about the size you have in mind.
If this is your first illustrative tattoo, the minimalist sailboat is the one I would pick. It has a bold shape, no shading to lose and a line weight that still looks deliberate in fifteen years.
If you already have a few pieces and want the collection to read as one thing, build around a shape that extends. The blackwork mountain range, the botanical branch and the illustrated globe can all grow at either end, and a matching set of small companions fills the gaps in sessions you have already booked.