
20 Mountain and Ocean Tattoo Ideas: Best Pairings (September 2026)
These mountain and ocean tattoo ideas pair the two places people actually dream about: a hard, still peak you have to earn, and moving water that asks nothing of you. Twenty distinct designs follow, each with a real size, a placement that suits it, and an honest note on how it ages.
Most of these work as a first nature tattoo, and the smaller ones sit happily next to an existing collection. If you already have mountain or wave pieces, start with 16 tiny mountain tattoo ideas, each with a placement (September 2026), or browse 56 beautiful ocean tattoo ideas that will make you smile for more water motifs to pair against. Updated for 2026.
Mountain and Ocean Tattoo Ideas: Quick Guide
| Idea | Style | Best placement | Size | Pain |
|---|---|---|---|---|
| 1. Peak flowing into a wave | Fine line, black and grey | Inner forearm | 2.5-3.5 in (6-9 cm) | Medium |
| 2. Snow peak reflected in the sea | Black and grey realism | Outer upper arm | 4-5 in (10-13 cm) | Medium |
| 3. Compass rose wrapped by a wave | Traditional | Upper arm | 4-5 in tall (10-13 cm) | Medium |
| 4. Minimal horizon | Minimal fine line | Inner wrist | 1.5-2 in (4-5 cm) | Low to medium |
| 5. Range rising from a stylized wave | Neo-traditional | Forearm | 4-6 in (10-15 cm) | Medium |
| 6. Crescent moon over mountain and sea | Fine line | Behind the ear | 2-2.5 in (5-6 cm) | Medium |
| 7. Breaker under a distant peak | Micro-realism | Calf | 3-3.5 in (8-9 cm) | Medium to high |
| 8. Coastal cliffs and breaking tide | Fine line | Outer thigh | 5-6 in (13-15 cm) | Medium |
| 9. Surfer under a mountain horizon | Minimal blackwork | Inner arm | 3-4 in (8-10 cm) | Low to medium |
| 10. Topographic map over a nautical star | Blackwork linework | Forearm | 3-4 in (8-10 cm) | Medium |
| 11. Eagle above an ocean wave | Bold blackwork | Upper arm | 4.5-5.5 in (11-14 cm) | Medium to high |
| 12. Circular badge with mountain and wave | Traditional roundel | Shoulder | 3-3.5 in diameter (8-9 cm) | Medium |
| 13. Dotwork mountain and rolling wave | Dotwork | Upper arm | 3.5-4.5 in (9-11 cm) | Medium |
| 14. Watercolour wash into blue waves | Watercolour | Outer thigh | 4-5 in (10-13 cm) | Medium |
| 15. Mountain built from ocean currents | Geometric black | Forearm | 4.5-5.5 in (11-14 cm) | Medium |
| 16. Mountain and ocean split by a sunset | Colour with gradient | Back of upper arm | 5-6 in (13-15 cm) | Medium |
| 17. Wave nested inside a peak | Micro fine line | Wrist | 1-1.5 in (3-4 cm) | Low |
| 18. Latitude lines across mountain and sea | Fine line map | Upper arm | 3-3.5 in (8-9 cm) | Medium |
| 19. Matching half sleeves | Fine line and soft colour | Both forearms | 5-6 in each (13-15 cm) | Medium to high |
| 20. Blackwork triangle with all three motifs | Bold blackwork | Shoulder blade | 4-5 in (10-13 cm) | High |
1. Mountain Peak Flowing Into a Single Wave
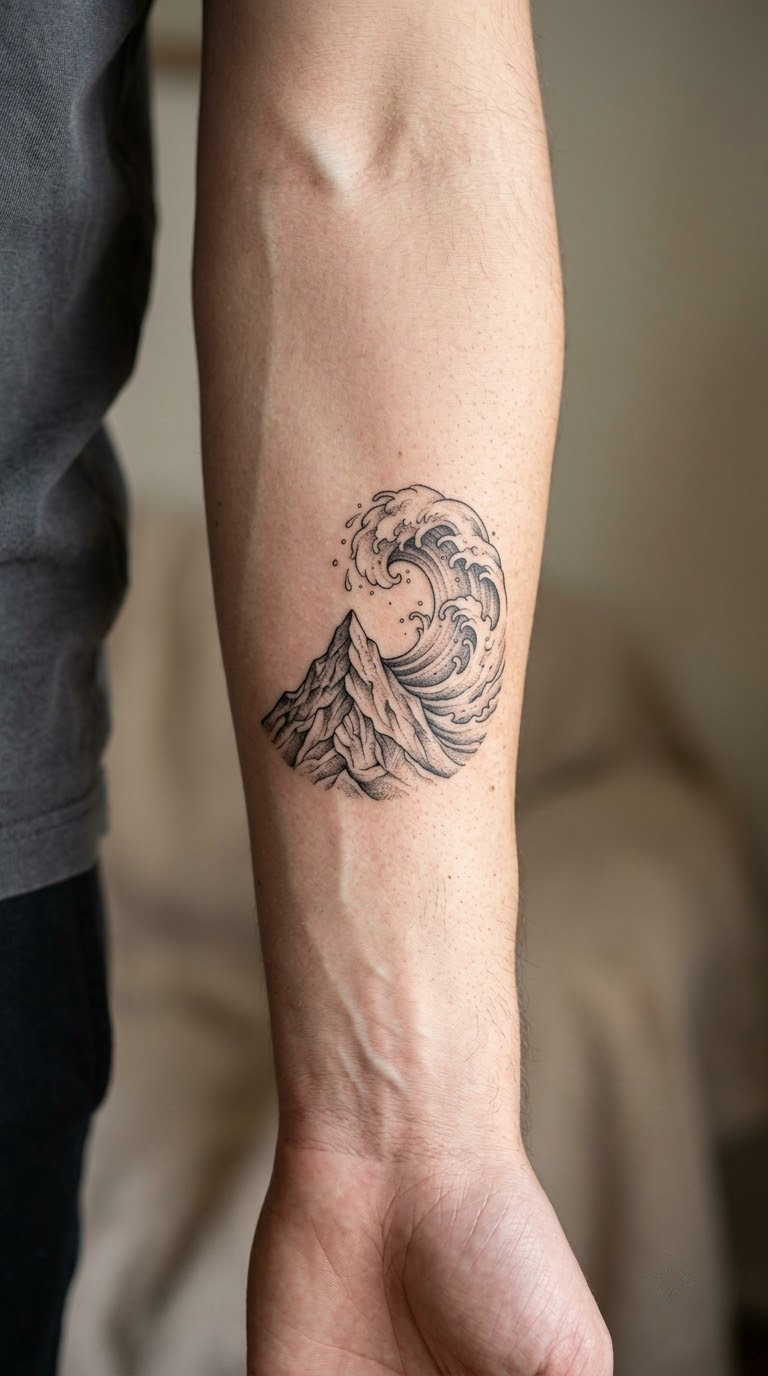
This is the mountain and ocean tattoo idea most people picture first: a single pointed peak drawn in fine black line, its right-hand slope curving down and forward until it becomes the crest of a wave, with the curl sitting where the summit used to be. There is no seam where the two shapes meet, which is the whole trick.
People usually choose it because the two halves already mean what they mean to them, and the merge says they belong to the same person. The meaning is yours to name, not something fixed.
Placement: inner forearm reads best because the design has a natural direction to run. It also works on the outer forearm and the inside of the upper arm. Size: 2.5-3.5 in (6-9 cm) wide. Style: fine line with light grey shading in the wave hollow. Pain: medium, and the inner forearm is a meaty area; the curl is the part you will feel. Fine line thins over the years, so expect a slightly softer edge after five or six.
Make it yours: put the longitude and latitude of a place that matters underneath the wave in tiny script, no bigger than the line weight you already have.
Why Mountain and Ocean Tattoos Work Together
One shape is angular and fixed. The other is curved and never in the same place twice. Put them side by side and the eye reads contrast, and a design with contrast reads clearly even at two inches. That visual tension is also why people say the pair means balance, though what that balance is to you is your own business.
The practical tip: give each element its own share of the space, roughly half mountain and half water, and keep one dominant line weight across both. Mismatched weights are what makes a two-element scene look busy, not the pairing itself.
2. Snow-Capped Mountain Reflected in the Sea
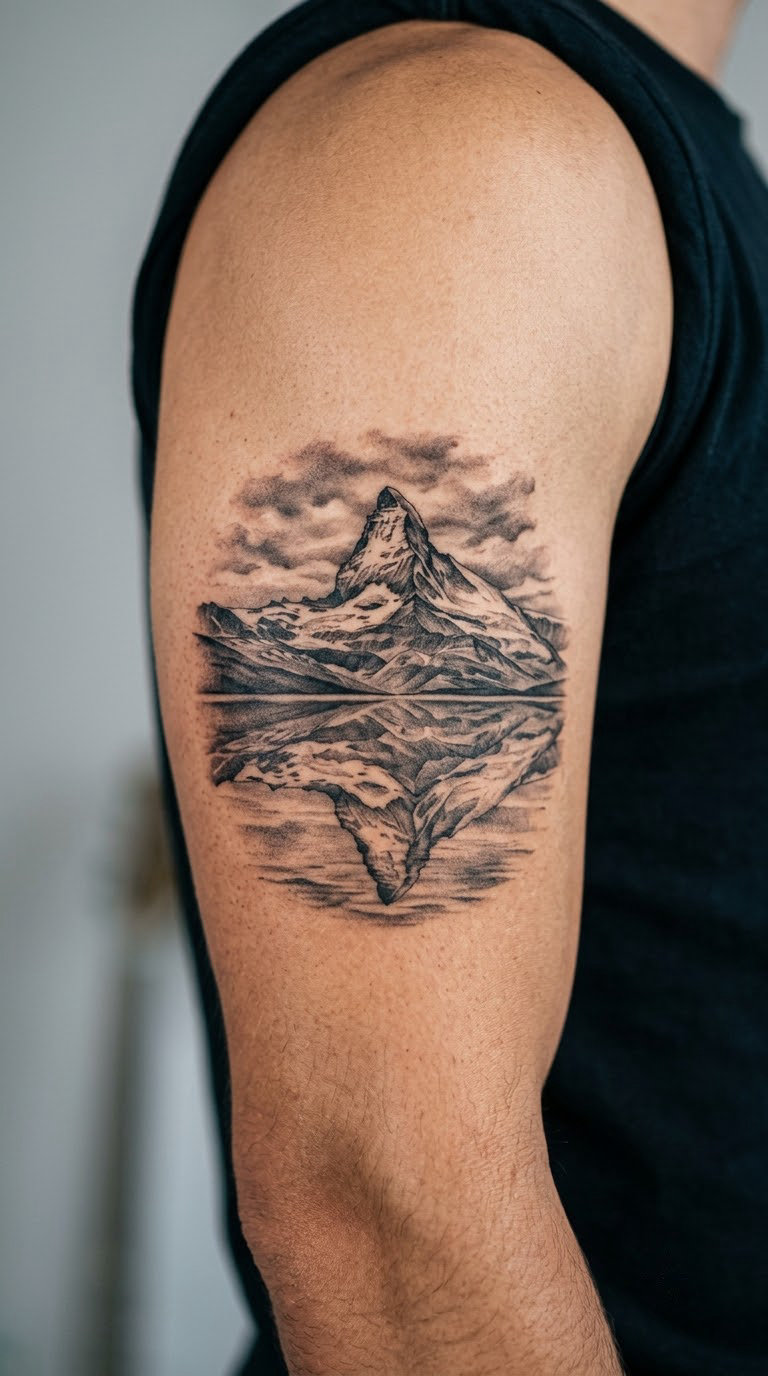
A shaded alpine summit sits above a horizon line, and beneath it the same peak appears again as a lighter, softer reflection, broken by three or four short ripple strokes. Keeping the reflection paler and blurrier than the mountain is what sells water instead of a second mountain.
It reads as a calm place rather than an adventure, which is why it attracts people who like mountains but do not want an aggressive piece. The meaning stays personal.
Placement: outer upper arm, where the design can sit wide without wrapping a curve. Flat inner forearm and outer thigh also hold it well. Size: 4-5 in (10-13 cm) wide. Style: black and grey realism with soft gradient shading in the snow. Pain: medium. Grey wash shading takes longer and stings more than linework. Pale greys are the first thing to fade, so plan on a touch-up every few years if you want the reflection to stay visible.
Make it yours: change the summit to a specific peak you have actually stood on. Artists work from a photo reference happily.
3. Compass Rose Wrapped by a Mountain Wave
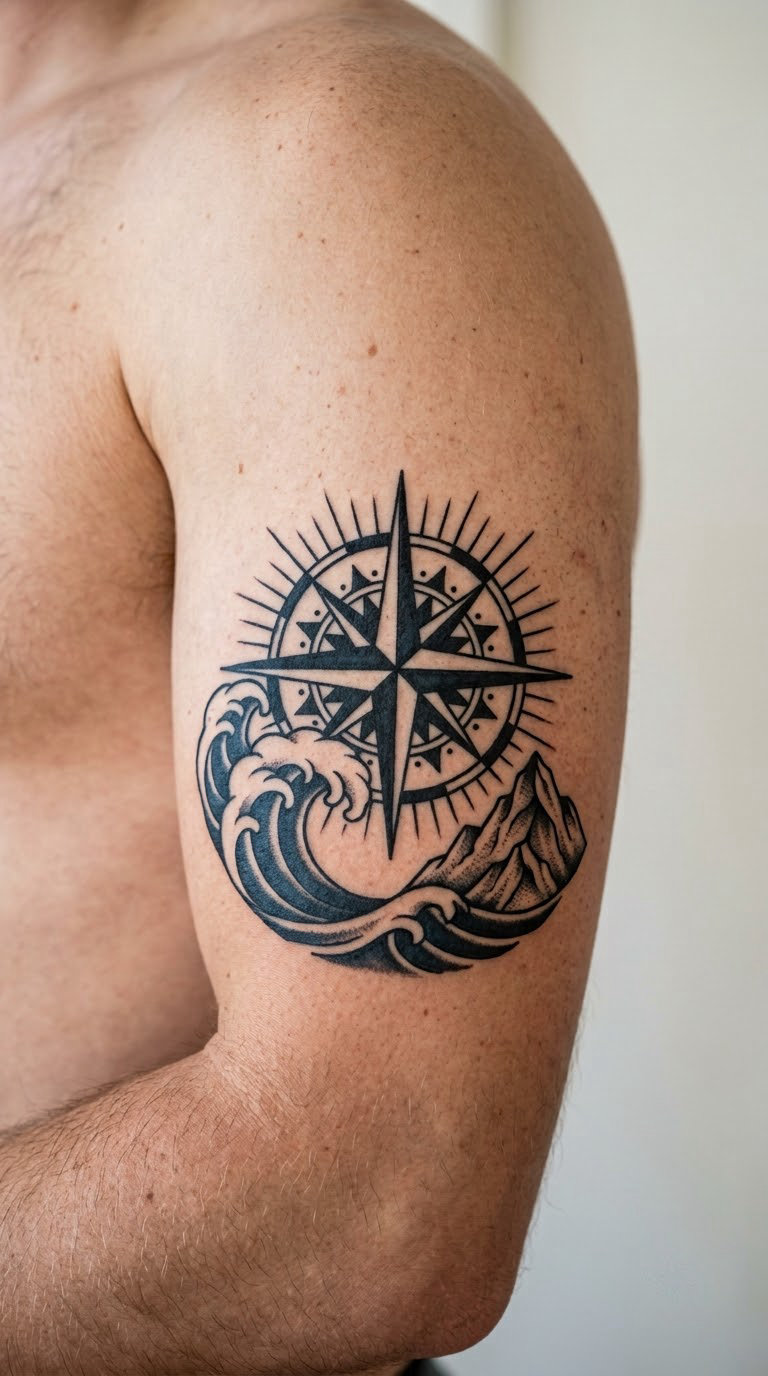
Here the wave does the wrapping. A bold cresting breaker sweeps around a traditional eight-point compass rose, and a small triangular peak pokes up behind the crest so the shape reads as three things at once without a single outline overlapping. Heavy black line, minimal shading, one accent of deep blue in the wave hollow.
The compass points toward navigation, travel, and choosing a direction. That symbolism is inherited from sailor tradition rather than invented, and the rest of the design carries whatever you attach to it.
Placement: upper arm or shoulder, anywhere with enough flat surface for a round shape. Chest and outer thigh work too. Size: 4-5 in (10-13 cm) tall. Style: traditional, bold line with flat colour. Pain: medium, higher on the rib area. Solid colour on a compass star can need a second pass to patch missed spots.
Make it yours: set the needle to point at a direction you are actually facing, or name a coordinate in the wave spray.
4. Minimal Mountain-and-Wave Horizon
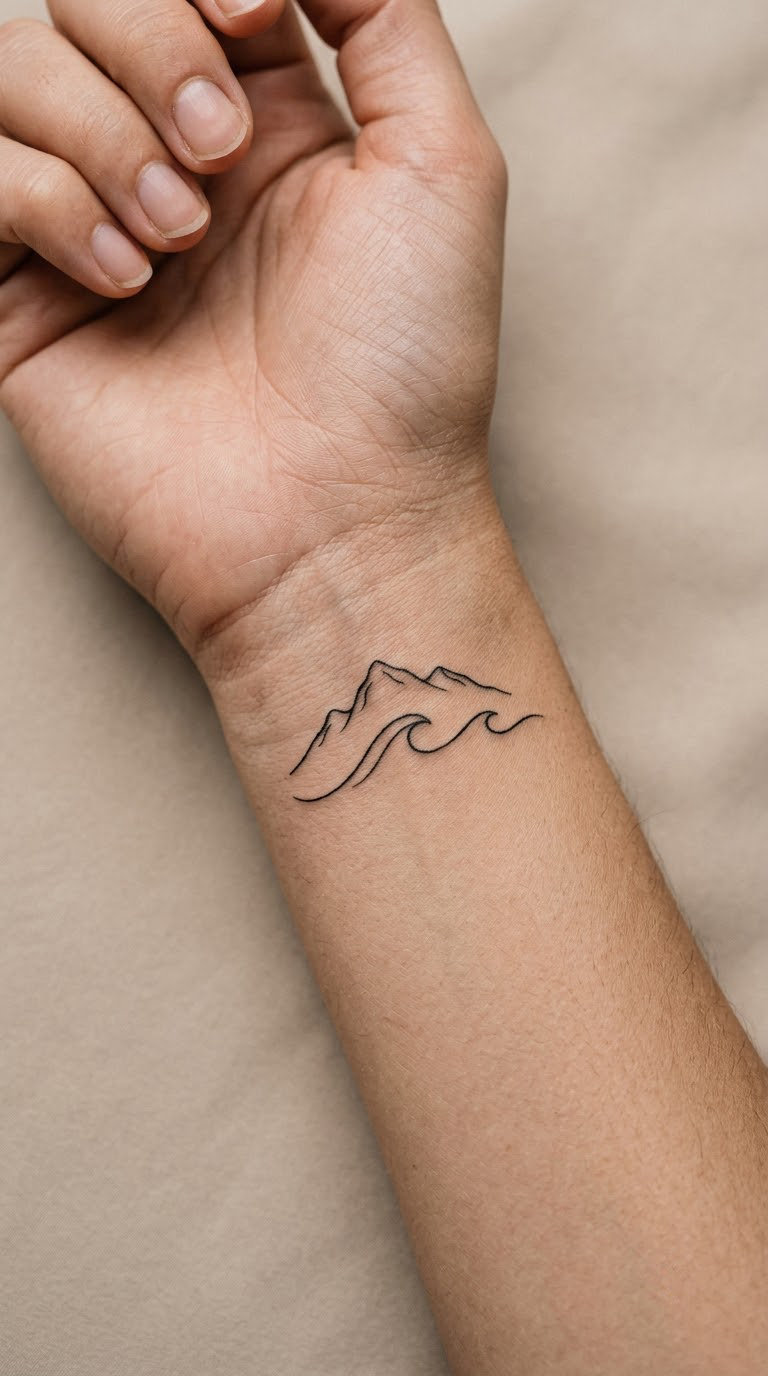
Two or three thin strokes and you are done: a low jagged silhouette on top, a single clean line for the horizon, and two curved wave strokes below it. No shading, no colour, no gradient. This is the design that works when you want the idea rather than the illustration.
It suits a first tattoo well because there is very little that can go wrong, and it reads as a finished piece rather than a fragment. What it means is whatever you decided when you got it.
Placement: inner wrist, the side of the wrist, the inner arm above the elbow, or behind the ear. Size: 1.5-2 in (4-5 cm) wide. Style: minimal fine line. Pain: low to medium, and it is a quick session, often under an hour. Wrist and hand placements fade fastest on the whole body, so expect this to soften noticeably within a few years and expect a free or cheap touch-up if you go to the same artist.
Make it yours: choose your real horizon. Ask for two peaks instead of three, or one peak and one low ridge, so it matches the view you actually see.
5. Mountain Range Rising From a Stylized Wave
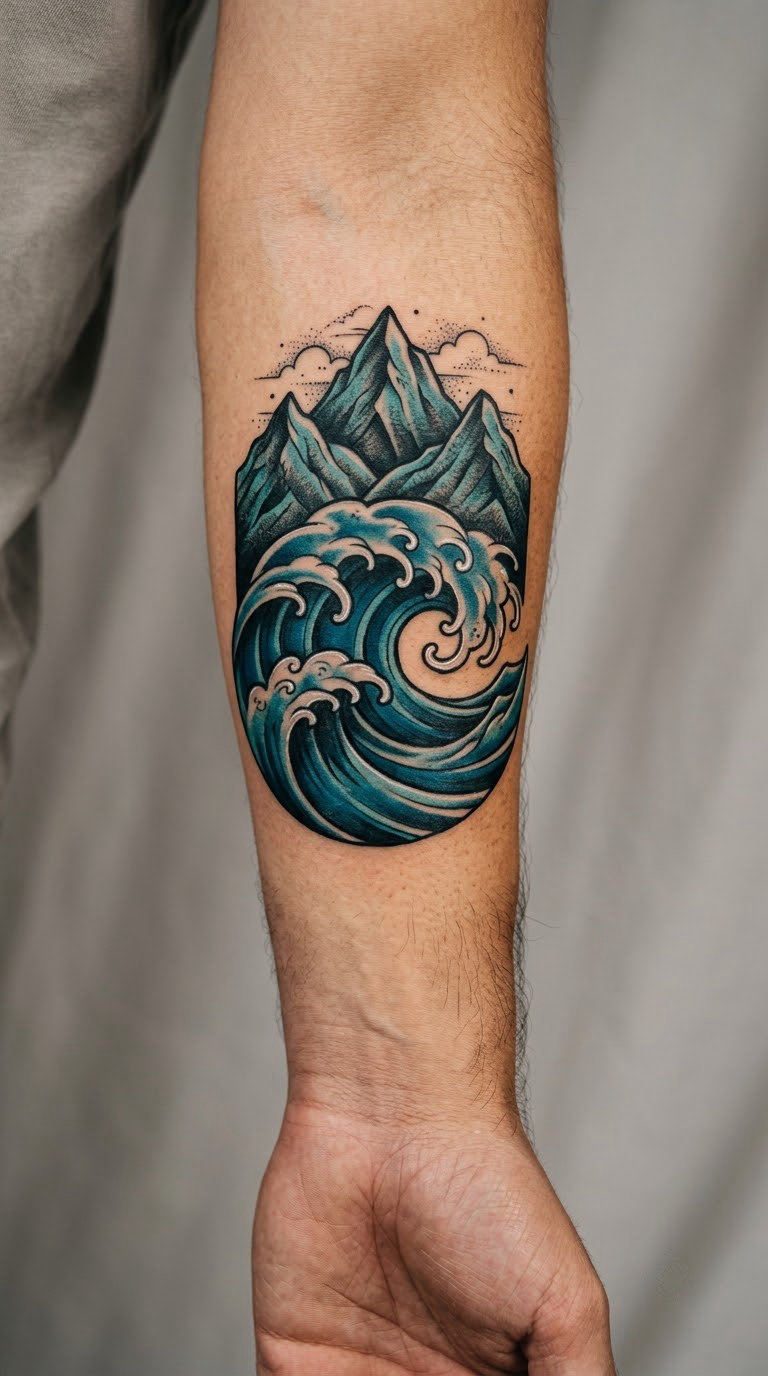
This is the bold, colourful cut of the motif. A dark teal and deep blue wave with heavy black outline supports three angular peaks that rise out of the water as if the range were floating on it. The wave has that thick, swelling, almost sculpted quality traditional work uses, and the mountains stay flat and graphic so the two do not compete.
It is the version people pick when they want their nature tattoo to be seen from across a room. The range can be a place they have actually been.
Placement: outer forearm works well for this width. The shoulder, outer thigh and calf all take the same shape at a larger scale. Size: 4-6 in (10-15 cm) wide. Style: neo-traditional with bold outlines and saturated colour. Pain: medium. Large colour fields mean a longer session and more passes over the same skin, and mid-tone blues are the first colour to cloud up as they heal.
Make it yours: lock the palette to one or two blues. A tight two-colour version ages more evenly than a full rainbow.
6. Crescent Moon Above Mountain and Ocean
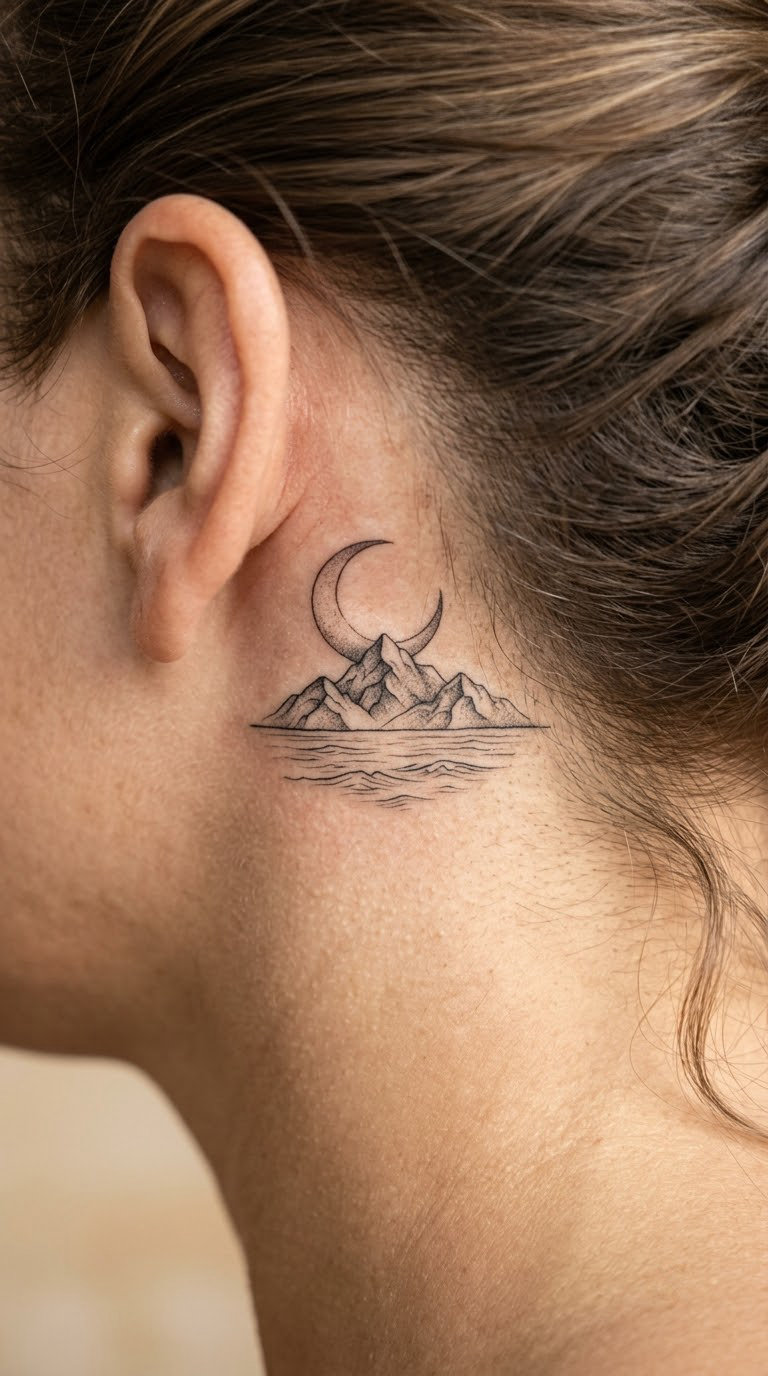
A thin crescent sits high in the composition, a single jagged ridge runs beneath it, and one quiet line marks the water. Plenty of open skin between the three elements is what makes this one feel calm instead of crowded. Some artists add a scatter of tiny stars in the empty space above the ridge.
It suits people who like the outdoors at night rather than the sport of it. A crescent often marks a specific night someone remembers, and that is the part worth saying out loud at the consultation.
Placement: behind the ear, the inner arm, the collarbone, or the upper back. Size: 2-2.5 in (5-6 cm) tall. Style: fine line, black only. Pain: medium, and behind the ear is sensitive because the skin there is thin over bone. The moon outline is the part that will fade first at that spot.
Make it yours: angle the crescent so its opening faces the peak, or the water. It is a small choice that changes how the whole piece reads.
7. Ocean Wave Cresting Beneath a Distant Peak
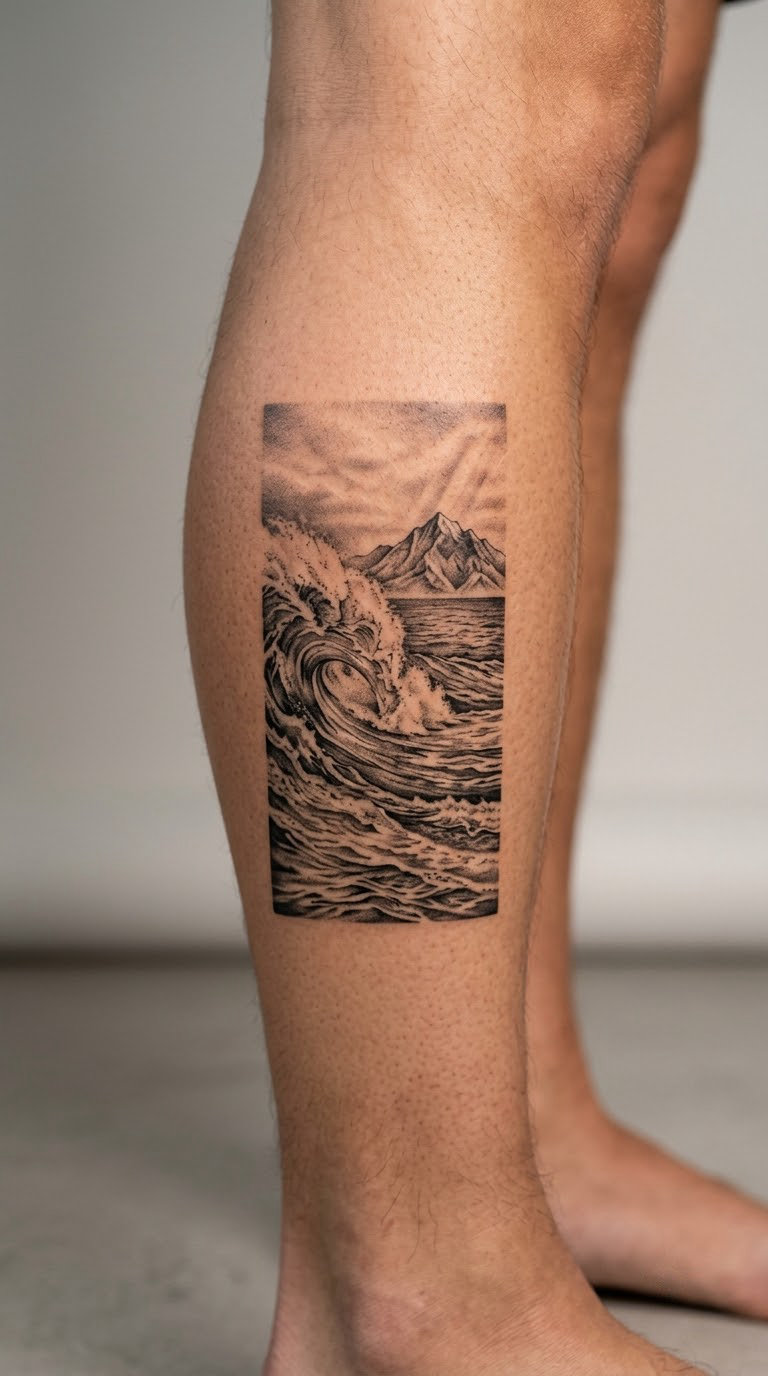
Depth does the work here. The foreground breaker is rendered in detail, with spray and a hollow barrel, while the mountain on the horizon is three or four soft grey strokes and nothing more. Most tattooers will draw the same scene the opposite way round, mountain in full detail with a simple wave below it, and it holds up just as well.
It reads as motion against distance, which people tend to read as a reminder to keep going rather than as any fixed idea about struggle. The meaning is personal.
Placement: calf, forearm, or the side of the torso. Size: 3-3.5 in (8-9 cm) wide. Style: micro-realism in black and grey. Pain: medium to high on the calf and ribs, and the calf bruises visibly for a couple of days. Micro-realism is the first style to lose its fine detail over time, so ask your artist for slightly heavier shading than the reference photo shows.
Make it yours: flip the depth. Put the crisp peak in front and the blurred wave behind for a version nobody will assume was copied from a template.
8. Coastal Cliffs, Mountain, and Breaking Tide
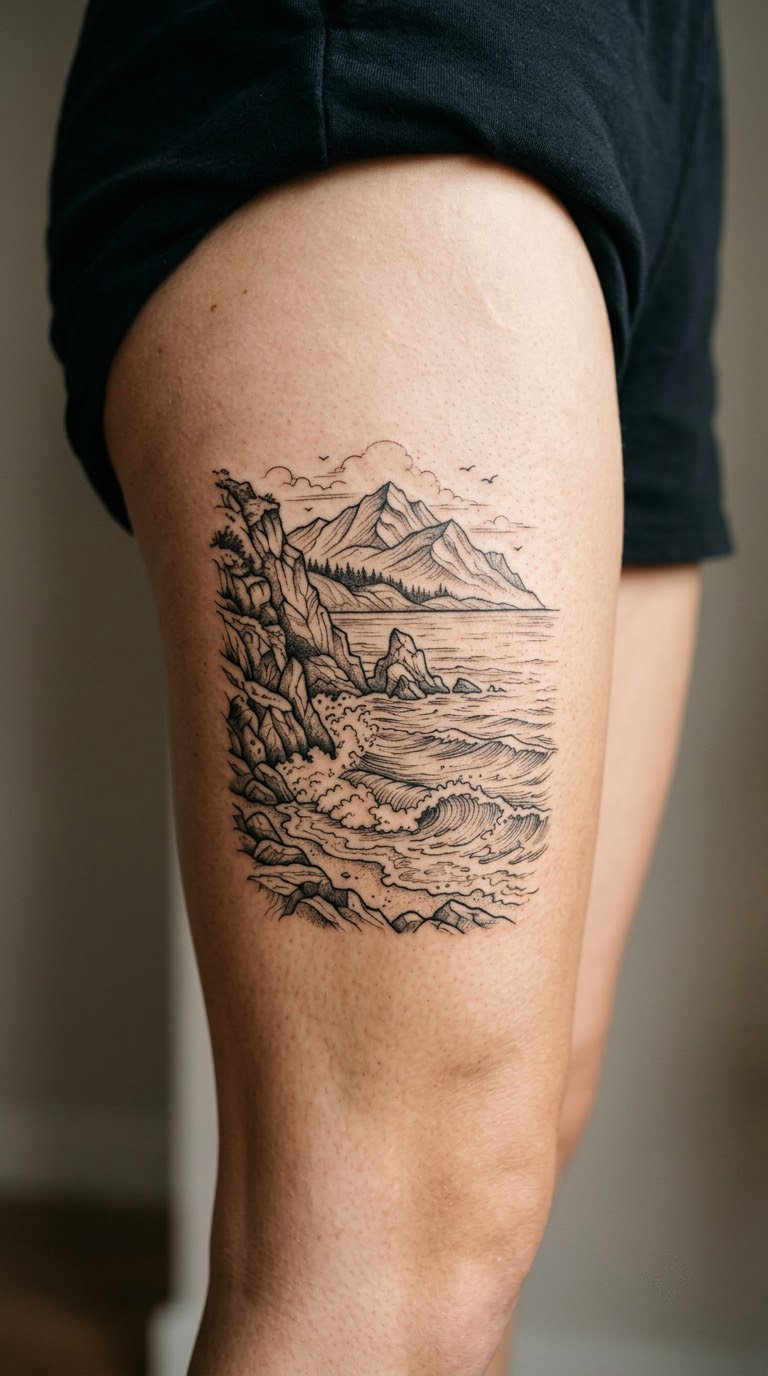
Steep cliff faces run down the left side, a mountain ridge recedes in the middle distance, and one white-water line breaks toward the shore. The linework is thin and the shading is almost nonexistent, which is the point: large areas of bare skin let the eye separate three depth layers that would otherwise merge.
Negative space is doing all the heavy lifting here. That is what makes a three-element scene readable, and it is why this design needs a bit of skin around it.
Placement: outer thigh, ribcage, upper arm, or the back of the shoulder. Size: 5-6 in (13-15 cm) wide. Style: fine line with sparse stippled shading. Pain: medium, and the ribcage version is on the higher end. Straight horizon lines placed over curved body parts will bow, so ask your artist to follow the body’s curve rather than force a ruler-straight line.
Make it yours: sketch in the outline of the coastline you grew up near. Artists are usually pleased to work from a rough shape, not a photograph.
9. Surfer Silhouette Under a Mountain Horizon
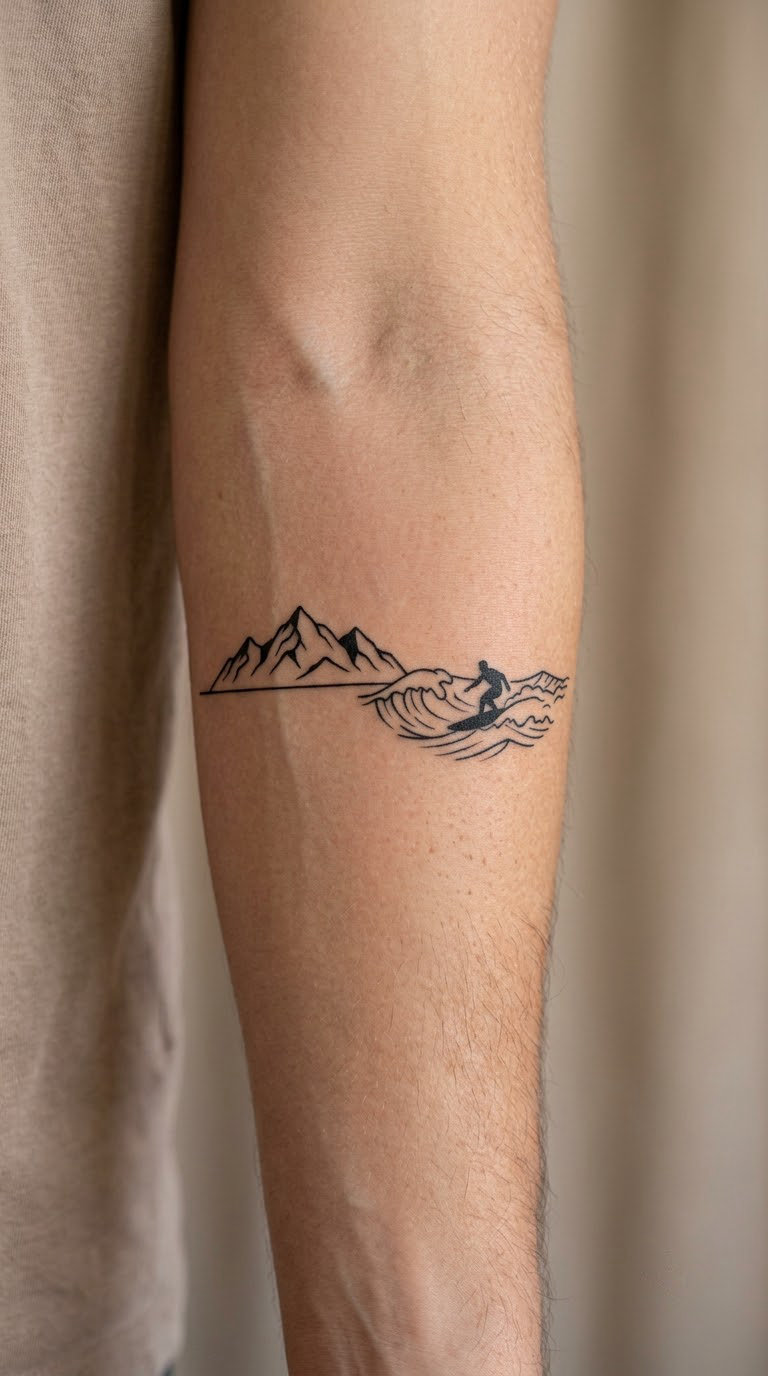
A small solid black surfer figure crouches on the line of a curling wave, and above the wave a low mountain horizon runs the full width of the design. The figure is deliberately tiny, maybe a quarter of an inch tall, which keeps it a suggestion of a person rather than a portrait.
This is the idea people get when the mountain and the ocean are both hobbies rather than metaphors. It fits nicely next to an existing wave piece, or it can start that collection.
Placement: inner arm, forearm, calf, or the outer arm below the shoulder. Size: 3.5-4 in (8-10 cm) wide. Style: minimal blackwork. Pain: low to medium. The tiny figure is done in one pass, which is quick, but the solid black needs a second pass to fill evenly and that pass stings more than the first.
Make it yours: add a second, matching piece on the other arm with a skier or hiker silhouette under the same horizon, or have the horizon in blue so the mountain and the water separate at a glance.
10. Topographic Mountain Map Over a Nautical Star
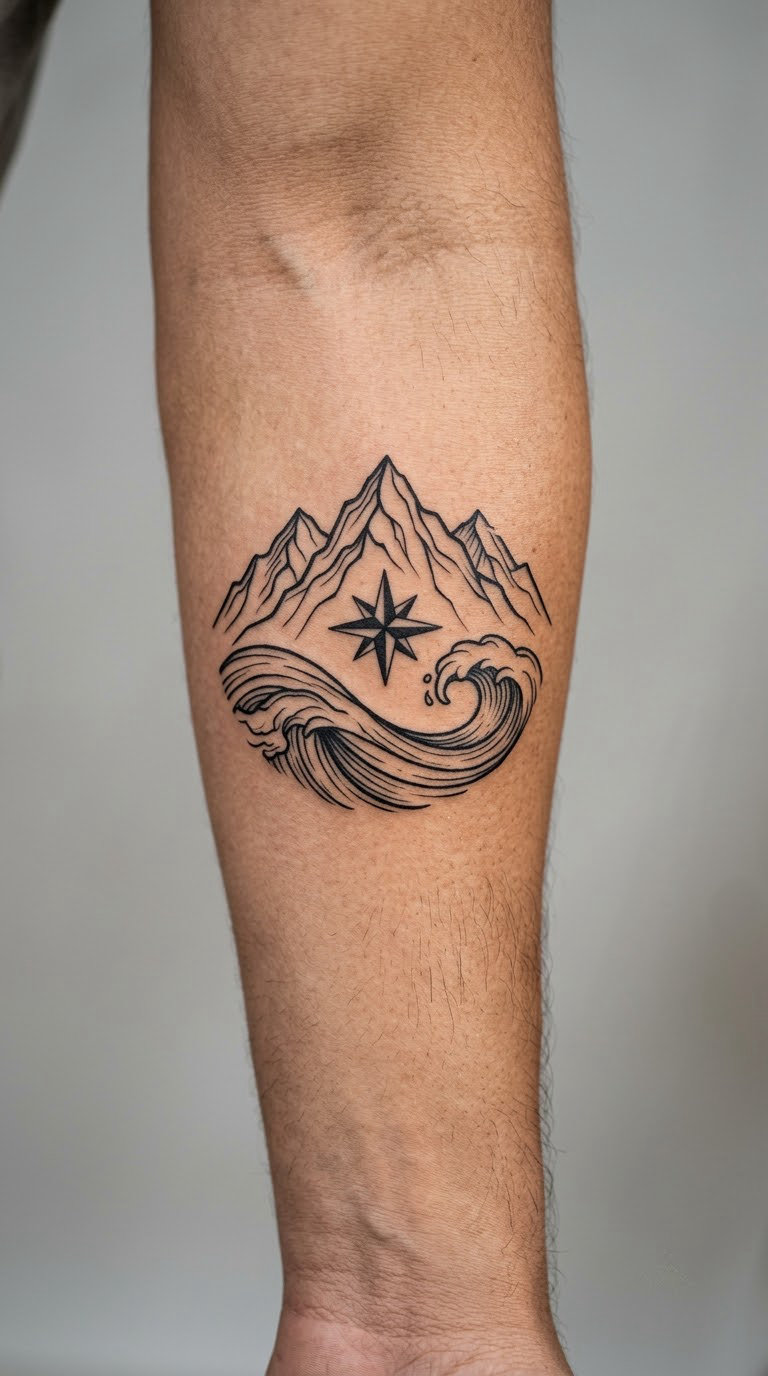
Contour lines wrap around a mountain shape in the way they do on a paper map, and a small eight-point nautical star sits in the corner of the composition with one clean wave stroke running underneath it. It is graphic rather than scenic, and it suits people who keep maps more than they keep postcards.
A compass star points to navigation and safe return, and contour lines carry the idea of terrain and route. Anything beyond that is your own addition.
Placement: forearm, upper arm, or the back of the hand for a smaller version. Size: 3-4 in (8-10 cm) wide. Style: blackwork linework with no shading. Pain: medium, and the back of the hand is a bone-sensitive spot. Contour lines are thin and evenly spaced, so they stay readable for a while but soften at the smallest sizes.
Make it yours: trace the actual contour lines from a map of a trail or coastline you know. Bring the map or a clear photo of it to the consultation rather than a single screenshot.
11. Mountain Eagle Above an Ocean Wave
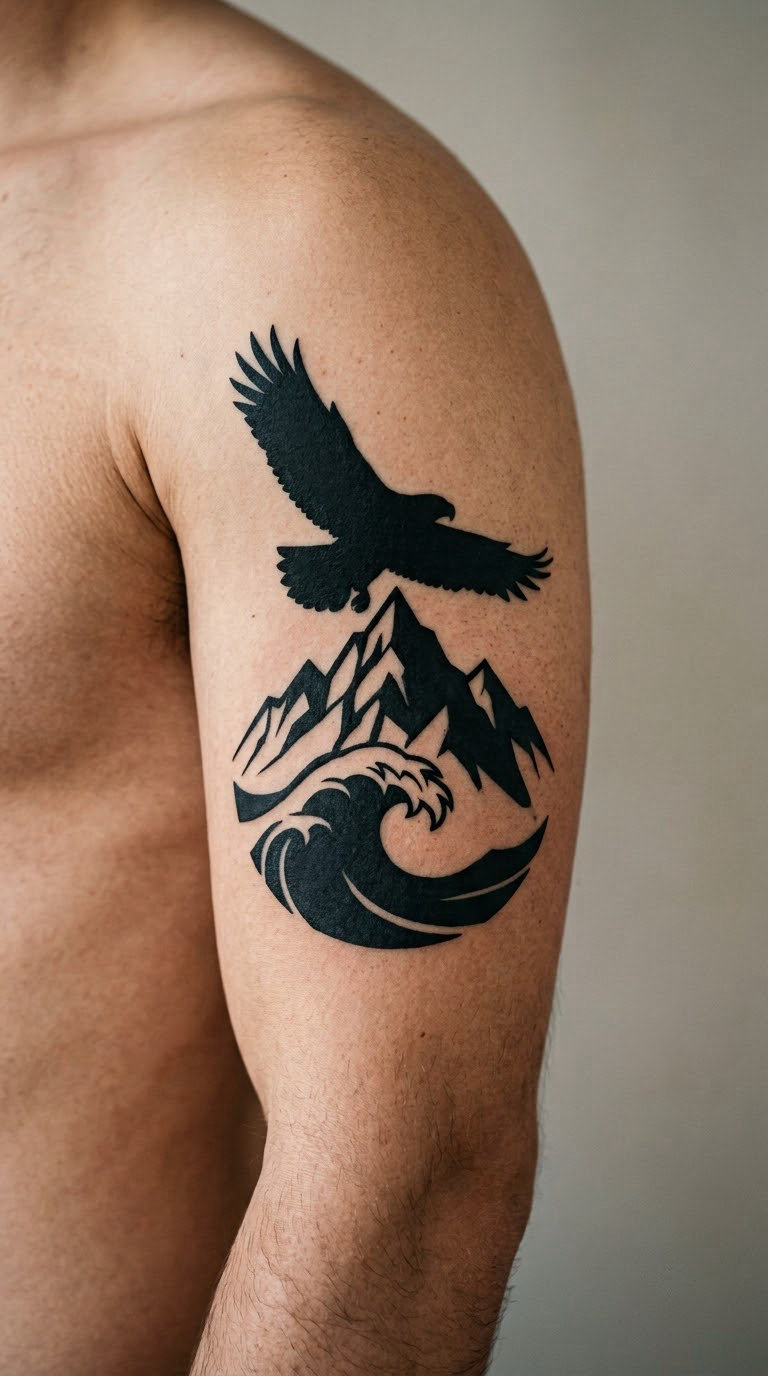
The eagle is a solid black silhouette with one clean cut where a wing crosses the body, the mountain below it is a hard angular triangle, and the wave is a thick black base with white foam left as bare skin. Three solid shapes stacked in a column, which is a hierarchy that works at almost any size.
Eagles carry freedom, sight, and grip in most readings, and mountains carry endurance. The pairing is dramatic, so it suits people who want a statement piece rather than a quiet one.
Placement: upper arm, shoulder, back, or the outer chest. Size: 4.5-5.5 in (11-14 cm) tall. Style: bold blackwork. Pain: medium to high, and large solid black areas are the most uncomfortable work there is. Ageing is the thing to plan for: a solid black fill develops a faint blue-grey cast after a few years, and sun exposure speeds that up.
Make it yours: have the eagle’s wing break the top line of the mountain, so the two shapes overlap instead of sitting in neat rows. It looks far less like a logo.
12. Mountain and Ocean in a Circular Badge
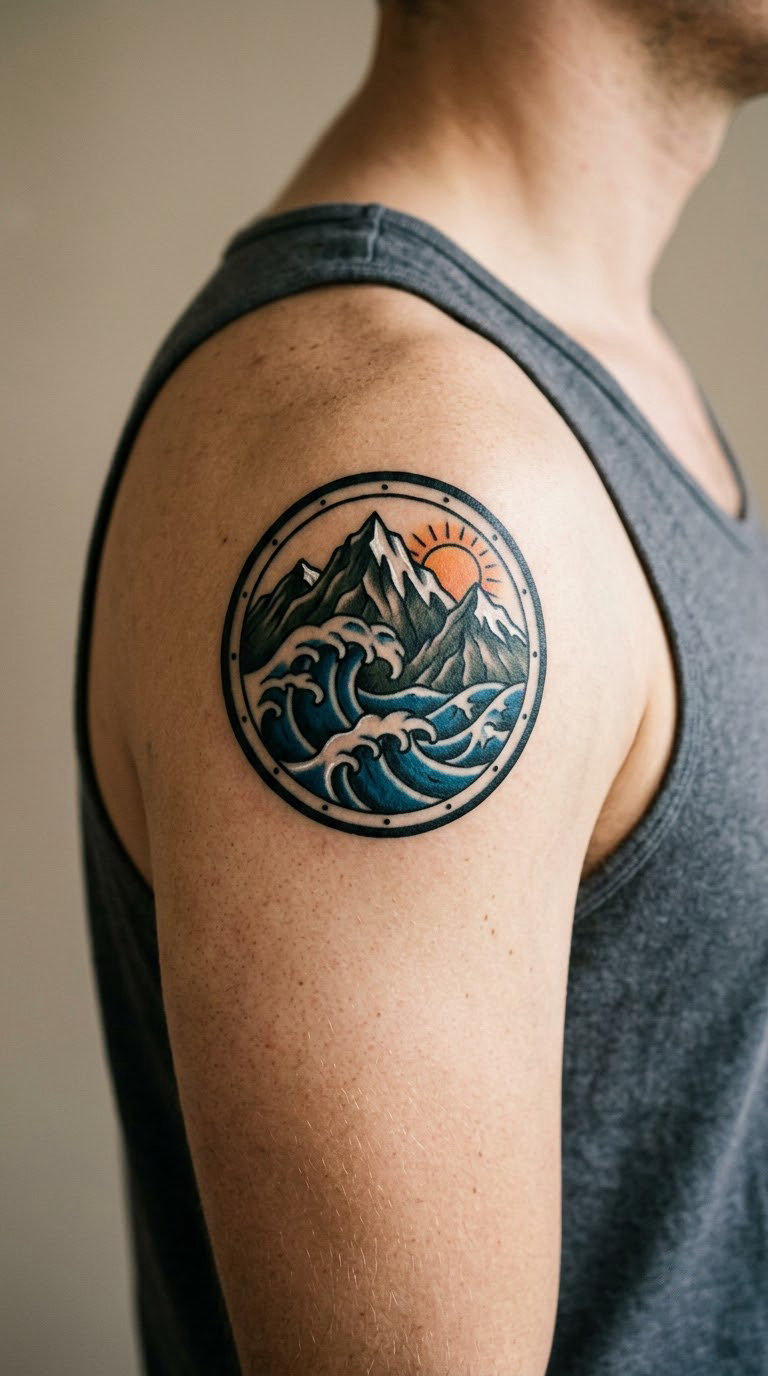
A clean circle holds a pointed mountain, a small sun tucked behind the summit, and two blue wave bands filling the bottom third. The border does the heavy lifting: it stops the eye wandering off the edge and it lets you pack in small details without the design losing its shape.
Roundels came out of sailor and military badge tradition, so this one sits in a recognisable family. What the sun adds is up to you, and plenty of people leave it out entirely.
Placement: shoulder, upper arm, chest, or the back of the calf. Size: 3-3.5 in (8-9 cm) in diameter. Style: traditional roundel with flat colour and bold outline. Pain: medium. The outer ring is a continuous line, which is one long pass around tender skin, so breathe through it rather than holding your breath.
Make it yours: put a year inside the ring beneath the wave, or split the circle so the top half is black for the mountain and the bottom half stays open for the sky.
13. Mountain Silhouette and Rolling Wave in Dotwork
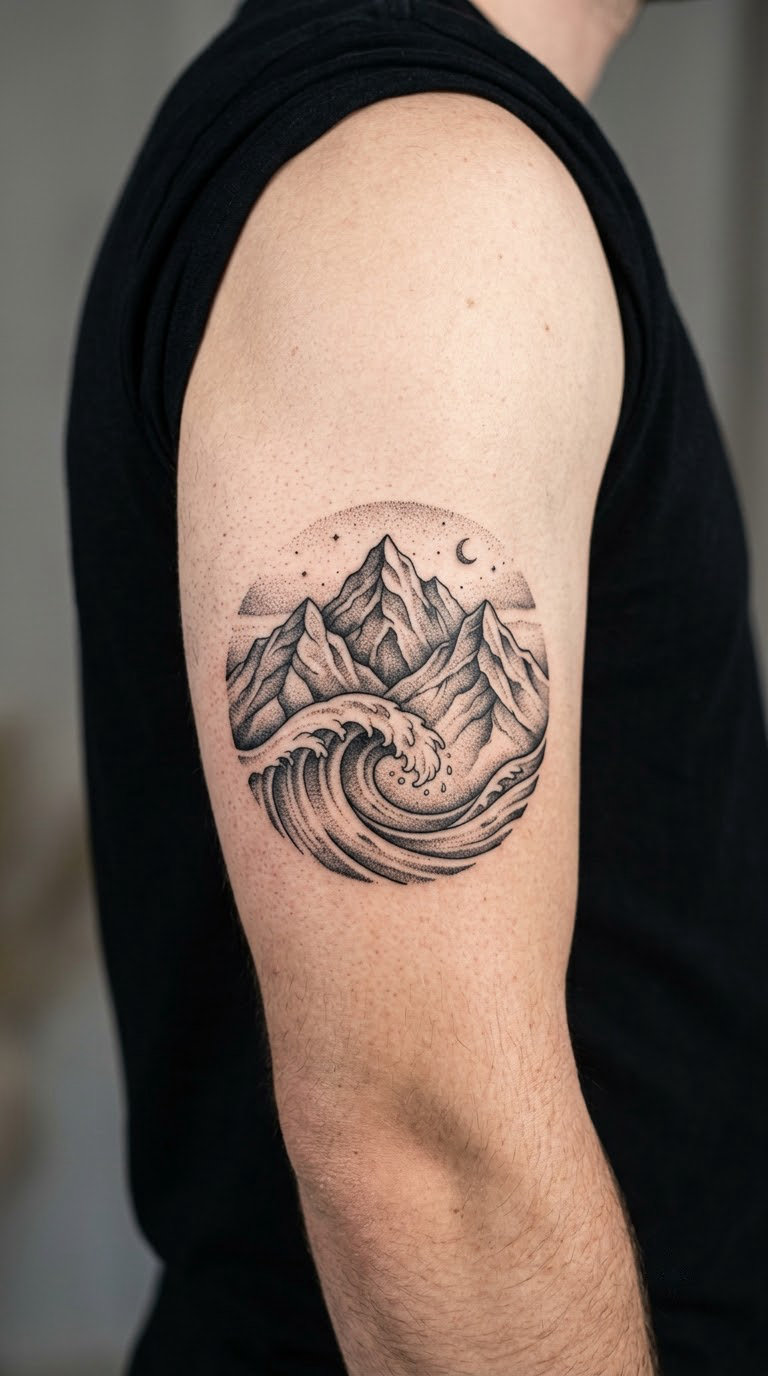
The mountain face is built from dense dots packed tightly enough to read almost as solid black, and the wave beneath it is made of sparse dots that fade out before they reach the edge. The contrast between the two densities is the design, and it needs no outline at all.
Dotwork is the safest of the textured styles here because a soft dot field is far more forgiving than a hard line when skin moves. It suits people who like detail but not the sharp graphic look.
Placement: upper arm, forearm, or the shoulder blade. Size: 3.5-4.5 in (9-11 cm) wide. Style: dotwork. Pain: medium, and dotting is repetitive rather than sharp, so it wears differently than linework. Dots spread and soften over time, usually over several years, so ask for a slightly heavier density than the reference.
Make it yours: add a real set of coordinates in tiny dotted script under the wave. Doing the numbers in dots keeps the texture consistent.
14. Watercolour Mountain Wash Into Blue Waves
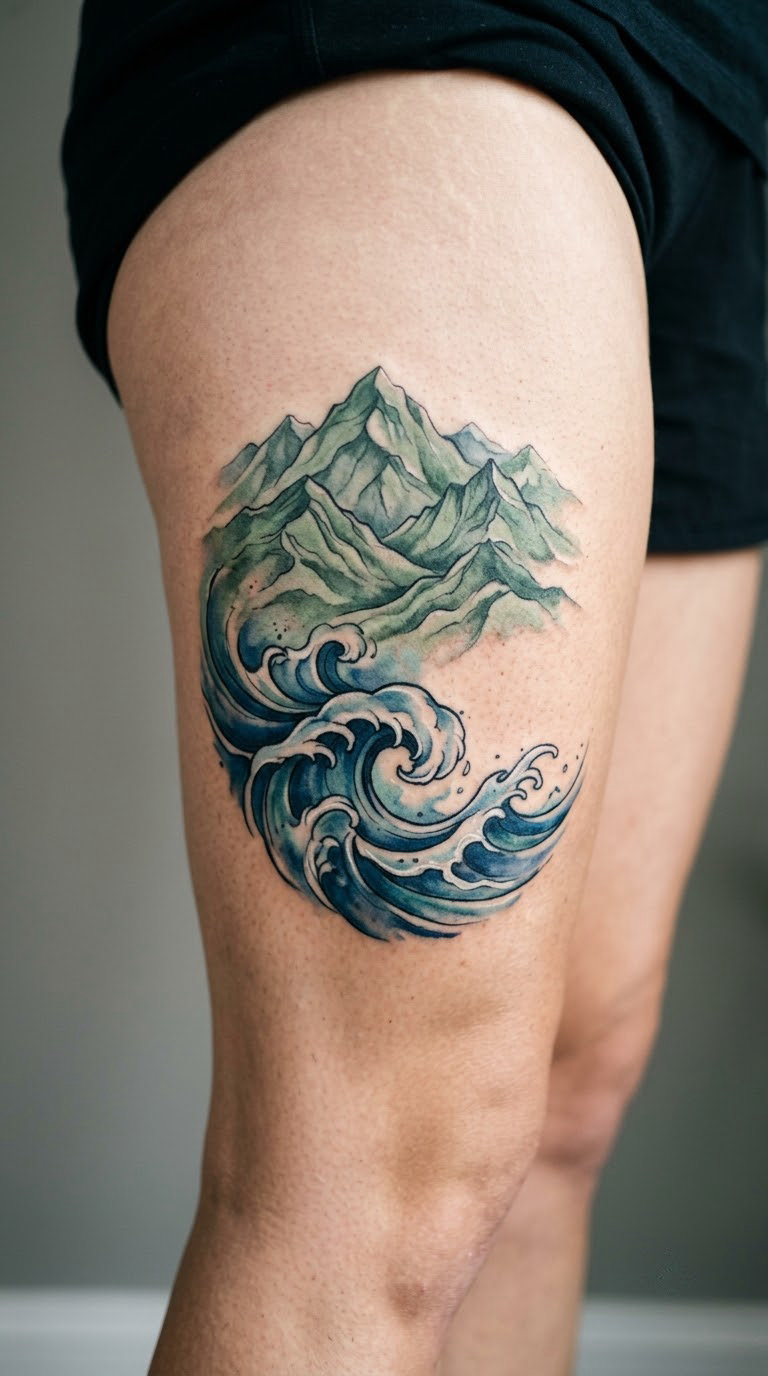
The mountain is a muted olive and grey wash with soft edges and no outline, and it bleeds into saturated blue water below, with the pigment getting deeper as the water comes forward. Nothing in it is hard-edged, so the whole thing looks painted rather than drawn.
Watercolour suits people who like the outdoors but do not want a traditional scenic piece on their skin. It is the softest of the twenty and the easiest to live with.
Placement: outer thigh, upper arm, or the ribcage. Flat areas suit it best because the wash pools differently on a curve. Size: 4-5 in (10-13 cm) wide. Style: watercolour. Pain: medium. Expect more colour passes than a black and grey piece, and a second session for large washes. Colour is the first thing to fade, and light blues go first, so a top-up every few years is normal.
Make it yours: bring two or three swatches of the exact shades you want. Artists mix to reference photos, and a physical swatch gets closer than a screenshot.
15. Geometric Mountain Made from Ocean Currents
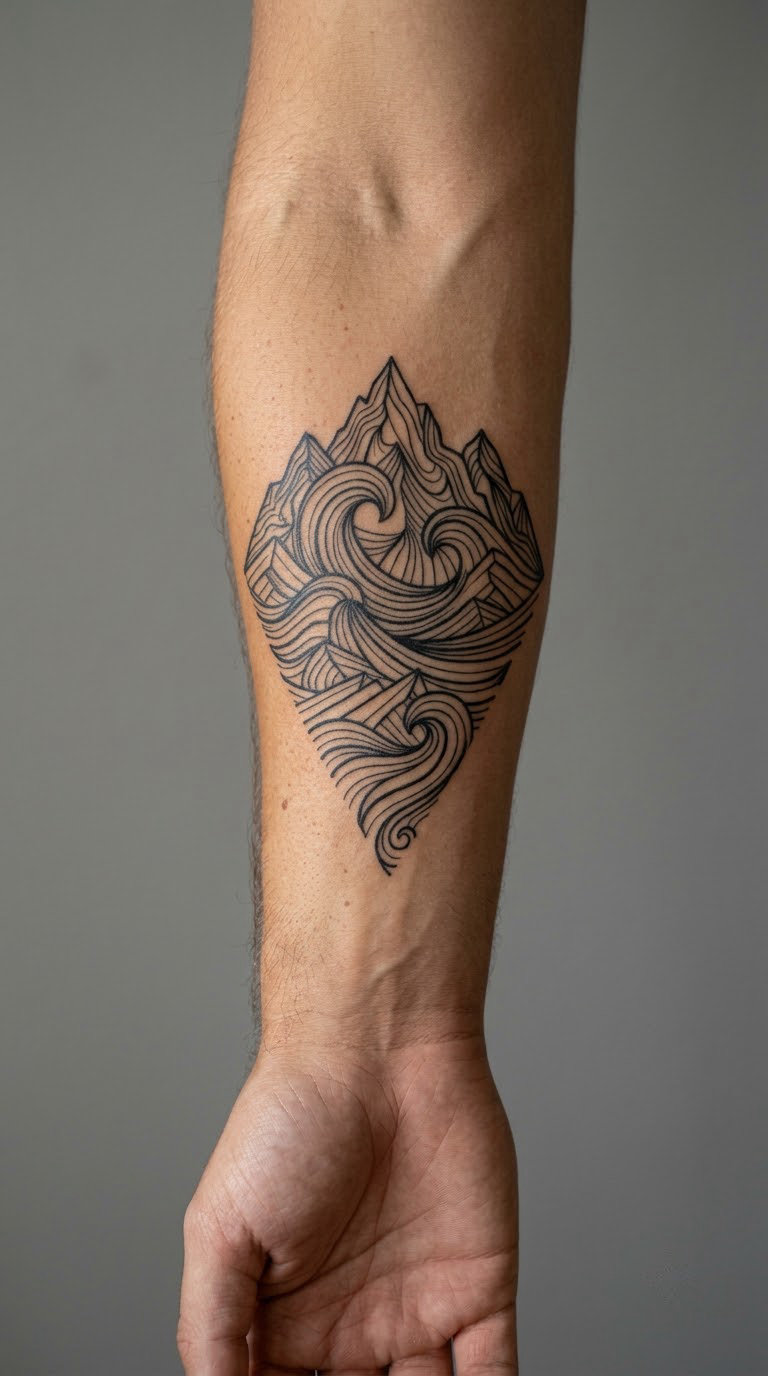
The mountain is not drawn as a mountain. It is built out of long, curving current lines that bend around each other and resolve into a triangular silhouette when you step back, while one larger wave form sits at the base. The triangle only appears from a distance, which is the interesting part.
It reads as abstract rather than literal, so people tend to describe it as movement rather than a place. It suits anyone who likes the idea of the motif and not the postcard version of it.
Placement: forearm, calf, upper arm, or the flank of the torso. Size: 4.5-5.5 in (11-14 cm) tall. Style: geometric black linework. Pain: medium, and long unbroken lines across the forearm take some steadiness. Geometric linework holds its shape well, but the thinnest current lines are the first to blur, and skin stretch along the forearm can bow them over a decade.
Make it yours: have one current line break out of the triangle and run past the design, so the mountain appears to dissolve into water at one edge.
16. Mountain and Ocean Split by a Sunset
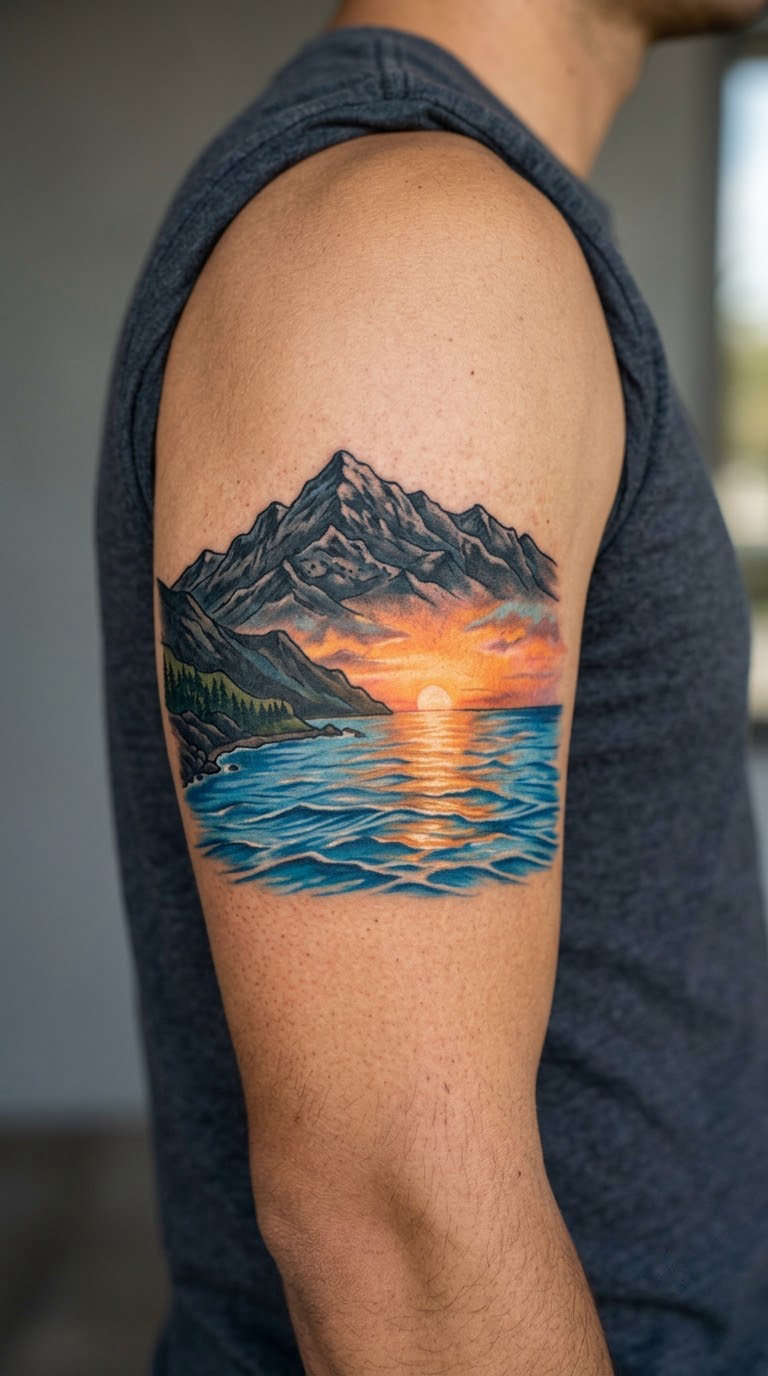
A warm gradient runs down the middle of the design, and a dark mountain sits on one side of it while reflective blue water sits on the other. The sunset band does the dividing, which is what stops the two halves from looking like two separate tattoos placed next to each other.
Sunset is the natural third element here and it changes the mood completely, turning a balance piece into something warmer. It also gives you a place to put a date.
Placement: back of the upper arm, upper back, outer thigh, or the ribs. Size: 5-6 in (13-15 cm) wide. Style: colour with a gradient. Pain: medium, and back-of-arm placement is one of the more relaxing spots to get a large piece. Warm oranges and yellows fade fastest of any ink; the deep blues hold up much better, so the mountains and water usually outlast the sunset.
Make it yours: set the sun exactly where it sat on a specific evening you want to remember, and have the gradient match that sky rather than a generic one.
17. Tiny Wave Nested Inside a Mountain Peak
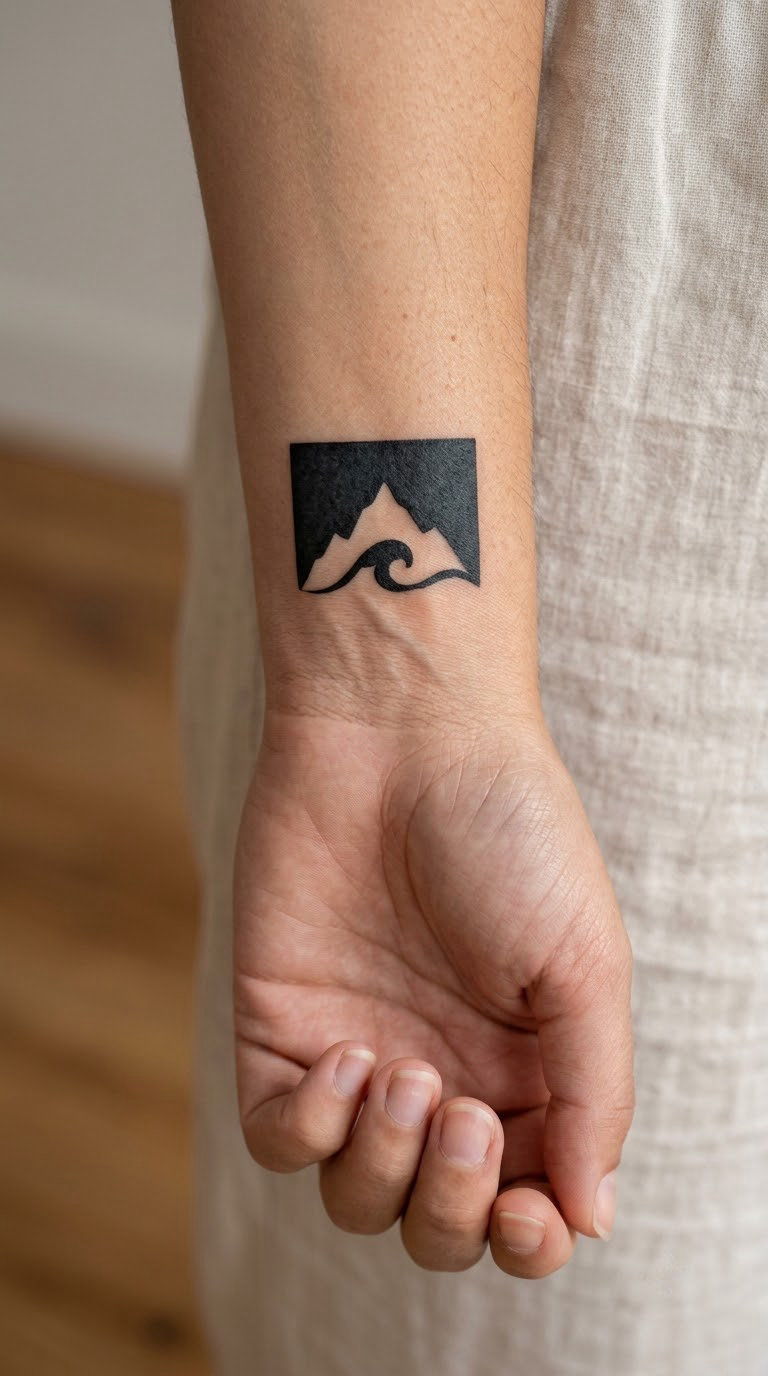
A small triangle sits on the skin, and the curl of a wave is tucked into the empty space inside it rather than drawn beside it. One outline, no shading, maybe a single line for water. It is the smallest idea in this list and probably the one that ages most gracefully, because there is almost nothing there to blur.
Discretion is the reason people choose it. It also works as a discreet tribute to a person who shares the same two places with you.
Placement: wrist, behind the ear, the inner ankle, or the side of a finger. Size: 1-1.5 in (3-4 cm) tall. Style: micro fine line. Pain: low, and this is often a 20-minute session. The real risk is not pain, it is longevity: at this size the wave’s curl can turn into a small smudge within a few years, and wrist and hand placements fade the fastest of anywhere on the body.
Make it yours: put an initial or a single date in the negative space under the triangle. At this scale that is all the detail it can take.
18. Latitude Lines Across Mountain and Sea
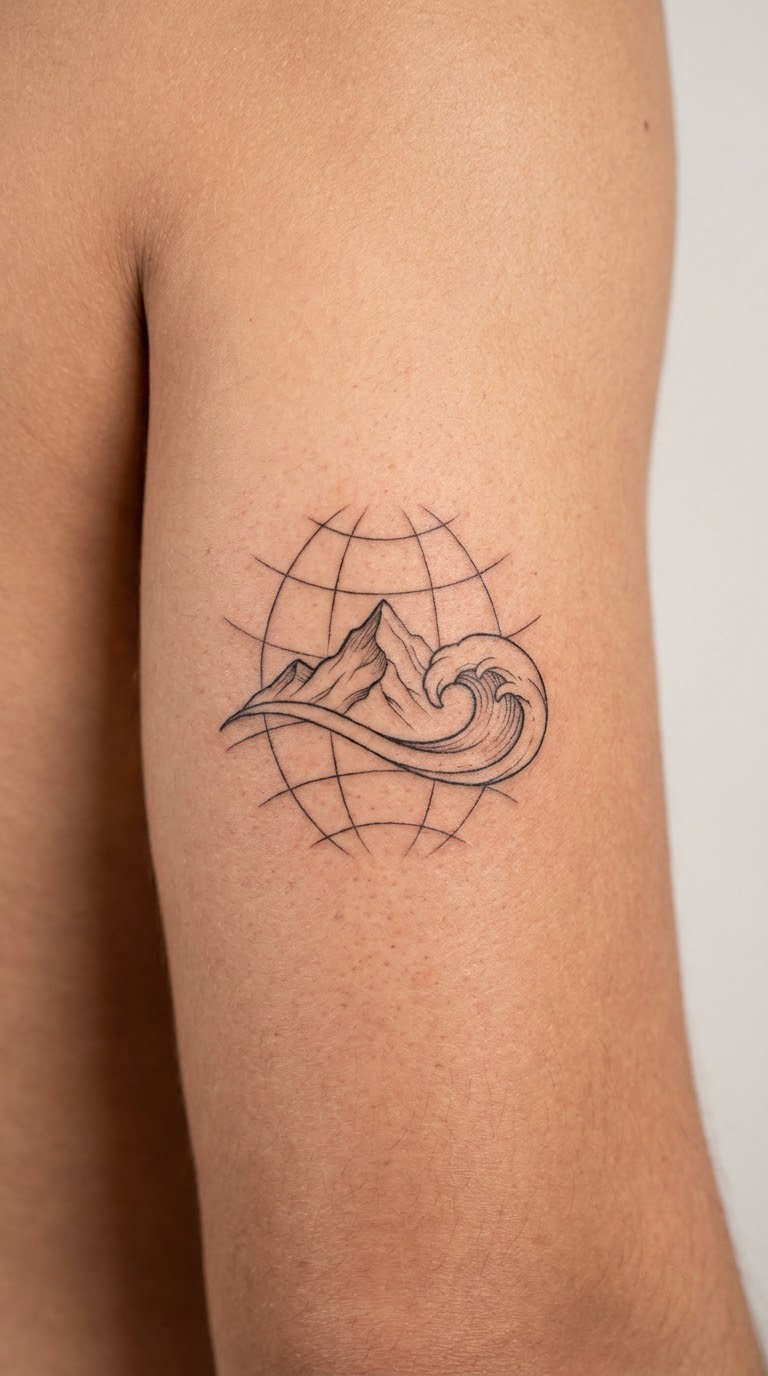
Curved horizontal latitude lines sweep across the whole design, passing behind a single mountain on one side and a single wave on the other, and the two landmasses read like markers on an old chart. It is a map idea rather than a scenic one, and it suits anyone who thinks of places as coordinates.
Map tattoos tend to carry a memory more than a message. The linework is light, so it needs a placement with a bit of room around it.
Placement: upper arm, forearm, or the ribcage. Size: 3-3.5 in (8-9 cm) wide. Style: fine line with no shading. Pain: medium. Latitude lines are the difficulty here, not the pain, because each one has to bow consistently across the whole piece, and a ribcage or forearm curve will exaggerate any wobble.
Make it yours: use the real latitude of the coast or trail the mountain is from, and put the coastline name in tiny lowercase lettering along the bottom line.
19. Matching Mountain-and-Ocean Half Sleeves
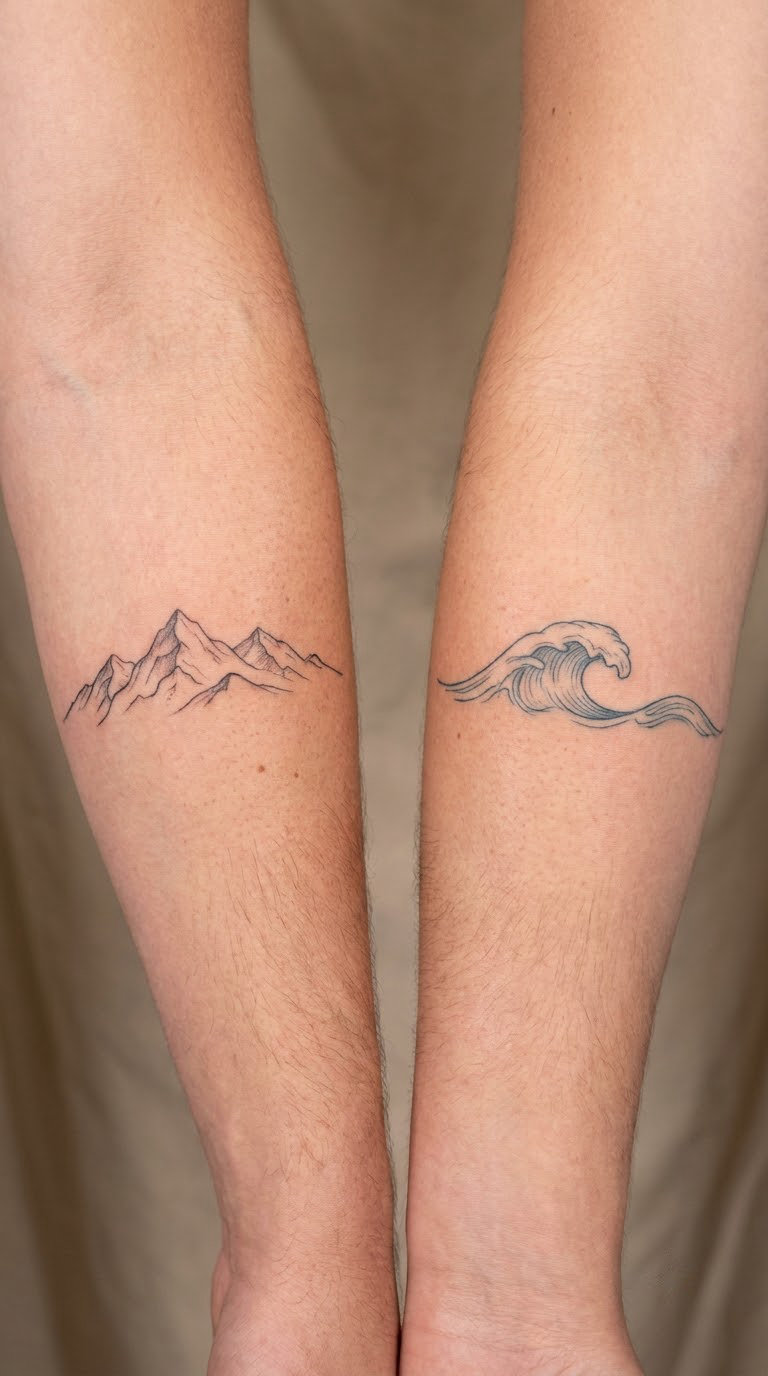
These are complementary, not identical. One forearm carries the mountain half in fine black line, the other carries the wave half in the same line weight with a soft blue-grey wash, and the two pieces share a horizon line at the same height on each arm so they line up when both arms are down or both are raised.
Split designs like this are popular with couples and siblings, and with people who just like owning one of each. Nothing about the pairing is fixed, and the matching is really about scale and line weight rather than matching content.
Placement: both outer forearms, or one inner and one outer so the pieces read differently at rest. Size: 5-6 in (13-15 cm) long on each. Style: fine line with a light colour wash. Pain: medium to high, and a forearm session of that size usually runs two to three hours. Most people do the two arms on separate days, a week or more apart, which is easier to sit through than trying to do both at once.
Make it yours: agree on one accent colour before the first session and bring it to the second. Matching across sessions is much easier when both pieces use the same two inks.
20. Mountain, Wave, and Crescent in a Blackwork Triangle
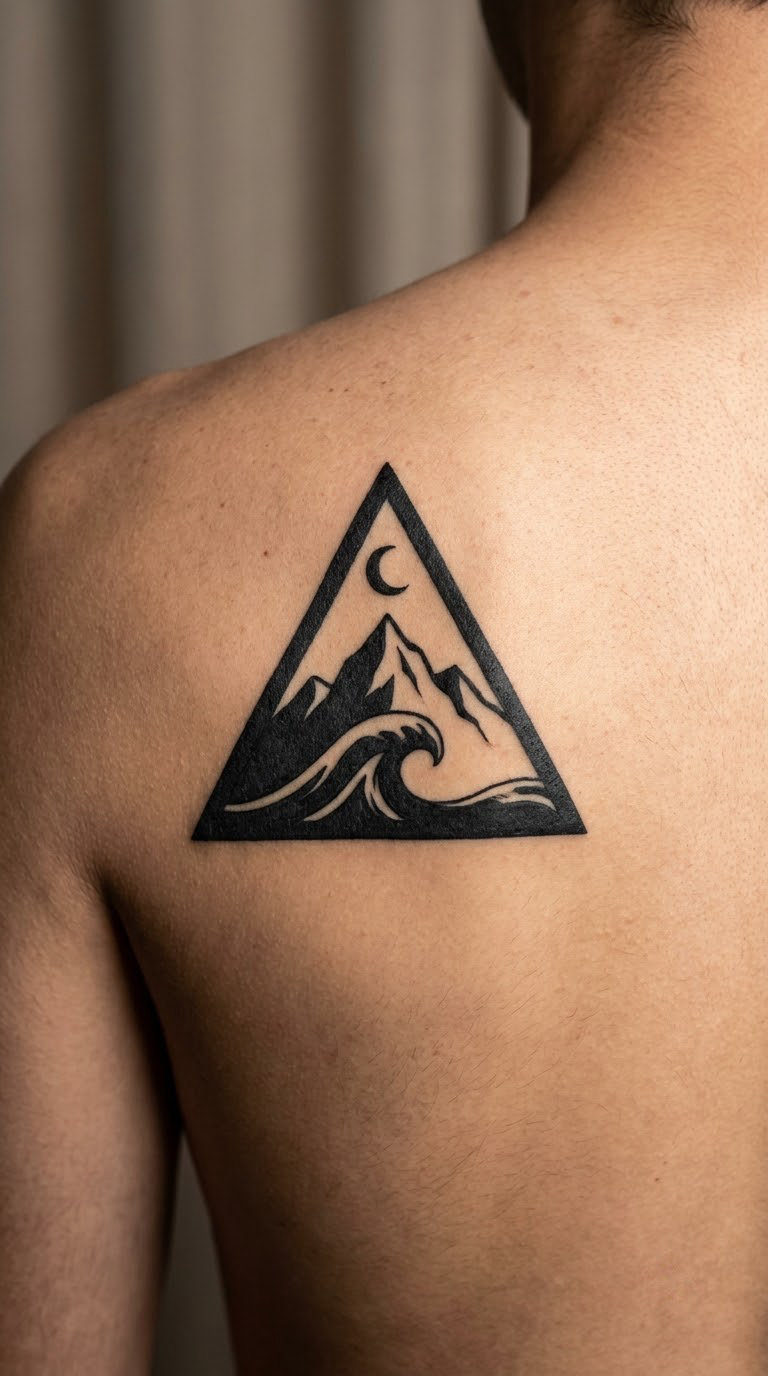
One triangle contains all three motifs: a solid black mountain filling the lower half, a wave curling through the middle with white foam left as bare skin, and a small crescent moon in the clear space at the top. The triangle frame gives all three a single edge to sit against, which is what keeps a three-element design from sprawling.
Triangles are common in this motif because they feel structural. This one leans on contrast between solid black and untouched skin rather than on detail, so it holds up well at a distance.
Placement: shoulder blade, upper back, outer chest, or the outer arm. Size: 4-5 in (10-13 cm) tall. Style: bold blackwork. Pain: high, and the shoulder blade is bony, so the frame’s outer line is the part that gets uncomfortable. Solid black inside the triangle needs a second pass, and that pass over the same spot is what people remember.
Make it yours: break the triangle’s base line where the wave meets it, so the water spills out of the frame by a few millimetres. Small enough to notice, big enough to change the design.
How to Choose the Right Design
Five checks will tell you more than any gallery scroll.
- Pick a style with open space. Fine line and dotwork designs keep blank skin between elements, which is what lets two different subjects read as one picture. Heavy realism at two inches does not.
- Match detail to body area. A 6 in design on a ribcage or a shoulder blade has to survive the curve. Anything with a straight horizon line needs an artist who will follow the body rather than the drawing.
- Test the mountain-to-water balance. Sketch the two shapes on the same piece of paper. If the water takes two attempts to find, the composition needs work before it goes on skin.
- Check it against what you already have. Lie down on the plan of your existing nature tattoos on a piece of tracing paper. Overlap is not automatically bad, but it is much easier to fix on paper than on a forearm.
- Be honest about the placement lasting. Shoulders, lower backs and ribs change shape as bodies change, and a literal scene on a stretched area distorts. Tattooers on the advice forums see this as the single biggest source of regret with literal nature designs. An abstract design ages far more gracefully than a literal one.
Cost and Session Time
Tattoo pricing in the US runs from a low hundreds for a micro piece like idea 17, through a few hundred for a small piece like idea 4, up into the many hundreds for a mid-size composition, and into the thousands for large work and half sleeves. Those are broad bands, not quotes.
Session length follows the same curve. Micro work is often 20 to 45 minutes. A small or mid-size piece is usually two to three hours, sometimes split across two sittings. Large scenic pieces run four to five hours, and half sleeves like idea 19 are commonly a multi-session project over several weeks. Forum accounts of full-sleeve nature work running to well over a dozen sessions are not unusual, so ask for the whole plan before you start rather than after.
What actually moves the number: the artist’s hourly rate and how long they think the piece takes, the shop minimum, your city, how much custom drawing your layout needs, and whether you want colour. Colour adds passes and therefore time. The most useful thing to ask at a consultation is what the artist expects the piece to require, not what a small version of it costs.
Aftercare Basics
Follow your artist’s aftercare instructions first. They know what they did, and the general list below is a reasonable baseline to discuss with them rather than a replacement.
- Wash gently with lukewarm water and unscented soap, then pat dry with a clean towel or paper towel. No scrubbing and no loofah.
- Keep it covered per your artist’s advice, and change the covering if it gets wet or dirty rather than letting it sit damp.
- Keep the design out of direct sun while it heals, and be thoughtful about sun exposure in the years after, because it is the fastest way to fade both line weight and colour.
- Skip swimming, pools, hot tubs and heavy friction for as long as your artist says, usually at least two weeks. Salt water and chlorine irritate fresh skin.
- Watch the area and contact your artist or a medical professional if something looks wrong to you. Your artist’s instructions come first, and nobody reading a gallery page should be diagnosing you.
Frequently Asked Questions
What size should a mountain and ocean tattoo be?
For most placements, 3 to 4 inches wide is the sweet spot where both the peak and the wave stay readable. Go smaller than about 1.5 inches and the wave detail starts to blur within a few years. Go larger than 6 inches on an arm or thigh and you are looking at a serious multi-hour session. The right size is really the smallest one your chosen body area can hold with breathing room around it.
Where is the best placement for a mountain and ocean tattoo?
The inner forearm and outer upper arm are the easiest places to get this right, because both give a flat-ish surface for a scene with a horizon line. Wrists, ribs and the shoulder blade all work but curve, and curved skin bends straight lines. Behind the ear suits the smaller designs. If you are undecided, bring a placement and an idea to your consultation rather than only a picture.
Can I add a mountain and ocean design to an existing nature tattoo collection?
Yes, and it is easier when you plan it than when you do not. Lay tracing paper over the area, trace the tattoos you already have, and draw the new one at the same scale. Fine line work matches fine line work easily. Blackwork next to blackwork is also straightforward. Pairing a heavy solid black piece with a light fine line design is the combination that usually needs a custom drawing session to balance.
Should a mountain and ocean tattoo be in colour or black and grey?
Black and grey holds its contrast longer. Line weight stays readable for years, and a soft grey ridge keeps working when the surrounding blues have faded. Colour gives you more depth and atmosphere, and the deep blues and greens hold up well, but lighter tones yellow and fade first. Whichever you choose, ask your artist which ink they plan to mix, because some blues go cloudy within a couple of summers of sun exposure.
What should I ask my tattoo artist at the consultation?
Ask how the design changes at the size you want, not just at the size in the reference image. Ask which line weight they will use and whether the horizon line will follow the curve of your body. Ask how many sessions it takes and what the touch-up situation is in a year. Bring several references and a clear idea of placement and scale. Tattooers consistently prefer that to a single screenshot of finished work from another artist.
Which Mountain and Ocean Tattoo Is Right for You?
For a first tattoo, start with idea 4, the minimal horizon. Two line weights, no colour, and a short session, which is a good way to find out how you handle the process before committing to something large.
If you already collect nature tattoos, idea 19, the matching half sleeves, is the one that earns its space. Decide the scale and the placement before you book, then take several references and your coordinates to the consultation. That is where these designs actually get made.