
20 Tattoo Ideas for Climbers: Simple, Stunning Picks (September 2026)
Tattoo ideas for climbers run on one idea: a design another climber recognises in half a second, tied to a climb that meant something to you. That usually means gear you actually use, a place you actually climbed, or a grade you actually sent.
Every design below covers what it looks like, where it sits best, honest sizing, expected pain, and one way to make it personal. I have kept every description specific enough that an artist could sketch it from the text alone.
One thing to sort before you fall in love with a picture: your gear touches certain parts of you constantly. Harness belts, chalk bags and rope contact zones decide which designs survive a climbing life and which get ground down. Wrist band tattoo ideas are worth a look if you are leaning toward smaller placements.
Tattoo Ideas for Climbers: Quick Guide
Here is every design in this list, in order, with the placement that suits it and what it will feel like. Scan the table first, then jump to the idea you like.
| Idea | Style | Best placement | Size | Pain |
|---|---|---|---|---|
| Minimal carabiner outline | Fine line | Inner forearm | 1.5-2 in | Low |
| Chalk bag with drawstring | Blackwork linework | Outer forearm | 2-2.5 in | Low |
| Figure-eight knot | Bold black | Inner forearm | 1.5-2 in | Low |
| Climbing rope in a circle | Fine line | Upper arm | 2.5-3 in | Low |
| Minimal mountain range | Black and grey | Forearm | 3.5-4.5 in | Low |
| Topographic contour lines | Fine line abstract | Calf or thigh | 3-4 in | Low |
| Climbing-shoe tread | Micro blackwork | Side of the hand | 1.5 in | Medium |
| Carabiner and route line | Minimal fine line | Outer upper arm | 3 in | Low |
| Climbing helmet hook | Fine line icon | Behind the ear | 1.5 in | Medium |
| Handhold silhouette | Geometric blackwork | Inner bicep | 2-3 in | Low |
| Belay knot fine line | Fine line | Inner wrist | 1.5-2 in | Medium |
| Peak with compass direction | Minimal black | Upper arm | 2-2.5 in | Low |
| Climbing route dots | Minimal dotwork | Forearm | 3 in | Low |
| Rope and handshake | Fine line illustrative | Inner forearm | 3 in | Low |
| Traditional sun over peaks | Traditional | Calf | 3.5-4.5 in | Low |
| Watercolor climbing route | Watercolor | Shoulder blade | 4-5 in | Low |
| Climbing sleeve with gear icons | Black and grey | Full arm | Full sleeve | Medium |
| Chalk-dust handprint | Soft black and grey | Inner calf | 3 in | Low |
| Indoor wall and crag split | Blackwork | Forearm | 4 in | Low |
| First ascent coordinates | Minimal fine line | Inner wrist | 2 in | Medium |
1. Minimal Carabiner Outline
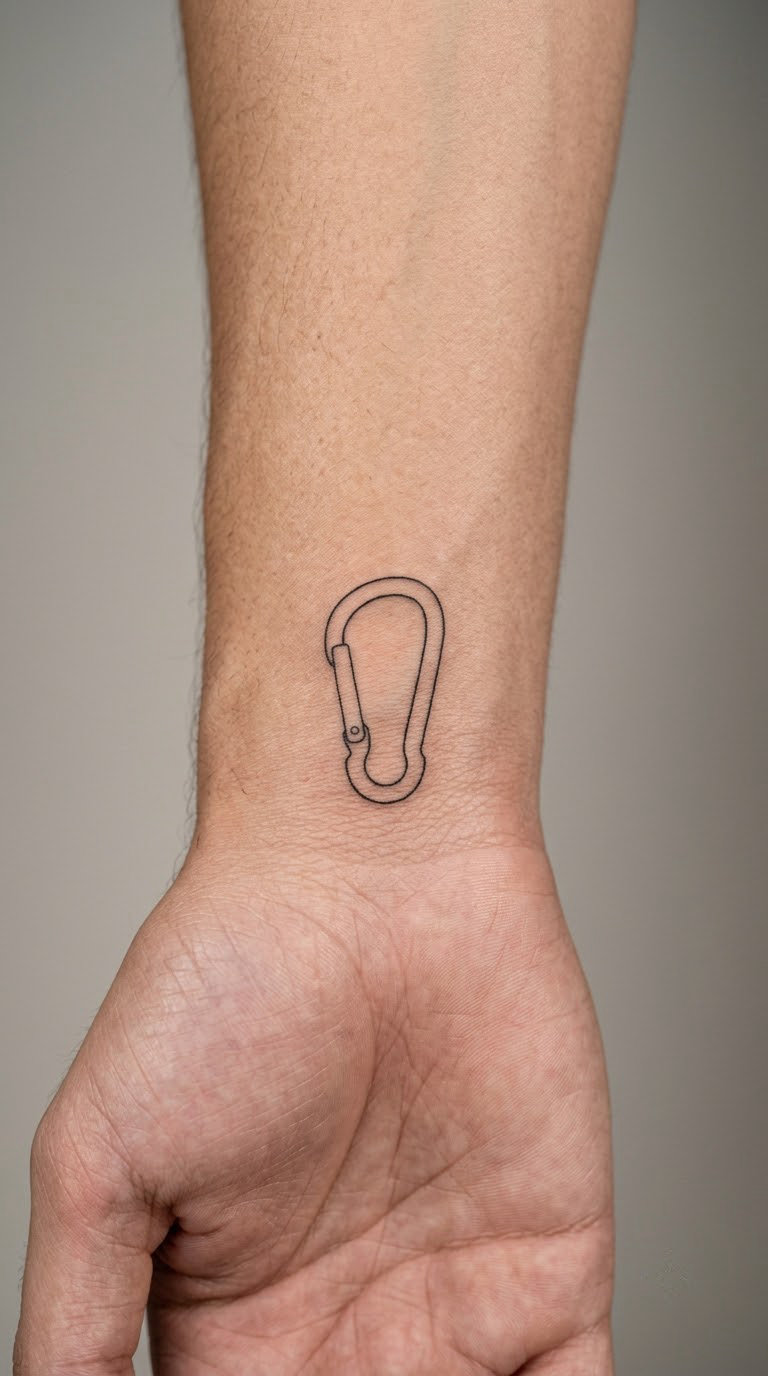
A minimal carabiner is the easiest climbing tattoo to get right, and the easiest one for a non-climber artist to understand. One continuous black line tracing the D-shape, gate line included, nothing else.
Climbers pick it because it is gear, not a logo, and it reads instantly. It also survives a first tattoo, since there is no shading to muddy.
Placement: inner forearm, or the inside of the upper arm. Size: 1.5 to 2 inches tall. Style: fine line or single-weight black.
Pain: low, a scratchy but short session. One ageing note: inner forearms get sun, so ask for a slightly heavier line than feels right in the chair.
Make it yours: engrave the carabiner’s own serial number, or pair it with the gate opening on the side where your climbing hand falls.
2. Chalk Bag with Drawstring
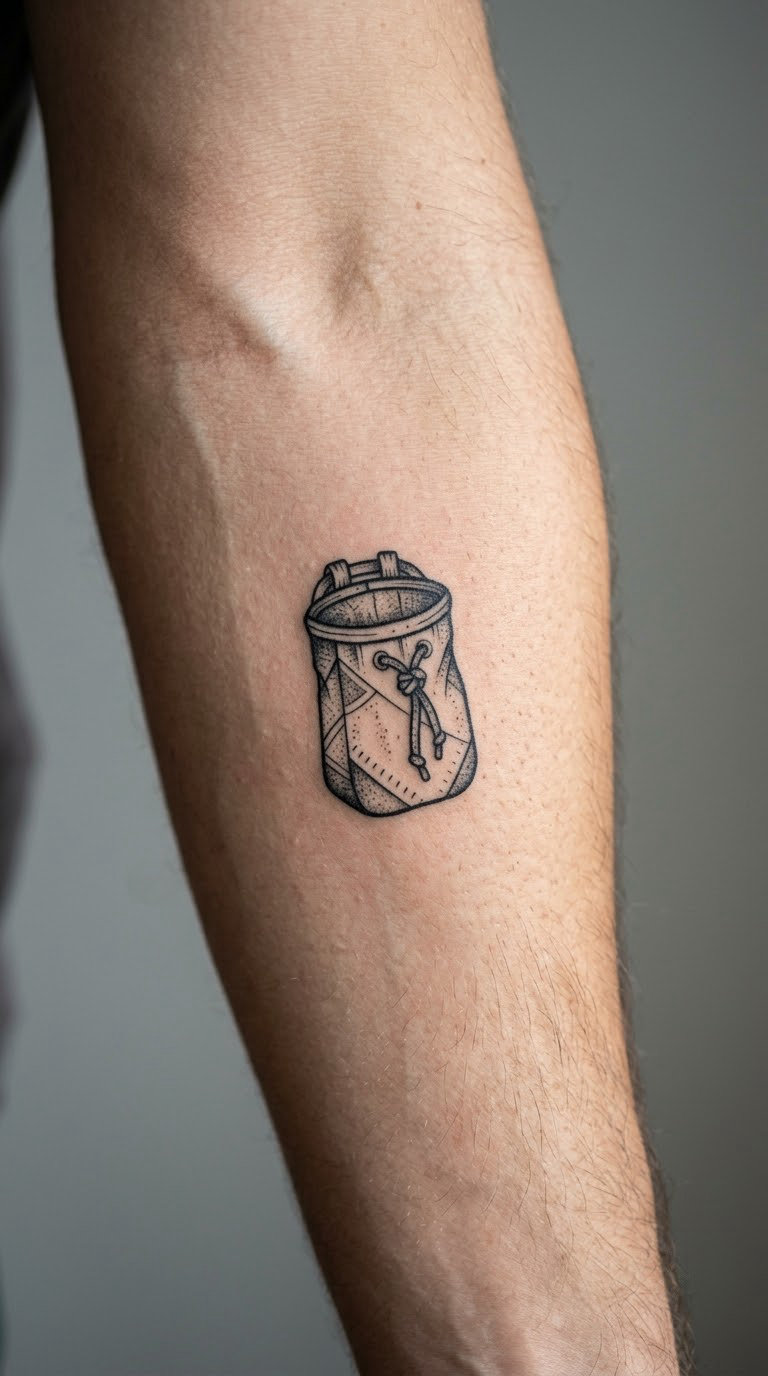
A chalk bag tattoo is a rounded bucket shape with a cinched drawstring at the top, a small loop where the cord knots, and a scattering of chalk dust breaking the bottom edge. Linework carries it, not colour.
It is one of the most recognised objects in the gym and on the crag, so it does the same job a mountain does, with less competition from hikers.
Placement: outer forearm reads best, where the shape can breathe. Size: 2 to 2.5 inches tall. Style: blackwork linework with light stippling for the chalk.
Pain: low, though the outer forearm sits close to bone in some people, so expect more pressure than the inner arm.
Make it yours: put your initials on the drawstring cord, or a crag name where the brand usually sits.
3. Figure-Eight Knot
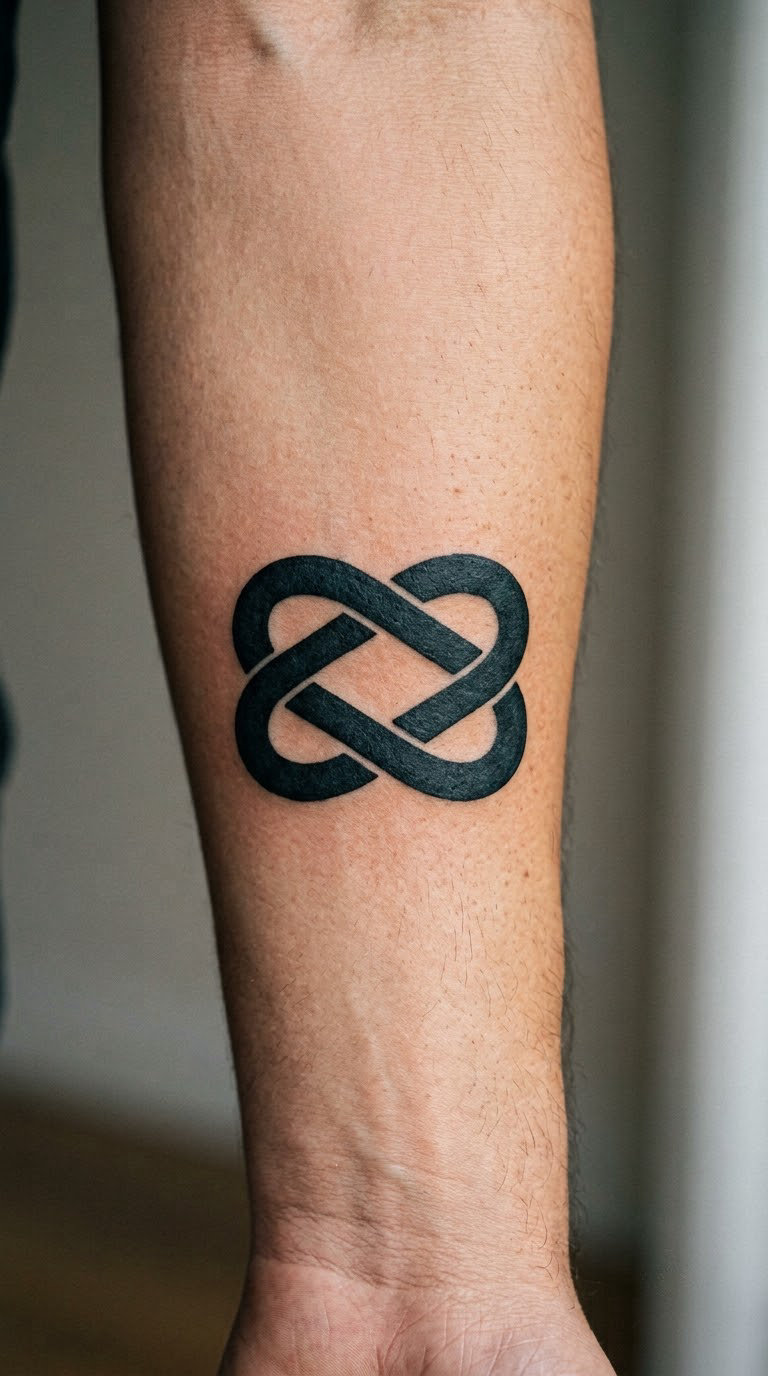
The figure-eight is the knot most climbers tie first, so it makes a compact, accurate design that any other climber will clock. Bold black lines with clean negative space inside the loops.
Its pull is technical rather than decorative. If your first rope session happened at a particular crag, this is the design that quietly records it.
Placement: inner forearm along the muscle, or the calf. Size: 1.5 to 2 inches across. Style: bold black or traditional rope rendering.
Pain: low to medium. Keep the open spacing. Tiny knot crossings fill in with age and turn the design into a dark lump.
Make it yours: use the exact knot you tie for your first lead, and let the artist draw it in the hand you actually use.
4. Climbing Rope in a Circle
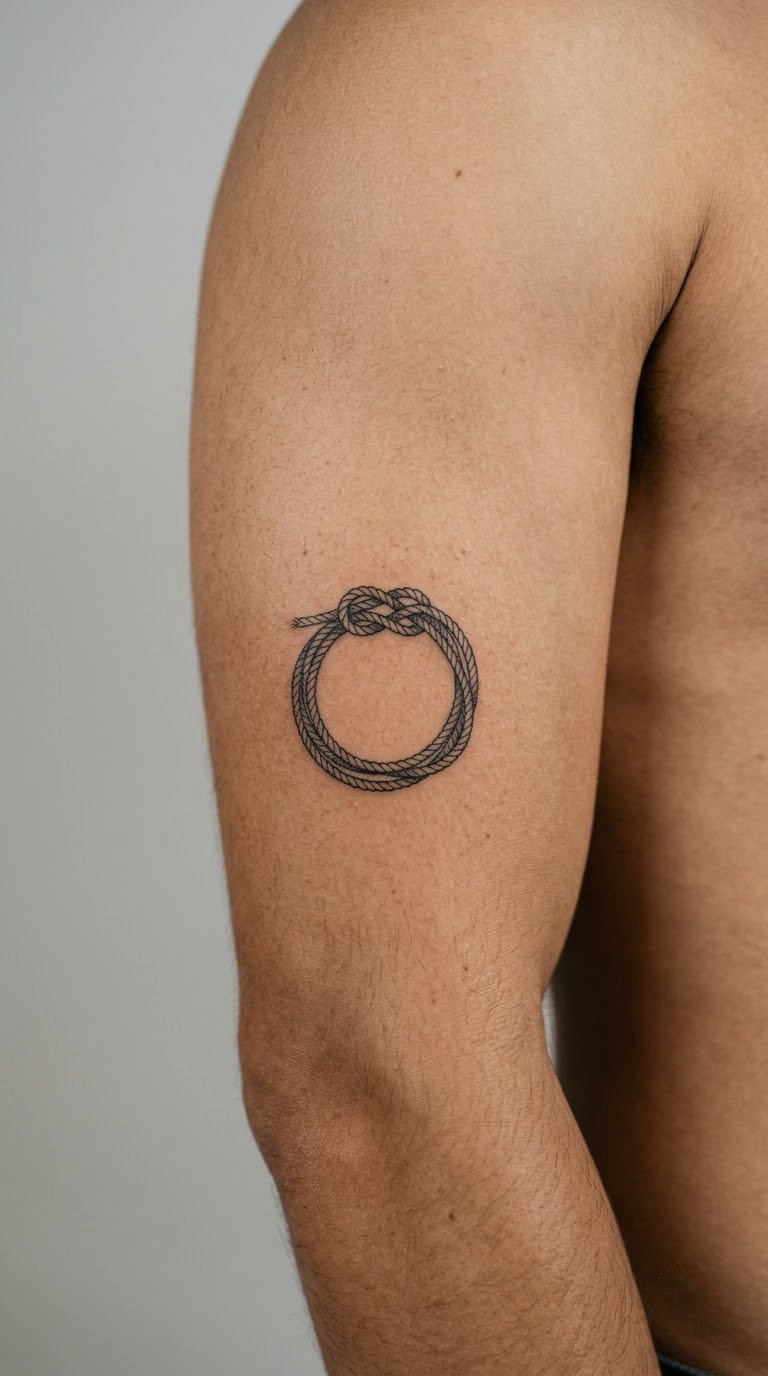
A single rope curled into an unfinished circle, with a visible spiral at the top where the strands would sit, works well as a fine-line piece. Leave the loop open at one point so it reads as rope rather than a plain ring.
The shape says repetition without a quote attached to it. People choose it for a season, a decade of climbing, or simply because it looks good on an arm.
Placement: upper arm, or wrapped once around the forearm. Size: 2.5 to 3 inches across. Style: fine line with a little grey shading in the spiral.
Pain: low on the upper arm, medium if it wraps the forearm where your pulse sits under the line.
Make it yours: count the years you have climbed and set the circle open by that many degrees.
5. Minimal Mountain Range
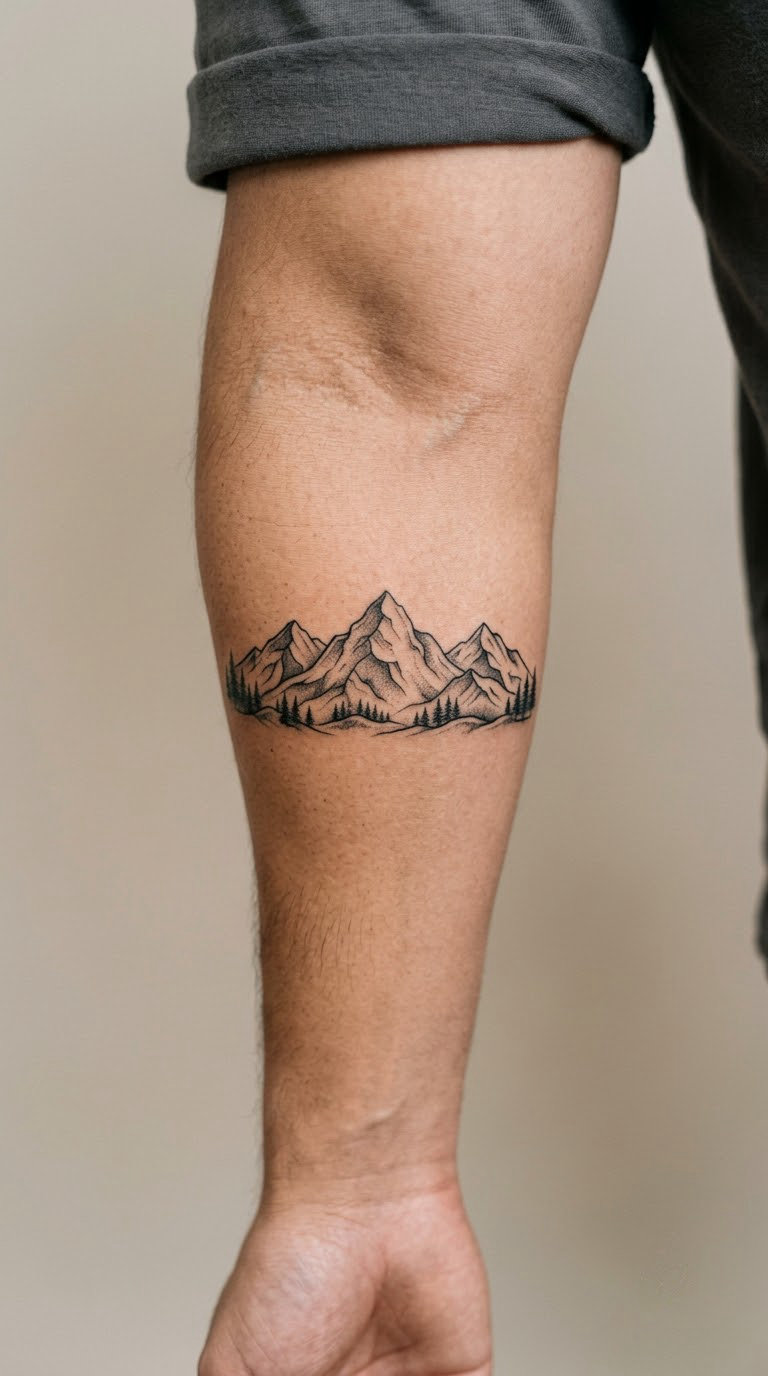
A mountain range tattoo is the most requested climbing design and the most generic, so the trick is making it specific. Give the artist a photo of the actual skyline you climb under, and ask for three peaks, not a mountain range graphic.
It marks a place, a trip, or the year you moved to somewhere with rock. Vague on purpose, personal to you.
Placement: across the forearm, or the calf. Size: 3.5 to 4.5 inches wide. Style: black and grey with soft grey ridgelines and one darker foreground peak.
Pain: low. Ageing note: gradient grey fades into the black lines, so ask the artist to keep contrast strong.
Make it yours: use the exact ridgeline of your home crag rather than a generic range.
6. Topographic Map Contour Lines
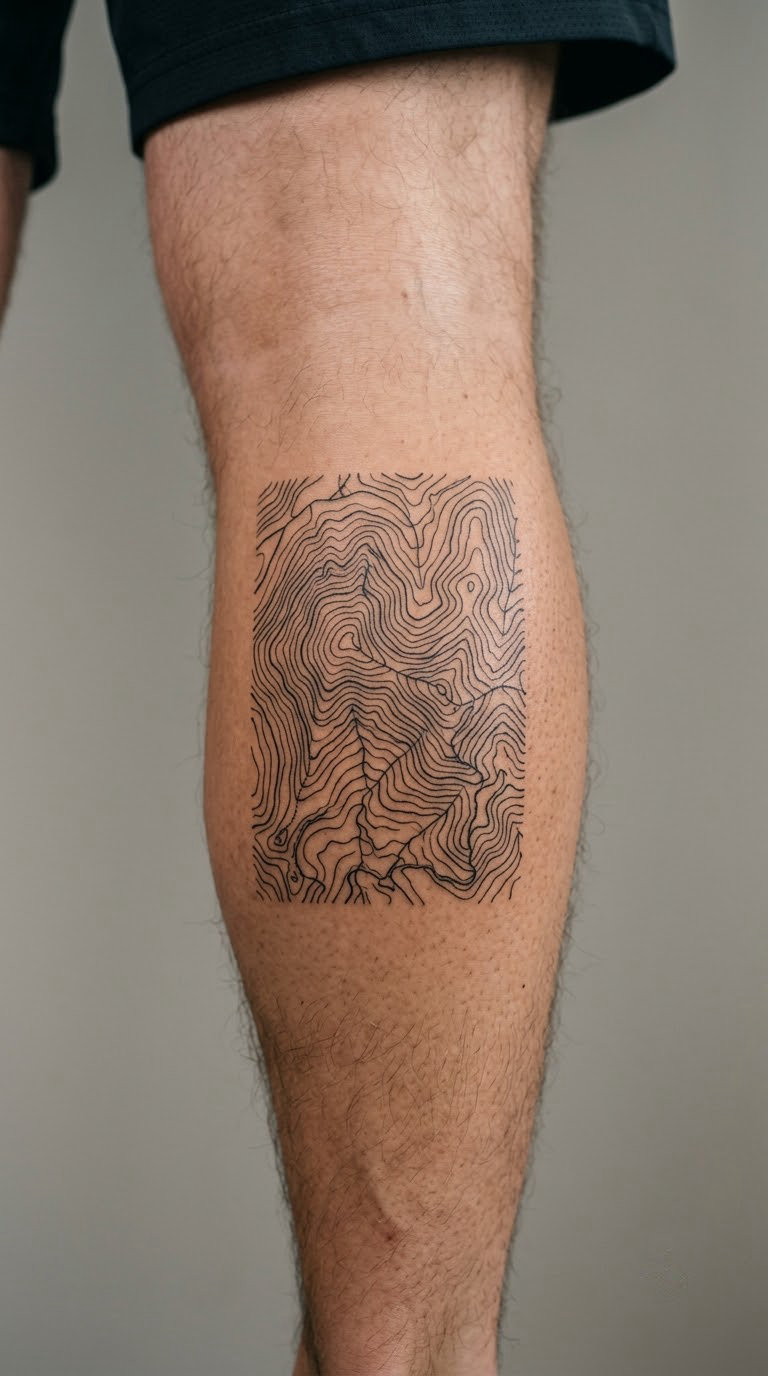
Topo contour tattoos take a real map section and reduce it to lines: closed loops around bumps, evenly spaced where the ground is flat, tight where it is steep. No labels, no colour, just the rhythm of the terrain.
Every loop holds a specific area, so the design is only as generic as the map you pick. A home crag patch reads as a climbing tattoo instantly.
Placement: calf, thigh, or the flat of the upper arm. Size: 3 by 4 inches. Style: fine line abstract, sometimes with dotwork in the steep sections.
Pain: low, though it takes a long session because of the line count. Ageing note: these are thin lines, so plan for them to soften within five years.
Make it yours: trace the topo of the route you have climbed most, cropped to just that section of rock.
7. Small Envelope Climbing-Shoe Tread
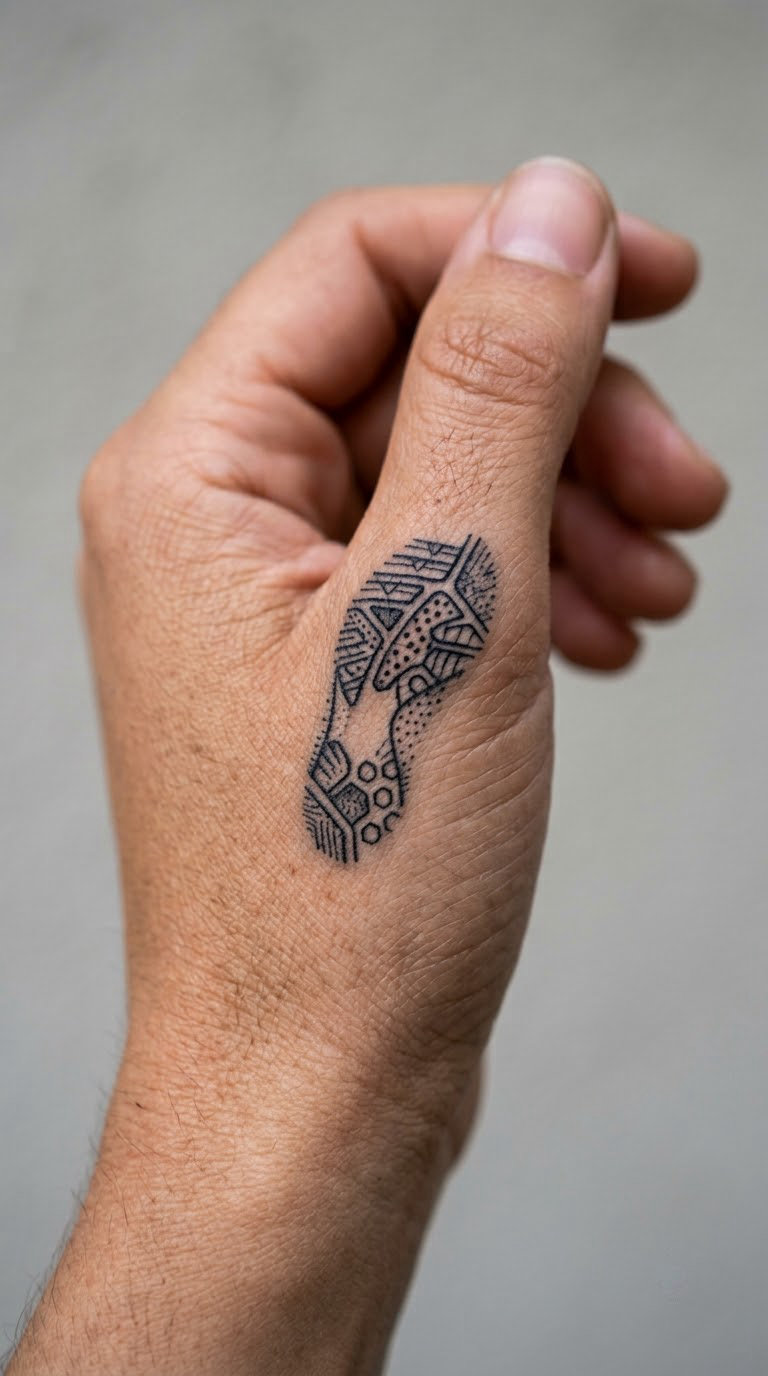
A climbing shoe tread tattoo is the rubber under your foot, abstracted into a block of chevrons or hexagons. It is close to a secret design, which is the appeal for people who do not want their climbing explained at a party.
It works because it is unmistakably climbing-related to anyone who has racked up, and nothing to anyone else. That is exactly what some people want.
Placement: side of the hand near the thumb, or the inner wrist. Size: 1.5 inches wide. Style: micro blackwork, solid and small.
Pain: medium to high on the hand. Skin there is thin and moves constantly, and fine detail on hands fades faster than anywhere else on the body.
Make it yours: tattoo the tread pattern of your own first pair of shoes, drawn from a photo of the sole.
8. Carabiner and Route Line
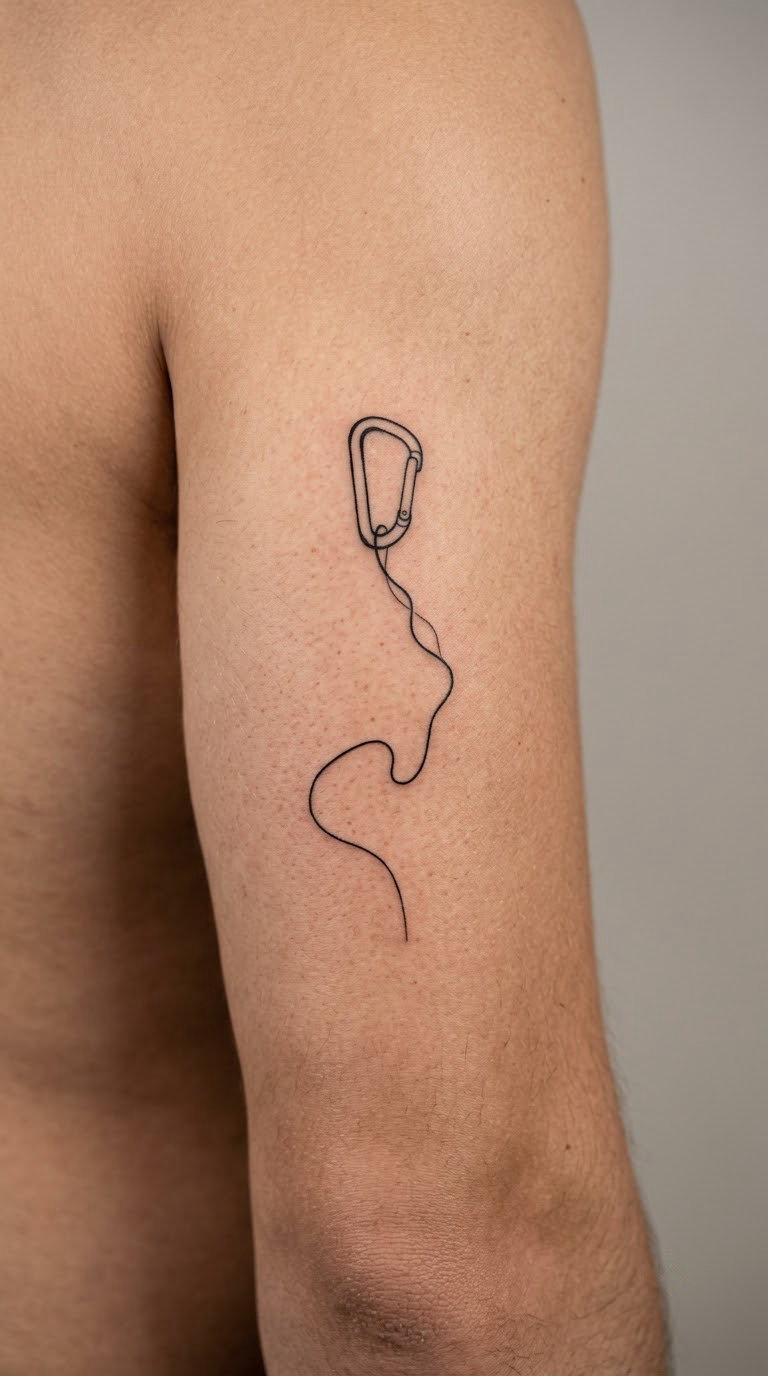
Take a single carabiner and run a single thin line out of its gate, curving away across the skin. The line is a route, not a border, and it should feel like it is going somewhere rather than framing the piece.
It carries more story than a lone carabiner without turning into a poster. Route lines are how climbers draw topos on their fingers in the sun, so it has borrowed language climbers already use.
Placement: outer upper arm, where there is flat space for the line to travel. Size: 3 inches tall. Style: minimal fine line, one weight throughout.
Pain: low, and the upper arm takes a long session without you shifting much.
Make it yours: have the line match the shape of a real approach path you have walked to a first pitch.
9. Climbing Helmet Hook
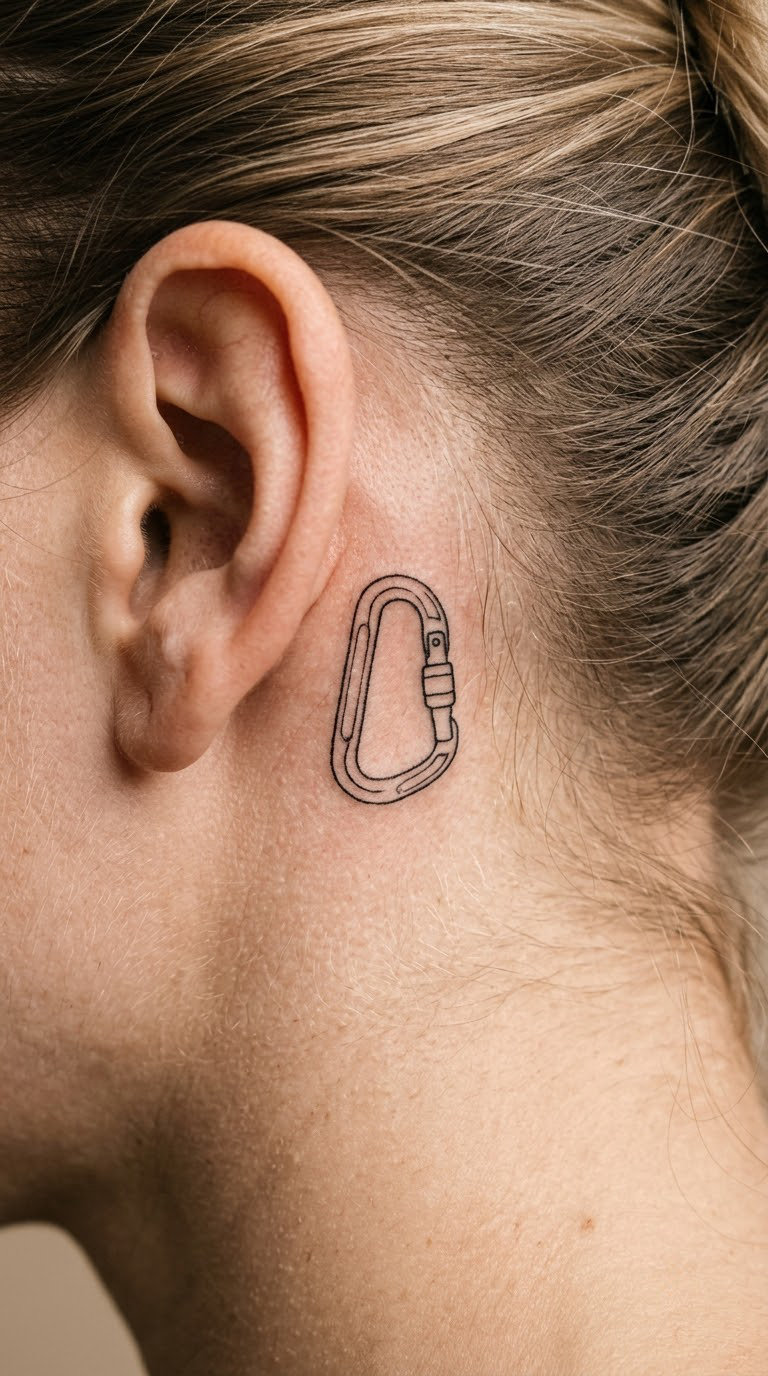
A helmet hook is a small piece of gear with a very particular shape, a curved slot on a flat plate. Tattooed on its own as a fine-line icon, it looks like a piece of minimal hardware rather than a climbing sticker.
It is a quietly nerdy choice. Climbers who lead at the crag will recognise it, and it carries the same association as any essential piece of kit.
Placement: behind the ear, or the inner forearm. Size: 1.5 inches tall. Style: fine line icon with even stroke weight.
Pain: medium. Behind the ear is thin skin over a bone ridge, and the discomfort is sharp rather than dull. Ageing note: small hardware detail softens, so keep the outline simple.
Make it yours: add a tiny chalk mark beside it, or put a hairline scratch through the plate as if it had been in a rack.
10. Handhold Silhouette
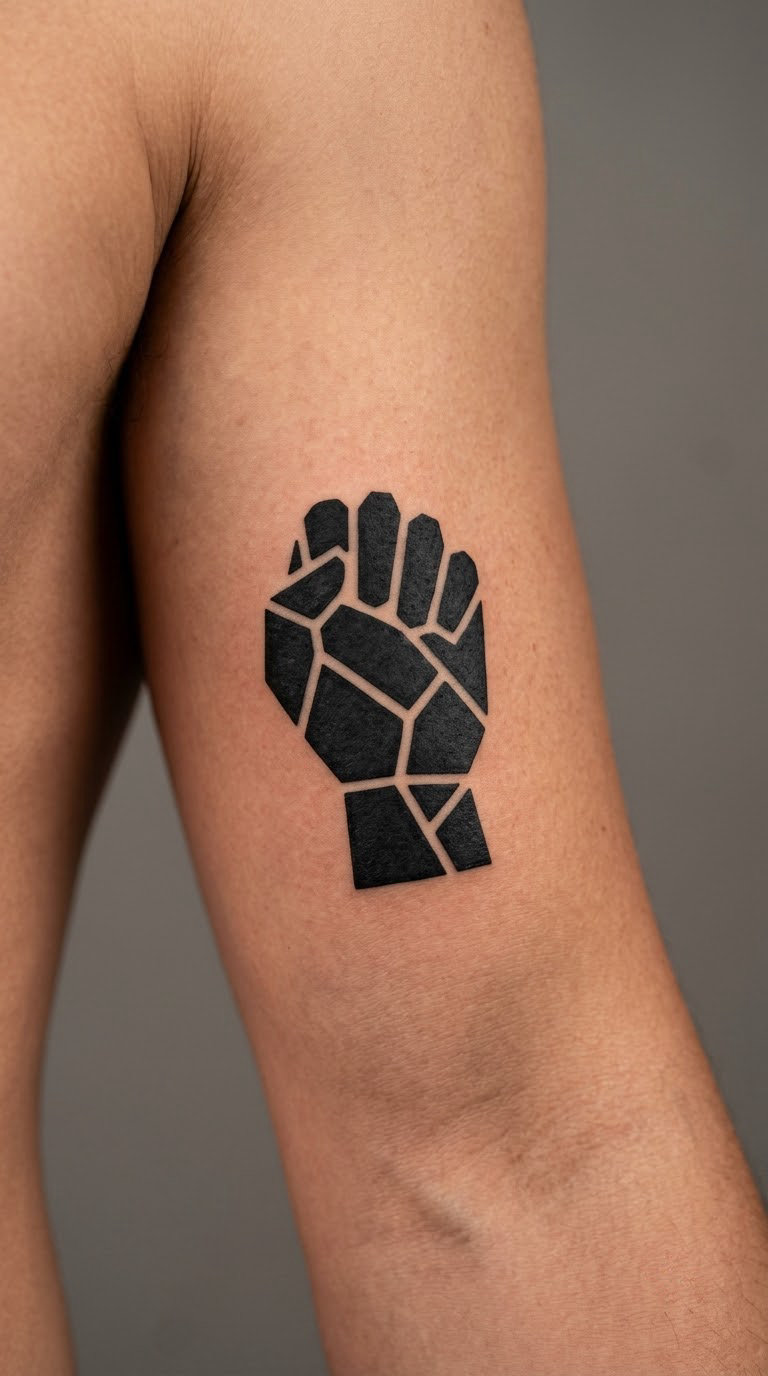
A handhold silhouette takes the shape of a single crimp or sloper and renders it as a solid black block with an irregular edge. No rock, no climber, no chalk. Just the hold, isolated.
It is a bouldering design more than a big-wall one, and people choose it because the specific hold means a specific problem. A positive memory reduced to one shape.
Placement: inner bicep, or the outer forearm. Size: 2 to 3 inches tall. Style: bold blackwork or geometric solid.
Pain: low, and solid black heals flatter than shaded work, so it looks the same in a year as it does in a week.
Make it yours: photograph the hold from the problem you sent most and use that outline instead of an invented one.
11. Belay Knot in Fine Line
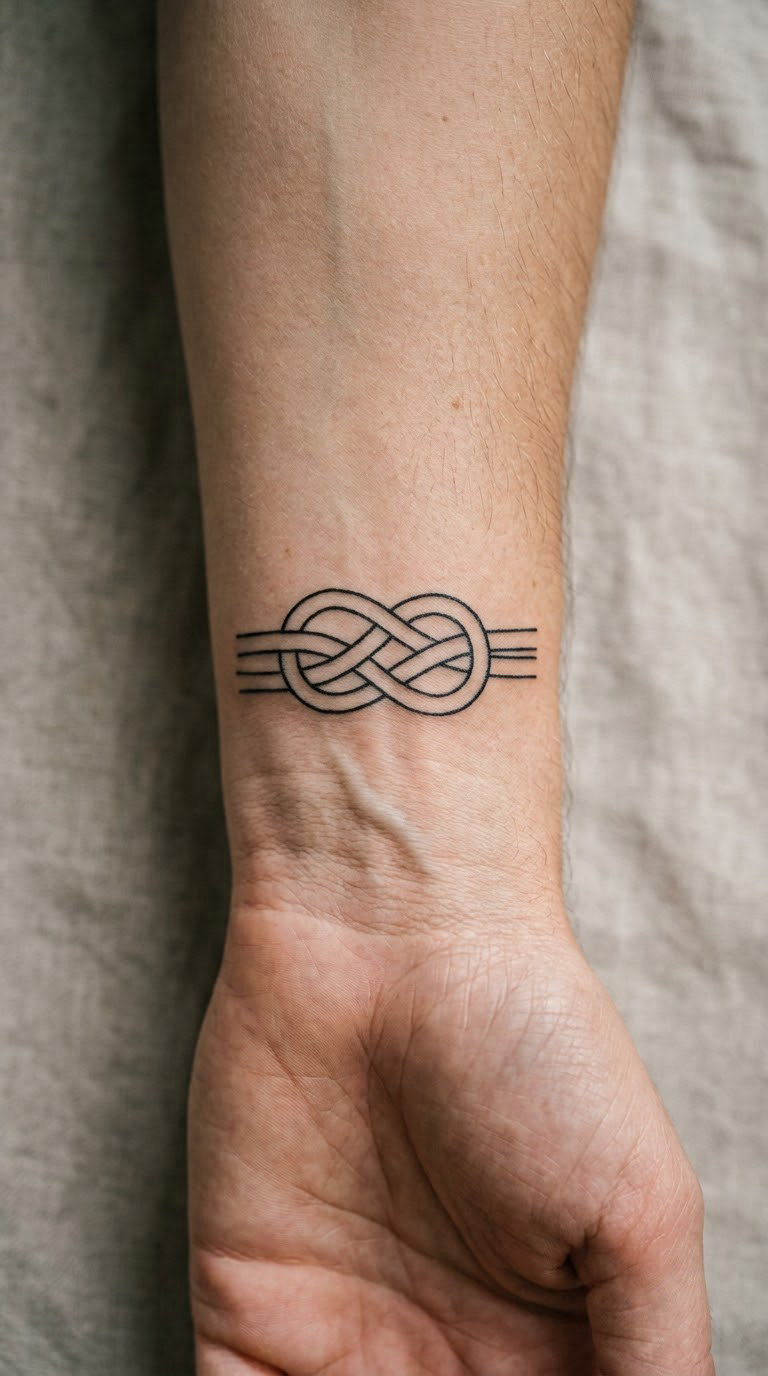
Fine-line knot work is a style in its own right, and the belay knot is the one most climbers can draw from memory. Line weight stays thin, the crossings keep open space around them, and the whole thing sits inside a clear outline.
It is the design to ask for if your climbing is mostly the other end of the rope. Belayers rarely get the tattoo and always carry the risk.
Placement: inner wrist, or along the forearm. Size: 1.5 to 2 inches across. Style: fine line, single needle, consistent pressure.
Pain: medium on the wrist. Wrist linework softens noticeably faster than the same design on the upper arm, so plan for a touch-up in year three or four.
Make it yours: have the artist draw the knot tied the way you actually tie it, including the tail length you always leave.
12. Mountain Peak with Compass Direction
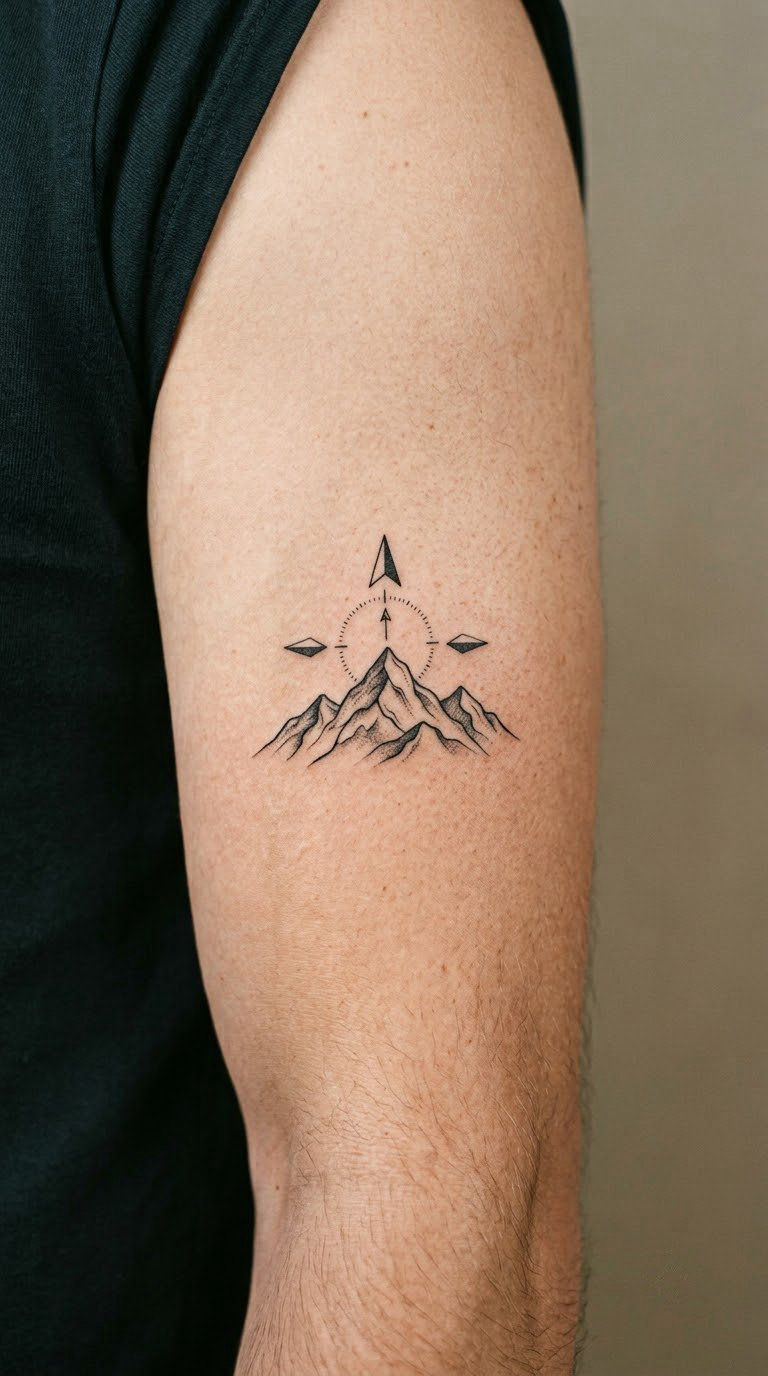
A single triangular peak, clean and slightly asymmetric, with a small degree marker or cardinal letter beside it. Two elements, no background, nothing else competing for attention.
The direction turns a generic mountain into a coordinate. People use the bearing of a summit they have stood on, or the direction of a crag that matters to them.
Placement: upper arm or the outer forearm. Size: 2 to 2.5 inches tall. Style: minimal black with a small fine-line detail for the marker.
Pain: low. Ageing note: fine degree numerals are the first thing to go, so keep them larger than feels necessary.
Make it yours: add a second bearing for the first pitch you ever led, set at the same angle.
13. Climbing Route Dots
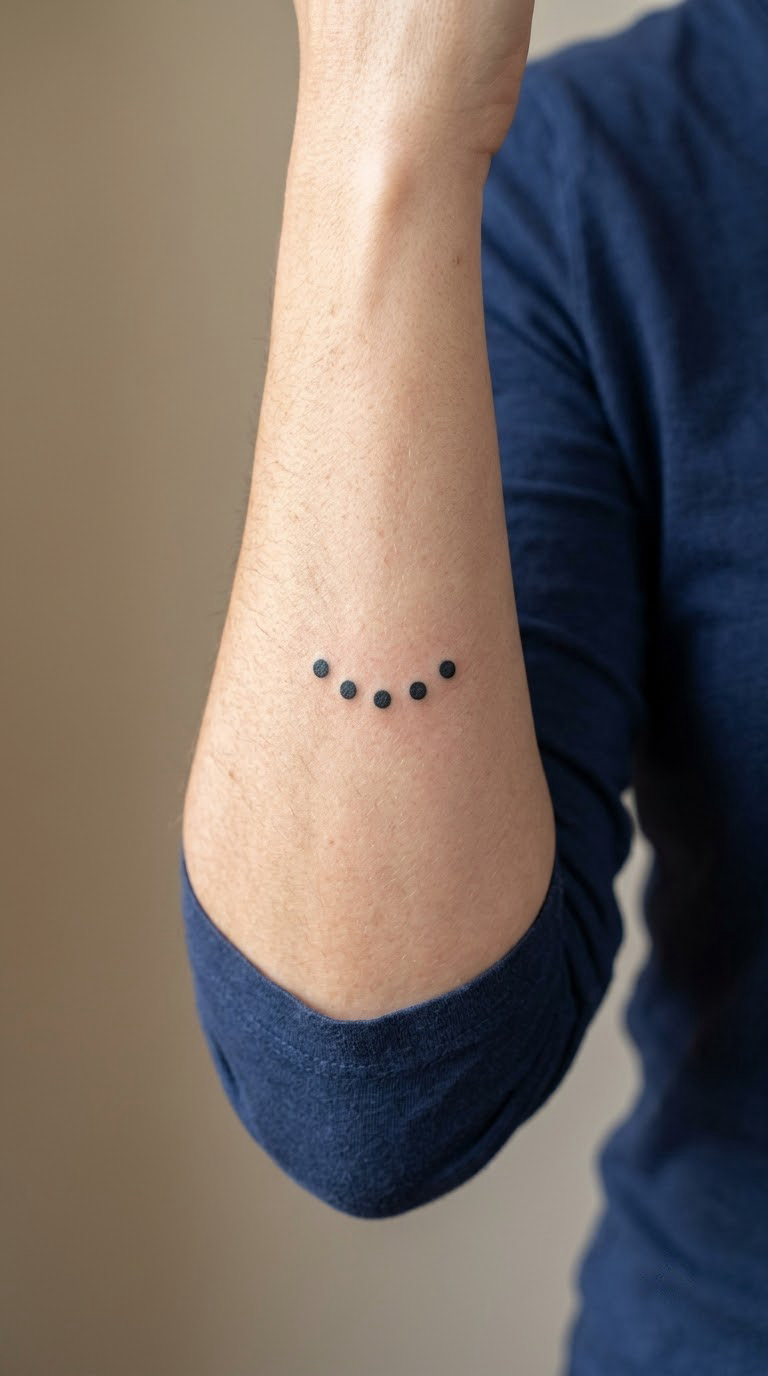
Route dots are the small marks climbers trace with a fingertip to show a sequence of holds. Five solid dots in a gentle curve, spaced like a sequence rather than a random scatter, is the whole design.
It is abstract enough to work as a piece about movement rather than gear, and it is one of the few climbing tattoos that is not literal.
Placement: forearm, following the line of the muscle. Size: 3 inches long, dots around 5 mm. Style: minimal dotwork, solid fills.
Pain: low. Small solid dots are forgiving, because there is no thin line to fade, and they age better than almost anything else here.
Make it yours: set the spacing to the actual hold sequence of a problem you know by heart, including the rest you take mid-way.
14. Rope and Handshake
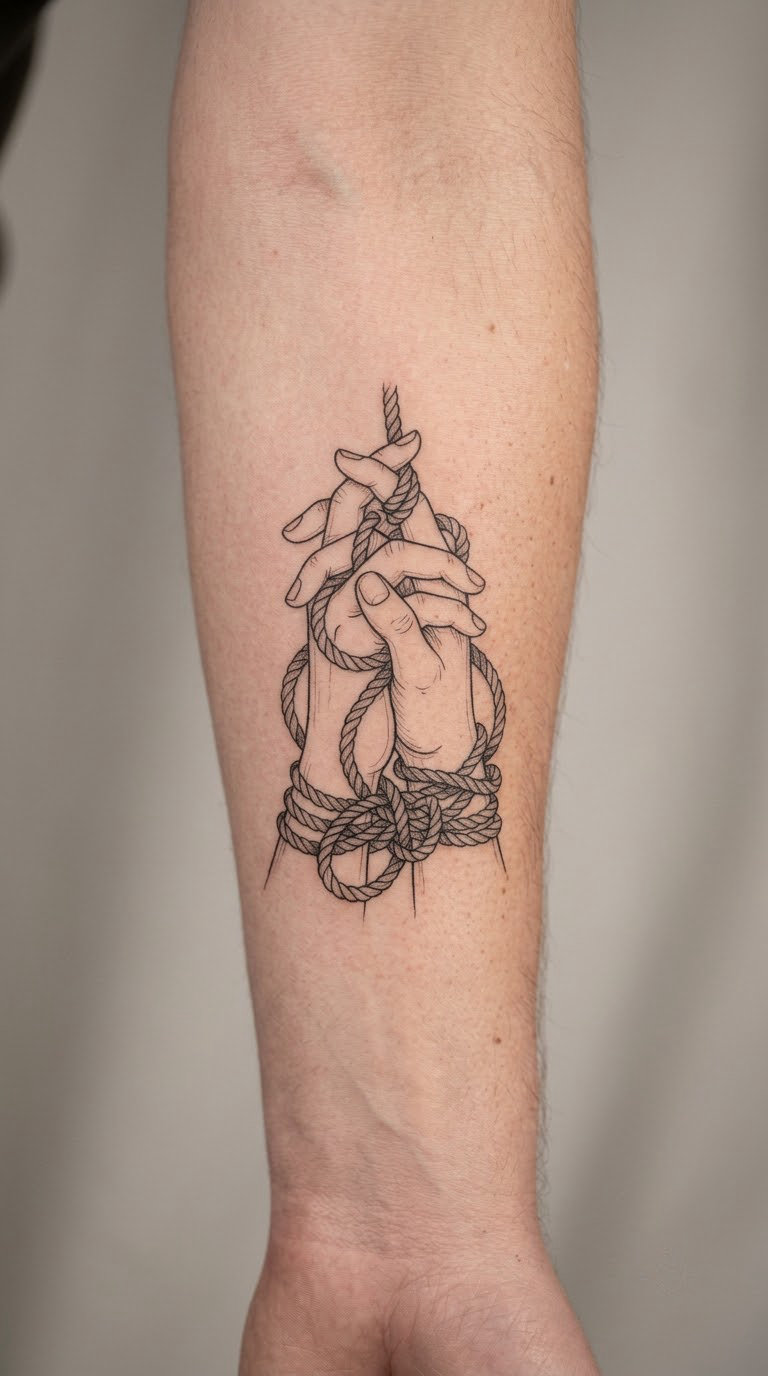
A rope line that loops and crosses into two simplified clasped hands, drawn in thin black lines with no shading. It is half gear, half gesture, and it is the most personal design in this list.
People get it for a specific partner, usually after a season, a send, or an accident. I have never met a climber who got one for a general idea about partnership.
Placement: inner forearm, or the chest near the collarbone. Size: 3 inches wide. Style: fine line illustrative.
Pain: low, with a long session because the line work is dense. Ageing note: hands drawn in fine line lose finger definition, so ask for a chunkier hand outline than the reference photo.
Make it yours: have the rope tied in the knot you use to finish a route, and ask the artist to trace the actual shape of your partner’s grip from memory.
15. Traditional-Style Sun Over Peaks
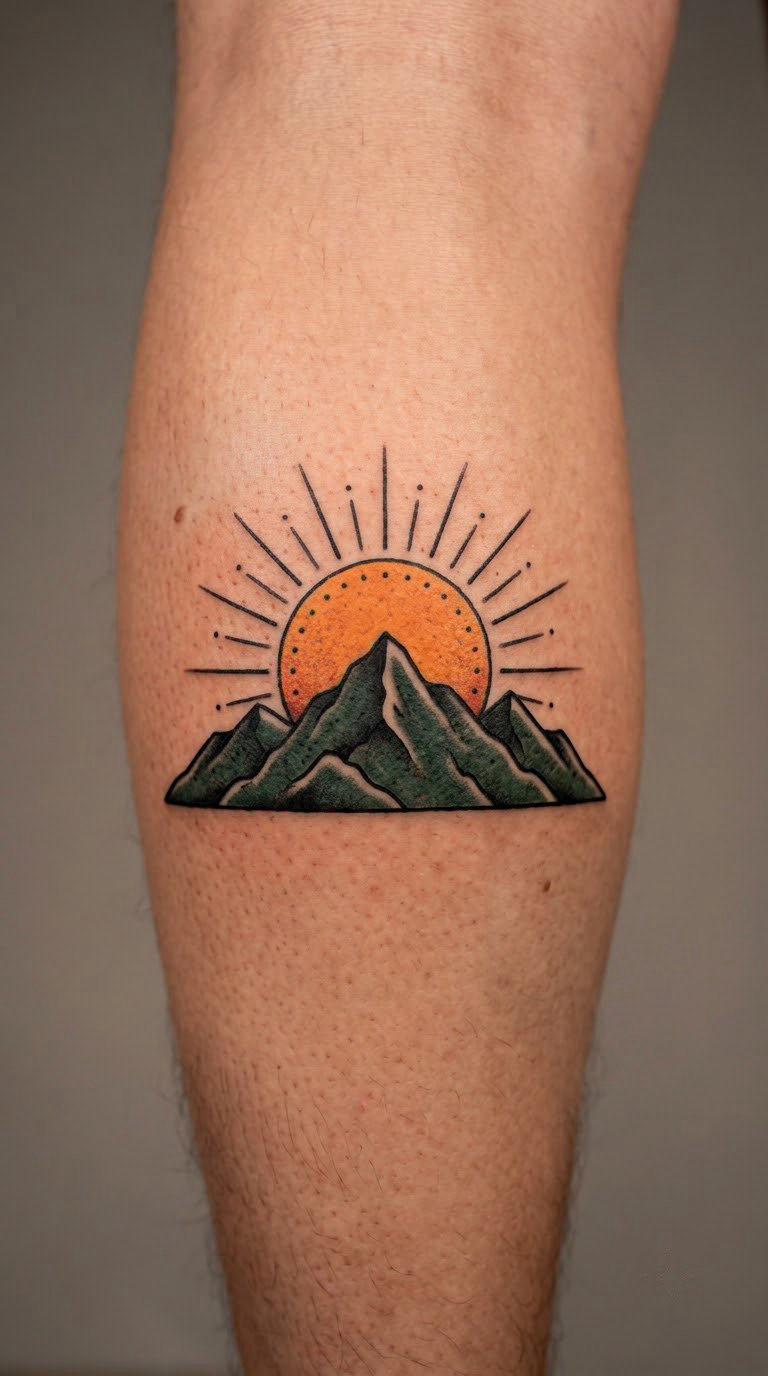
Traditional style suits this subject well: hard black outlines, flat colour, a rising sun with straight rays behind two or three dark mountain peaks. No gradients, no grey, colour sitting inside clean line.
It is the one design here that is about atmosphere rather than gear. Sunrise above a ridge is the view that pulls most people into climbing in the first place.
Placement: calf, or the outer arm. Size: 3.5 to 4.5 inches wide. Style: traditional, with strong outlines and flat fills.
Pain: low. Colour takes longer than line work, so expect a full session for something this size.
Make it yours: add your grade in traditional lettering beneath the peaks, or pick the two colours you always chalk with.
16. Watercolor Climbing Route
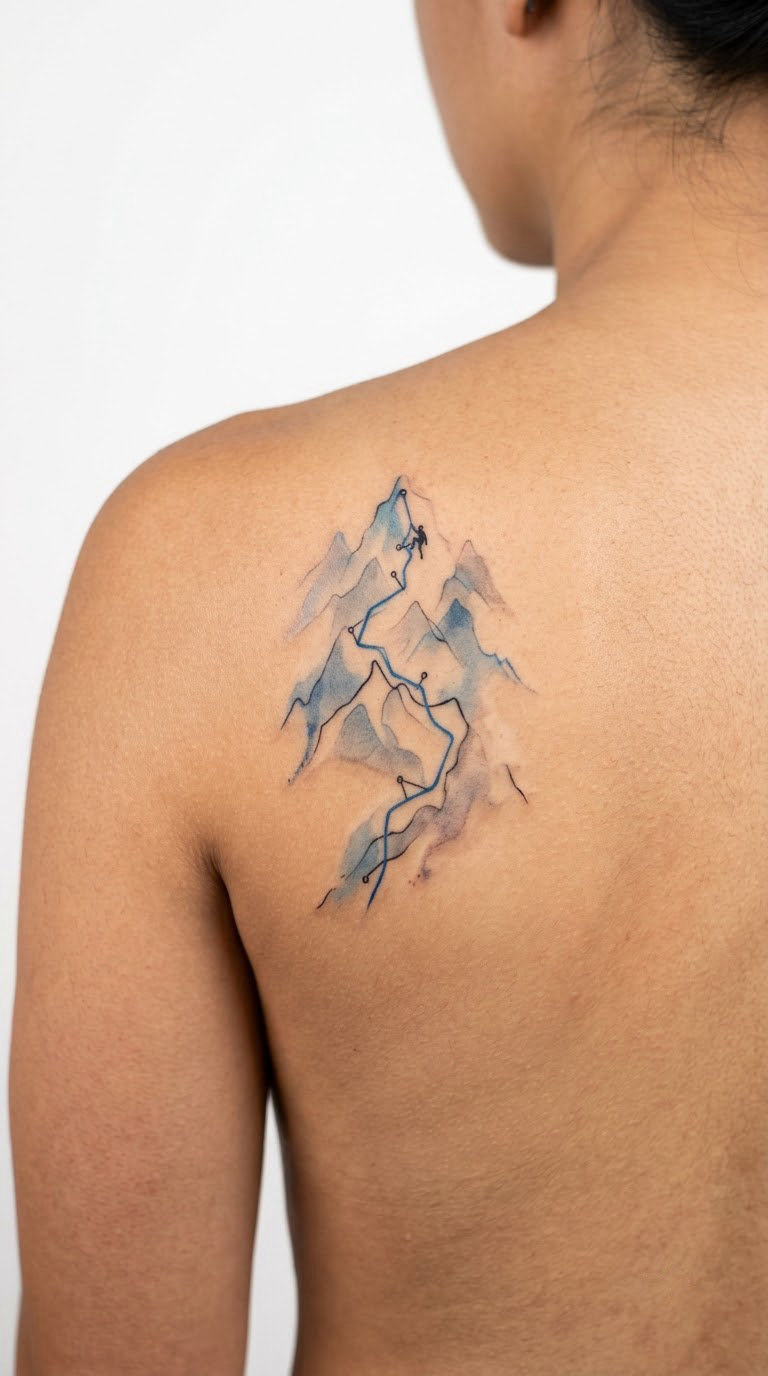
A soft blue and grey wash with a darker route line drawn through it, the way a topo looks when it is half-dissolved in rain. Peaks stay faint, almost background, so the line carries the piece.
It is a design about exposure and changing conditions, and it does not age the way solid blackwork does, which can suit people who expect their tattoos to shift.
Placement: shoulder blade, upper back, or the thigh. Size: 4 to 5 inches tall. Style: watercolor with a fine line focal point.
Pain: low, and a shoulder blade session lets you move your arm without stretching the skin.
Make it yours: use the colour of a sky you remember from a specific climb, and keep the route line as that climb’s path.
17. Climbing Sleeve with Gear Icons
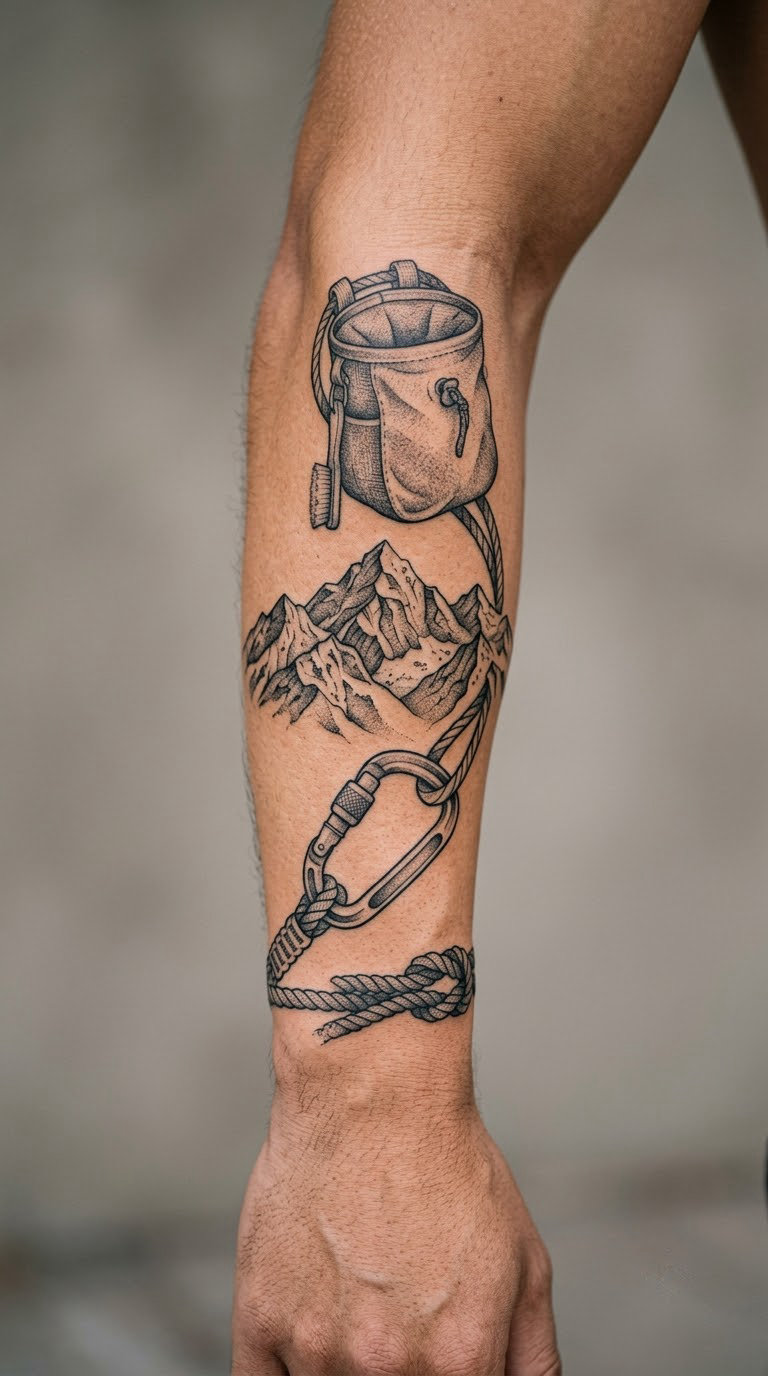
A climbing sleeve is a connected composition rather than a stack of separate pieces. A rope runs the length of the arm, a carabiner clips into it, peaks sit near the elbow, and a chalk bag anchors the wrist end. Each element has its own space.
This is the choice for someone who already has one small climbing tattoo and wants a body of work. It only works as a project, planned with the artist rather than improvised.
Placement: full arm, from wrist to shoulder. Size: a half or full sleeve. Style: black and grey illustrative, consistent line weight across every element.
Pain: medium over a long session count, and sleeves usually take several appointments. Ageing note: consistency matters more than detail here, because mismatched line weights read as a mistake from a metre away.
Make it yours: order the elements in the order you rack gear, and add one piece of trad gear if that is your discipline.
18. Minimal Chalk-Dust Handprint
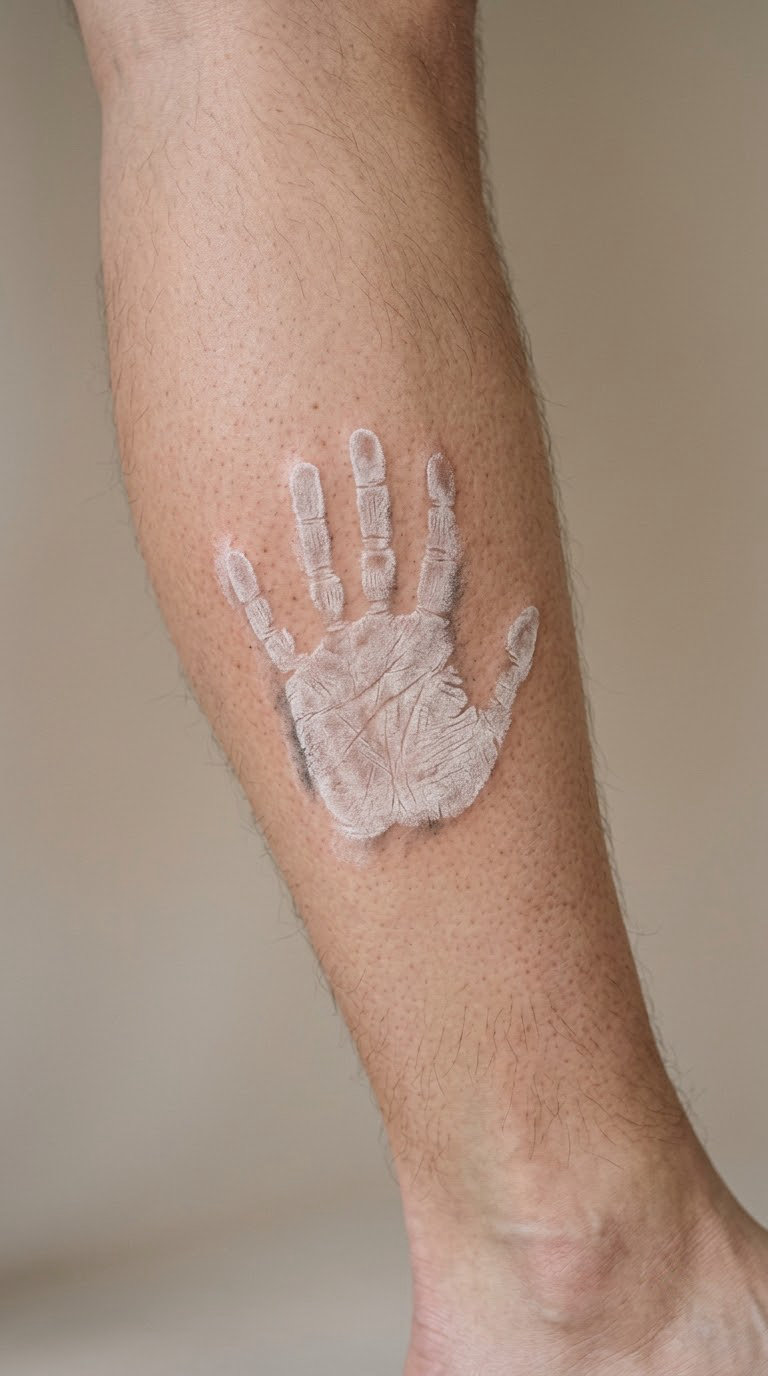
A handprint rendered as a soft palm shape with the edges dissolving into scattered dots, the way chalk transfers onto a hold. Fingers are suggested rather than outlined, so it reads as a print rather than a drawing.
It is the design for someone who climbs hard and does not want a technical piece explained. The fade at the edges does the work that a quote would otherwise have to do.
Placement: inner calf, or the hip. Size: 3 inches tall. Style: soft black and grey with a dotwork fade.
Pain: low, and the calf takes ink well. Ageing note: dotwork fades first, so ask for heavier dots than look right fresh.
Make it yours: use your actual climbing hand and have the artist space the fingers to match, then add a date under the wrist line.
19. Split View of Indoor Wall and Crag
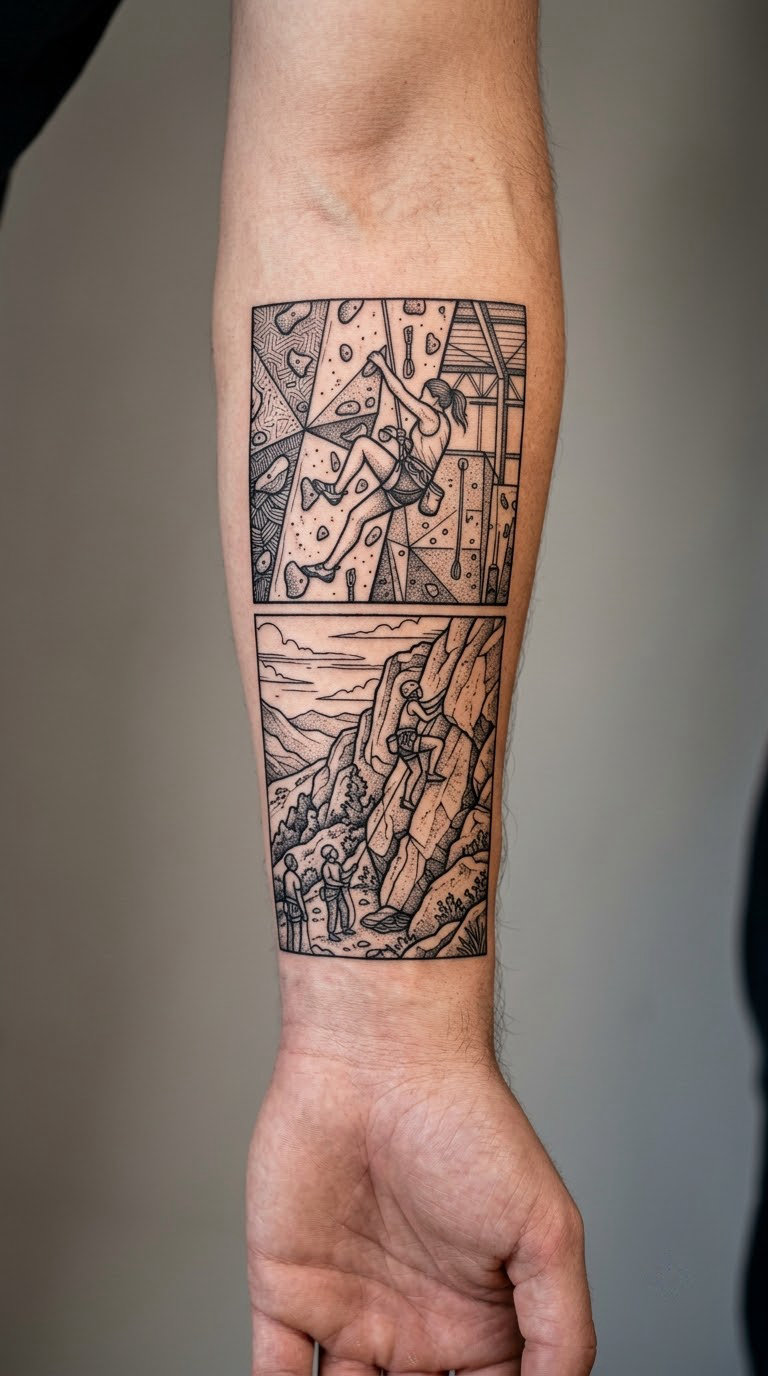
A forearm-length design split down the middle. On one side, a geometric climbing wall with holds on a grid. On the other, a rough outdoor face drawn in hard angular blackwork. The dividing line runs straight.
It splits the two halves of most climbing lives, the gym and the crag, into one piece. Gym climbers who get outdoors see themselves in it, and so do the reverse.
Placement: forearm, outer side, running across the muscle. Size: 4 inches wide. Style: blackwork, high contrast between the orderly wall and the broken rock.
Pain: low, with the forearm crease being the only awkward part. Ask to stop the dividing line short of the wrist if you sit at a desk all day.
Make it yours: draw the outdoor side from a photograph of your favourite crag and the wall side from the gym you actually train in.
20. Personalized First Ascent Coordinates
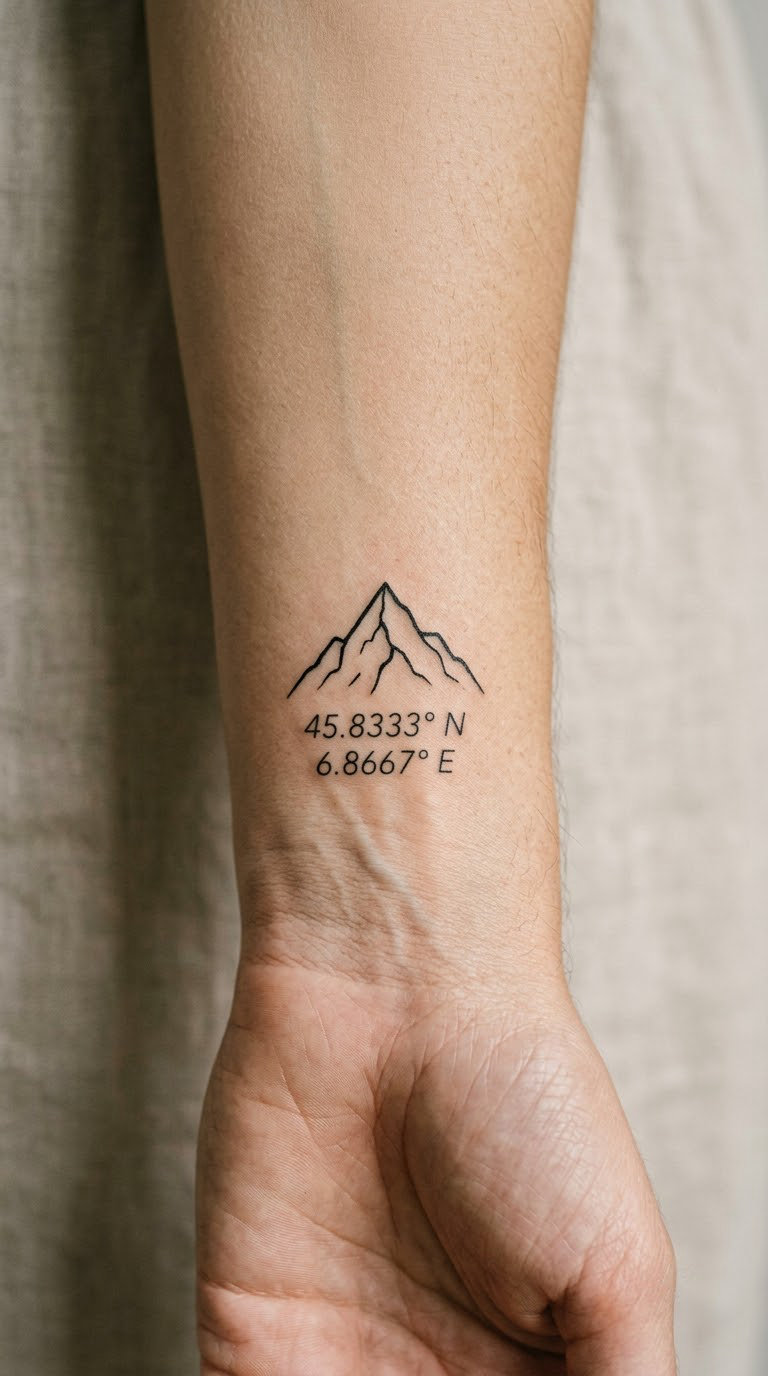
A small solid peak with a set of coordinate numerals underneath, set in a clean fine-line serif. Nothing else. It is a discreet piece that only reads properly to you.
Coordinates mark a specific point rather than a general idea, which is why this one keeps its meaning as the years pass. A first ascent, a pitch you fell off, a spot you always walk past.
Placement: inner wrist, or behind the arm near the elbow. Size: 2 inches wide. Style: minimal fine line, numerals slightly heavier than the peak.
Pain: medium on the inner wrist, where the skin is thin and the veins sit close. Ageing note: numerals are the first casualty, so check the size before you commit.
Make it yours: pull the coordinates from your own tracking app for the climb you care about, and use the grid reference rather than decimal degrees if you prefer a shorter line.
How to Choose the Right Design
Most climbing tattoos that age badly fail on one of five things. Check these before you book anything.
Can another climber read it?
Test the design against a stranger in the queue at the crag. If they see a mountain, you have a mountain tattoo. If they see hardware, rope, a topo or a tread pattern, you have a climbing tattoo. Generic reads as generic, and generic is the main regret people report in climbing communities.
Does the line work survive your placement?
Fine line on the inner forearm, wrist, hand and finger fades faster than the same line on the upper arm or calf. Sun, chalk and skin movement all speed it up. If you want thin lines, put them where your gear and your daylight do not both hit.
Will your gear destroy it?
Map the contact zones before you choose the spot: harness belt at the waist, shoulder pad area, rope across the hip, chalk bag on the lower back, and the inside of the forearm where your watch strap sits. Thick gear over a fresh line is where healing goes wrong.
Is the size honest?
Describe the design by its tallest or widest point, in inches, and tell the artist whether that measurement is skin-to-skin or edge to edge. Small detailed gear renderings are the most common ageing failure, because there is no spare line width to lose.
Does it mean something to you in twenty years?
Ask yourself whether the design points at a place, a person, a grade or a moment. Generic mountain art survives socially but fades personally. A specific reference, even one only you and a friend understand, keeps its weight longer.
Cost and Session Time
I will not quote you a number, because rates swing too much by city and artist to be useful. What I can do is explain what moves the number, so you can compare quotes sensibly.
Micro designs under roughly 1.5 inches are usually the shortest booking in the chair, sometimes 30 to 45 minutes. Small pieces up to about 2.5 inches typically take an hour to an hour and a half. Mid-size work in the 3 to 4 inch range runs two to three hours, and anything that size may need two sessions rather than one marathon sitting.
Full and half sleeves are always multi-session projects. Plan for a first session that lays out the flow, then several to complete it, with weeks between each so the piece settles before the next part is added.
Shop minimums matter more than hourly rates. Plenty of studios will not book a small design at all unless you commit to a larger piece, which is worth knowing before you walk in with a carabiner idea and a one-hour expectation.
Two more cost drivers worth asking about: line complexity and how much hand-drawn reference is needed. A topo, a cam rendering, or a specific hardware brand takes longer to draw than a mountain, and a good artist will price that in rather than rush it.
Aftercare Basics
- Follow your artist’s aftercare instructions first, whatever else you have read online.
- Wash gently with unscented soap and cool water, then pat dry with a clean towel rather than rubbing.
- Keep the area covered from direct sun, and remember that sun is the slowest and most permanent way a tattoo fades.
- Do not soak, swim, or steam the area while it is healing, and skip long hot showers on the first days.
- Leave the skin alone. Picking flakes is the fastest route to a patchy result, and it is the most common self-inflicted mistake.
- Skip strapping, harness pads and rope contact across the new work until your artist says it has healed enough. A few weeks of easy sessions beats a touch-up you paid for twice.
Frequently Asked Questions
What is the meaning of a climbing tattoo?
There is no single official meaning. Most climbers choose gear, a topo, a grade or a peak that points at a specific climb, a partner or a place. That specificity is what makes it read as a climbing tattoo rather than a generic mountain image. Ask yourself whether it names something real to you, because that is the part that still matters in twenty years.
Are small climbing tattoos likely to blur over time?
Small is fine. What fades is thin line, and how exposed the area is. Fine line on the inner forearm, wrist, hand or fingers softens fastest, and hands get sun and chalk constantly. On the upper arm or calf a 1.5 inch design can hold for decades. If you want it small, ask for slightly heavier lines and solid shapes rather than shading.
Where is the best placement for a carabiner or rope tattoo?
The inner forearm and the upper arm are the safest options. Both are relatively flat, both heal predictably, and neither sits under a harness belt or a shoulder pad. The inner wrist works but fades faster and is more painful. The lower back sits under a chalk bag, so avoid it for anything fine-lined. Check your gear contact zones before you commit.
Do climbing tattoos hurt more on the wrist or fingers?
Fingers hurt more. The skin is thin, the bone sits close, and the digit moves constantly while you are being tattooed, so the artist will be working in a shifting surface. The inner wrist is a medium, mostly a sharp pressure rather than a deep ache. Forearms, upper arms and calves are the easy placements. Most first-timer nerves calm down after a few minutes.
Can I personalize a climbing tattoo with a route or date?
Yes, and that is the strongest version of most of these designs. A route topo cropped to one section of rock, a grade with the date you sent it, or the coordinates of a first ascent all turn a common motif into a private reference. Bring a clean reference image or a topo file to the consultation, and let the artist adjust the linework for the size you are choosing.
What style works best for a first climbing tattoo?
Fine line or simple blackwork, honestly. A single carabiner outline, a mountain peak or a chalk bag needs one sitting, is easy to hide at work, and heals with fewer variables than a colour or a sleeve. It also gives you a realistic sense of how you handle a session, which is useful before you commit to anything larger. Keep it simple and let your artist do the drawing.
Conclusion
If this is your first tattoo, the minimal carabiner outline or a small chalk bag is the one to start with. One sitting, an easy placement, a design any climber reads correctly.
If you are already inked and building a climbing collection, the sleeve with gear icons is the piece to plan properly, ideally alongside forearm band tattoo designs that frame the arm rather than compete with it. Take your time with the design brief, and let the artist redraw the gear accurately. That accuracy is the difference between a climbing tattoo and a mountain with a rope next to it.
Whatever you choose, pick a placement your harness will not sit on, and give the piece a reason that is yours.
Updated for September 2026.