
22 Guitar Tattoo Ideas: Best Designs (October 2026)
A guitar tattoo usually means one specific thing to you, and the best 22 guitar tattoo ideas are the ones that make that meaning readable to other people. Most people get one for the same reason: music has been a real part of how they live, and they want it on their skin permanently.
What separates a good design from a forgettable one is recognition at arm’s length, honest sizing for the spot you picked, and one personal detail nobody else could copy. Below are 22 designs, each with placement, real inch sizes, a pain rating, and a way to make it yours.
22 Guitar Tattoo Ideas: Quick Guide
| Idea | Style | Best placement | Size | Pain |
|---|---|---|---|---|
| 1. Fine-line acoustic guitar | Fine line | Inner forearm | 3-4 in | Medium |
| 2. Vintage electric with pickup detail | Black and grey realism | Upper forearm | 5-6 in | Medium |
| 3. Guitar silhouette | Solid black silhouette | Behind the ear | 2 in | Medium |
| 4. Guitar with floral sound hole | Fine line and botanical | Forearm | 4-5 in | Medium |
| 5. Minimalist guitar pick | Minimal line | Wrist | 1-1.5 in | Medium-high |
| 6. Flying V in blackwork | Blackwork | Outer upper arm | 4-5 in | Medium |
| 7. Guitar and rose on collarbone | Fine line with colour accent | Collarbone | 3 in wide | Medium |
| 8. Micro-realism acoustic on the rib | Micro-realism | Rib, side of torso | 2-3 in | High |
| 9. Headstock with notes | Fine line detail | Wrist or inner arm | 3 in | Medium-high |
| 10. Watercolor guitar burst | Watercolour | Shoulder | 5-6 in | Medium |
| 11. Traditional rosewood acoustic | Traditional | Forearm | 4-5 in | Medium |
| 12. Guitar with breaking chain | Black and grey | Upper arm | 4-5 in | Medium |
| 13. Pick filled with mountain peaks | Fine line and dotwork | Forearm | 2-3 in | Medium |
| 14. Treble clef and guitar outline | Minimal line | Inner arm | 3-4 in | Medium |
| 15. Sunburst electric, neo-traditional | Neo-traditional colour | Chest | 6-8 in | High |
| 16. Guitar pedal and amp controls | Realistic black work | Forearm | 3 in | Medium |
| 17. Skeleton hand holding a neck | Blackwork | Forearm | 5-6 in | Medium-high |
| 18. Guitar with handwritten song title | Fine line and script | Forearm | 3-4 in | Medium |
| 19. Dotwork guitar with sound waves | Dotwork | Upper arm | 4-5 in | Medium |
| 20. Two interlocking guitars | Graphic line | Forearm | 5 in | Medium |
| 21. Pick and microphone split | Symmetrical fine line | Upper arm | 3-4 in | Medium |
| 22. Semi-realistic open sound hole | Black and grey realism | Outer arm | 4-5 in | Medium |
1. Fine-Line Acoustic Guitar on the Forearm
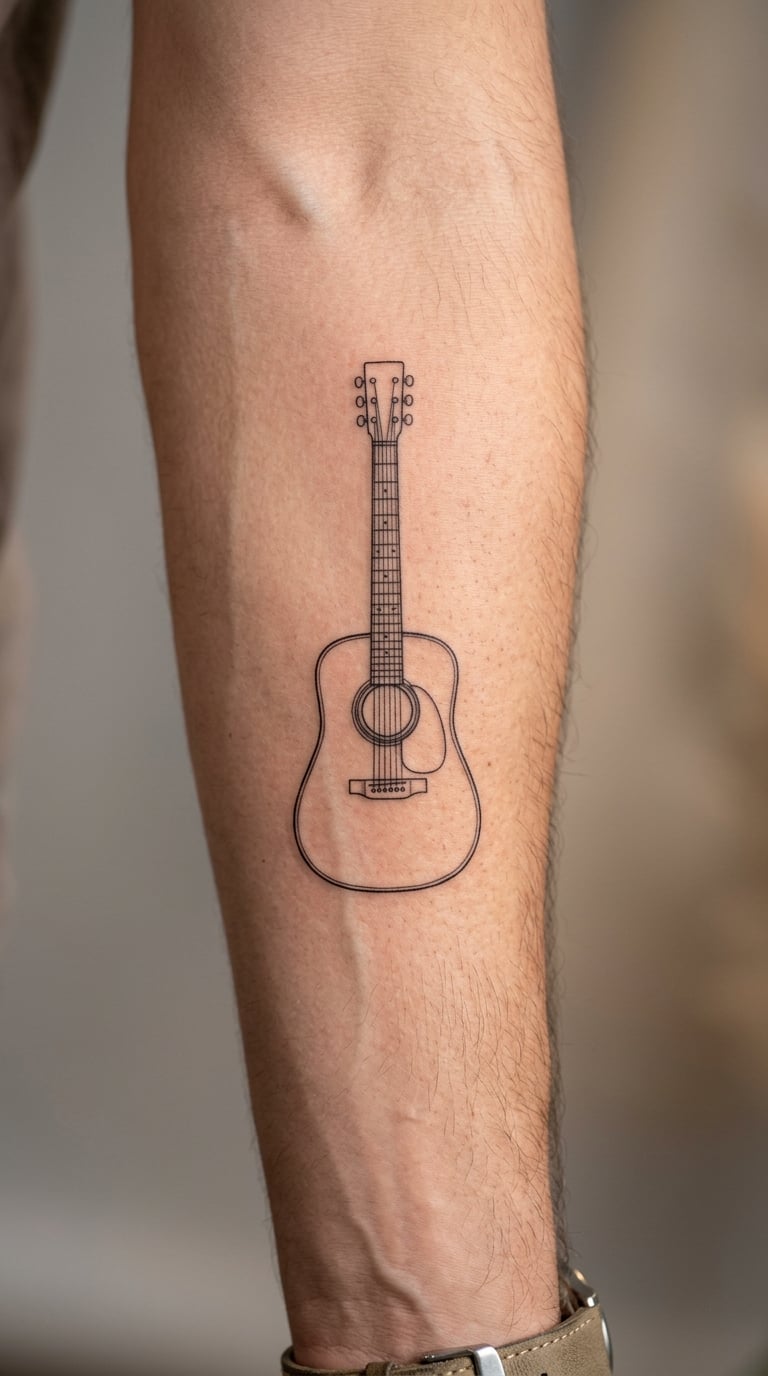
This is a single continuous outline of an acoustic body with a neck, a small circular sound hole, and six straight string lines. Nothing is filled, nothing is shaded, which is exactly the point: the whole design has to read at three inches, so there is nowhere to hide messy linework.
People usually choose this for a first guitar, a guitar they still play, or simply a quiet nod to music that does not need explaining. The mean thing about it is understated, which is why it wears well in an office and still gets noticed at a gig.
Placement: Inner forearm, running from wrist toward elbow. Size: 3-4 inches long, 1-1.5 inches wide. Style: Fine line. Pain: Medium, and the inner forearm stays tender longer than most spots. Ageing: Fine line blurs at the edges, so ask for a line weight one notch heavier than feels right. Make it yours: Have the artist copy the outline of your own instrument instead of a generic shape.
2. Vintage Electric Guitar with Pickup Detail
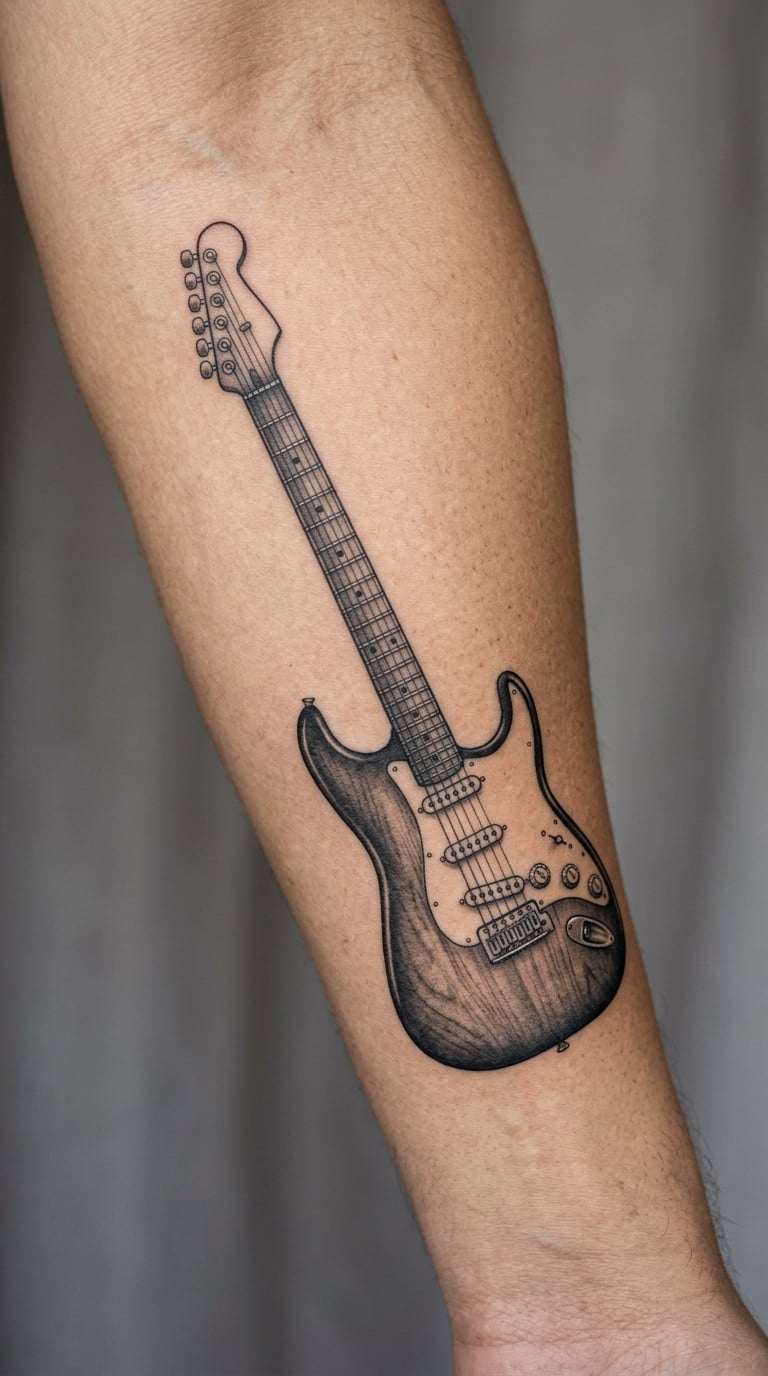
Realistic black-and-grey rendering of an electric guitar with visible pickups, bridge saddles, control knobs, six tuning pegs and a short length of cable curling away from the jack. Shading is kept to a mid grey wash so the hardware stays readable rather than turning into a grey smear.
This one is for players who want the instrument itself to be the subject, not a symbol standing in for it. The cable is usually the detail people mention, because it gives the composition movement and stops the guitar looking like a sticker.
Placement: Upper forearm or outer forearm, diagonal so it follows the arm’s line. Size: 5-6 inches. Style: Black and grey realism. Pain: Medium. Ageing: Grey shading holds well, but very fine hardware blurs if the design stays under 4 inches. Make it yours: Bring a photo of your actual guitar so the pickup layout and body curve are yours.
3. Guitar Silhouette Behind the Ear
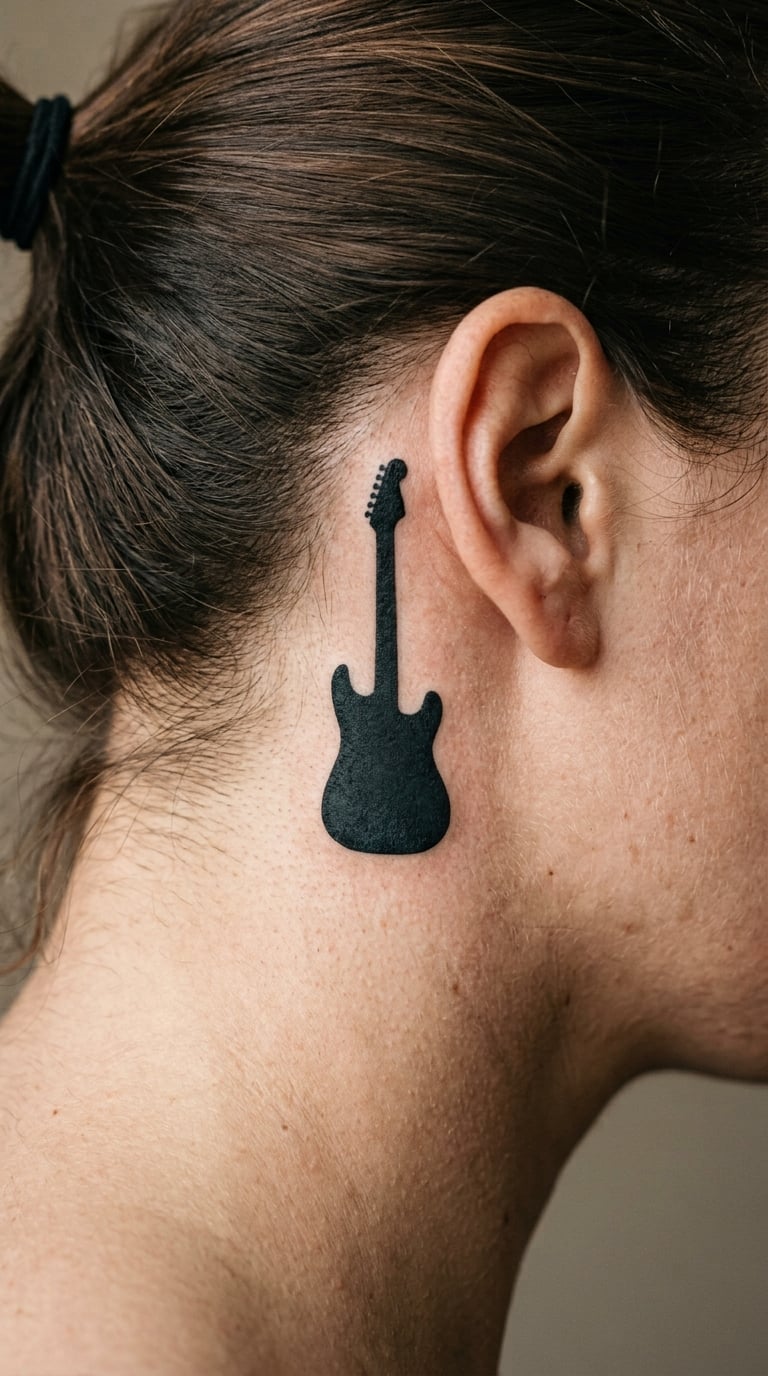
A flat black silhouette of an electric guitar, angled about thirty degrees, with no interior detail at all. The design works because the outline alone is unmistakable, and it sits in the small patch of skin behind and just below the ear where there is not much room to work.
It reads as discreet, which is the point for anyone who wants music on them without announcing it. Placement close to hair and behind the ear means it stays visible in most everyday settings without being the first thing in a room.
Placement: Behind the ear, tucked slightly under the earlobe. Size: 2 inches long, 1 inch tall. Style: Solid black silhouette. Pain: Medium, and the skin is thin and close to bone there. Ageing: Solid black fades to grey unevenly, so plan for a touch-up. Make it yours: Use a short-handled shape so the detail survives at 2 inches.
4. Guitar with Floral Sound Hole
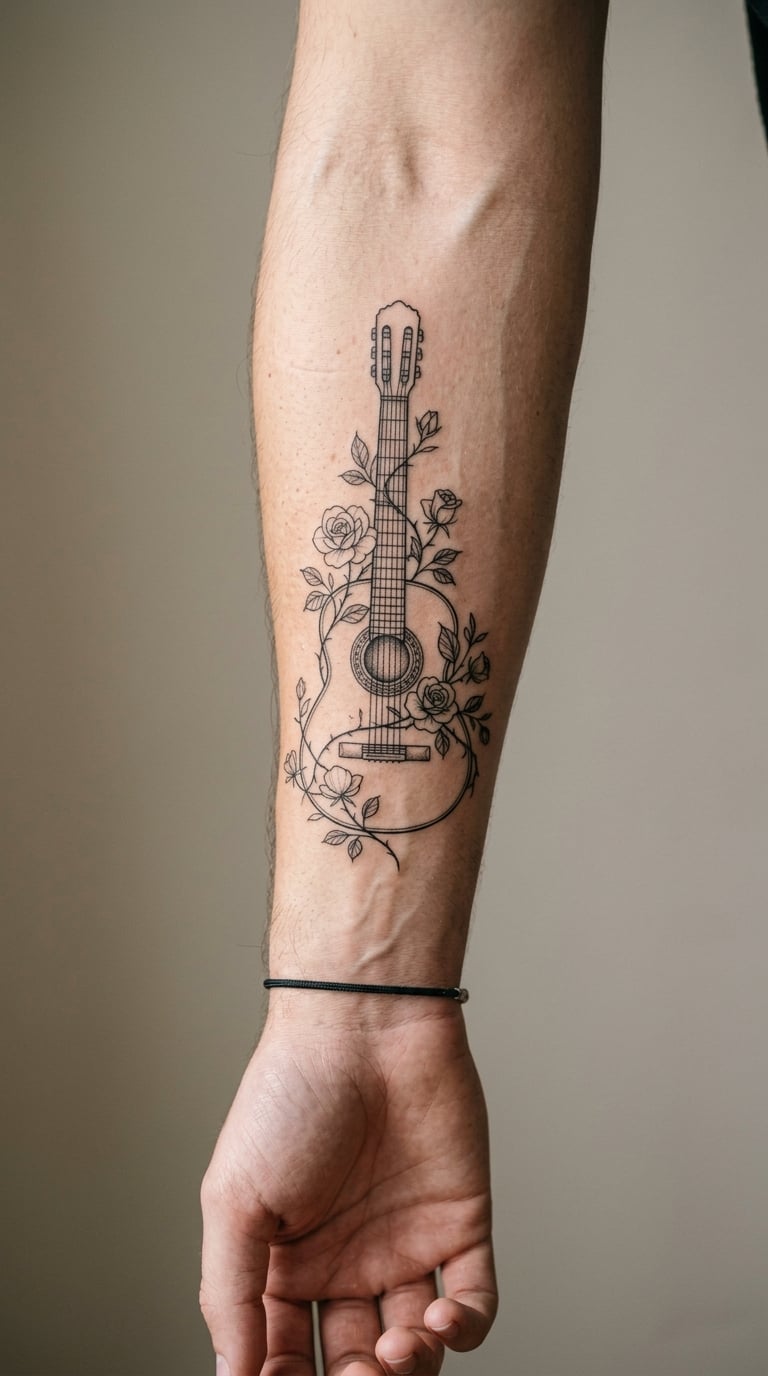
A classical guitar body in black linework with stems, small roses and leaves growing out of the sound hole and curling along the lower bout. The botany is kept fine and sparse so the composition stays balanced rather than turning into a flower bouquet with a guitar somewhere inside it.
Most people get this one as a second piece, pairing something floral with an instrument. It also works well as a matching design, with two people taking the same composition at different sizes.
Placement: Forearm, especially the flat inner side. Size: 4-5 inches. Style: Fine line with light botanical shading. Pain: Medium. Ageing: Hairline stem detail softens within a few years, so keep leaves at least a millimetre thick. Make it yours: Name the flowers you actually want, or use one species that means something to you.
5. Minimalist Guitar Pick Tattoo
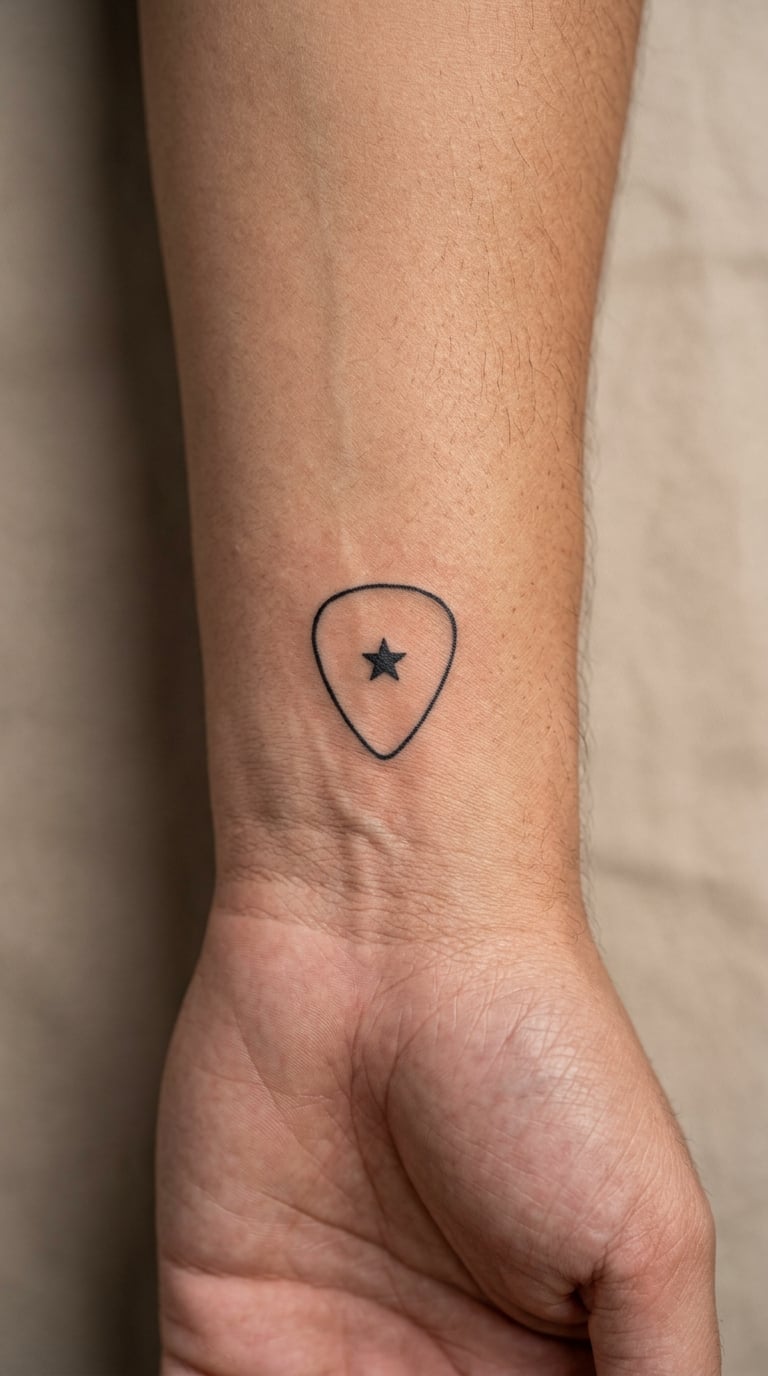
One guitar pick shape drawn in a single line, with a small mark in the centre, such as a star, a dot, or a single initial. Two or three strokes in total, and the whole thing is done in under an hour by most artists.
It is the easiest guitar tattoo to get as a first piece because there is almost nothing that can go wrong technically. People also use it when they play constantly and do not want something large on an arm they see every day.
Placement: Inner wrist, or the fleshy part below the thumb. Size: 1-1.5 inches. Style: Minimal line. Pain: Medium to high, and wrist tattoos are rough to sleep on for a few nights. Make it yours: Engrave your band, your initials, or the number of the fret you always start on.
6. Flying V Electric Guitar in Blackwork
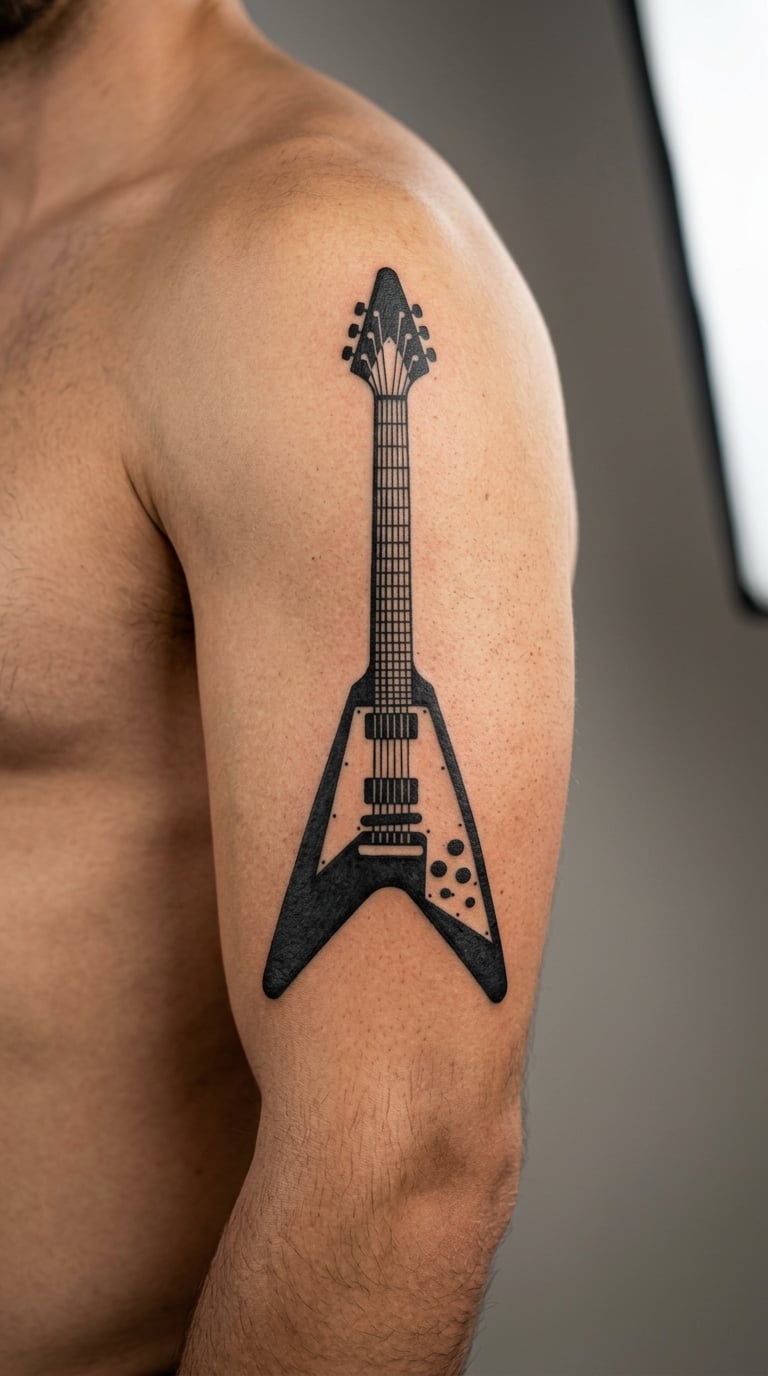
A solid blackwork flying V with the wings of the body filled in flat black and the strings left as sharp white negative-space lines cutting across it. The high contrast is what makes it read from across a room, and the angular shape suits a placement with straight lines nearby.
It is a loud, graphic design, and people tend to choose it when the music they play is loud too. The negative space is the difficult part, since a string line that closes up during healing loses the whole effect.
Placement: Outer upper arm or shoulder. Size: 4-5 inches. Style: Blackwork with negative space. Pain: Medium. Ageing: Solid black softens at the edges, while the cut-out strings stay sharp. Make it yours: Tilt the V slightly and add your amp or band name along the lower edge.
7. Guitar and Rose on the Collarbone
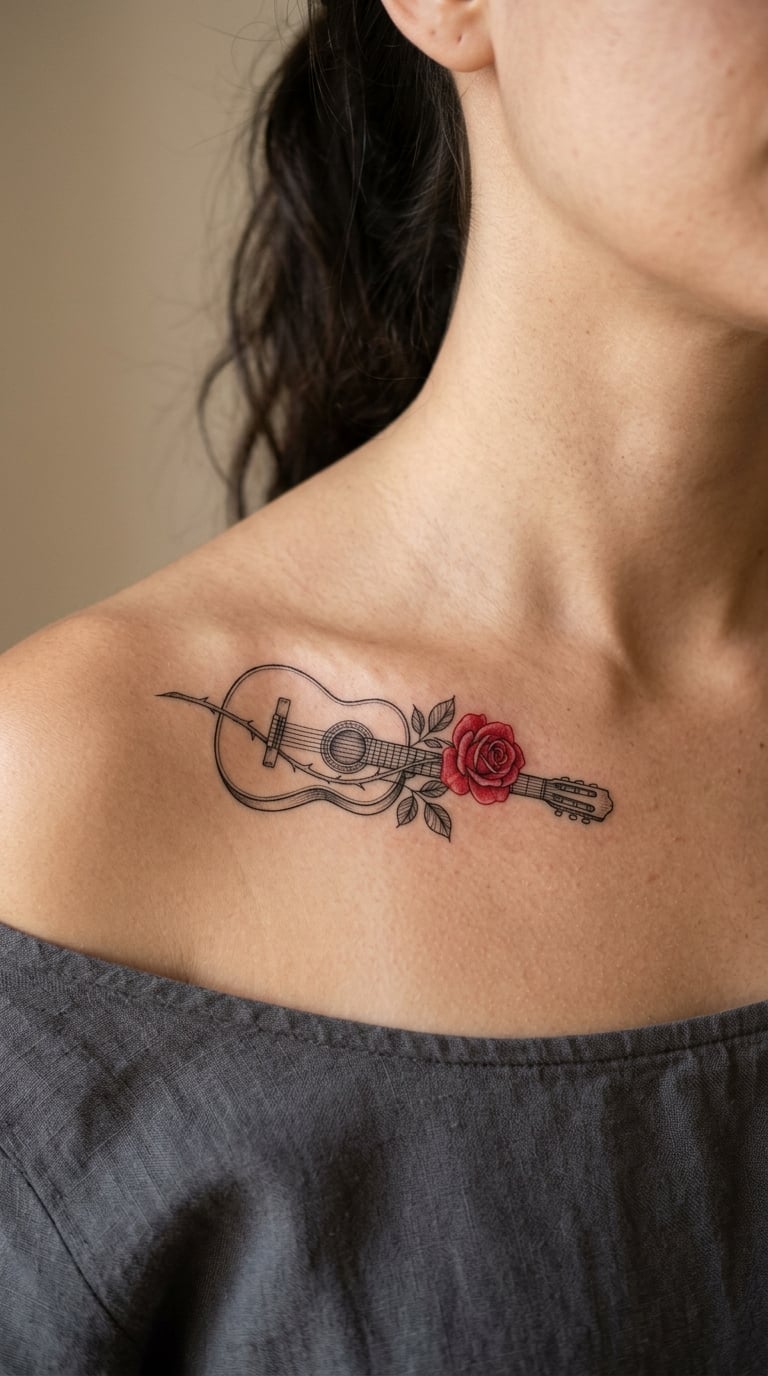
A small classical guitar in thin black line paired with a single rose, arranged so the flower sits below the body rather than through the sound hole. The two elements are balanced in weight so neither looks like it was added later to fill a gap.
It is a warm design rather than a rock one, and it works for people whose connection to music is more about songs and rooms than gear. The collarbone placement keeps it visible in a low neckline and coverable otherwise.
Placement: Along the collarbone, one element per side if you want symmetry. Size: 3 inches wide, 1.5 inches tall. Style: Fine line with one colour accent. Pain: Medium, and the collarbone area bruises visibly for a few days. Make it yours: Keep the rose red and the guitar black, or ask for the whole piece in one colour.
8. Micro-Realism Acoustic Guitar on the Rib
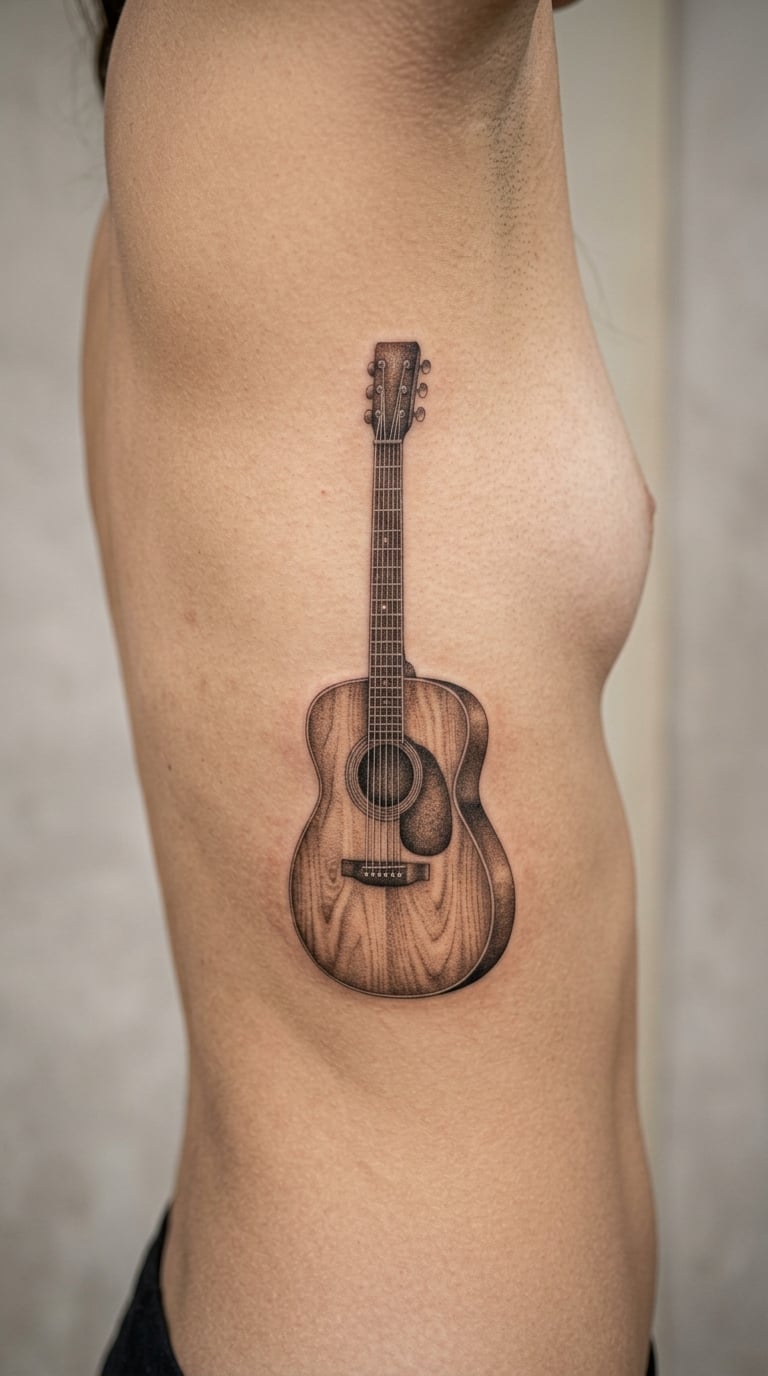
A tiny realistic acoustic guitar with wood grain running along the body, a dark sound hole, a proper bridge and six fine strings. At 2-3 inches the artist is essentially doing miniature painting, and the design only works if the shading is done in fewer layers than usual.
People choose it when they want detail nobody else can reproduce, often a replica of a specific instrument. A vertical rib placement uses a long flat surface, so the guitar can be longer than it is wide without looking stretched.
Placement: Side of the torso beside the rib, or along the inner thigh. Size: 2-3 inches. Style: Micro-realism. Pain: High, ribs and sides are sensitive and the session is long for the size. Ageing: Grain detail softens first, so keep the strings and sound hole as the crisp elements. Make it yours: Send a clear photo of your own guitar.
9. Guitar Headstock with Musical Notes
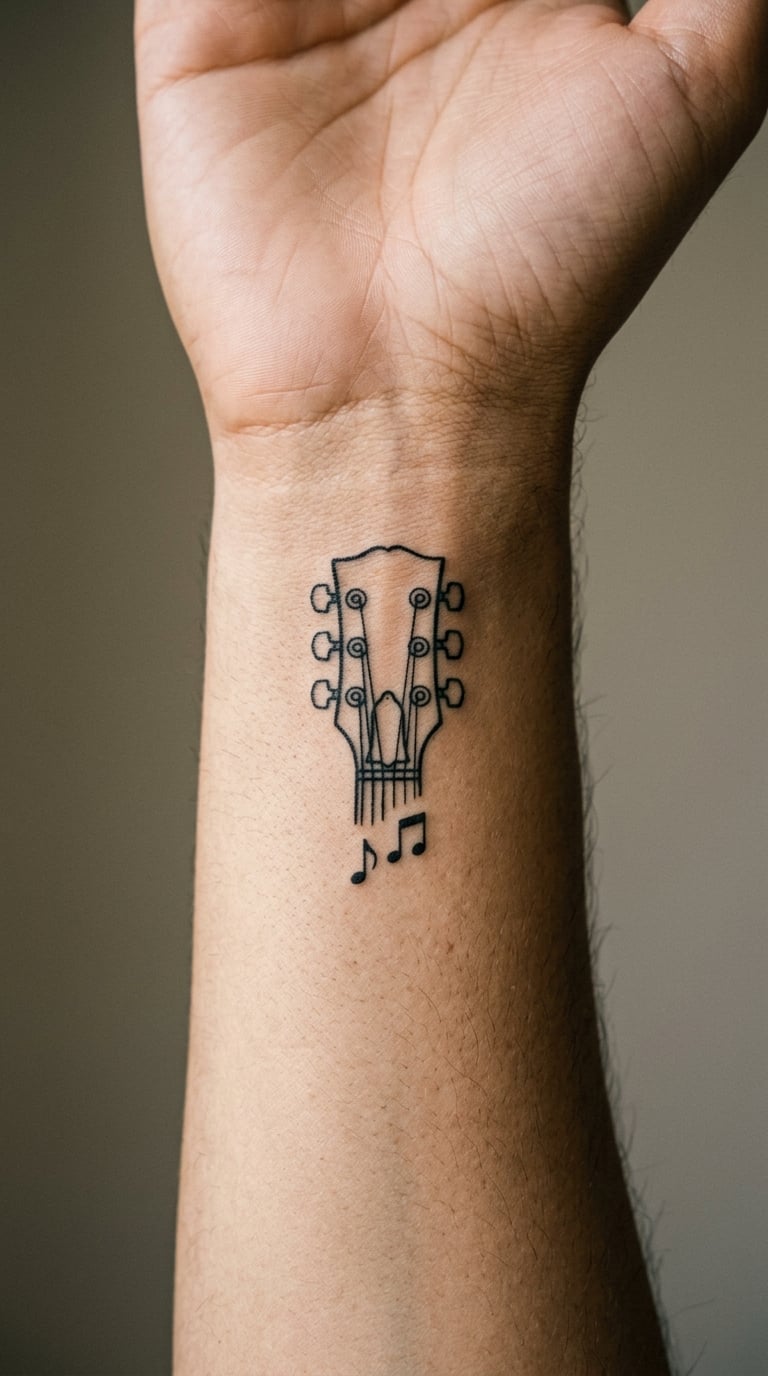
The headstock and nut of a guitar, drawn with all six tuning pegs in place, plus two or three small notes drifting off to one side. The headstock is the most recognisable part of a guitar, which makes it a strong choice when you want the design to read as music without drawing the whole instrument.
It is a common companion piece, usually matched with a treble clef or a pick elsewhere on the body. It also suits people who play keys or bass and want the guitar represented in a way that connects to the other instruments.
Placement: Inner wrist or inner arm. Size: 3 inches. Style: Fine line detail. Pain: Medium to high on the wrist, and pegs are all sharp corners. Ageing: Peg detail disappears first at small sizes, so ask for slightly heavier dots at the ends. Make it yours: Use your own headstock shape, which many brands share but yours will not.
10. Watercolor Guitar Burst
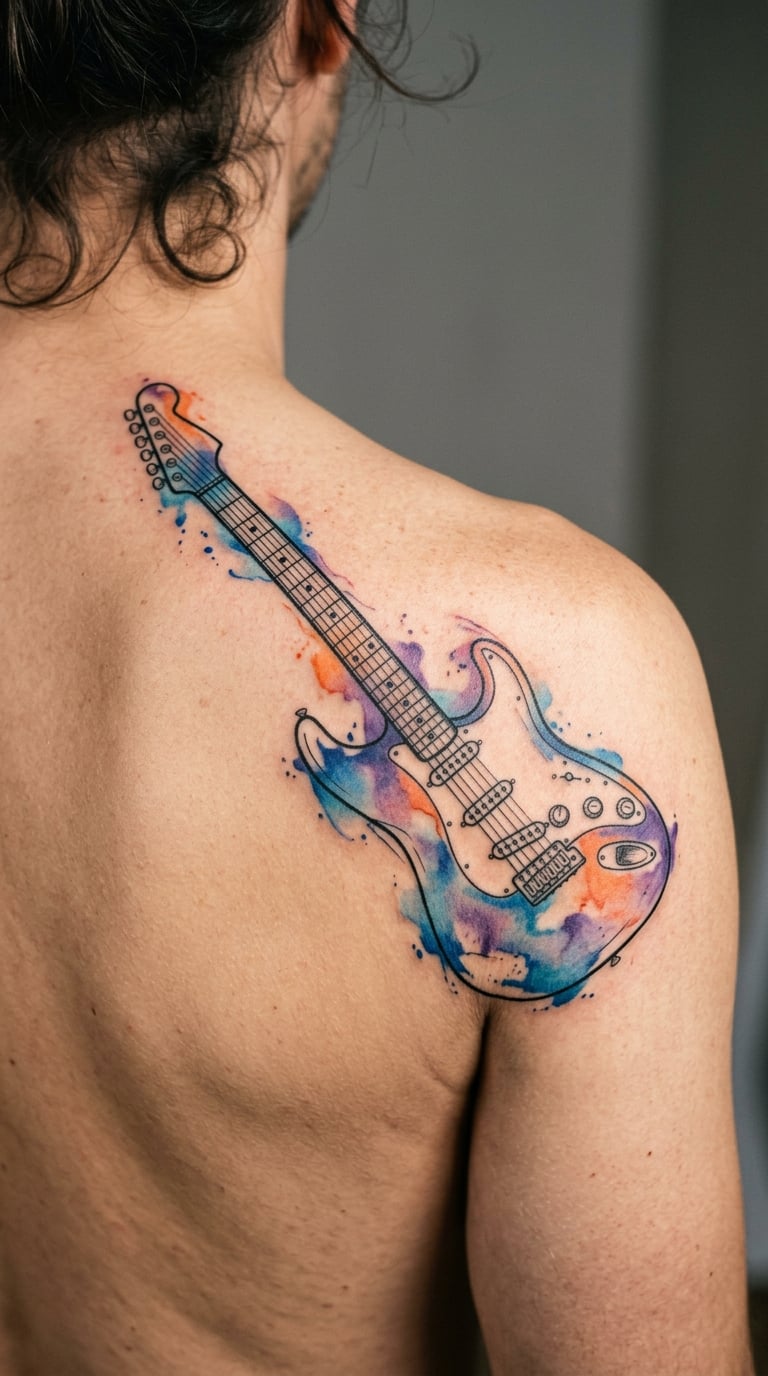
A solid black guitar shape at the centre with loose washes of blue, purple and orange bleeding out around it, edges soft and uneven like paint sitting on wet paper. Some artists add a few dry brush flicks at the edges so the colour looks like it moved rather than was filled in.
It suits people who want colour without committing to a fully rendered guitar, since the black silhouette keeps the subject readable while the wash carries the mood. The colour placement does most of the personalising here.
Placement: Shoulder, upper back or chest. Size: 5-6 inches including the wash, with the guitar itself around 3 inches. Style: Watercolour. Pain: Medium. Ageing: Pale washes lighten over the years, so deeper pigment holds better than a soft tint. Make it yours: Pick colours from a record sleeve or a stage photo.
11. Traditional Rosewood Acoustic Guitar
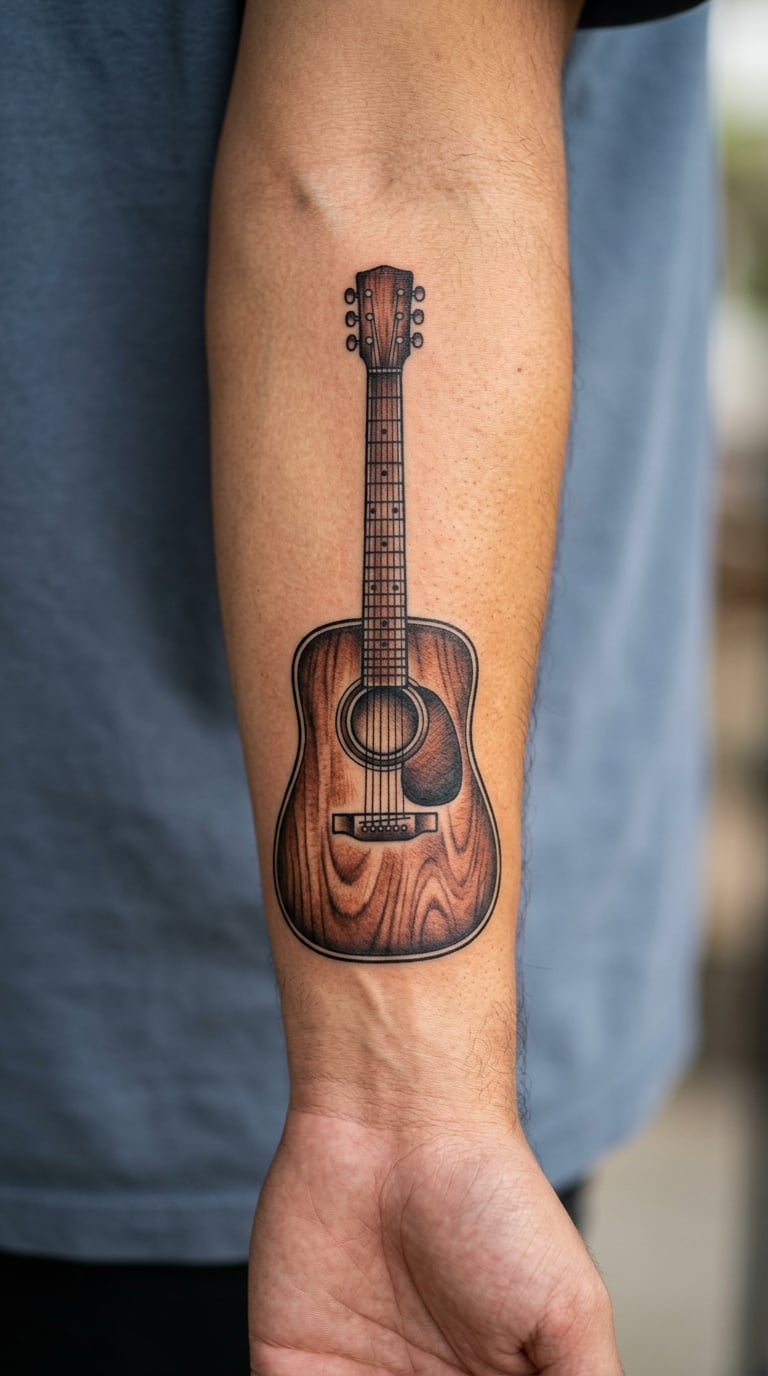
A warm brown acoustic body with heavy black outlines, thick dark shading along the lower bout and a highlight left on the top curve. The old-school look comes from strong contour lines and limited tonal range, not from photographic detail.
Traditional work ages interestingly because the shading is built from a small number of tones that stay distinguishable. People tend to pick this one for the craftsmanship rather than the meaning, and it takes a real traditional artist to do it properly.
Placement: Forearm, or calf for more space. Size: 4-5 inches. Style: Traditional. Pain: Medium. Ageing: Bold outlines hold for decades, while brown fills shift toward orange. Make it yours: Ask for your guitar’s natural wood tone rather than a generic red.
12. Guitar with a Breaking Chain
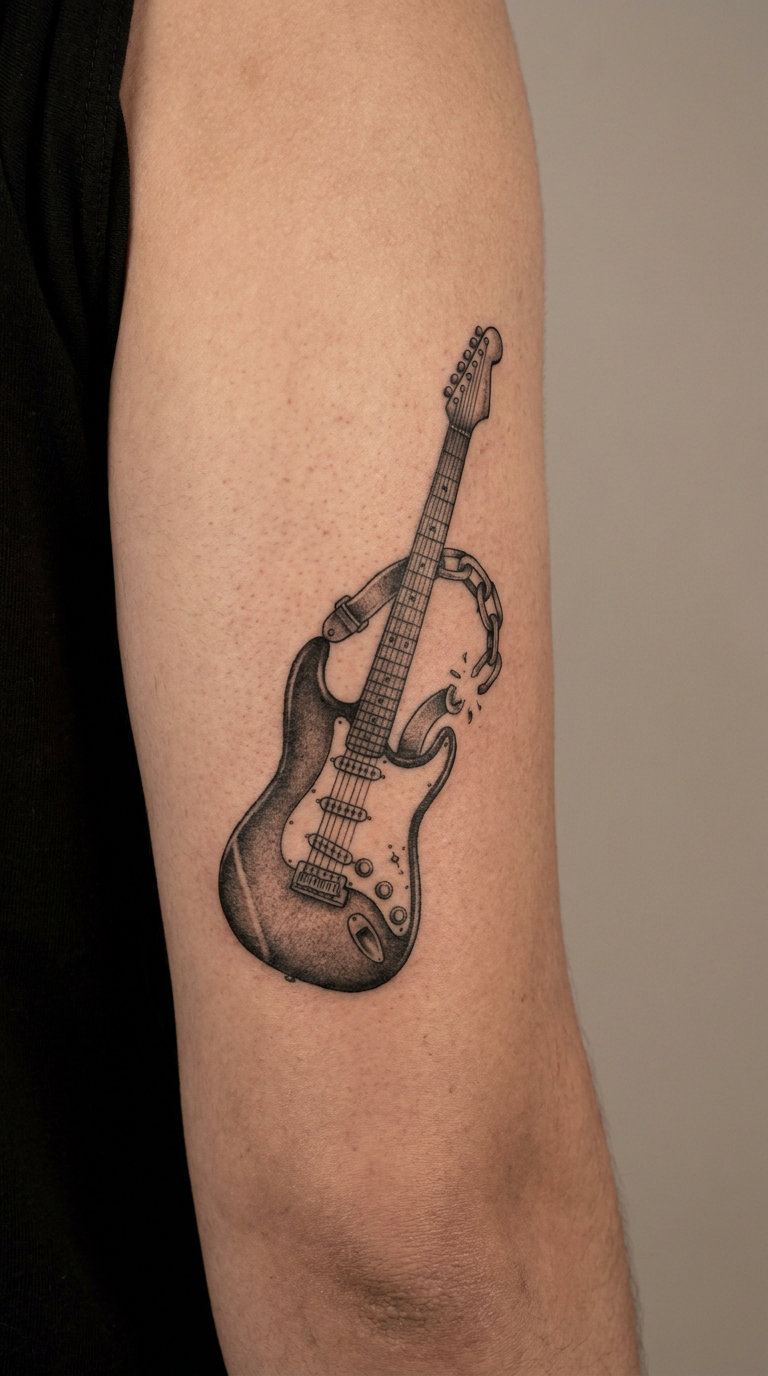
A black-and-grey electric guitar with a chain wrapped around the neck or body, one link pulled apart and falling away. The broken link gets the strongest contrast in the piece, usually solid black against a lighter grey guitar, so the eye lands there first.
People describe this one as breaking out of something, though what that is depends entirely on the person wearing it. As a design it works because the chain gives a solid geometric element to balance the curves of the body.
Placement: Outer upper arm, where there is room for the chain to trail. Size: 4-5 inches. Style: Black and grey. Pain: Medium. Ageing: Chain links stay crisp because they are closed shapes, which holds better than open linework. Make it yours: Make the falling link break toward your body rather than away from it.
13. Guitar Pick Filled With Mountain Peaks
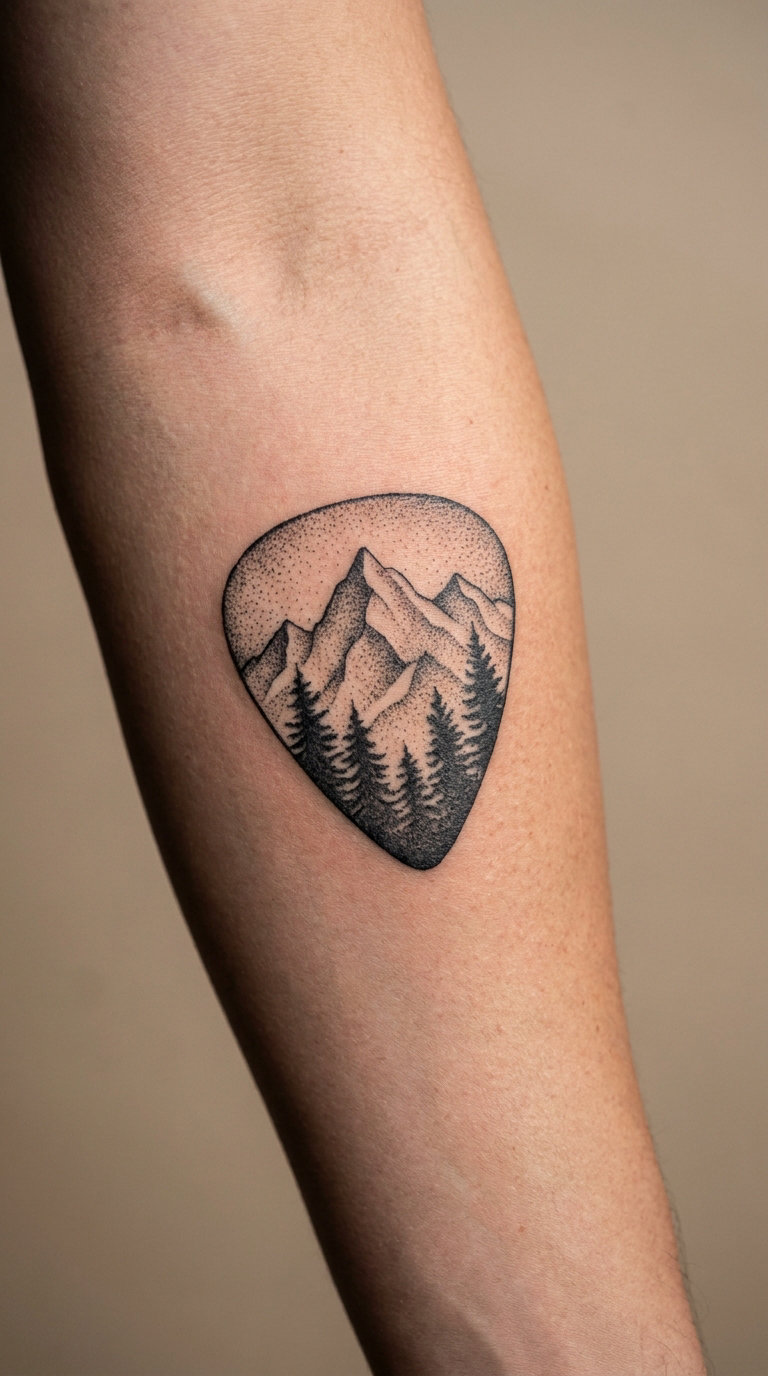
The outline of a guitar pick with a mountain range inside it, three or four peaks layered with a light wash, plus a couple of pine trees and dotwork filling the negative space. It is a landscape design inside a music symbol, and the contrast between the two is what makes it work.
It usually comes from people who split their identity between music and the outdoors. The pick shape keeps the music reference readable even if someone does not look closely at the peaks.
Placement: Forearm or upper arm. Size: 2-3 inches. Style: Fine line with dotwork. Pain: Medium. Ageing: Dotwork holds up well, but very fine ridge lines in the peaks blur, so give them weight. Make it yours: Use the ridgeline from a hike or a place that matters to you.
14. Minimal Treble Clef and Guitar Outline
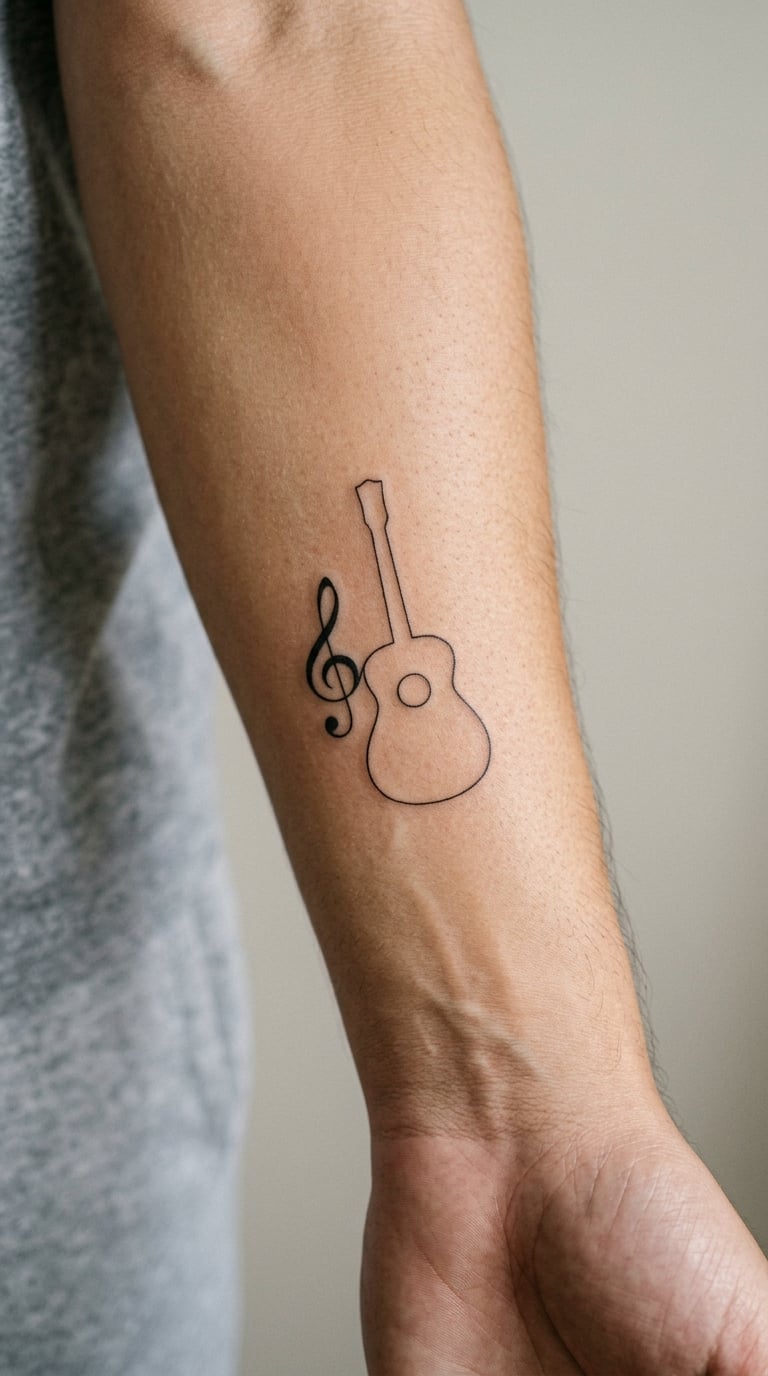
A treble clef, which is the G clef symbol, drawn in one continuous black line next to a guitar rendered as a single contour with no interior detail. Two symbols, equal weight, sitting side by side rather than overlapping.
The treble clef is the symbol for the higher register in written music, and pairing it with a guitar reads as musical literacy rather than a literal instrument. It works as a matching piece, with the clef on one wrist and the outline on the other.
Placement: Inner arm or forearm. Size: 3-4 inches. Style: Minimal line. Pain: Medium. Ageing: The clef’s inner curl is the first thing to close up, so it should be drawn at a healthy weight. Make it yours: Pair it with a bass clef on the other arm, drawn at exactly the same height and size for a matched set.
15. Sunburst Electric Guitar in Neo-Traditional Style
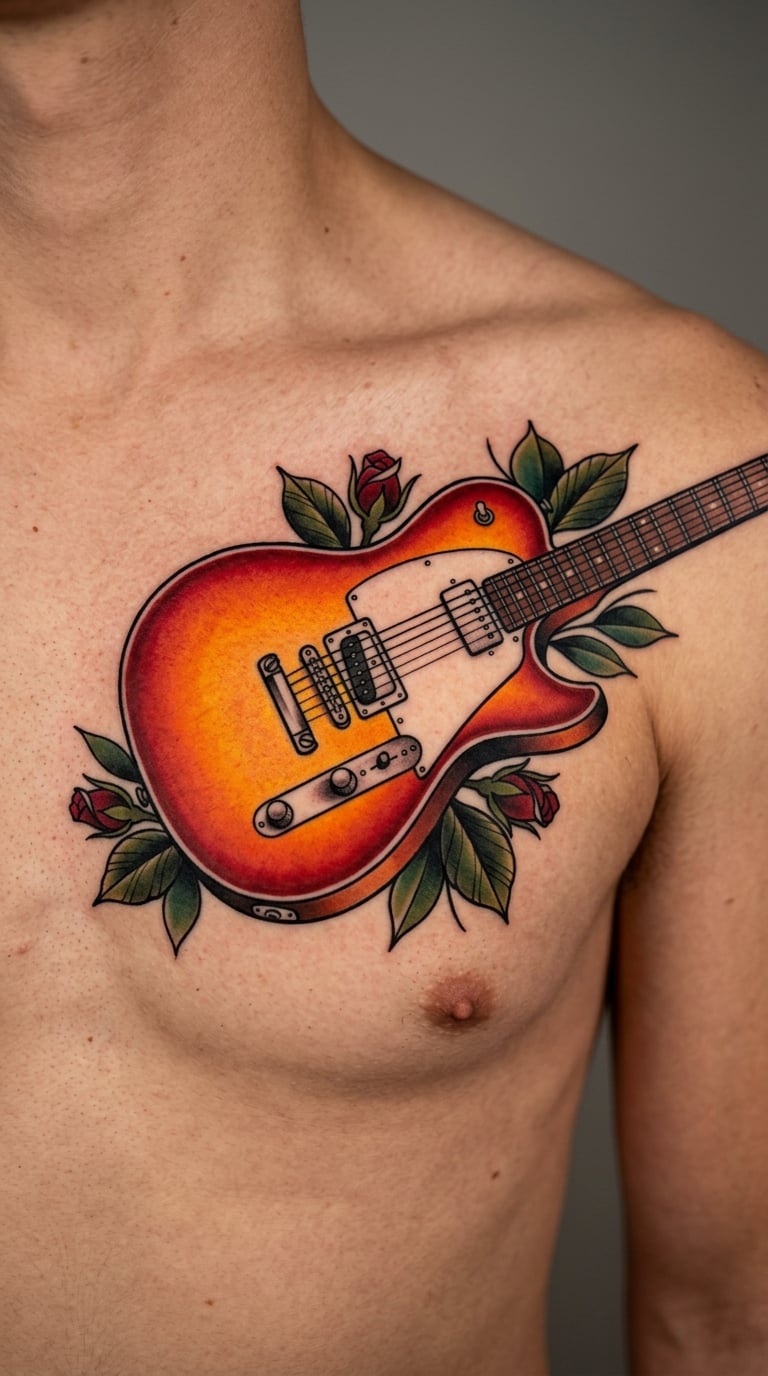
A guitar with a saturated sunburst running from deep red at the edge through orange to bright yellow at the centre, wrapped in bold black contours and a little bit of highlight work. It is a large, high-contrast design and it wants room.
Sunburst finishes are among the most recognisable looks in guitar culture, and a traditional artist can render the colour gradient with real skill. This is the one on the list most likely to need a second session.
Placement: Chest or upper back, both of which give a flat surface. Size: 6-8 inches. Style: Neo-traditional colour. Pain: High on the sternum, and a piece this size runs long. Make it yours: Ask for the colour fade to match your real instrument’s finish.
16. Guitar Pedal and Amp Controls
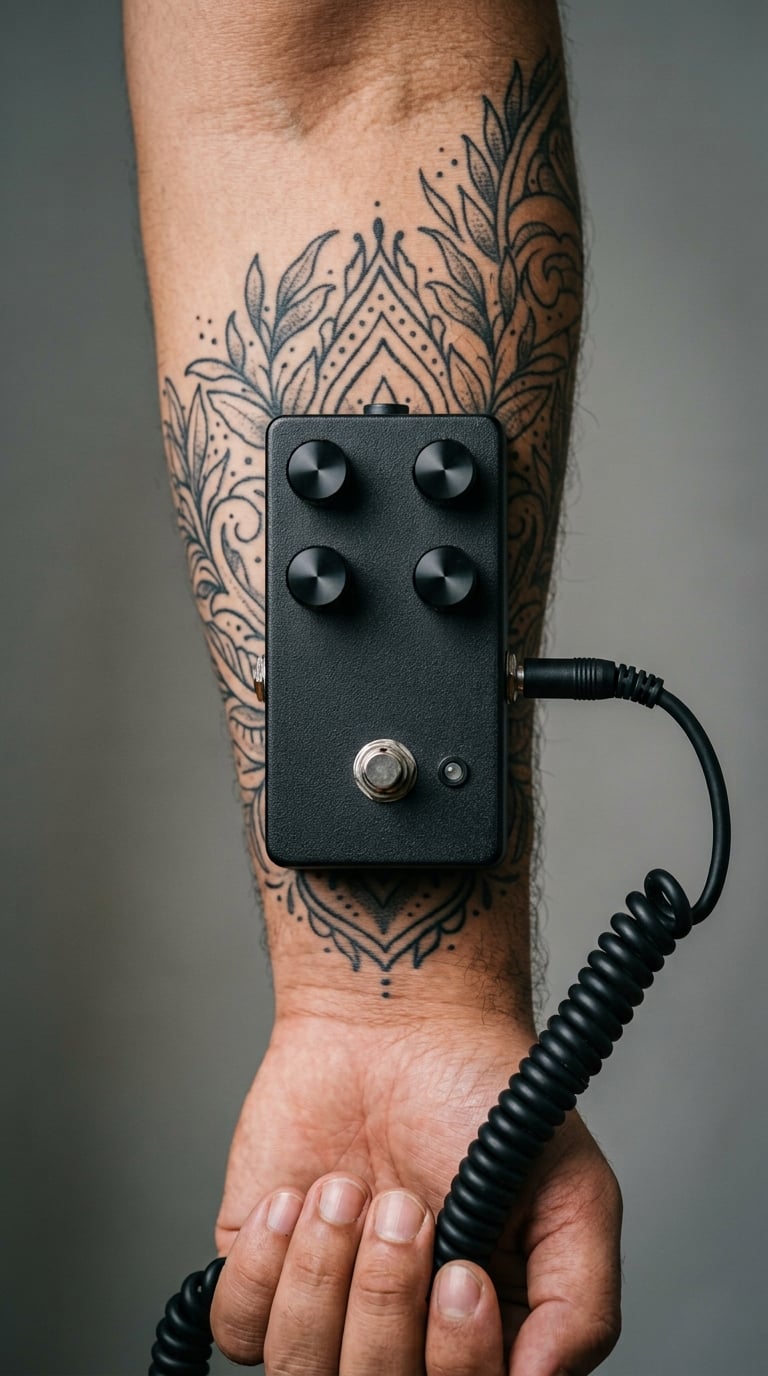
A stompbox pedal drawn straight on, with four knobs, a footswitch, indicator lights and a short cable running out of frame. Straight-on rather than angled, which makes it read as an object on a shelf instead of part of a scene.
This is the least obvious guitar tattoo on the list and it tends to attract conversation from people who play. It suits musicians more than listeners, since the details only register to anyone who has stood on stage with a pedalboard.
Placement: Forearm, upper arm or calf. Size: 3 inches. Style: Realistic black work. Pain: Medium. Ageing: Knob outlines and text are fragile at this size, so keep lettering minimal. Make it yours: Have the artist draw your actual pedal, including your settings if they are readable.
17. Skeleton Hand Holding a Guitar
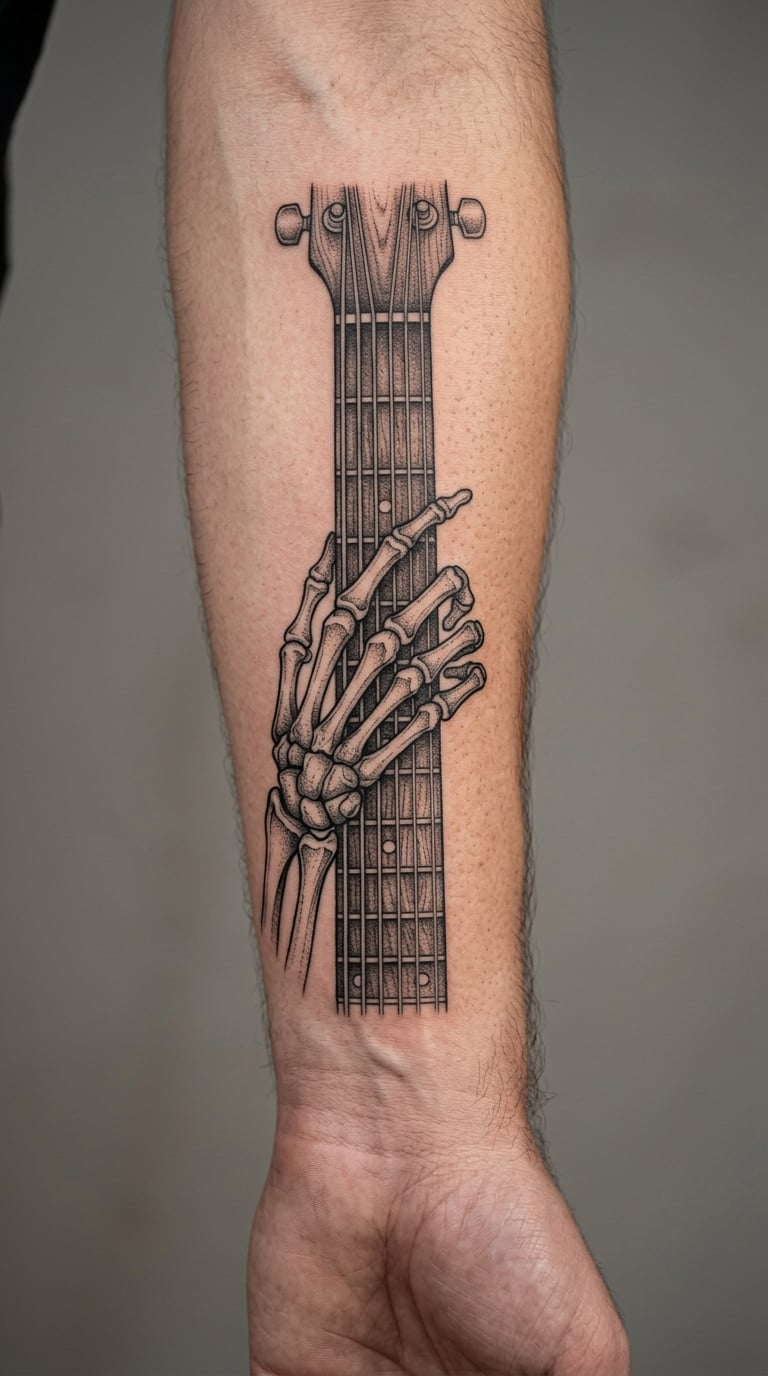
A skeleton hand in blackwork gripping a guitar neck, with the fingers wrapping around the frets and the thumb behind. Bone structure, tendon shading and the guitar neck all need real space, and the spacing between the fingers is what makes or breaks the piece.
It combines mortality imagery with music, which people read as a life lived through the instrument. It needs a real blackwork artist, since a beginner version looks like a fist with lines on it.
Placement: Forearm, with the hand at the elbow end and the neck running toward the wrist. Size: 5-6 inches. Style: Blackwork. Pain: Medium to high, and wrists are rough to sleep on after a piece this size. Make it yours: Have the frets be real frets, in the position your hand naturally forms.
18. Guitar with Handwritten Song Title
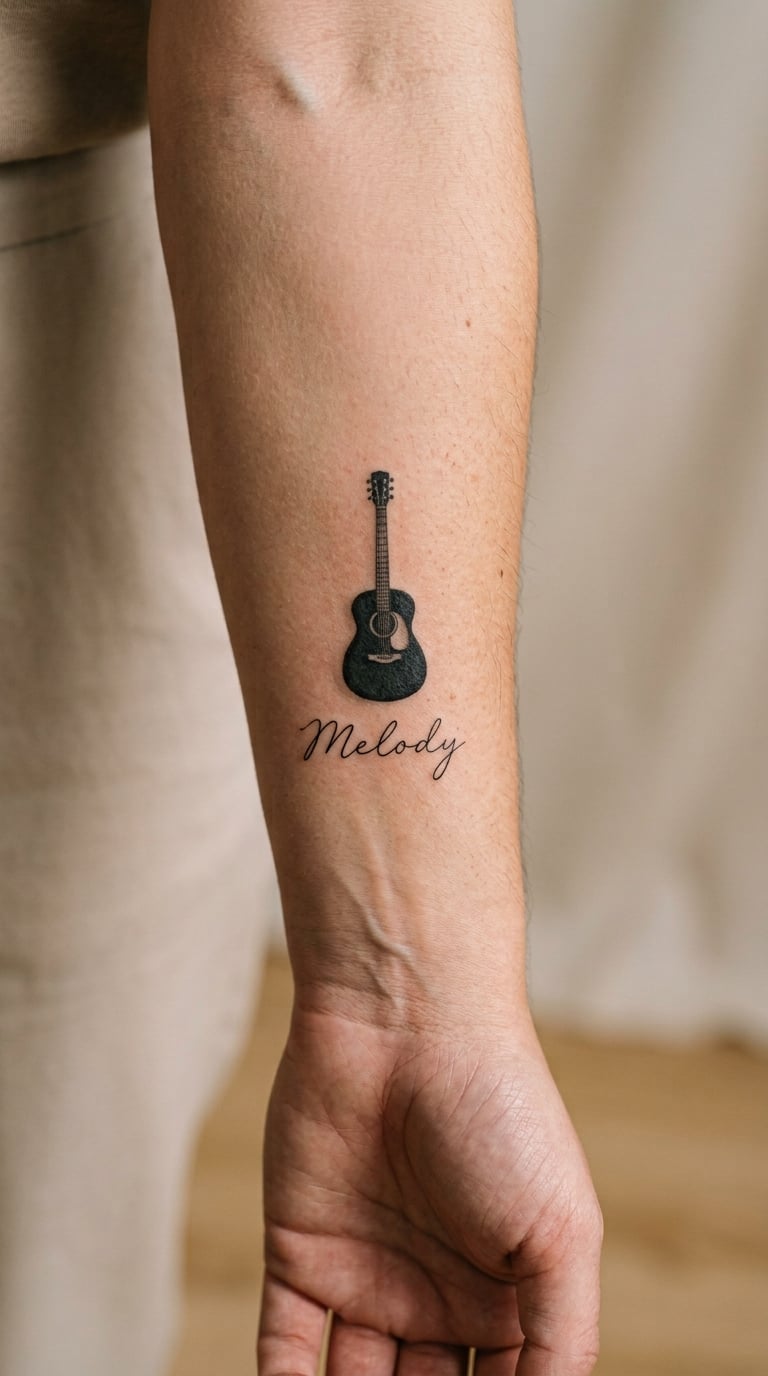
A small black acoustic guitar with a line of handwritten lettering beneath it, the words set in a light script that looks like it was written rather than typed. The guitar stays the dominant element and the text sits under it, smaller and lighter.
Song titles and lyric fragments are the most personal element you can add to a guitar tattoo, and this is the design where that matters most. Keep the text short, since small script is the first thing to blur.
Placement: Forearm or ribs, anywhere there is flat space. Size: 3-4 inches including the text. Style: Fine line with script. Pain: Medium. Ageing: Handwriting goes soft and hard to read within a few years, so larger letterforms and heavier strokes last longer. Make it yours: Write out the title in your own handwriting and hand it to the artist to trace.
19. Dotwork Guitar with Sound Waves
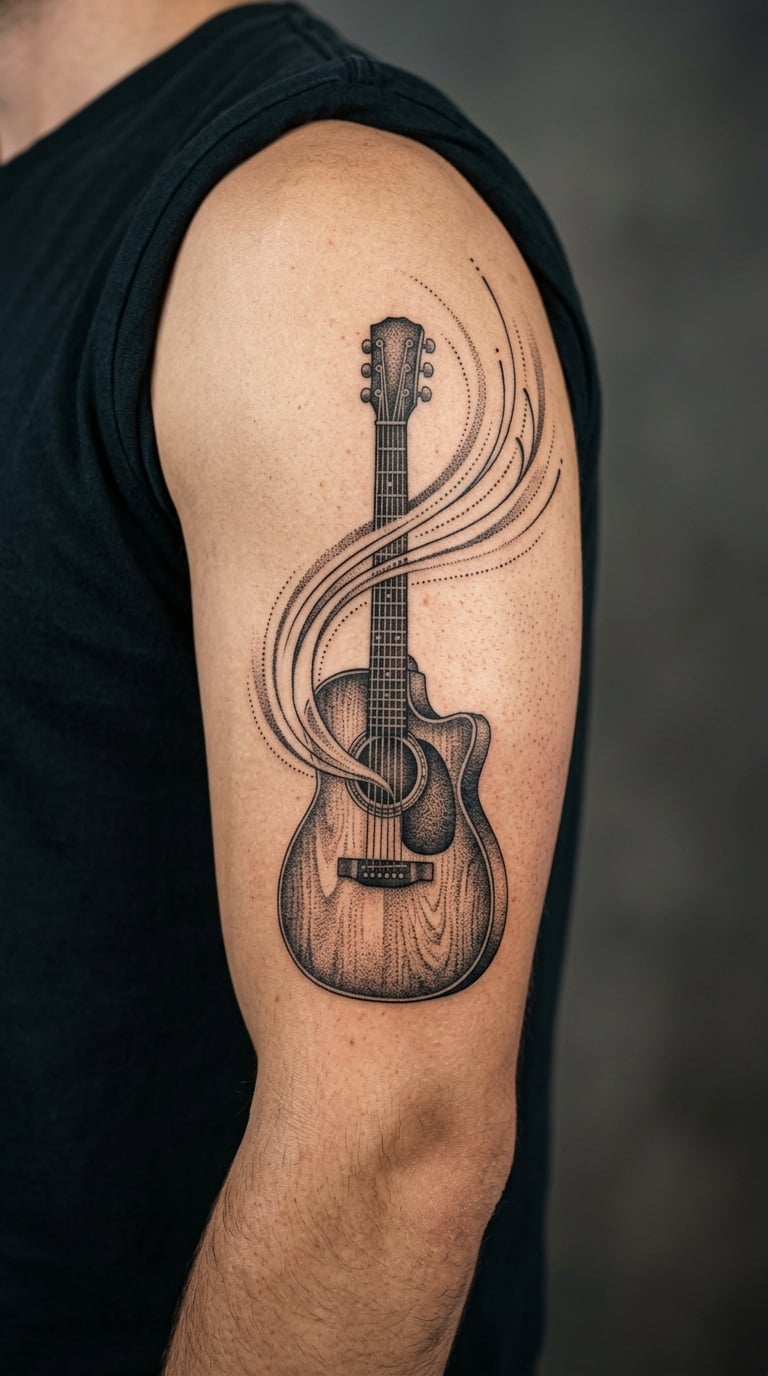
A guitar built entirely from dots, with the density of the shading changing across the body, and three or four curved sound waves flowing out from the sound hole. Dotwork is one of the most forgiving styles for ageing because there is no thin line to lose.
It reads as textured rather than detailed, which makes it a good match for an arm that is already partly covered in similar work. The waves give it movement without adding an extra object to the composition.
Placement: Upper arm, shoulder or calf. Size: 4-5 inches. Style: Dotwork. Pain: Medium. Ageing: Dots spread slightly and blur into each other, so ask for spacing between them. Make it yours: Vary the wave spacing to suggest something like a waveform from a track you play.
20. Two Interlocking Guitars
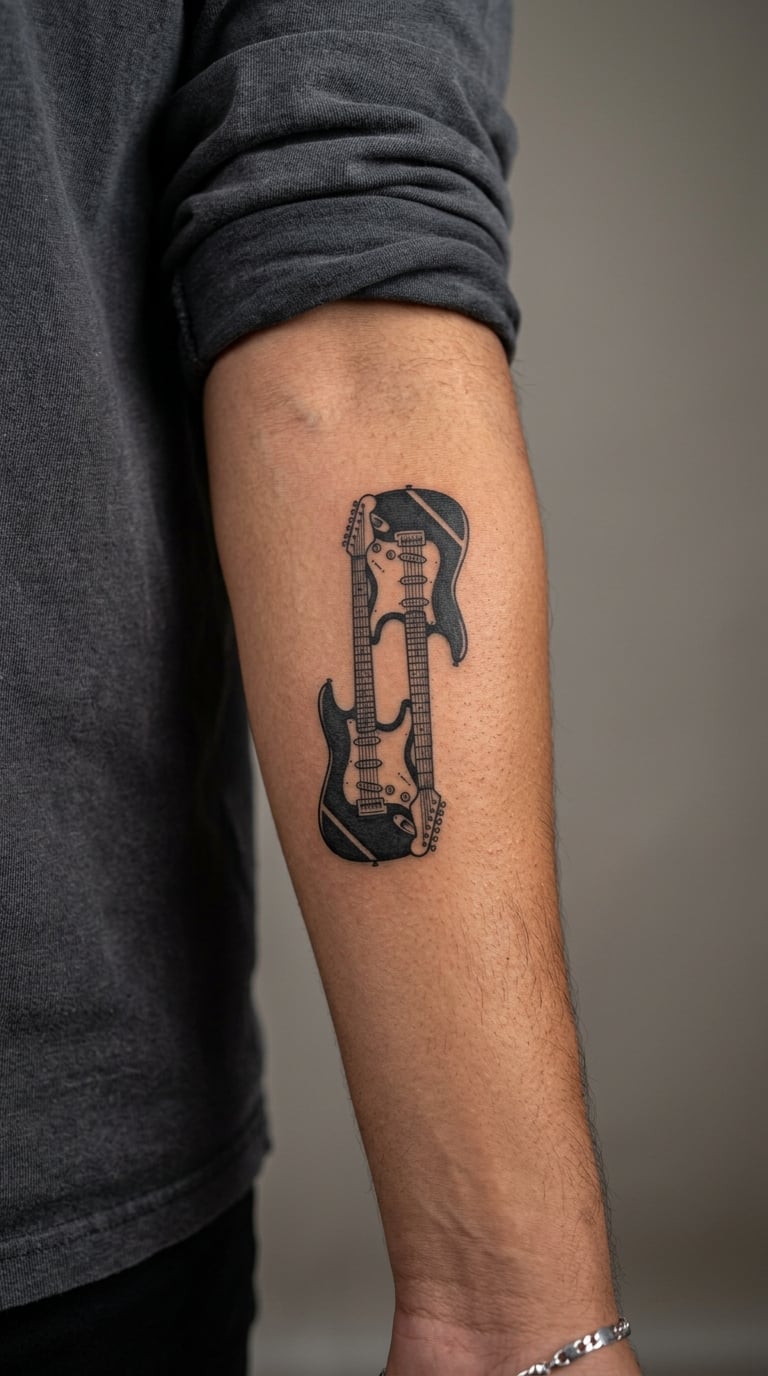
Two electric guitars drawn as mirrored silhouettes, necks crossing and bodies overlapping so the shapes lock together into a single symmetrical composition. Contrast comes from the shapes themselves, one typically angled differently from the other.
It is the design people pick for connection, a band, a pairing, or a duo. Bands in particular often take the same composition at matching sizes on matching arms.
Placement: Forearm or across the chest. Size: 5 inches. Style: Graphic line. Pain: Medium. Ageing: The overlap is where fading shows first, so ask for a hard edge where the two bodies cross. Make it yours: Use two different body shapes, one from each player’s instrument.
21. Guitar Pick and Microphone Split Design
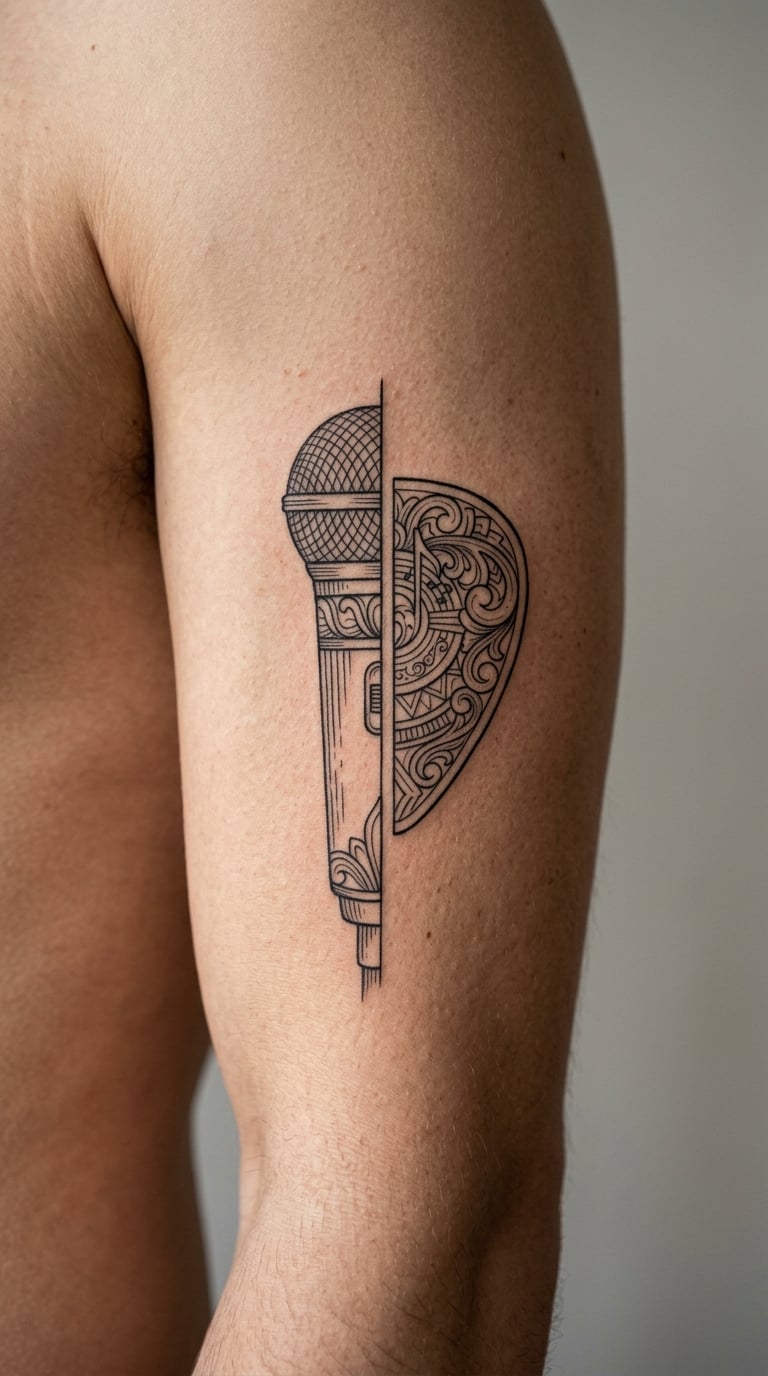
A fine-line composition split down the middle, with half a guitar pick on one side and half a vintage ribbon microphone on the other, meeting along a single clean vertical line. Symmetry keeps the two halves from feeling like two separate tattoos stuck together.
It works for people who cover both sides of a stage, playing and singing, or for stage crew and sound people who want both halves represented. It is also a good composition for a matching pair with the two elements swapped.
Placement: Upper arm, chest or ribs. Size: 3-4 inches. Style: Symmetrical fine line. Pain: Medium. Ageing: Fine grille lines on the microphone are delicate, so ask for a simplified grille at this size. Make it yours: Use a microphone shape from a venue you have played.
22. Black-and-Grey Guitar with Open Sound Hole
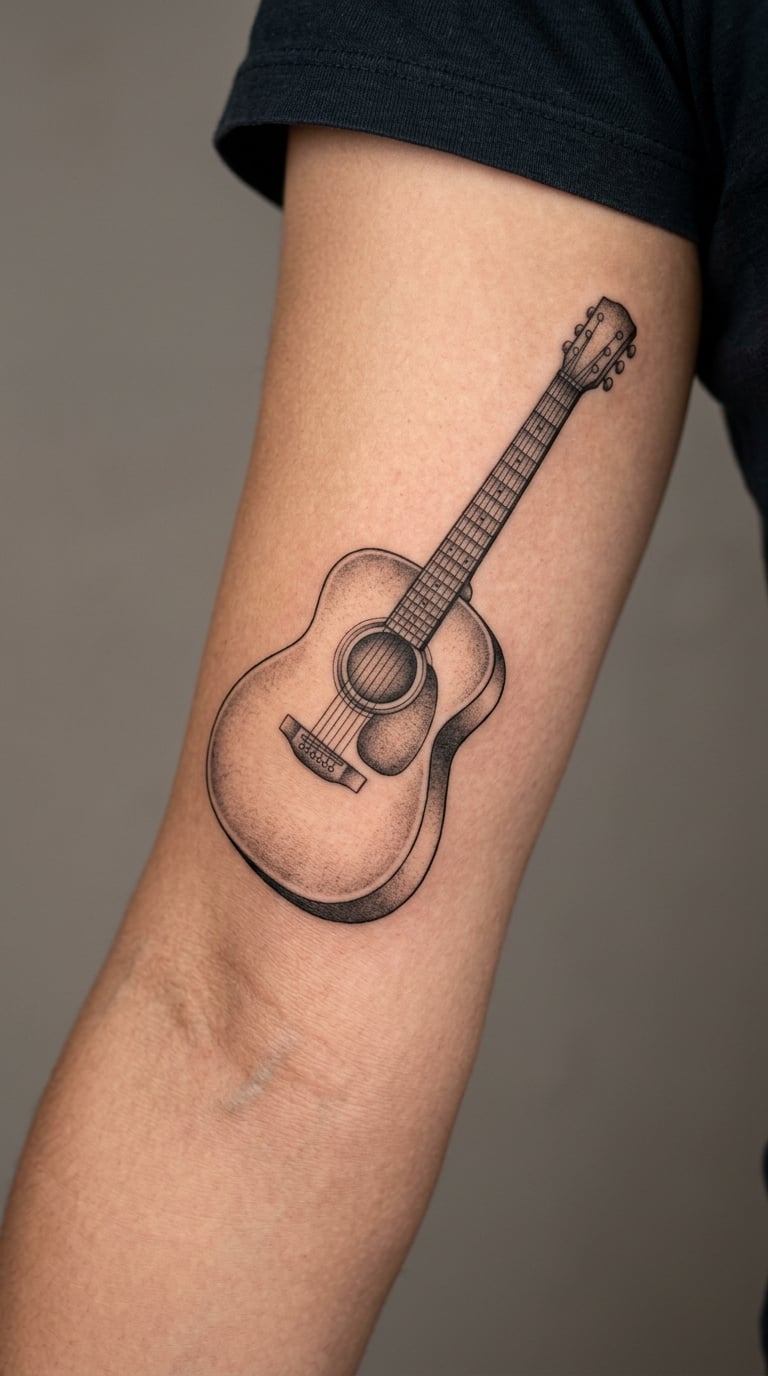
A semi-realistic acoustic guitar shaded in black and grey with a dark, open sound hole at its centre, light rim highlight on the upper bout and controlled grey across the lower curve. It is the most balanced design on the list, recognisable and not overworked.
It is a good last design to look at if the ones above feel too specific, because the shading carries it without needing added symbols. Solid black in the sound hole gives the strongest contrast in the composition, so it stays readable from a distance.
Placement: Outer arm or upper back, diagonal. Size: 4-5 inches. Style: Black and grey realism. Pain: Medium. Ageing: Grey gradients even out over time, which suits this design well. Make it yours: Have the rosette pattern around the sound hole copied from your own instrument.
What Makes a Great Guitar Tattoo Design (Quick Criteria for 22 Guitar Tattoo Ideas)
It reads at a glance. Stand three paces back and squint. If you cannot tell it is a guitar, the artist needs more contrast, more size, or fewer elements competing inside the outline.
The detail fits the size. Six strings, a rosette and a bridge in a 2-inch design is asking for a blur. This is the most common regret pattern in the forums: an over-detailed small piece that turns into grey cross-hatching. Ask your artist to tell you honestly what will hold at the size you want, because most will.
It has one personal anchor. A single line of lettering, one colour from a real instrument, or a shape copied from your own guitar is enough. Add notes, banners and flames on top of that and the composition goes unreadable at any size.
The orientation suits the body. On a forearm, run it lengthwise along the arm. Across a flat chest or back, either works. Behind the ear, a short-handled guitar is the only realistic option.
How to Choose the Right Design
Start with honesty about the spot, not the image. A 6-inch sunburst across the forearm is not a small commitment, and if you are still unsure, every design on this list works smaller than its listed size with a small loss of detail.
- Minimalist or fine line (ideas 1, 4, 5, 9, 14, 18, 21): smallest pain, fastest sessions, easiest to hide under a long sleeve. The trade is fading, so go heavier on line weight than you think you need.
- Realistic black and grey (ideas 2, 12, 16, 22): holds shading well and looks the same in a decade. Needs 4 inches or more to avoid turning muddy.
- Blackwork (ideas 6, 17): highest contrast, most visible from across a room. Edges soften over time and want a touch-up eventually.
- Traditional and neo-traditional (ideas 11, 15): bold outlines and colour, the longest-lasting outlines on this list. Bigger session counts, and the sternum placement on 15 is genuinely uncomfortable.
- Watercolour and dotwork (ideas 10, 13, 19): forgiving styles that age gracefully. Pale colour fades faster than deep pigment, so expect the wash to lighten.
Think about additions too. One guitar tattoo plus two or three related pieces reads as a deliberate theme, because a set of small designs follows the body’s lines. Six unrelated ones reads as a collection of separate decisions, and the same guitarist can end up with both without planning to.
On lettering, the thing to avoid is thin script at a small size. It is the first style to blur and it is very hard to cover later, so pick larger letterforms, a heavier weight, or no text at all. As for famous brand guitars and band logos, there is a real risk with recognizable instruments and band names, and a lot of people end up with fan art rather than personal art. Copying the shape of your own instrument gets you the same recognition with none of that.
Lastly, judge the artist on healed work at six months, not fresh photos from the shop’s Instagram. If you have seen a healed piece of theirs at arm’s length, you know what the fine line will look like in five years.
Cost and Session Time
Tattoo pricing in the US varies a lot by city, artist and shop minimum, so treat what follows as a sense of scale rather than a quote. Artists usually bill by the hour, sometimes with a flat rate for a piece of a set size, and every shop sets a minimum session charge that covers even a very small tattoo.
- Micro, 1-2 inches: a single short session, and the easiest budget tier. Ideas 3, 5 and 14 sit here. Expect one appointment, no follow-up session.
- Small, 2-3 inches: still usually one session. Ideas 8 and 13 land in this band, and the difference in cost from micro comes mainly from the number of hours, not the size.
- Medium, 4-5 inches: one to two sessions, and the middle of the price range. Most of this list falls here, including ideas 1, 2, 4 and 19.
- Large, 6-8 inches or a full forearm panel: two to five sessions, and the tier where the money climbs fast. Ideas 15 and 17 are the expensive ones because of the colour work and the shading density.
Session length drives everything, and size drives session length. A 6-inch sunburst with colour shading is a multi-hour job no matter how good the artist is, while a 2-inch silhouette might be finished in under an hour. A piece priced by the hour rewards you for going smaller, because the artwork is the same work either way.
Tipping on top of the stated rate is normal, usually 15 to 20 percent, and shops are glad to tell you their convention if you ask. A percentage tip on a small piece is just as welcome as a large flat one. Custom work, such as drawing your own guitar from a photo, sometimes carries a separate design fee before the session starts, so ask about that in the consultation rather than at the counter.
Aftercare Basics
Follow your artist’s aftercare instructions first, every time, because they match how they actually worked on your skin. The general version looks like this.
- Leave the covering they applied alone for as long as they told you to, usually a few hours.
- Wash gently with lukewarm water and unscented soap, then pat dry with a clean hand rather than a towel. Patting matters, rubbing starts irritation.
- Keep it moisturised with whatever they recommend, applied thin. Heavy ointment traps heat under the ink and is a common cause of early fading.
- Stay out of intense sun for the first couple of weeks, and treat any sleeve session the same way you would a large one.
- Skip swimming, hot tubs and heavy soaking while the surface is still healing.
- Watch for signs that something is off, such as redness that spreads after the first few days, heat, swelling or discharge, and contact your artist or a doctor rather than guessing.
On a forearm or sleeve, expect visible redness, swelling and warmth for the first three to five days before it settles into the itch and flake stage. Healing takes two to four weeks for a small piece and longer for a big one. If you are ever unsure whether something is healing normally, message the artist who did it. They have seen a few hundred of these and will tell you in one message.
Frequently Asked Questions
What does a guitar tattoo symbolize?
Usually a real, long-standing connection to music: playing, listening, or a person tied to a guitar memory. An acoustic guitar leans toward nostalgia, calm and raw authenticity, while an electric guitar reads as energy, rebellion and amplified power. Adding a lyric, a name or your own instrument’s silhouette turns a general symbol into a specific story.
Does a guitar forearm tattoo hurt?
The forearm sits in the middle. The outer forearm is among the more comfortable spots on the body, while the inner forearm near the wrist is more sensitive and stays tender for a couple of days after. Most people rate a 5-inch forearm piece around a 5 or 6 out of 10. Expect to sleep carefully for two or three nights.
How big should a small guitar tattoo be?
Two to three inches is the practical floor for anything with a sound hole, strings and a bridge. Under two inches, hardware blurs within a few years and the piece turns into a grey smudge. If you want a small guitar, a solid silhouette or a single pick shape at 1.5 inches holds far better than a detailed instrument.
Where is the most painful place to get a guitar tattoo?
Among the placements on this list, the ribs, the sternum and the inner wrist are the hardest. Ribs and chest hurt a lot and bruise for days, and wrist ink is genuinely hard to sleep on for a few nights. The outer forearm, upper arm and calf are the comfortable options if pain is a concern.
What does a treble clef tattoo mean?
A treble clef, also called the G clef, is the symbol for the higher register in written music, so it stands for musicianship and musical literacy rather than one specific instrument. Paired with a guitar outline, it reads as a player rather than a listener. On its own it works as a small matching symbol across the wrists or ankles.
Will a fine line guitar tattoo fade?
Yes, and the fine details go first: string lines, rosettes, hairline stems and thin script. To slow it down, ask for a line weight one notch heavier than the reference photo shows, keep the smallest features at least a millimetre thick, and use a sunblock on the area once it is fully healed. Solid black and dotwork fade far more slowly.
Where to Start With Your Guitar Tattoo
If this is your first tattoo, look at ideas 3, 5 and 14. Small, simple and hard to regret, and they double as matching pieces later.
If you already have ink and are building a music-themed arm, start with a solid blackwork or traditional piece such as 6 or 11, because bold shapes fill gaps between existing work far better than fine line does. Bring a photo of your own guitar to the consultation, look at healed work, and let the artist tell you what your size and placement can honestly hold.