
24 Sound Wave Tattoo Ideas (October 2026) for Music Lovers
These 24 sound wave tattoo ideas turn a recording into a line you can read on skin, whether that recording is a song you have played since you were twelve, a voicemail you still keep, or your dog barking at the door. Most people arrive at this style wanting one small piece that nobody else has, and the trick is knowing which waveform shape actually suits the body part you have in mind.
What makes a sound wave design work in ink is restraint. The audio has to be trimmed to a few seconds, the peaks have to be spaced far enough apart to stay legible, and the whole thing has to sit at a size your artist can finish in one sitting. Get those three things right and a plain black line on an inner forearm will outlive a colourful design twice its size. Plan ahead if you are booking around a season, since studios fill up a month or two out and healing takes a couple of weeks before it settles.
24 Sound Wave Tattoo Ideas: Quick Guide
Here is the whole list at a glance, in the same order as the sections below, so you can mark the ones worth showing your artist.
| Idea | Style | Best placement | Size | Pain |
|---|---|---|---|---|
| 1. Minimal line | Fine line | Inner forearm | 3 in wide | Low to medium |
| 2. Handwritten waveform | Fine line, freehand | Inner wrist | 2.5 in wide | Medium |
| 3. Split stereo wave | Fine line, mirrored | Inner forearm | 3.5 in long | Low to medium |
| 4. Vinyl groove spiral | Fine line black | Behind the ear | 2 in across | High |
| 5. Watercolor wave | Watercolor | Outer forearm | 4 in wide | Medium |
| 6. Equalizer bars | Minimal black | Side of ribs | 4 in tall | High |
| 7. Oscilloscope trace | Single continuous line | Outer upper arm | 3 in long | Low |
| 8. Wave from a note | Fine line with motif | Inner upper arm | 2.5 in tall | Low to medium |
| 9. Microphone and wave | Black and grey | Inner forearm | 3 in wide | Medium |
| 10. Dotwork wave | Dotwork | Upper shoulder | 4 in long | Medium |
| 11. Blackwork collarbone wave | Bold blackwork | Above collarbone | 4.5 in wide | Medium to high |
| 12. Matching ankle pair | Fine line, matched | Outer ankles | 1.5 in each | Medium to high |
| 13. Vinyl record on thigh | Black and grey realism | Outer thigh | 5 in wide | Medium |
| 14. Heartbeat rhythm line | Fine line | Upper sternum | 3 in wide | High |
| 15. Neon equalizer | Colour, glow effect | Inner arm | 3 in tall | Medium |
| 16. Concentric rings | Fine line geometric | Outer arm | 3 in across | Low to medium |
| 17. Song title under micro wave | Handwritten script | Inner forearm | 2 in tall | Low to medium |
| 18. Jagged blackwork wave | Heavy blackwork | Outer calf | 5 in long | Medium |
| 19. Gradient audio bars | Colour gradient | Inner forearm | 3.5 in wide | Medium |
| 20. Headphone outline | Fine line outline | Upper forearm | 2 in wide | Low to medium |
| 21. Faded tapered wave | Fade-to-fine line | Outer bicep | 4 in long | Low |
| 22. Geometric wave | Geometric, angular | Shoulder blade | 4 in wide | Medium |
| 23. Red voiceprint trace | Single red line | Inner forearm, vertical | 3 in long | Medium |
| 24. Freestyle sleeve panel | Composed freestyle | Outer forearm | 6 by 3 in | Medium |
1. Minimal Sound Wave Line on the Forearm
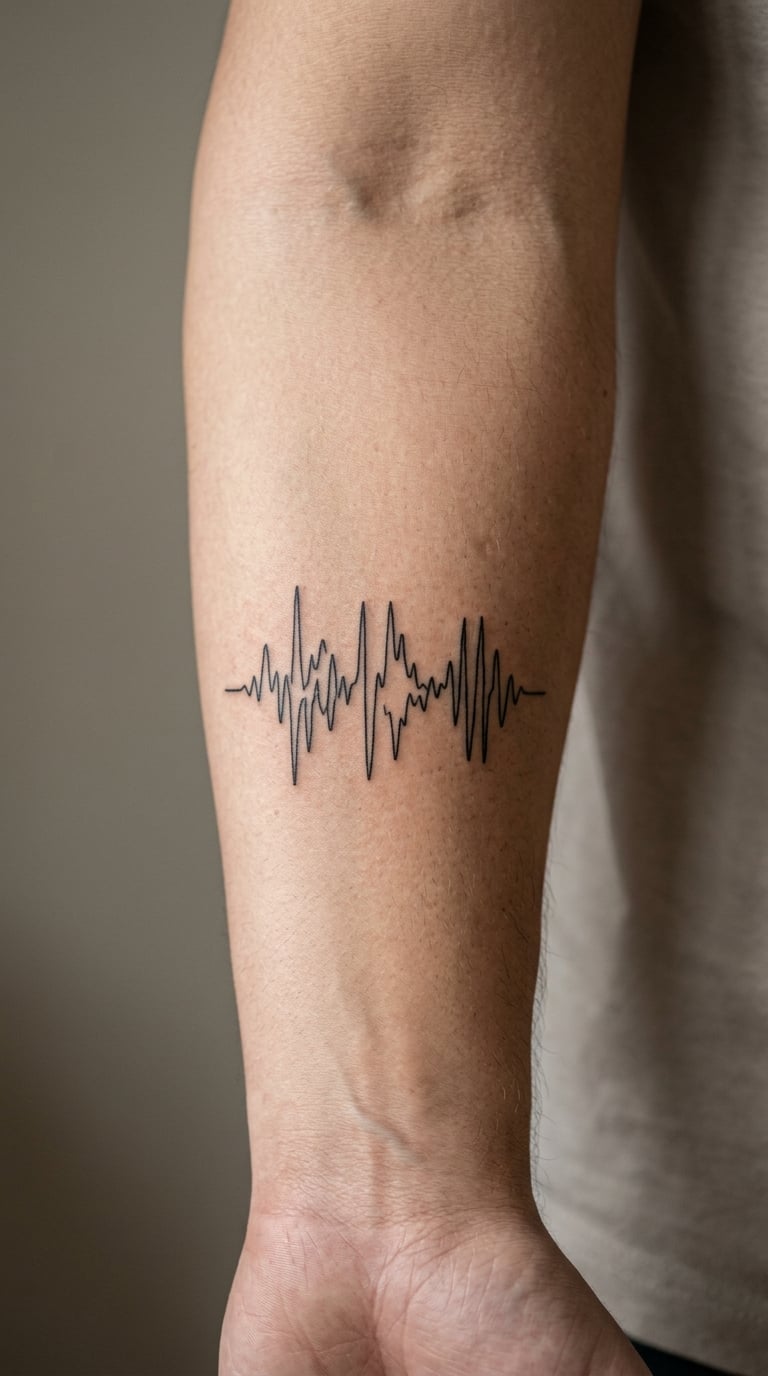
A single black waveform, drawn as one unbroken line across the inner forearm, is the cleanest version of this style and the one most first-timers end up with. The amplitude stays gentle so the peaks read as a rhythm rather than a mountain range, and there is no shading anywhere on it.
People choose it for the recording itself, not for decoration. A line from a song, a spoken sentence, a short laugh, all of it stays readable at arm’s length without shouting.
Placement: Inner forearm, roughly halfway between wrist and elbow. Size: about 3 inches wide (7.5 cm), 0.5 to 0.75 inch tall. Style: fine line, single needle weight.
Pain: Low to medium, a scratchy forearm sort of feeling. Being in direct sun daily, the line will soften and grey within a few years, so plan for a touch-up rather than expecting it to stay razor sharp.
Make it yours: Use the two or three seconds of audio with the widest dynamic range, the part where someone actually speaks or the band actually comes in. Quiet, flat audio produces a dead straight line.
2. Handwritten Audio Waveform on the Wrist
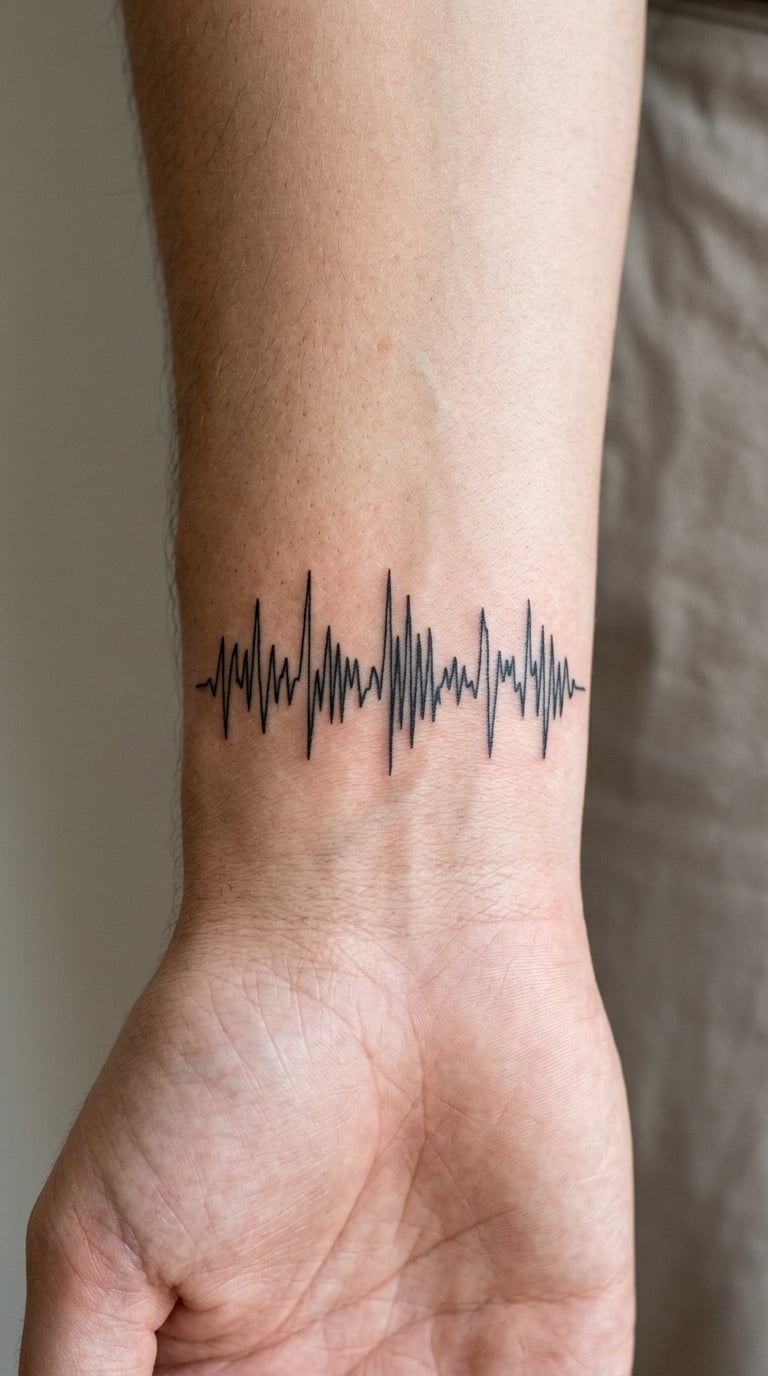
This one is tattooed as if someone drew it in one breath, with the peaks varying in height the way a hand moves when it is not guiding itself. The result is a waveform that is technically accurate to your file but looks loose and personal rather than machine-clean.
It works well when the audio carries emotion rather than music. A sentence, a nickname, the first thing a child ever said, all of it suits a slightly imperfect line.
Placement: Inner wrist, above the wrist crease. Size: about 2.5 inches wide (6 cm). Style: fine line, freehand variation.
Pain: Medium. Wrist skin is thin and the bones sit close, so expect more feedback than the forearm. Fine line work on the wrist also wears faster because sleeves and watch straps rub against it.
Make it yours: Ask your artist to exaggerate the tallest peak slightly so the design has one clear focal point instead of reading as even noise.
3. Split Stereo Wave on the Forearm
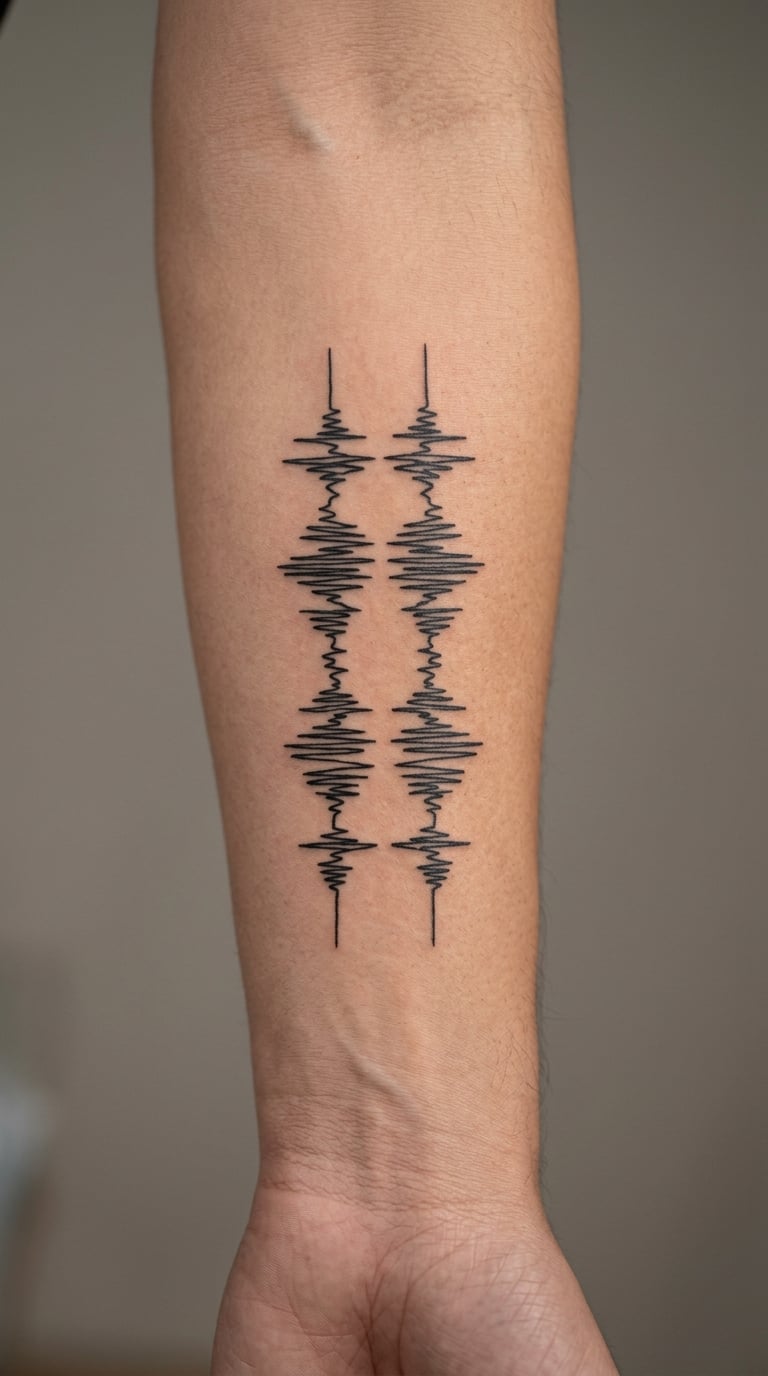
Two waveforms, one above the other, mirror each other the way the left and right channels of a stereo track do. The gap between them stays consistent, which gives the design a mechanical, tuned-in look.
It is a favourite for people who listen to records properly rather than as background. The idea is the two-channel image, the sense that a song is really two things happening at once.
Placement: Inner forearm, running lengthwise. Size: about 3.5 inches long (9 cm), each line under 0.5 inch tall. Style: fine line, mirrored layout.
Pain: Low to medium. Two thin lines mean two passes over the same skin, so expect more redness than a single-stroke piece. Keep the channel gap wide, because tight parallel lines blur as they age.
Make it yours: Use a stereo track with real separation between channels, like an acoustic recording, so the two lines differ visibly instead of matching exactly.
4. Vinyl Groove Spiral Behind the Ear
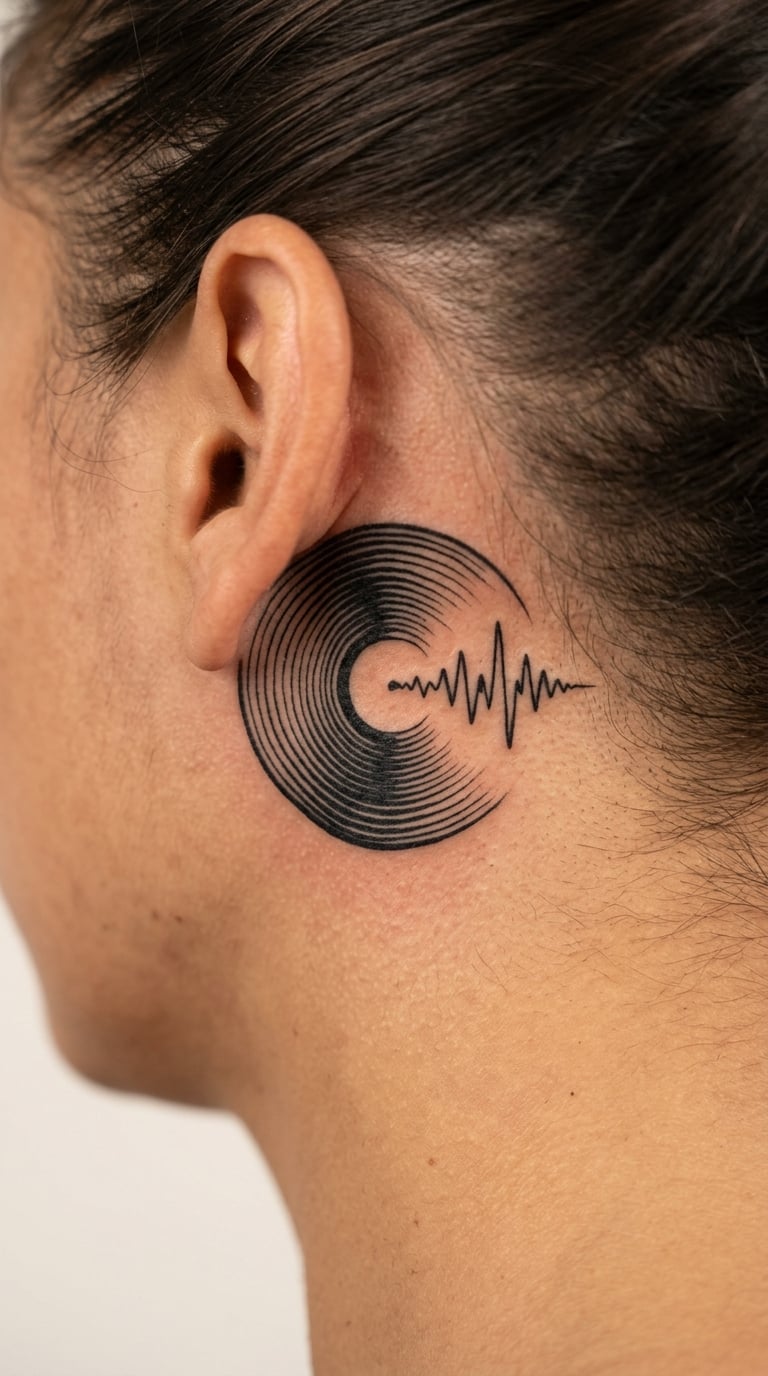
Concentric black grooves circle a centre point, then break out of the spiral at one edge and turn into a short waveform. The two halves meet without a hard seam, so the eye reads it as one continuous drawing.
It is an old-fashioned design, which suits people who still buy records or whose relationship with music started on a turntable.
Placement: Behind the ear, tucked into the gap between ear and skull. Size: about 2 inches across (5 cm). Style: fine line black, spiral linework.
Pain: High. Behind the ear is thin skin over bone and it is a spot people flinch at constantly. The small line spacing in the grooves will also blur noticeably, so a bolder line weight is the better call here.
Make it yours: Use an audio clip that opens and closes, so the waveform has a soft beginning and end that blends into the spiral naturally.
5. Watercolor Sound Wave on the Arm
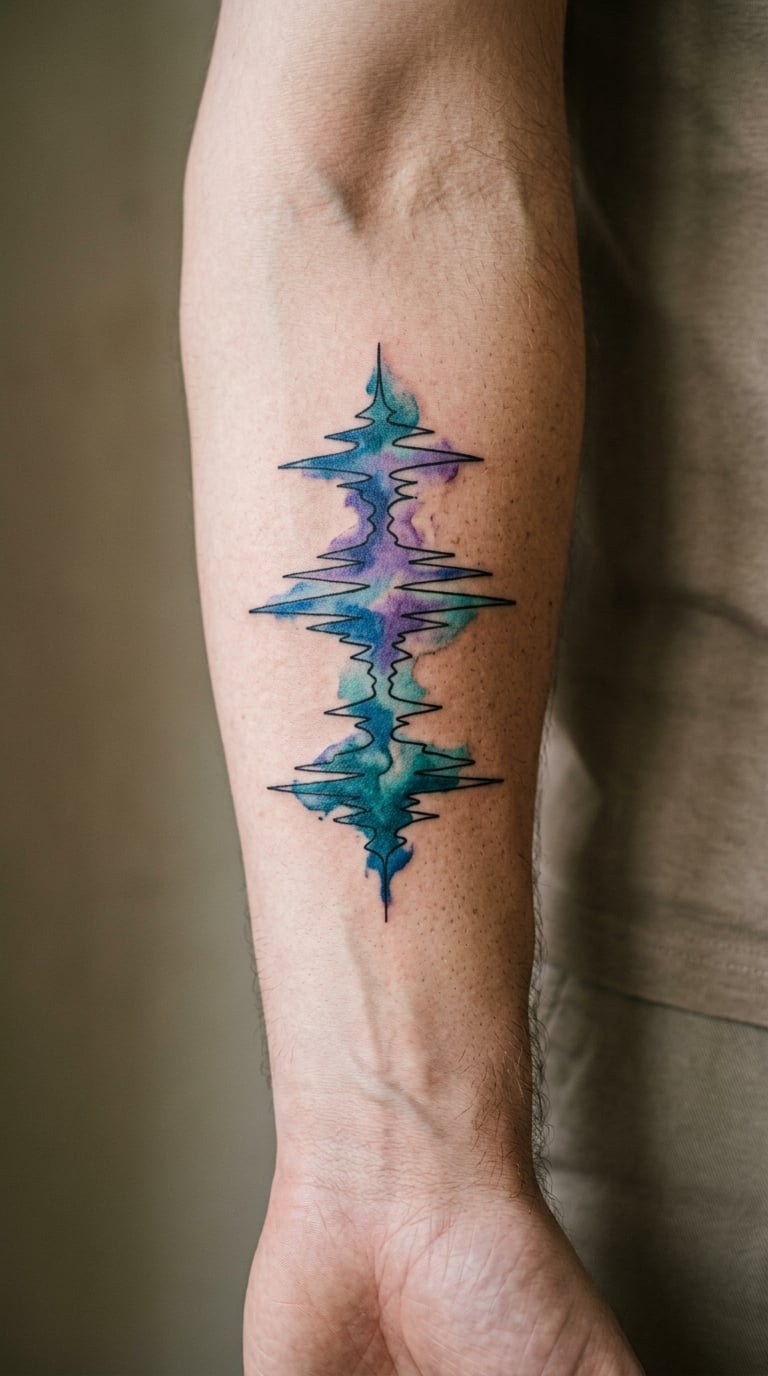
A loose waveform drawn in translucent washes of teal, blue or violet, with colour pooling under the tallest peaks and fading to nothing at the ends. The line itself is thin and a little broken, more suggestion than outline.
It suits people who want the recording to be recognisable only to them, since no one can read a specific shape from a few feet away. The colour does the emotional work instead of the geometry.
Placement: Outer forearm or upper arm, on a flat stretch. Size: about 4 inches wide (10 cm). Style: watercolor with a light black contour line.
Pain: Medium, and often longer than a plain line piece because of the shading passes. Watercolour shading is the first thing to fade, so expect a touch-up or a colour refresh every few years.
Make it yours: Pick one hue and let it bleed into clear skin at the edges, which ages far better than three colours fighting for attention.
6. Equalizer Bars on the Side of the Ribs
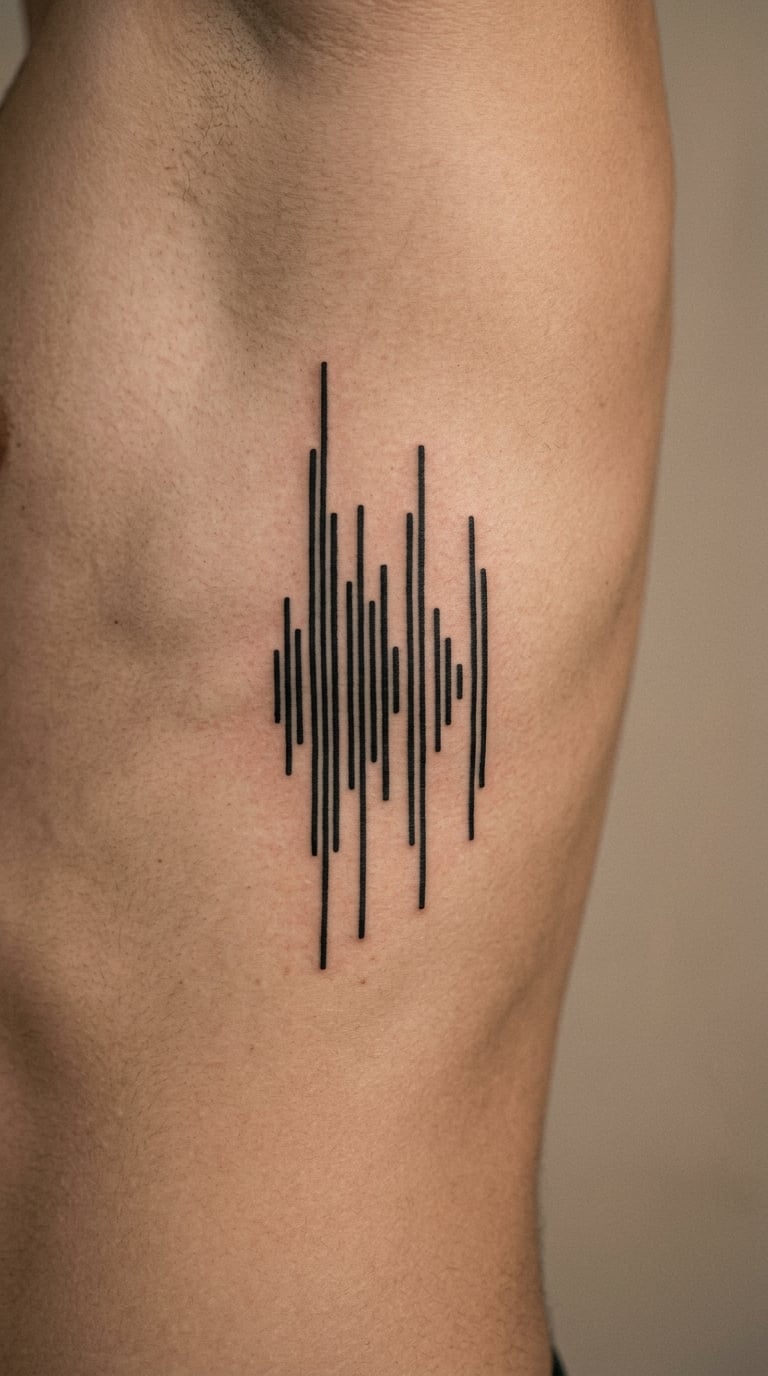
Vertical bars of uneven height, arranged like the visualiser on a music player, with each bar spaced far enough apart to read individually. The group follows the curve of the rib cage rather than sitting flat.
People who care about how audio looks as much as how it sounds tend to pick this. The bars also give an artist more freedom to stylise than a single faithful trace.
Placement: Side of the ribs, following the curve. Size: about 4 inches tall (10 cm), 3 to 4 inches wide. Style: minimal black linework.
Pain: High. Rib skin is stretchy and the needle catches differently across each rib, and movement makes it hard to hold still. Worth it for the shape, but not a first-timer’s choice.
Make it yours: Fix the number of bars before the session, because adding a bar later means rebuilding the spacing and the design will no longer match the audio.
7. Oscilloscope Trace on the Upper Arm
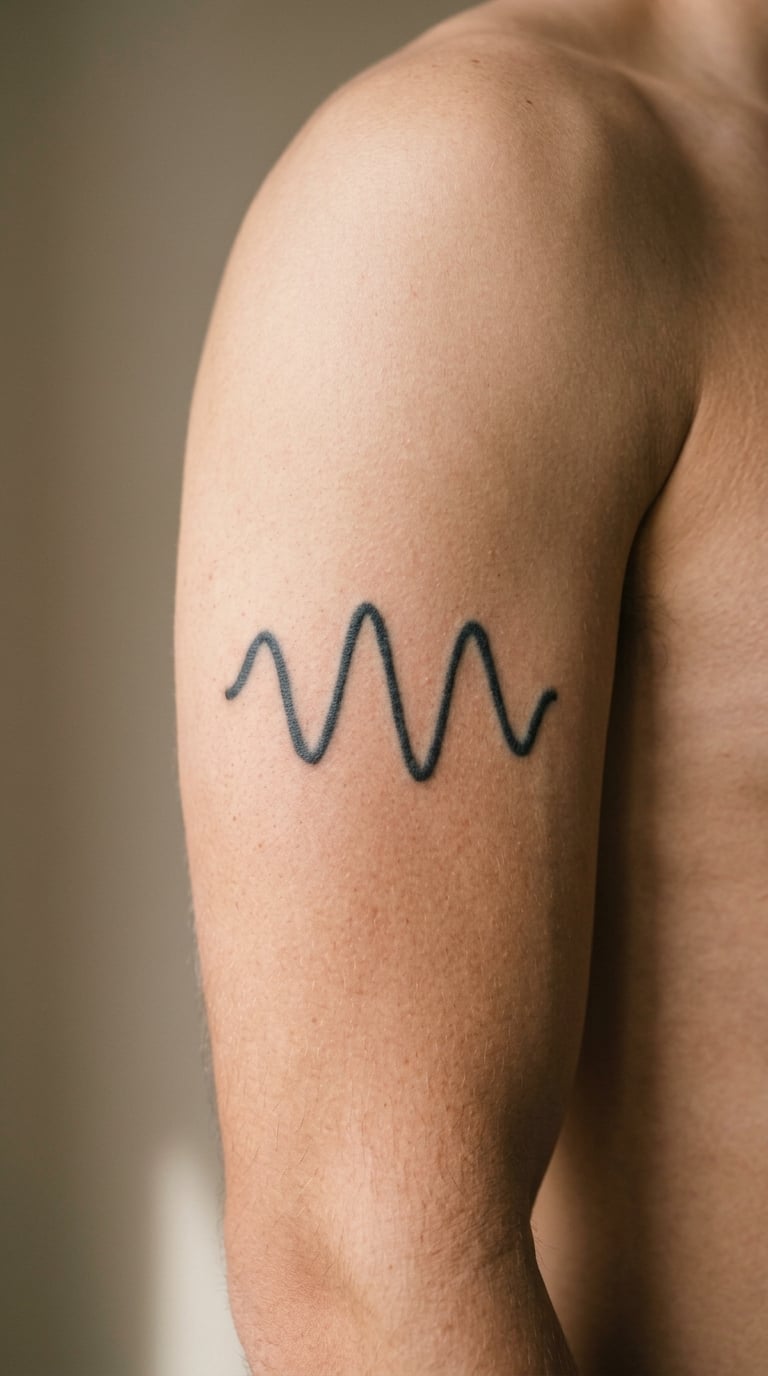
A continuous line with smooth, rounded peaks and dips, drawn the way an oscilloscope draws a signal: level stretches, sudden climbs, calm runs. Unlike a bar design, this is one stroke from start to finish.
It reads technical without being busy, and it suits recordings with clear structure, a drum intro, a spoken phrase with pauses, anything with a recognisable shape.
Placement: Outer upper arm, comfortably fleshy. Size: about 3 inches long (7.5 cm). Style: single continuous line, medium weight.
Pain: Low. The upper arm is forgiving, and a one-stroke design is quick. A medium line weight holds its shape better here than a hairline stroke would.
Make it yours: Trim your clip to a phrase with a build, so the trace has a low quiet opening and a taller finish.
8. Sound Wave Emerging from a Music Note
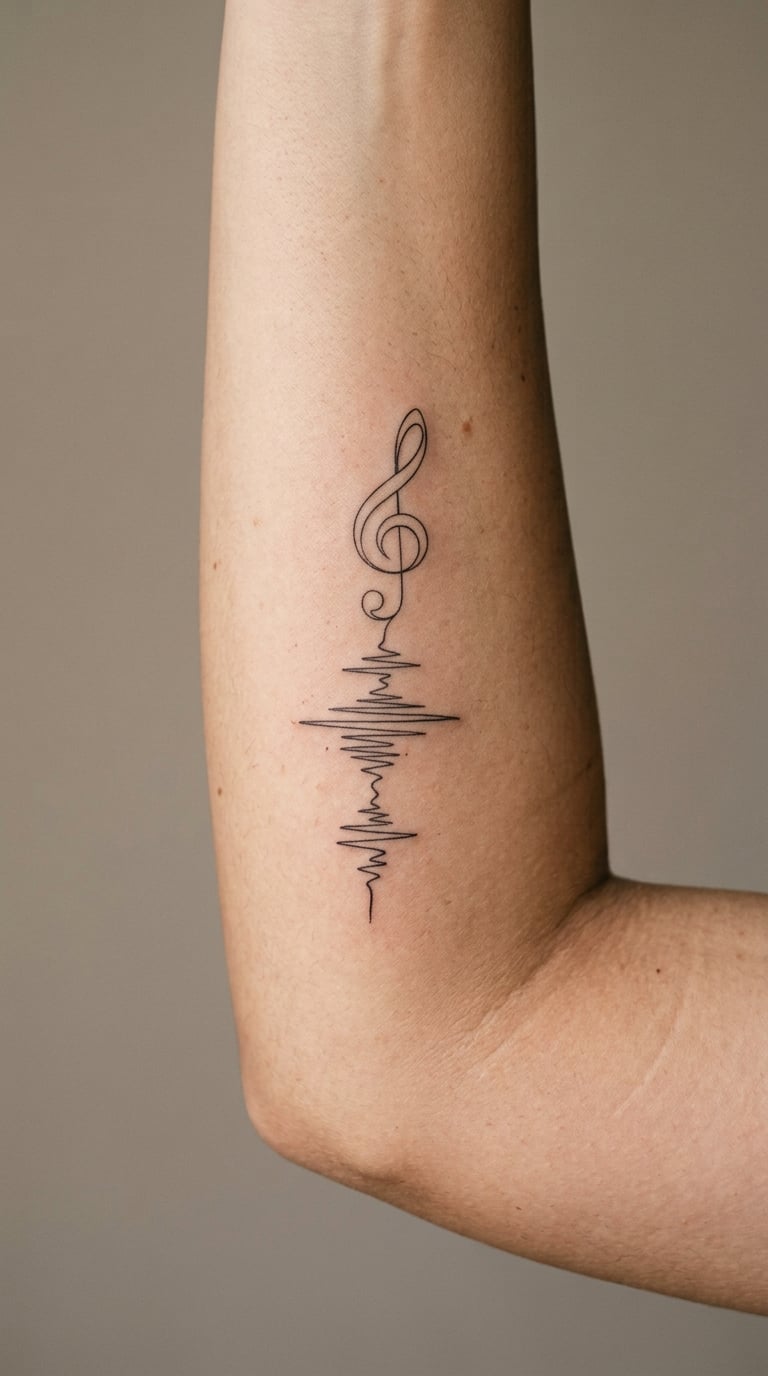
A single plain music note at the base, drawn with no lettering or branding of any kind, with a waveform flowing upward and out of it. The two elements meet so the wave looks like it is coming from the note.
It is the choice for someone who wants the music reference to be readable at a glance, not just to themselves.
Placement: Inner upper arm or the soft area below the collarbone. Size: about 2.5 inches tall (6 cm). Style: fine line with one motif element.
Pain: Low to medium. Keep the note small and the piece stays under a quick sitting. Stick to original linework rather than any band logo or character likeness.
Make it yours: Have the waveform start as a flat line at the note and gain amplitude as it travels, so the drawing has movement built into it.
9. Microphone and Sound Wave on the Forearm
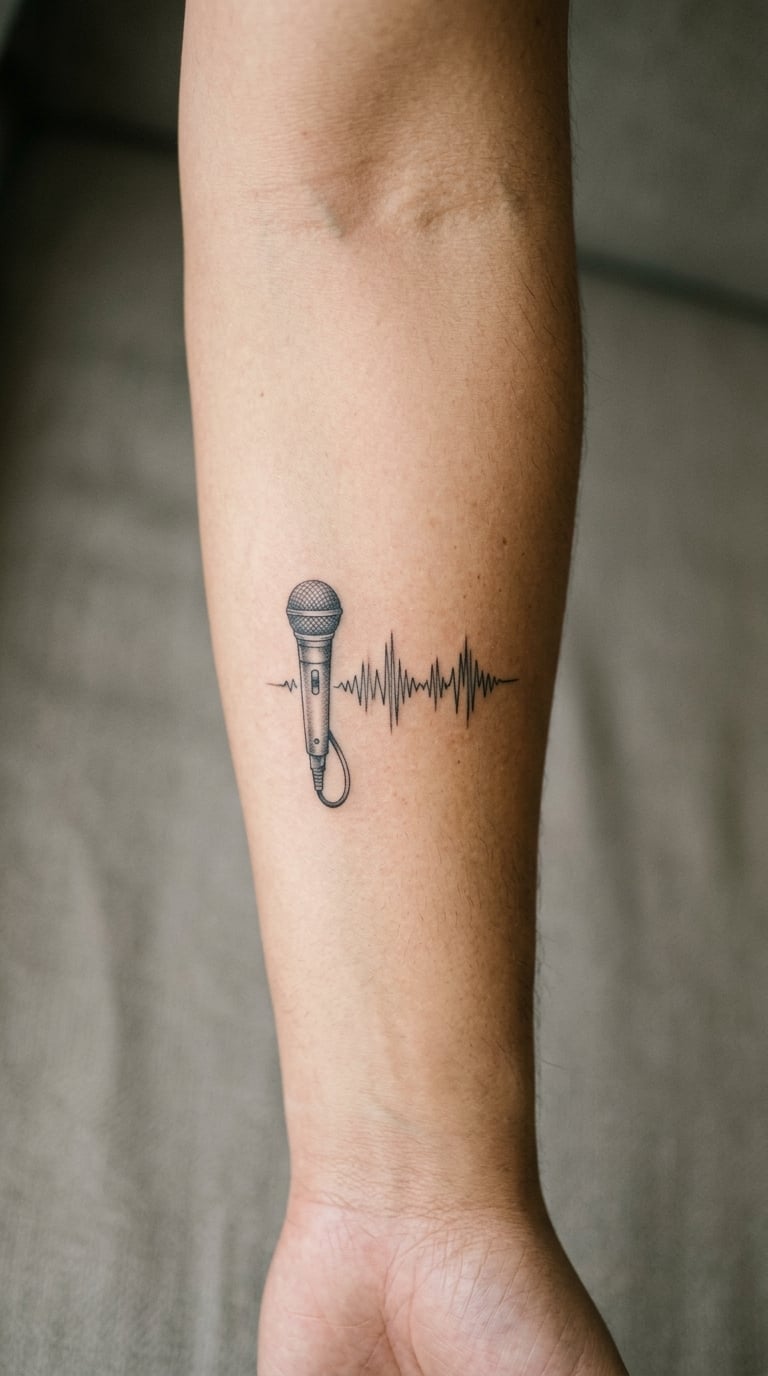
A compact retro microphone rendered in black and grey shading, sitting beside a short waveform of equal height. The shading is smooth rather than stippled, so it stays readable as it softens.
People who sing, record, or work with audio usually pick this one, since the microphone says the craft and the wave says the specific take.
Placement: Inner forearm. Size: about 3 inches wide (7.5 cm). Style: black and grey realism with a fine line wave.
Pain: Medium, mostly from the shaded areas where the needle passes more than once. Shading fades faster than outlines, so plan on a refresh or accept a softer grey later.
Make it yours: Match the microphone style to your actual setup, a handheld vocal mic, a ribbon mic in a studio, a lapel mic on a podcast.
10. Dotwork Sound Wave on the Shoulder
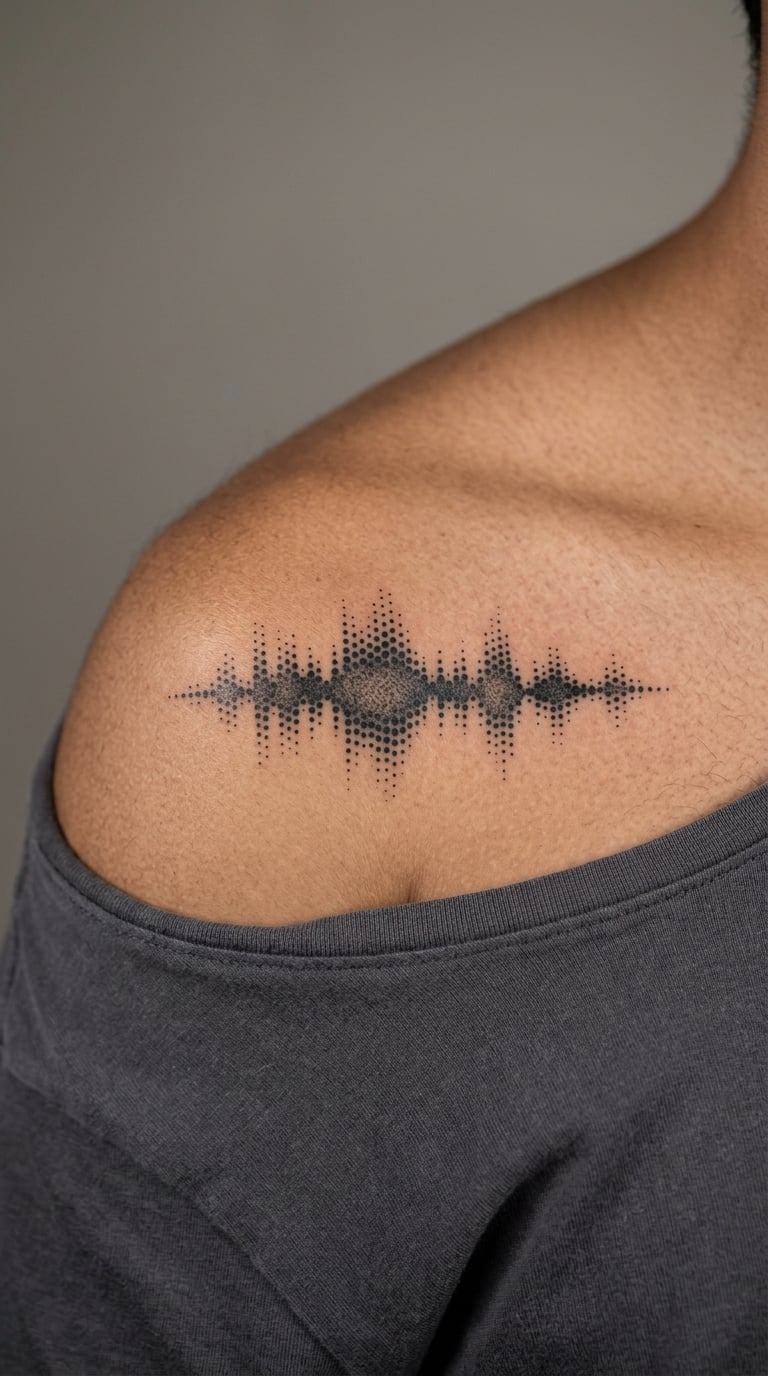
The waveform is built entirely from evenly spaced dots, with dot size standing in for amplitude. Tall peaks get large dots, quiet stretches get small ones, and the whole shape has a soft texture rather than a hard edge.
It reads as music without looking like a waveform diagram, which makes it a good match for someone who wants a music reference that blends into a textured black and grey piece.
Placement: Across the upper shoulder or shoulder cap. Size: about 4 inches long (10 cm). Style: dotwork, graduated sizing.
Pain: Medium, and slow going, because dotwork is a lot of separate little taps. Dots lose definition over time, so ask your artist to keep a size gap between the smallest and largest dot.
Make it yours: Let the dots at each end run smaller and closer together, so the piece fades out at the edges like the audio does.
11. Blackwork Sound Wave Across the Collarbone
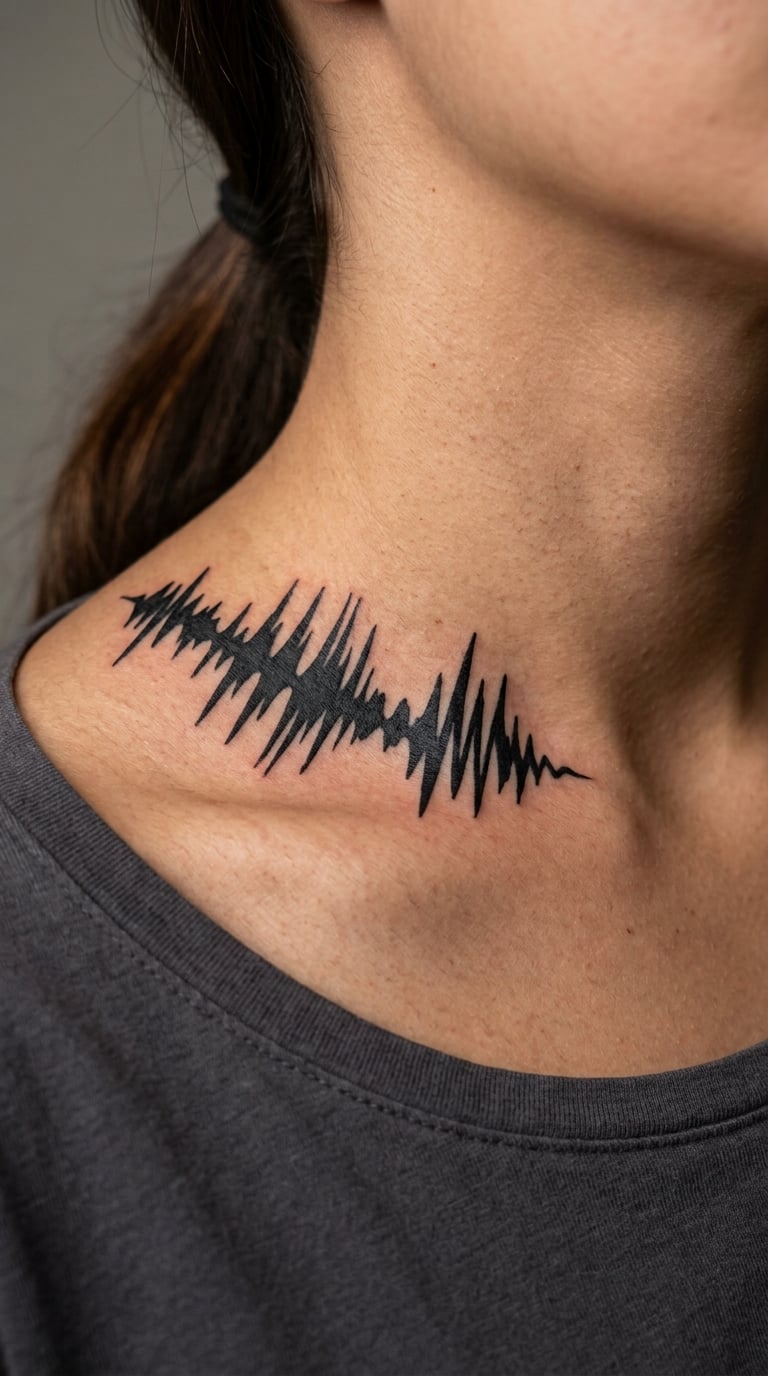
A heavy black line with alternating thick and thin sections, thick where the audio is loud and thin where it drops away. The result is high contrast and hard to miss, closer to a bold graphic than a delicate drawing.
This is the version people choose when they want the tattoo to read as a statement, and it holds its edges far better than a hairline trace.
Placement: Just above or just below the collarbone, one side of the chest. Size: about 4.5 inches wide (11 cm). Style: bold blackwork.
Pain: Medium to high. The collarbone sits close to the surface and the skin there moves when you move, so expect an unsteady feeling under the needle. Bold ink also means a longer sitting.
Make it yours: Map the loudest and quietest moments of your clip onto line thickness, so the design genuinely reflects the recording rather than looking decorative.
12. Two Matching Micro Sound Waves on the Ankles
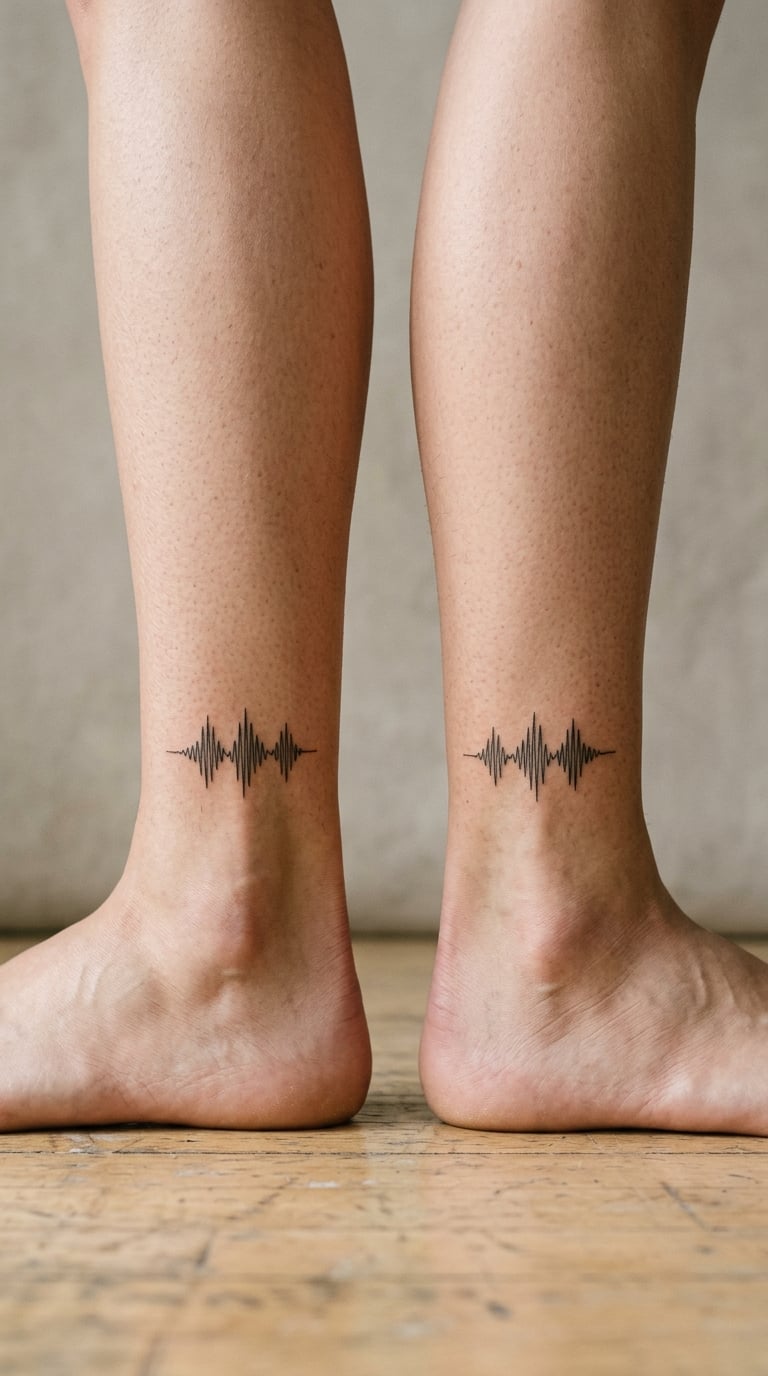
Two small waveforms, matched in size and style but cut from different recordings, one on each outer ankle. They read as a pair from a distance and separate into two individual pieces up close.
Couples, siblings, and parent and child pairs usually go this way, where matching means the same layout rather than the same audio.
Placement: Outer ankles, mirrored heights. Size: about 1.5 inches wide (4 cm) each. Style: fine line, matched pair.
Pain: Medium to high. Ankles are bony and near the bone hurts more. Ankles also rub against shoes and see a lot of sun, so fine line here needs more upkeep than the same design on a forearm.
Make it yours: Give each person the same number of seconds of audio, even if the recordings differ, so the two pieces line up visually.
13. Black-and-Grey Vinyl Record Wave on the Thigh
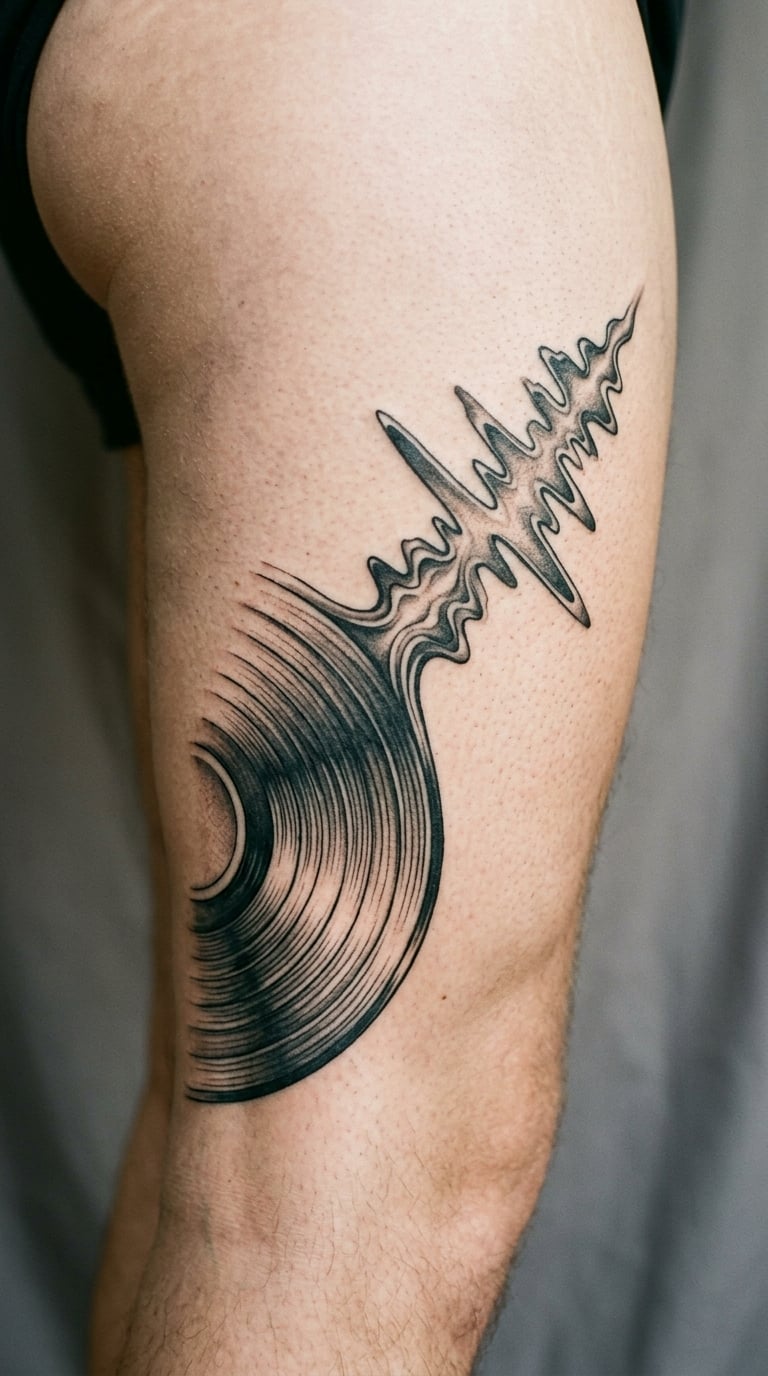
A larger composition where a section of vinyl record with smooth grey shading turns, partway around, into a bold waveform. The tonal shading in the record half gives the piece depth that a pure line design does not have.
It suits people whose music taste runs older, or who want something with enough size to carry a real amount of detail.
Placement: Outer thigh, plenty of flat surface. Size: about 5 inches wide (13 cm). Style: black and grey realism with a bold line half.
Pain: Medium, and expect it to run past an hour. Thigh skin is forgiving but the size makes this a two-visit piece more often than not. Grey shading in the record half will soften noticeably within a few years.
Make it yours: Put the record half in shadow and the waveform half in solid black, so the two textures separate cleanly even after the greys fade.
14. Heartbeat Rhythm Line on the Sternum
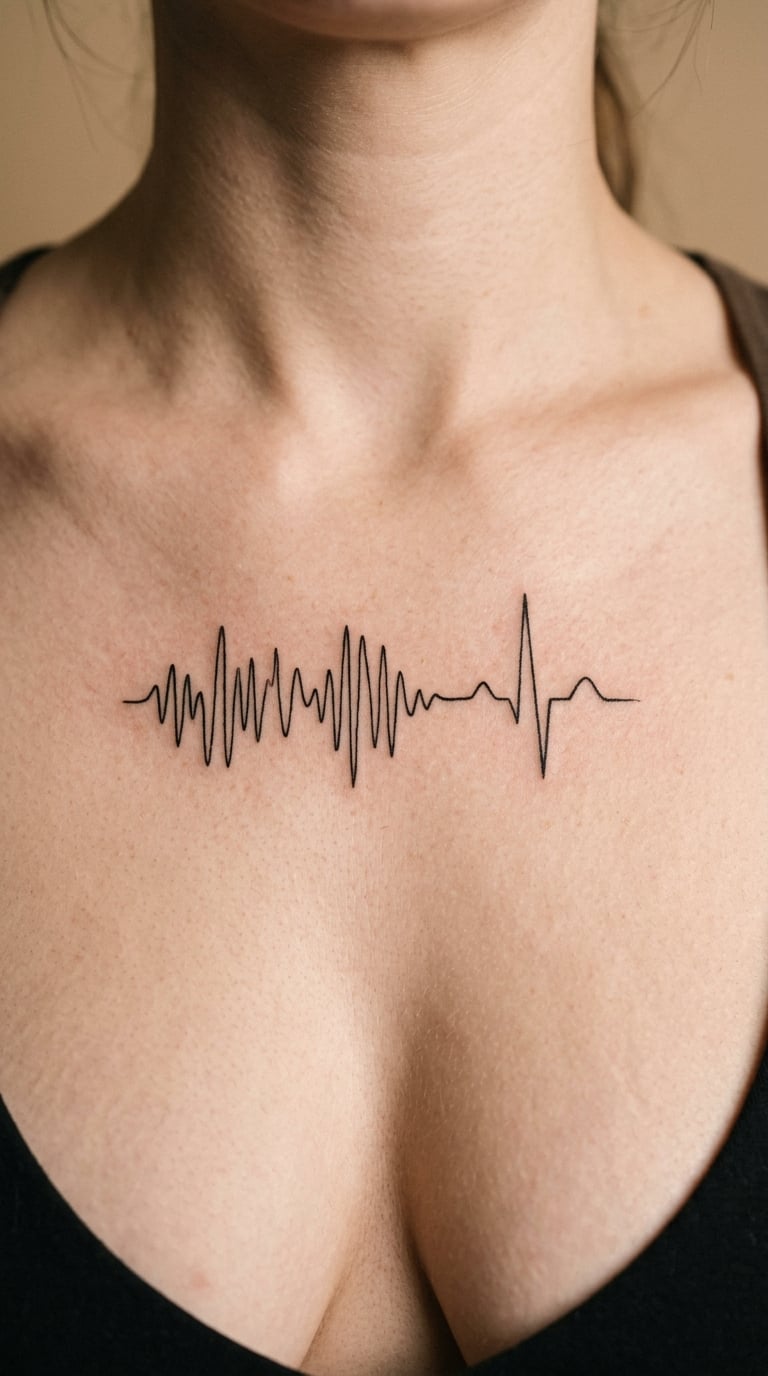
An audio waveform that gradually shifts into an ECG-style rhythm, with the audio peaks thinning out and the repeating beat taking over. It is a visual shape, not a medical reading, and the design is not connected to any health data.
The appeal is the meeting of two kinds of rhythm, the sound of a voice and the sound of a pulse, often chosen as a memorial piece for a parent or partner.
Placement: Upper sternum, horizontal, or running down the centre of the chest. Size: about 3 inches wide (7.5 cm). Style: fine line with a small repeated motif.
Pain: High. Sternum skin is thin, sensitive and sits over bone, and it is a spot that makes people tense up. The repeated beat pattern is small detail, so use a medium line weight rather than a hairline.
Make it yours: Have the audio portion run at full amplitude and let the beat section simplify, so the eye reads the recording first and the rhythm second.
15. Neon Equalizer on the Inner Arm
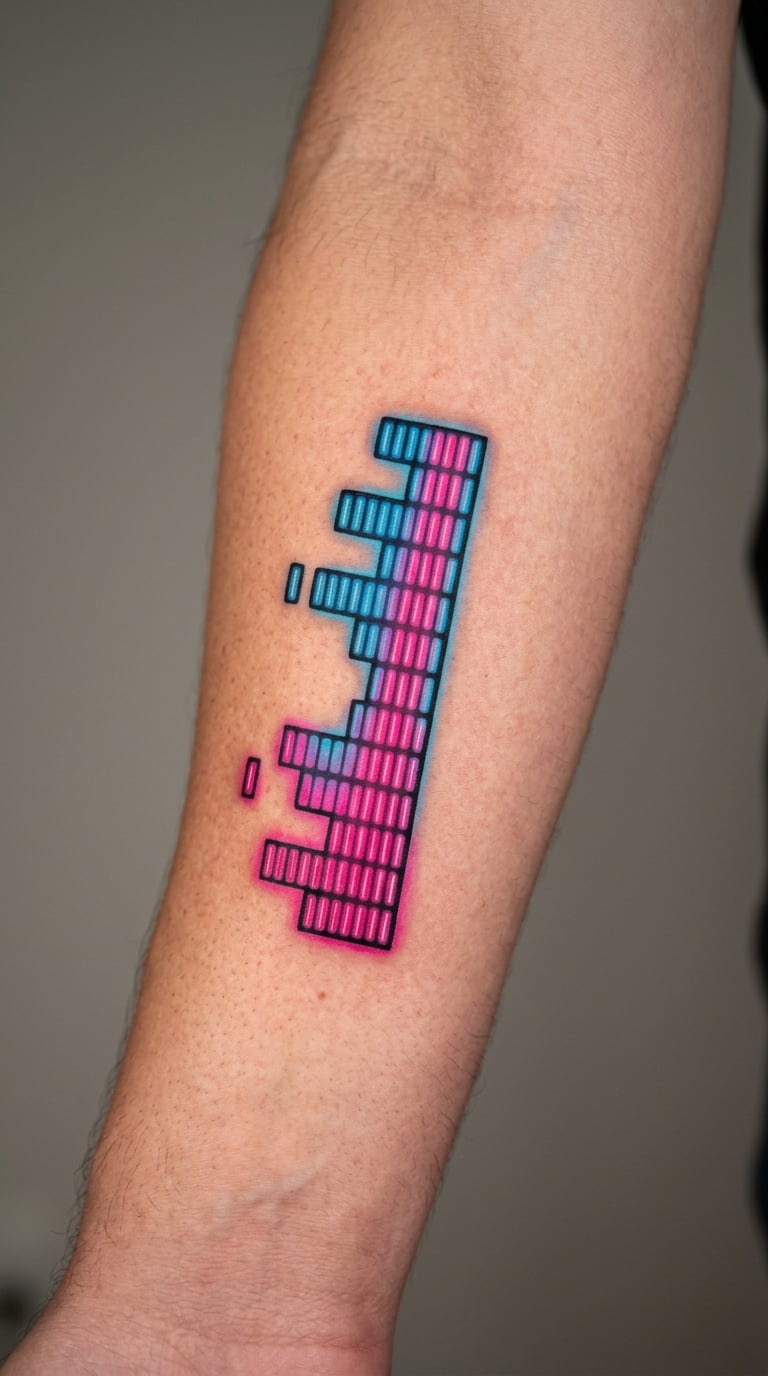
Equalizer bars in bright pink, blue or yellow, with a soft glow blurred out around each bar so they look lit from within. The glow is soft shading, not a hard outline, and the bars stay evenly spaced.
It is the boldest option in this list and the one that reads best in low light, which is why it keeps showing up on stage lighting and concert photography.
Placement: Inner arm or inner calf, anywhere flat. Size: about 3 inches tall (7.5 cm). Style: colour with soft glow shading.
Pain: Medium. Colour work needs more passes, and the glow shading adds time. Bright colours fade first, so treat this as a piece that will need refreshing rather than one that stays exactly as drawn.
Make it yours: Use two colours only. Three or more read as a rainbow in small sizes and the glow effect stops looking like light.
16. Concentric Sound Rings on the Arm
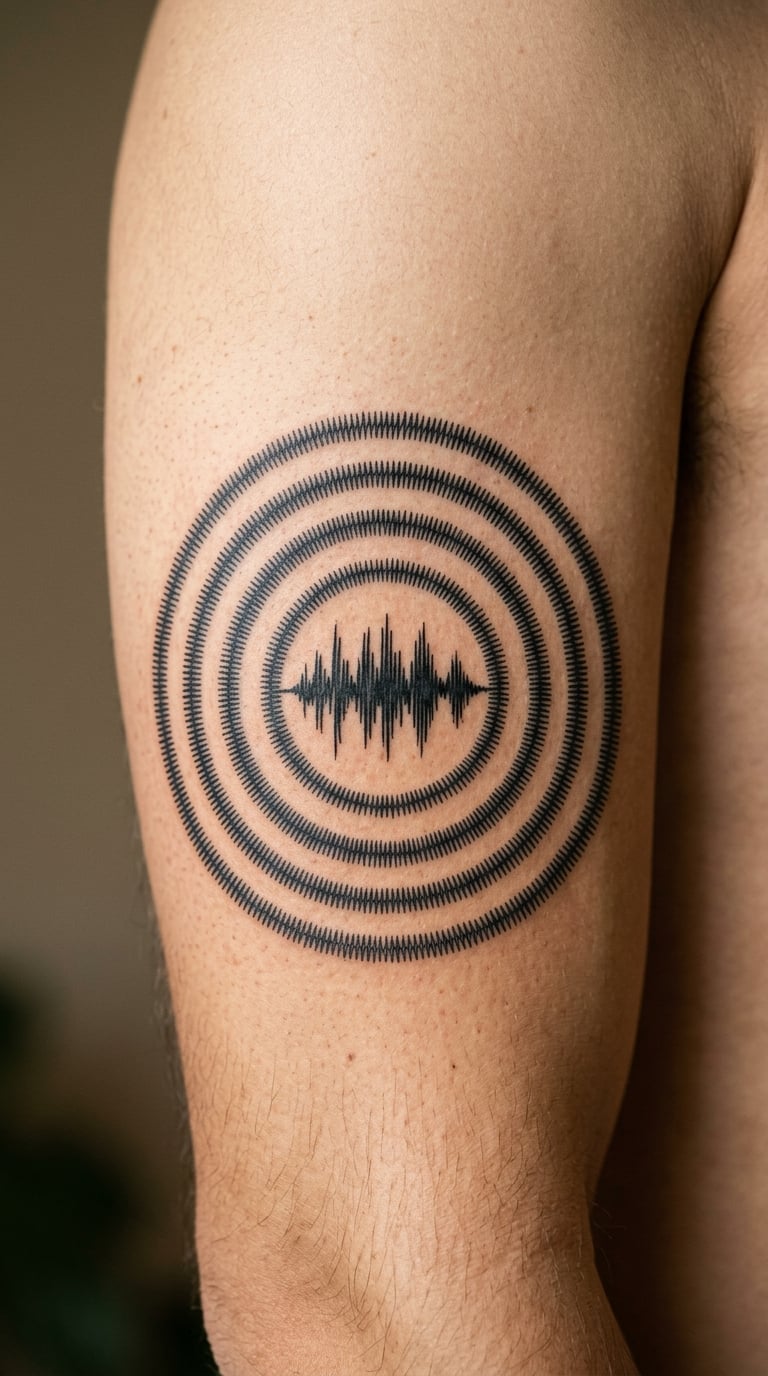
Circular rings expand outward from a small waveform at the centre, each ring’s outline carrying the amplitude shape of the audio at a slightly different scale. It looks like ripples spreading across still water.
It works best with audio that has a clear peak, since the centre has to be readable at a very small size for the whole design to hold together.
Placement: Outer arm or outer thigh. Size: about 3 inches in diameter (7.5 cm). Style: fine line geometric.
Pain: Low to medium. Round shapes are hard to tattoo on a curved surface, so your artist will build it outward from the centre rather than following one circle. Small inner detail blurs within a few years, so keep the centre waveform chunky.
Make it yours: Use three or four rings rather than eight. More rings means thinner spacing, and thin spacing on a circular design fills in first.
17. Handwritten Song Title Beneath a Micro Wave
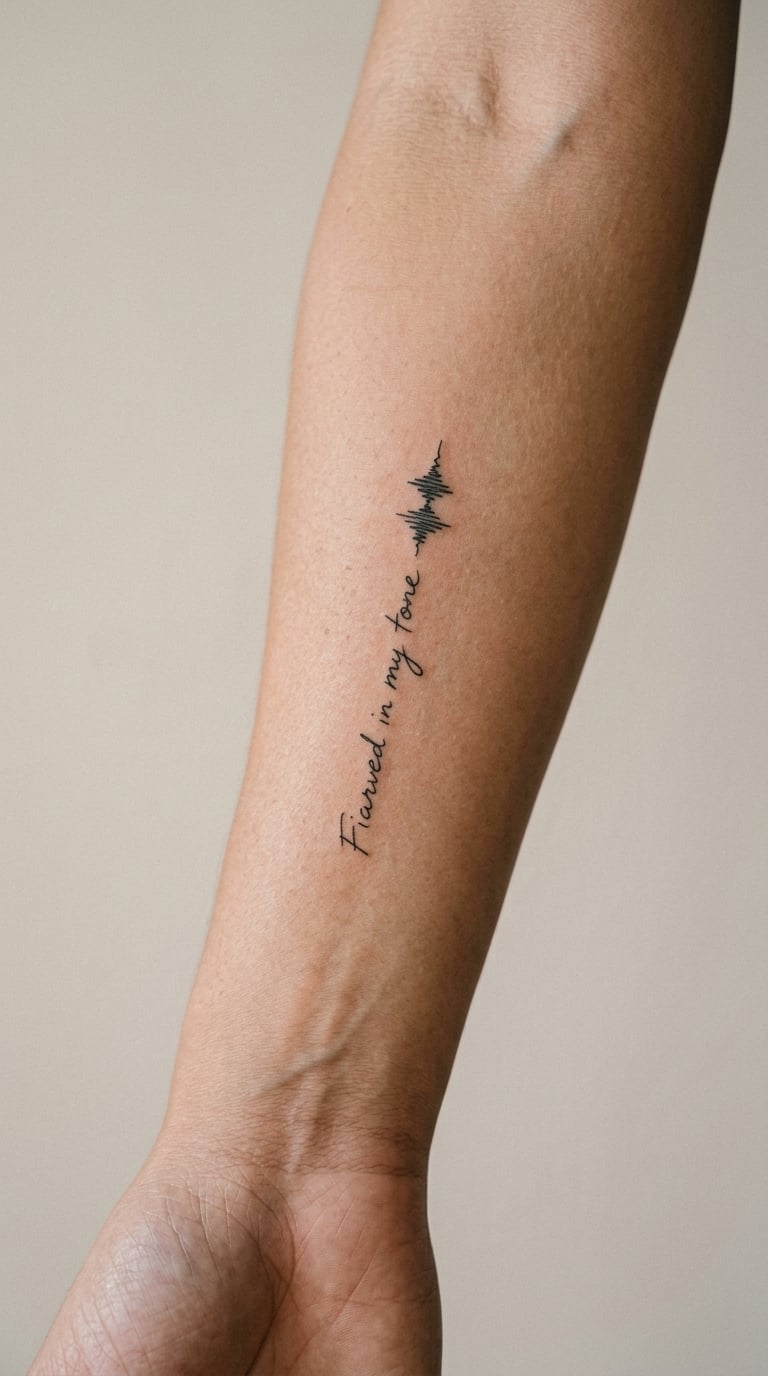
A small waveform sits above a song title written in flowing script, the two stacked so the text is the widest part of the design. The script is loose and slightly uneven rather than formal calligraphy.
It is for the person who needs a clue, since the wave alone means nothing to anyone else but the title gives the memory a handle.
Placement: Inner forearm or the inner arm above the elbow. Size: about 2 inches tall (5 cm). Style: fine line with handwritten script.
Pain: Low to medium. Script letterforms are thin strokes, so the piece takes longer than its size suggests. Fine line lettering softens noticeably in the first five years, and staying legible long-term means a slightly heavier hand.
Make it yours: Keep the title to two or three words, and let the handwriting slant along the forearm rather than sitting straight, so it follows the body’s line.
18. Jagged Blackwork Wave on the Calf
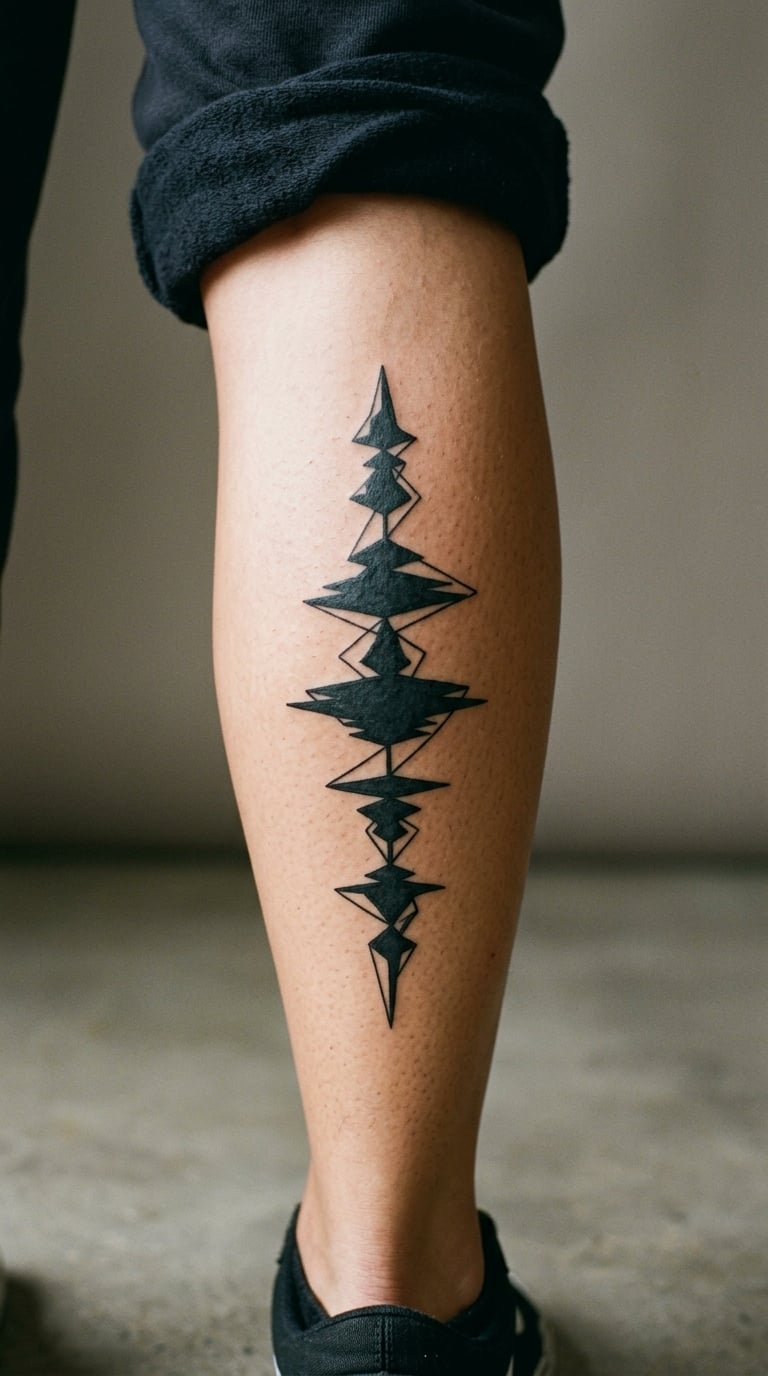
An angular waveform with sharp, aggressive peaks and dense black fills between them, closer to a heavy blackwork shape than a technical trace. Negative space does a lot of the work, with thin gaps cut out of solid black.
It is the boldest, most tattoo-looking option for someone who wants a music reference to read as graphic design rather than a diagram.
Placement: Outer calf, running vertically along the muscle. Size: about 5 inches long (13 cm). Style: heavy blackwork with negative space.
Pain: Medium. Large solid black areas are quicker per inch than fine line but take longer to heal and need more aftercare. Blackwork on the calf holds shape well, and the calf is a low-visibility spot unless you wear shorts.
Make it yours: Convert the quietest part of your clip into the largest solid black shape, which gives the design a solid core instead of an even scatter of bars.
19. Gradient Audio Bars on the Forearm
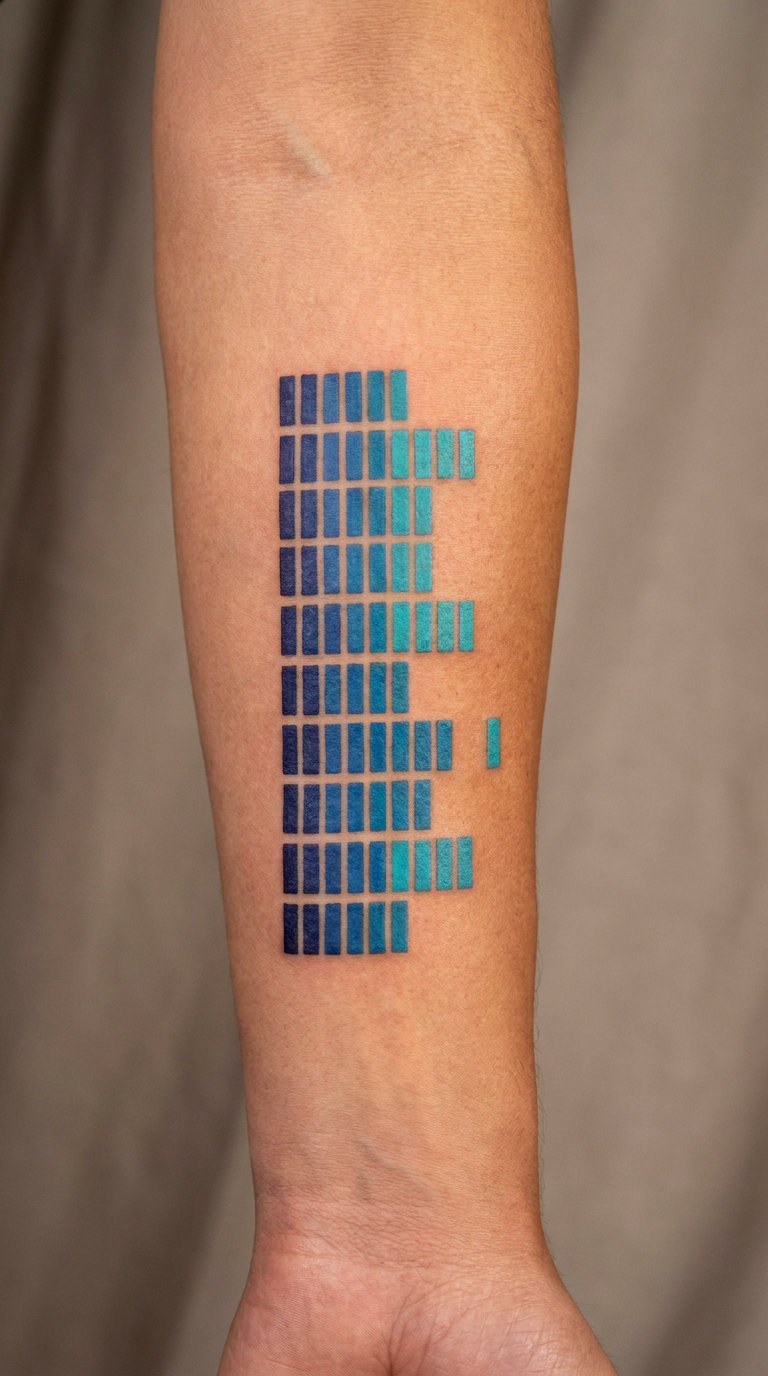
Equalizer bars in a single colour gradient, running from deep blue at one end to bright cyan at the other. Each bar is a solid block, so the design is heavier and more graphic than a line waveform.
It suits people who want a music reference that reads clearly from across a room but still has some colour in it.
Placement: Inner forearm or outer calf. Size: about 3.5 inches wide (9 cm). Style: colour gradient, solid bars.
Pain: Medium, more from the volume of colour than the depth. Gradients are the first thing to shift as ink ages, so ask for a middle tone that will match both ends later. The forearm is a good canvas because it barely moves while you sit.
Make it yours: Run the gradient from the loudest point of the clip to the quietest, so the colour itself tracks the shape of the recording.
20. Headphone Outline Wrapping a Wave
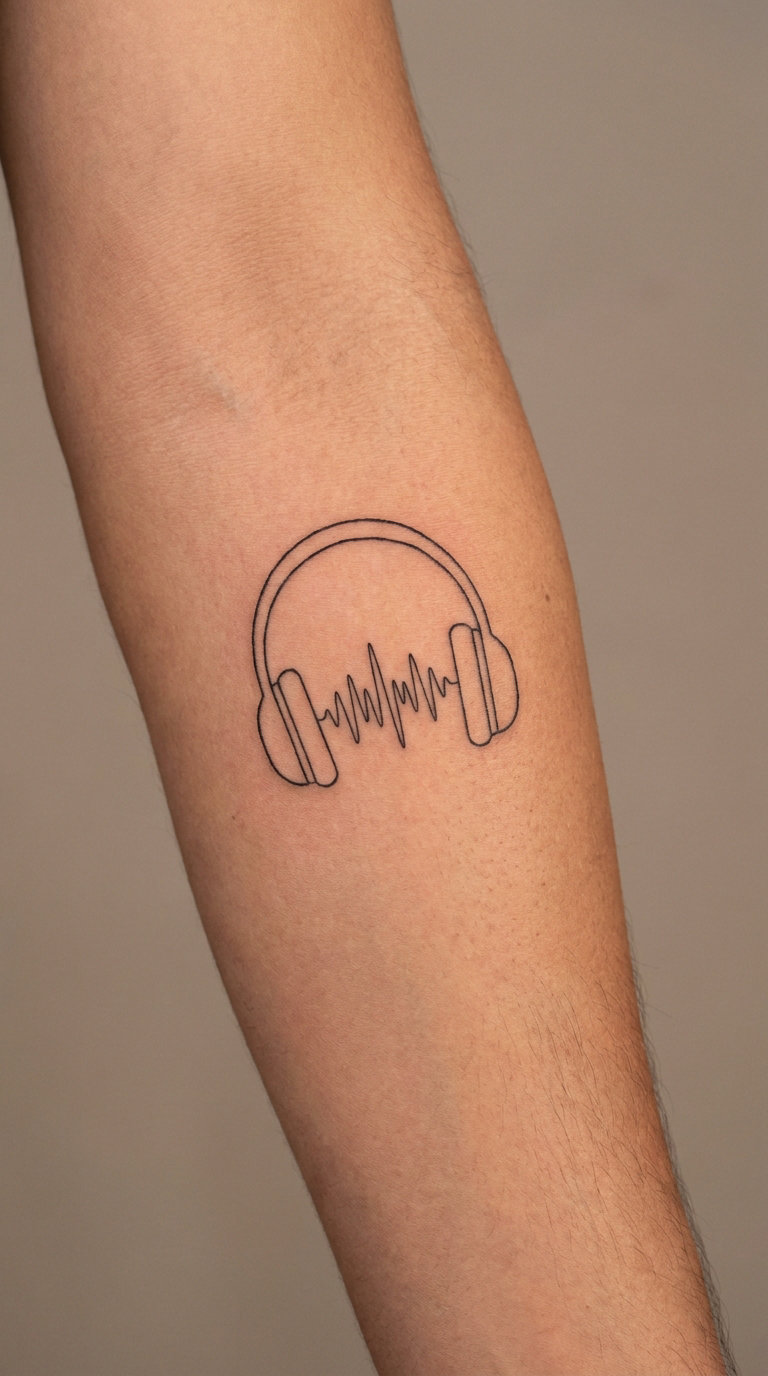
A simple headphone silhouette drawn as a clean outline, with a compact waveform sitting inside the band so it reads as the sound coming from the cups. The line weight stays even and no branding appears anywhere.
It is a friendly, slightly playful design that works for a first tattoo, since the motif is instantly legible even before anyone notices the waveform.
Placement: Upper forearm or the back of the hand. Size: about 2 inches wide (5 cm). Style: fine line outline.
Pain: Low to medium. The back of the hand ages faster than the forearm, so keep it there only if you want a design that softens quickly. An upper forearm placement will hold its outline far longer.
Make it yours: Have the waveform sit slightly off centre so the headphones read as over-ear rather than on-ear, which gives the drawing more depth.
21. Faded Tapered Wave on the Bicep
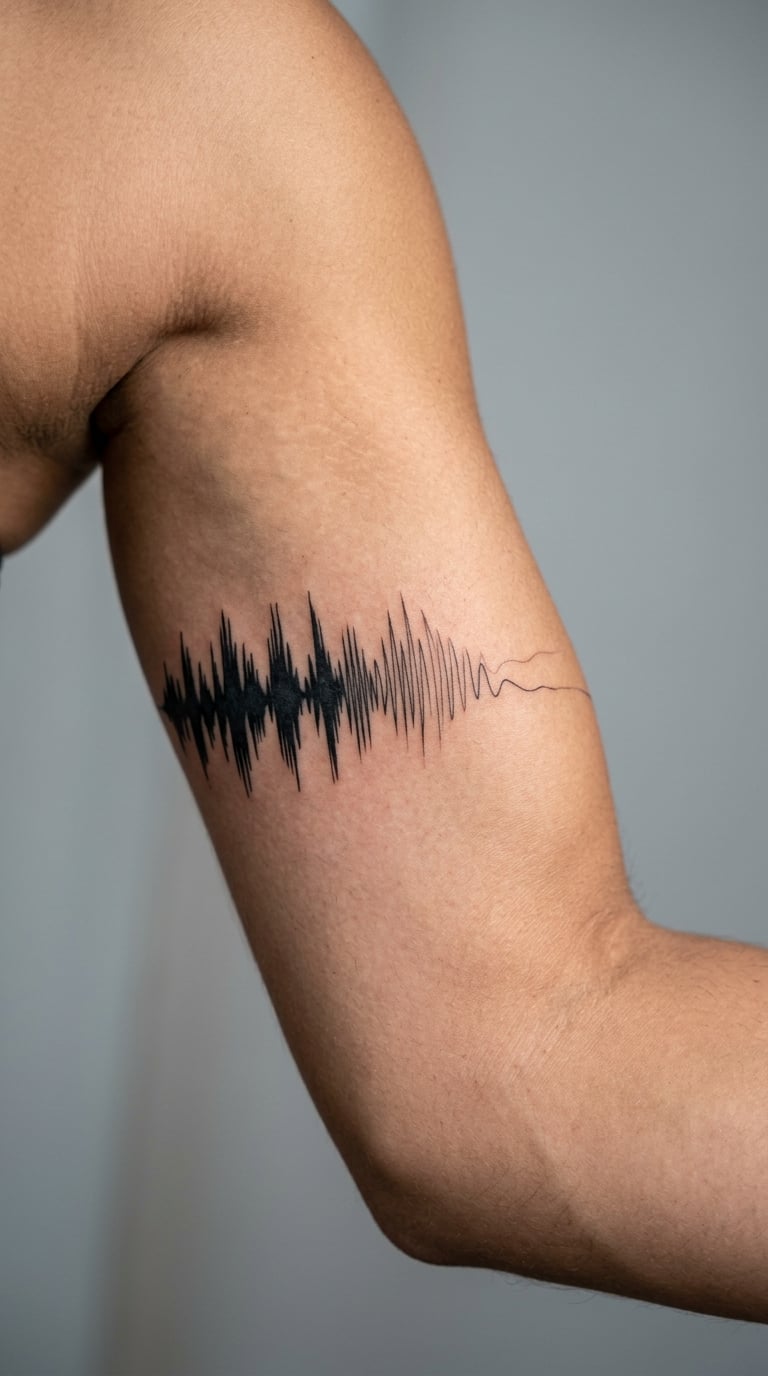
A waveform that starts as solid black at one end and thins out, breaking into progressively finer lines until it almost disappears into the skin. The fade is gradual, not an abrupt cut.
It has real movement in it, the sense of a signal losing strength, and it works as a standalone piece without needing anything around it.
Placement: Outer bicep, following the muscle. Size: about 4 inches long (10 cm). Style: fine line with a gradient fade.
Pain: Low. The bicep is a soft, forgiving area. The fine end of the fade is the part that softens first, so the very lightest section may need a touch-up sooner than the rest.
Make it yours: Use audio that naturally decays, a track ending rather than one cut off mid-phrase, so the fade matches the shape of the sound.
22. Geometric Sound Wave on the Shoulder Blade
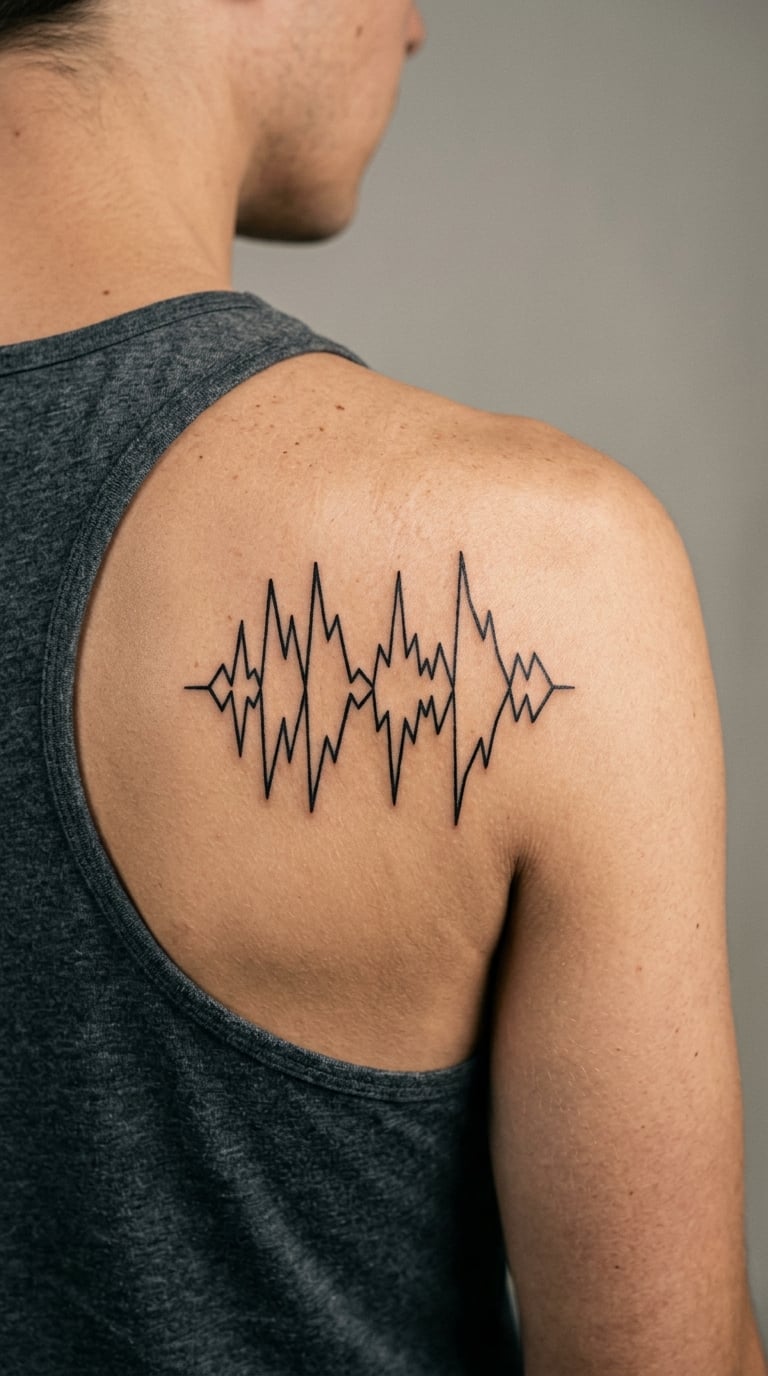
The waveform reduced to angular line segments, straight strokes and sharp angles that imply the peaks and valleys without curving. The result is closer to abstract geometry than to a literal trace.
It suits people who like precision and structure, and it works well as a mid-piece between two softer designs.
Placement: Across the shoulder blade, or the flat of the upper back. Size: about 4 inches wide (10 cm). Style: geometric, angular linework.
Pain: Medium. Back skin twitches involuntarily, so sessions are often shorter and broken into two parts. The shoulder blade moves with the arm, so keep the design away from the joint itself.
Make it yours: Count the segments in your clip and keep that number, so the geometry has an actual relationship to the audio rather than being a random pattern.
23. Red Ink Voiceprint-Style Trace
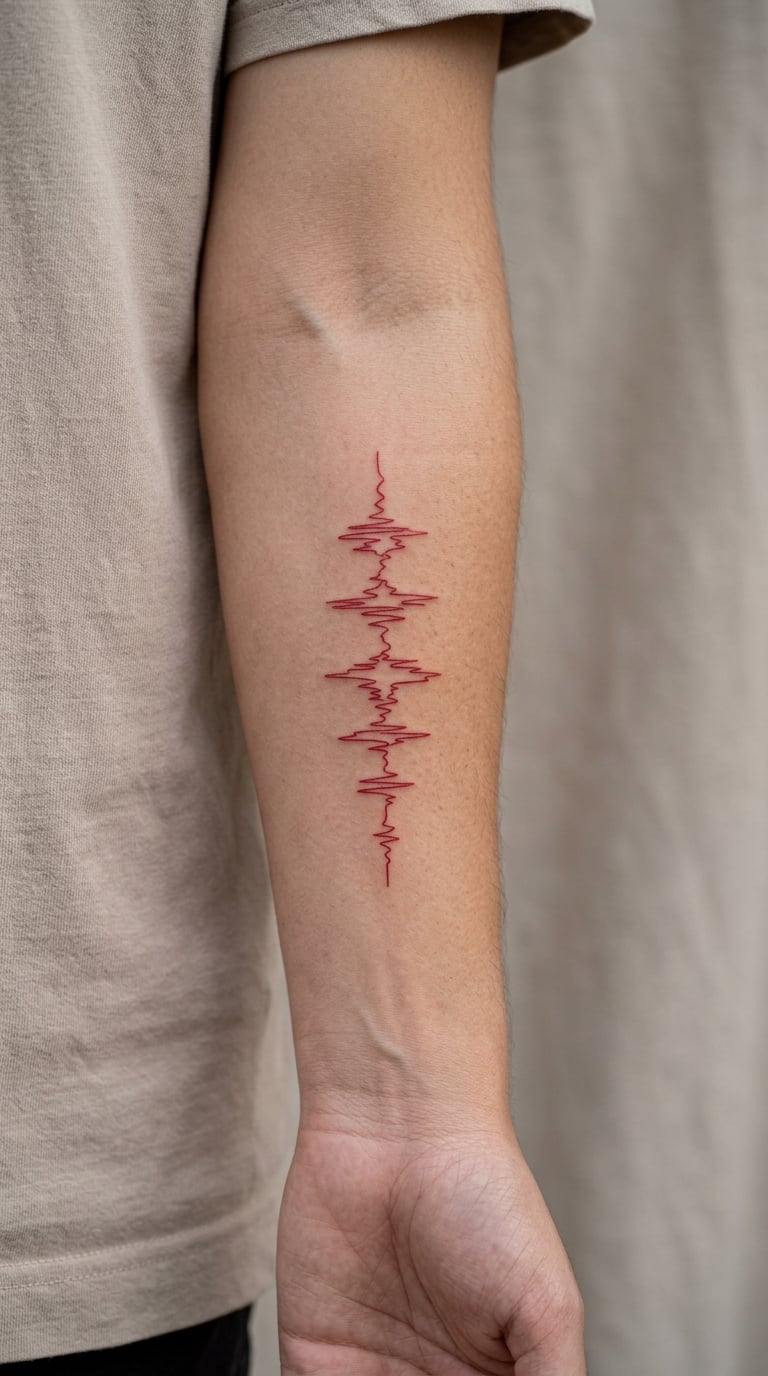
A single flowing line in red ink, with the loose irregular shape of a voice print rather than the even geometry of a music waveform. It is a drawing in the style of audio, not a code that plays anything back.
Red is the choice for people who want warmth and visibility without committing to a full colour piece, and it photographs well against skin.
Placement: Inner forearm, running vertically, or along the ribs. Size: about 3 inches long (7.5 cm). Style: freehand fine line in red.
Pain: Medium. Red ink often needs a slightly deeper pass and settles a shade darker as it heals, which surprises people. One-colour line work fades like black does, and red softens toward orange over the years.
Make it yours: Use a short spoken clip with strong emotion, where the peaks and pauses vary a lot, since a monotone recording makes a very dull shape.
24. Freestyle Sound Wave Sleeve Panel
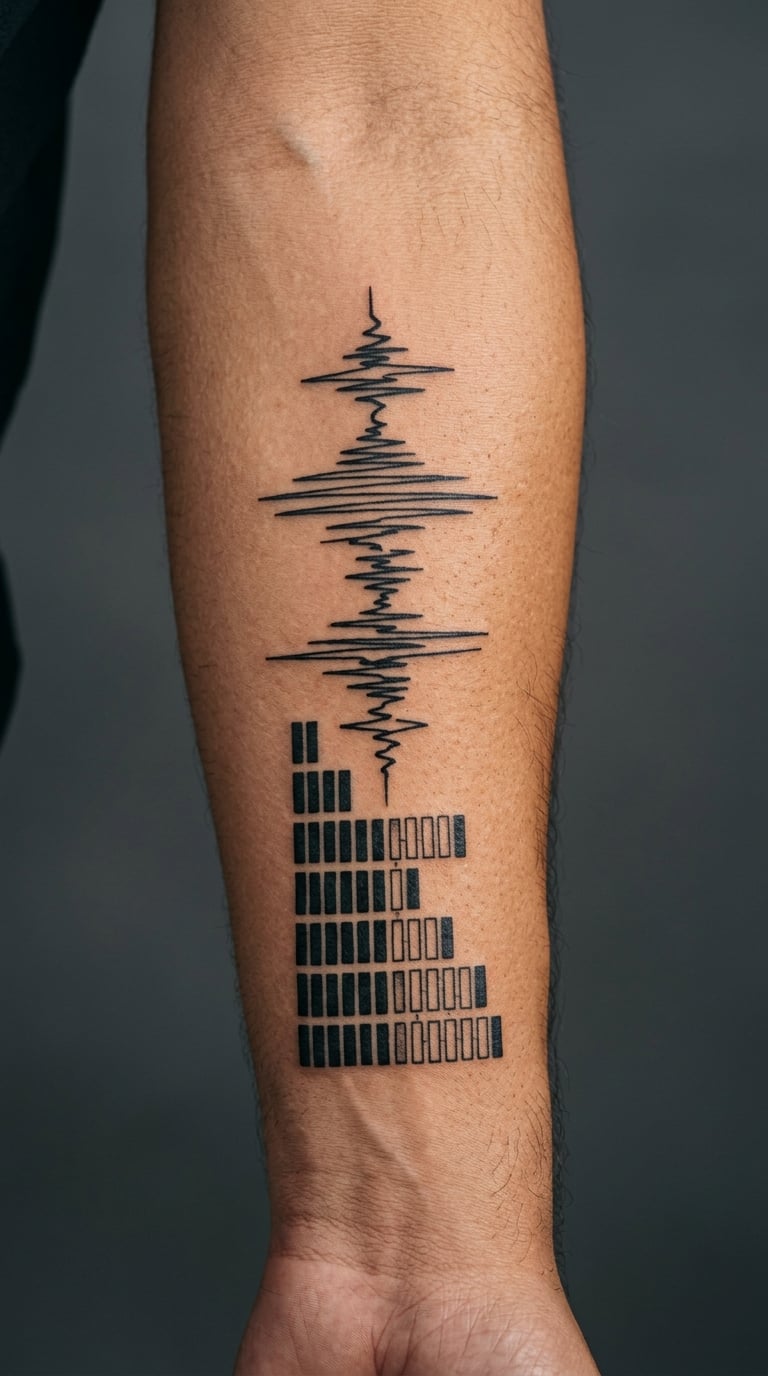
A full panel combining a bold central waveform, a run of equalizer bars beneath it, and a lighter background of fine texture and scattered small peaks filling the remaining space. It is composed work rather than a single element, and it is built to be the centrepiece of a forearm.
This is the version for someone building a collection, where the sound wave is the subject and the surrounding elements support it.
Placement: Outer forearm, as a dedicated panel. Size: about 6 by 3 inches (15 by 7.5 cm). Style: freestyle composition in black with one accent colour.
Pain: Medium, but this is a long sitting, usually two to three hours, and most people book it as the start of a sleeve rather than a standalone piece. Book a break for standing up, and plan on a second session for the fine background texture.
Make it yours: Sketch the layout on paper first and get it approved as a full composition. Adjusting the arrangement after the bold waveform is already done means covering finished work.
How to Choose the Right Design
Once you have read through all 24 of these sound wave tattoo ideas, the choice usually comes down to five things. Think about them in this order and the design decisions take care of themselves.
How these 24 sound wave tattoo ideas hold up by placement
1. Match the detail to the skin, not to the picture. Dense spacing works fine on a thigh and disappears on a wrist. If your reference image is full of tiny peaks, scale the whole design up rather than squeezing it in.
2. Pick the line weight before the shape. Fine single-needle line is elegant and ages fastest. A medium line holds its shape for far longer, which matters most on the inner arm, the collarbone and the sternum where skin moves constantly.
3. Decide how much of your audio you actually need. Two to five seconds gives you a shape with recognisable peaks and valleys. Much longer than that and the waveform turns into a flat block unless you scale it up a lot.
4. Check the body part against daily friction. Wrists, ankles and the back of the hand meet watch straps, shoe tongues and sleeves all day. Forearms, upper arms and thighs take far less abuse, and a design there usually still looks sharp years later.
5. Make sure the meaning is yours. Ask yourself whether you want a stranger to recognise the reference. If it should stay private, a faithful trace from a personal recording works better than a bold graphic with a song title.
Save the two or three sound wave tattoo ideas you like in the same place, and bring them to a consultation side by side. A single reference image rarely settles line weight and scale on its own, and seeing two designs next to each other makes the decision obvious fast.
If you want more context on the wave motif itself, we have written about what a wave tattoo means, and there is a wider set of small wave tattoo designs if you are still deciding whether a sound wave is the right version of that idea for you.
Cost and Session Time
Every studio prices by the hour with a shop minimum, and most US studios run roughly 100 to 200 an hour for a single-needle fine line specialist. A sound wave tattoo falls into clear size tiers, and the numbers below are what you should expect to pay at a mid-priced shop in the US. Artists working in big cities or booking months out sit at the top of each range.
| Design tier | Typical size | Usual cost range | Session time |
|---|---|---|---|
| Micro wave or single small motif | Under 2 in | 100 to 200 | 30 to 60 minutes |
| Small wave with a name or date | 2 to 3 in | 150 to 300 | 1 to 1.5 hours |
| Medium wave, two lines or bars | 3 to 4 in | 250 to 450 | 1.5 to 2.5 hours |
| Large composition or panel | 5 in and up | 500 to 1200 plus | 3 hours, often split |
| Colour or blackwork piece | 3 in and up | 350 to 900 | 2 to 4 hours |
Colour, shading and dotwork all push toward the higher end because the needle covers more skin per inch. If a design comes in under the shop minimum, expect to pay the minimum rather than the quoted price, and remember that very small fine line work takes longer per inch of design than its size suggests.
Aftercare Basics
Five points, and the first one matters more than the other four combined.
1. Follow your artist’s aftercare instructions. Every artist has a protocol for their own ink and needle depth, and it should override anything general you have read, including this list.
2. Wash gently, twice a day. Lukewarm water and a mild unscented soap, then pat dry with clean paper rather than rubbing with a towel. Let the shower water run over it for the last minute of your wash instead of soaking it directly.
3. Protect it from sun for the first few weeks. Loose clothing over a fresh tattoo beats sunscreen on day one, and long-term sun exposure on the forearm is what wears fine line out fastest. Once healed, use sun protection whenever the area is uncovered.
4. Leave it alone otherwise. No picking at flaking skin, no scratching when it itches, no gym gear or tight straps rubbing across it while it sets. A healed sound wave is the one with clean, even peaks.
5. Know when to contact the studio. Spreading redness, warmth, swelling, yellow-green discharge, a hot feeling, or a line that looks blurred or blown out within the first days are all reasons to message the studio, and a fever or spreading redness is a reason to see a qualified medical professional promptly. Your artist can usually tell you whether what you are seeing is normal healing or not.
Frequently Asked Questions
What size should a sound wave tattoo be?
For a first sound wave tattoo, aim for 2 to 3 inches wide, which keeps the peaks far enough apart to stay readable and usually fits in a single sitting. Under 2 inches and the shape turns to mush; over 4 inches and you are committing to a much larger piece. The inner forearm handles 3 inches comfortably, while wrists and ankles suit closer to 1.5.
Can a sound wave tattoo represent a specific song or voice?
Yes, that is the point of the design. An audio file is run through waveform software, which turns the sound’s amplitude over time into a spiky trace, and that trace is cleaned up and sent to your artist as a stencil reference. Bring the audio and ask the artist to confirm the file used is yours, because plenty of decorative sound wave designs online are just a pleasing squiggle.
Do fine-line sound wave tattoos fade quickly?
Faster than most tattoos, mainly because the line weight is so light. Fading speeds up on sun-exposed and high-friction spots like the inner wrist, the ankle and the back of the hand, and tight peak spacing fills in as the skin softens. A medium line weight, wider spacing between peaks, and covering a forearm placement all slow it down. Plan on a touch-up every few years.
Are sound wave tattoos painful on the wrist or ribs?
Both are on the higher end. The inner wrist has thin skin and bones sitting close to the surface, and the ribs catch the needle differently on every pass while the area moves as you breathe. Forearms, upper arms and thighs are the easiest. Whatever the placement, eat properly, stay hydrated, and keep moving during long sittings, because tension makes everything feel worse.
Can I combine a sound wave with musical notes or headphones?
You can, and several of these designs do exactly that. The rule is to keep the added motif small and give the waveform the dominant share of the space, otherwise the design reads as a music icon with a squiggle attached. A good balance is roughly 70 percent waveform to 30 percent motif, and keep any lettering or branding off the design entirely.
Conclusion
If this is your first tattoo, go with idea 1, the minimal sound wave line on the inner forearm. It is small, it fits in one sitting, it hides under a sleeve on a work day, and the shape is forgiving enough that a slightly imperfect version still looks deliberate.
If you are already collecting pieces, the freestyle sleeve panel is the stronger choice, because it is designed to sit alongside other work rather than compete with it. Either way, start by saving the sound wave tattoo ideas closest to what you already own, pick the two to five seconds of audio you care about most, and keep that file somewhere you will not lose it before you take the printout to a consultation. Our wave and sun tattoo gallery has more designs if you want to see how this motif sits next to something else entirely.