
20 Fern Tattoo Ideas (October 2026): Best Botanical Designs
These 20 fern tattoo ideas cover the full range, from a single fiddlehead curled on your inner forearm to a layered botanical panel wrapping the arm. A fern works on skin because of its shape: one central stem with leaflets stepping down in size, which follows the line of a forearm, calf or spine and still reads clearly when it is small. Ferns also carry real associations with endurance, new beginnings and quiet growth, so the design usually means something even when nobody explains it.
What makes a fern hold up is restraint in the linework and honest scaling. If you like the outdoorsy, quiet look rather than a loud piece, you will find something here. Pair it with our pine forest forearm tattoo ideas for a woodland theme, or start with tattoo ideas that symbolize growth if the meaning matters most to you.
20 Fern Tattoo Ideas: Quick Guide
Every idea below gets the same five labels so you can scan straight to the one that fits your spot, your pain budget and how much detail you want to live with. Sizes are finished-healed measurements on skin.
| Idea | Style | Best placement | Size | Pain |
|---|---|---|---|---|
| 1. Fine-line fiddlehead | Fine line | Inner forearm | 2-3 in | Low |
| 2. Minimalist fern sprig | Minimalist | Wrist | 3 in | Low to medium |
| 3. Blackwork fern frond | Blackwork | Outer forearm | 5 in | Medium |
| 4. Watercolor Boston fern | Watercolor | Calf | 4-5 in | Medium |
| 5. Dotwork fern leaflet | Dotwork | Above wrist crease | 2 in | Medium |
| 6. Micro-realism royal fern | Micro-realism | Side of forearm | 3 in | Medium |
| 7. Trailing fern on the spine | Fine line | Upper spine | 7-9 in | High |
| 8. Fern half-wreath | Fine line | Collarbone | 4 in across | Medium |
| 9. Blue fern study | Botanical colour | Upper arm | 4 in | Medium |
| 10. Traditional sword fern | Traditional | Shoulder blade | 5 in | Medium |
| 11. Bird’s nest fern | Black and grey | Between shoulder blades | 4 in wide | Medium |
| 12. Single fern leaf | Minimalist | Inner wrist | 2 in | Low |
| 13. Cascading button fern | Fine line | Side of forearm | 5 in | Medium |
| 14. Silver fern on the back | Black and grey | Upper back | 7 in | Medium |
| 15. Fern branch behind the ear | Fine line | Behind ear | 2 in | Medium |
| 16. Geometric fern half-sleeve | Blackwork and geometric | Forearm | 6 in across | High |
| 17. Coloured leatherleaf fern | Realistic colour | Thigh | 5 in | Medium |
| 18. Minimal fern on the hand | Minimalist | Back of hand | 3 in | High |
| 19. Sunburst fern wrist tattoo | Fine line with accent | Inner wrist | 3 in | Low to medium |
| 20. Layered fern forearm panel | Botanical colour | Forearm | 6 by 4 in | High |
1. Fine-Line Fiddlehead Fern
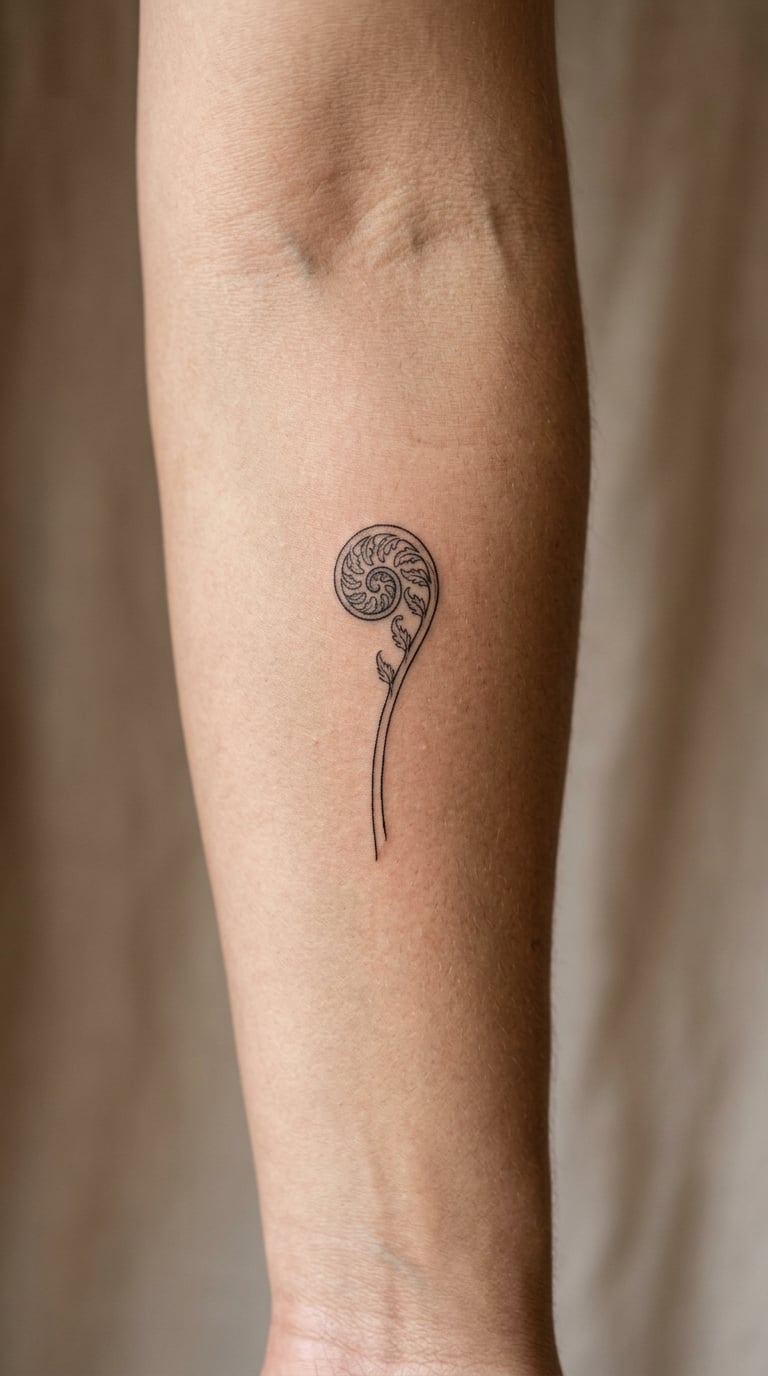
This is one curled fern shoot, drawn as a spiral at the top that unwinds into a short stem. The line thins as it travels, and there is no shading at all. It is the most recognisable fern image and it stays legible at postage-stamp size, which is exactly why it keeps working as a first piece.
People choose it because a fiddlehead is the whole life story of a fern compressed into one shape: something tightly closed that is in the middle of opening.
Placement: inner forearm a few inches above the wrist crease, or the rib area. Size: 2 to 3 inches tall (5 to 7.5 cm). Style: fine line, single needle weight. Pain: low to medium on the inner arm; it is a short session, often under an hour. Hairline strokes on a small curl are the first thing to soften, so expect the inner spiral to look slightly looser in a year.
Make it yours: put the curl opening upward toward your elbow so the shape reads as growth as your arm moves.
2. Minimalist Fern Sprig
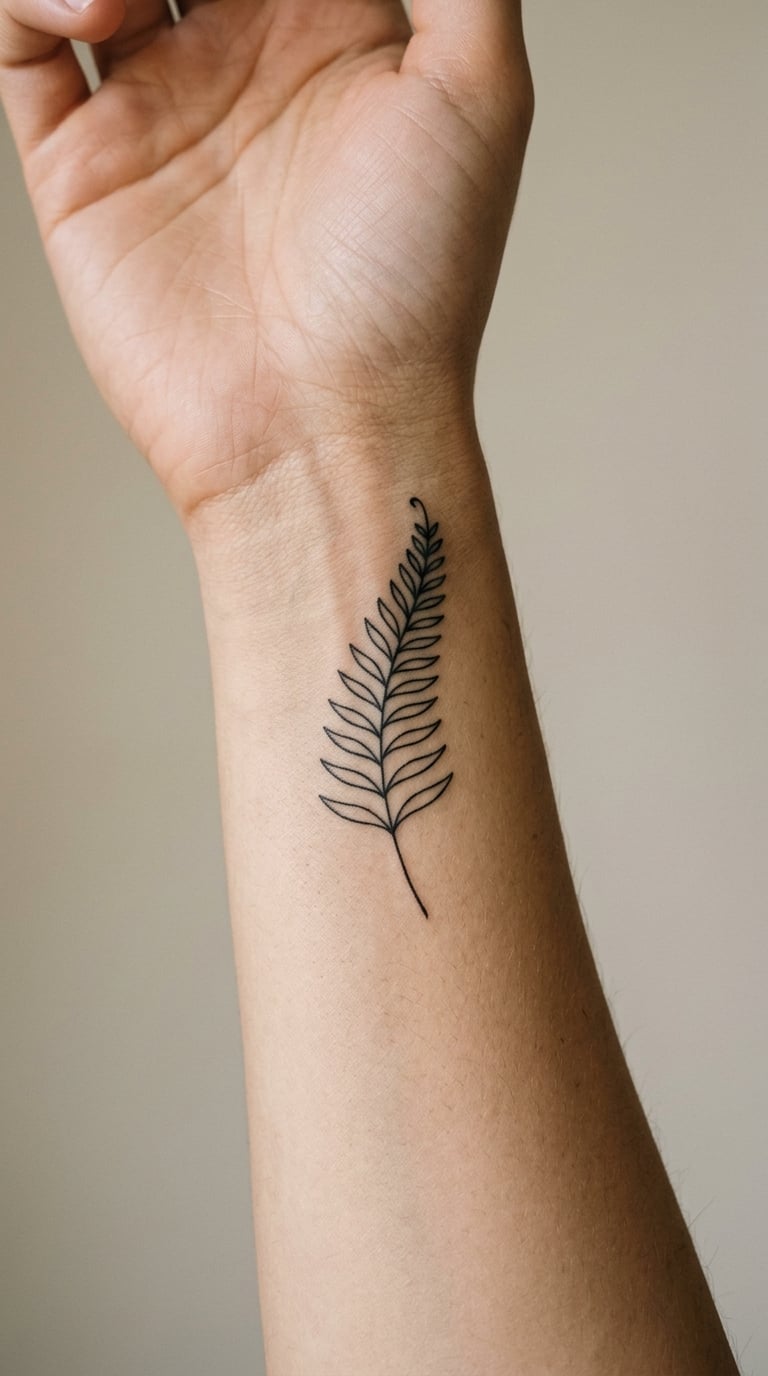
A single stem with evenly spaced leaflets stepping down in size, nothing else on the arm. The trick here is restraint: too many leaflets and it turns into a caterpillar, too few and it stops reading as a fern.
It is the safest botanical tattoo to commission because almost any artist can execute it well, which matters if it is your first permanent piece.
Placement: inner wrist, just above the crease, or the ankle bone. Size: around 3 inches long (7.5 cm). Style: minimalist fine line with a slightly thicker stem than leaflet. Pain: low to medium. Wrist skin is thinner than the forearm, so expect more of a scratch than a sting. Thin lines on the wrist fade fastest of all the spots in this list, mostly from sun exposure.
Make it yours: have the artist tilt the whole sprig slightly off the bone line so it follows your wrist curve rather than fighting it.
3. Blackwork Fern Frond
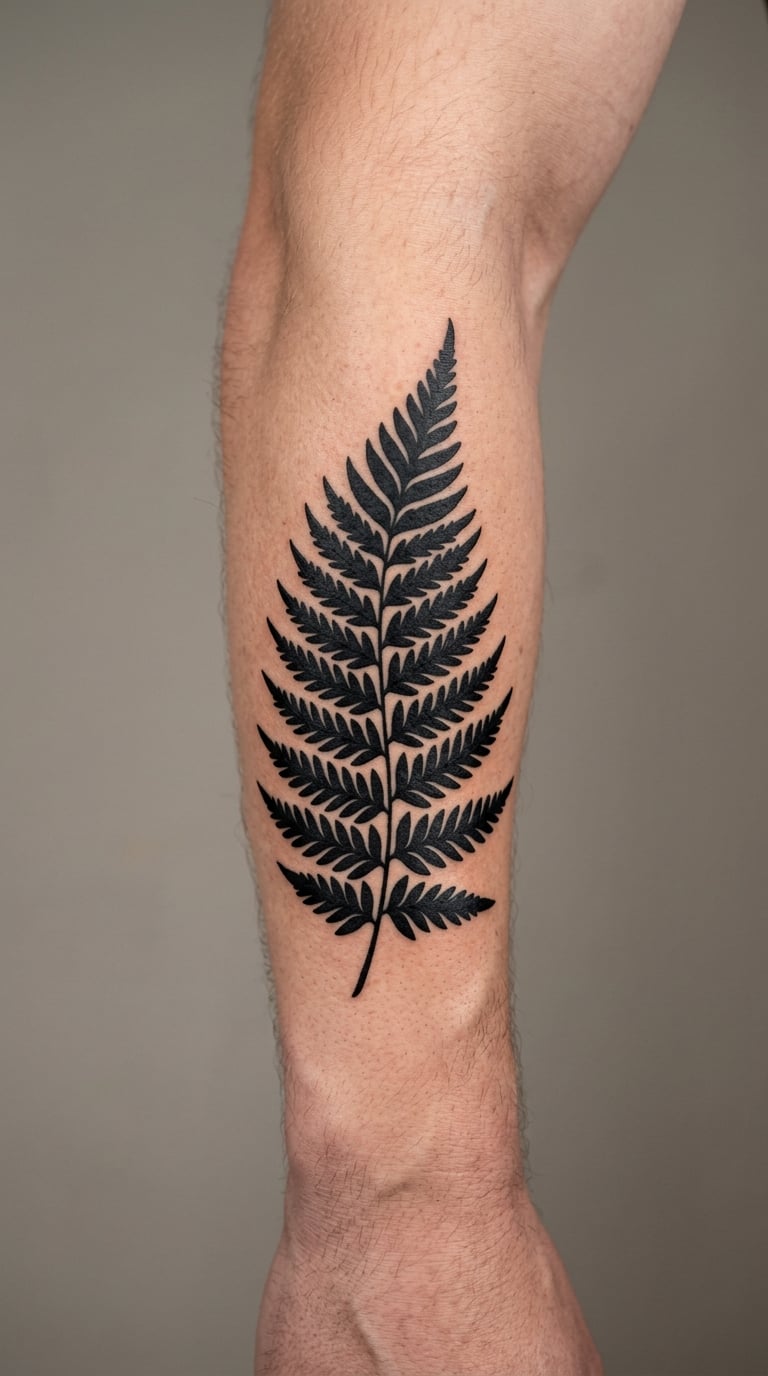
Solid black leaflets with hard edges and generous negative space between them, no grey, no soft shading. The leaflets are usually drawn as tapered wedges that fill in solid, and the stem is a single heavy line.
This version exists for people who want a fern that still looks sharp in fifteen years. Blackwork hides small errors and has almost nothing to lose to sun fade.
Placement: outer forearm, upper arm, or calf. Size: 5 inches long (12.5 cm) or larger. Style: blackwork with solid fills. Pain: medium, because solid black means more repeated passes. It is a two-hour job at most for a single frond, and solid areas stay readable as the design ages, which fine line does not.
Make it yours: ask for one frond rather than three, then leave a wide band of bare skin. The negative space is doing most of the work.
4. Watercolor Boston Fern
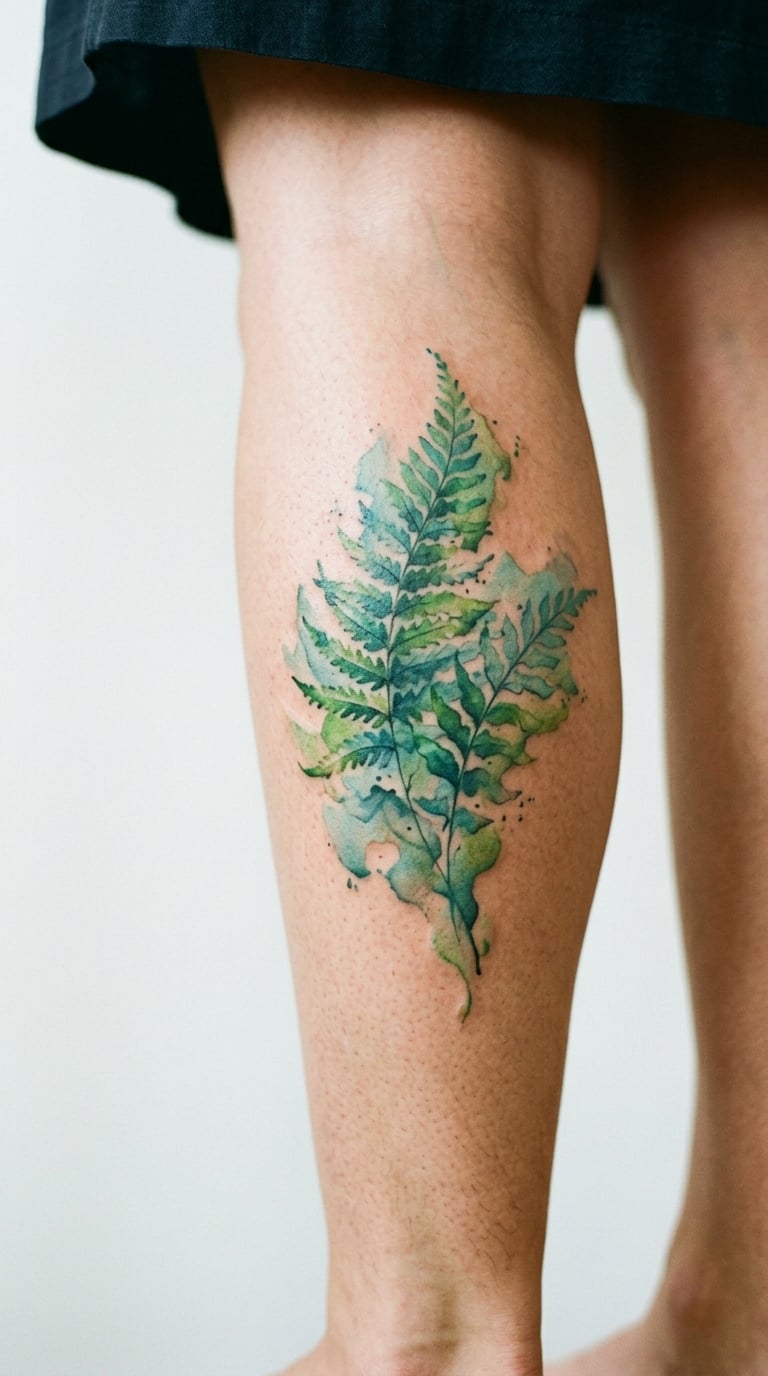
Layered translucent washes in moss, olive and blue-green, with edges that run slightly outside the line of the frond as if the pigment bled on wet paper. Some artists add one darker stem in black so the shape holds.
Boston fern has a soft, full, arching habit, so it reads as generous rather than spare. It suits people who want a fern that looks handmade rather than traced.
Placement: calf, thigh, shoulder. Size: 4 to 5 inches long (10 to 12.5 cm). Style: watercolor with loose edges. Pain: medium. The colour settles a shade darker and warmer as it heals, and pale washes fade fastest, so ask for more pigment than looks right on a healed photo.
Make it yours: add two or three watercolour speckles above the frond, or a wash behind it in your favourite colour instead of green.
5. Dotwork Fern Leaflet
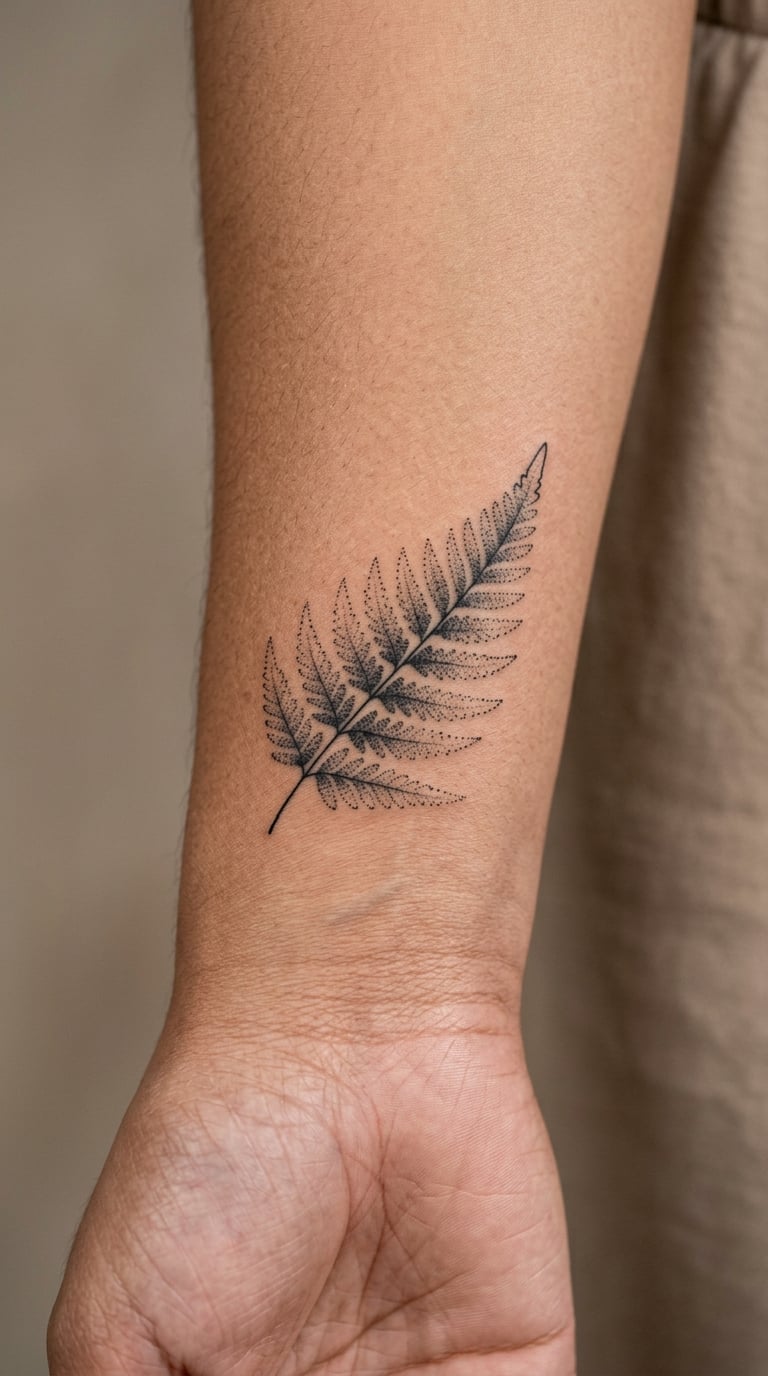
One curved section of a frond built entirely from dots that vary in size and spacing, so the form appears and disappears rather than sitting flat. Dot size and gap do the shading, not grey wash.
It is a good middle ground between a full realistic frond and a plain outline, and it works well if you dislike solid black.
Placement: just above the wrist crease, inside the upper arm, or along a rib. Size: 2 inches long (5 cm). Style: dotwork. Pain: medium. Dots take longer than linework, so a small piece can run 90 minutes. Fine dots heal slightly blurred together over the first few months, and the smallest ones soften first.
Make it yours: ask the artist to run the dot size from large at the stem down to tiny at the tip so the leaflet tapers naturally.
6. Micro-Realism Royal Fern
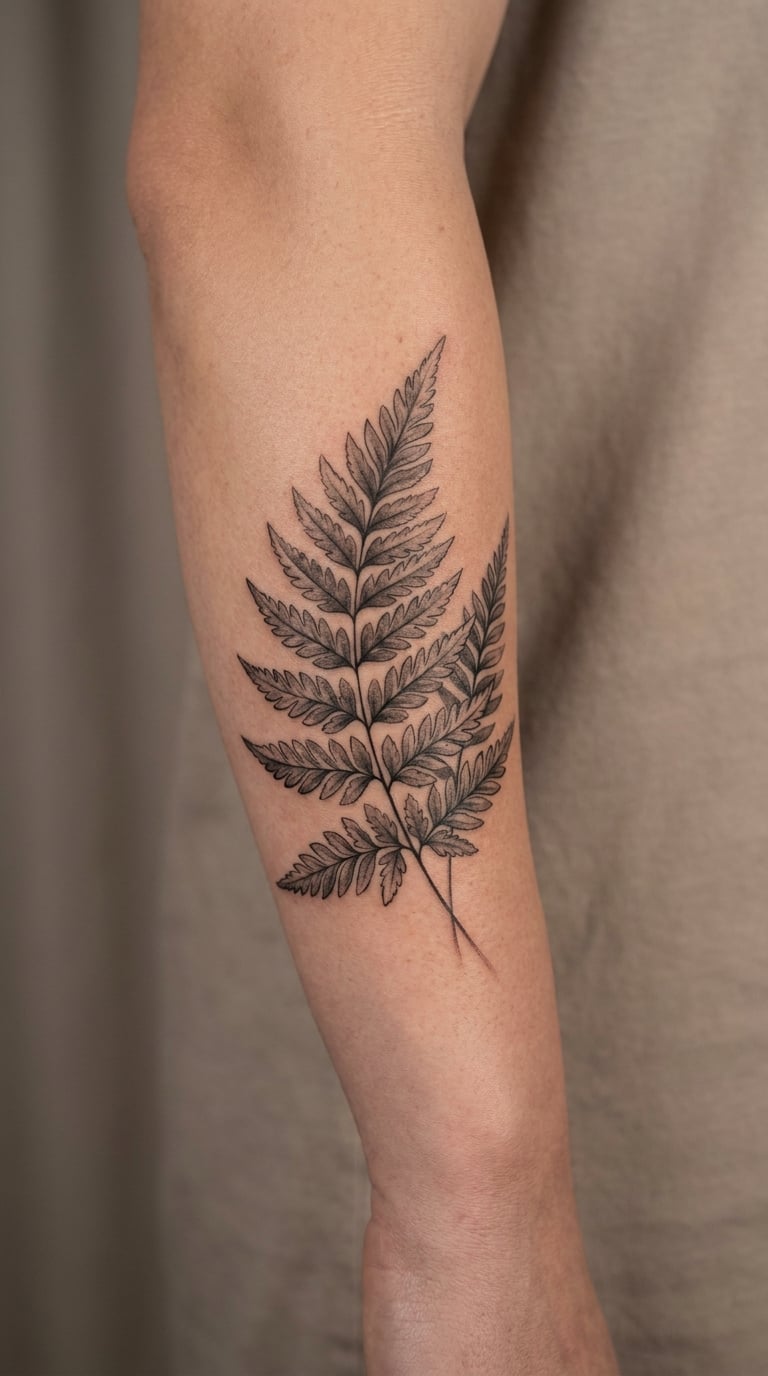
A small but properly structured frond: overlapping leaflets, soft grey shading where one leaflet crosses another, and a visible central rib. It is tiny, but the anatomy is right, which is what separates realism from a generic leaf.
Royal fern has a dense, upright shape, so it gives you a full-looking plant in a small footprint. This is a good pick if you want detail without a big commitment.
Placement: side of the forearm, inner upper arm, behind the ear. Size: 3 inches tall (7.5 cm). Style: micro-realism in black and grey. Pain: medium. Ask your artist for a reference photo of an actual royal fern rather than a drawing, because the leaflet shape is specific. At this scale, expect some softening in the shading within three to five years.
Make it yours: add a tiny second frond behind it at a shallower angle so the piece has depth instead of sitting flat.
7. Trailing Fern on the Spine
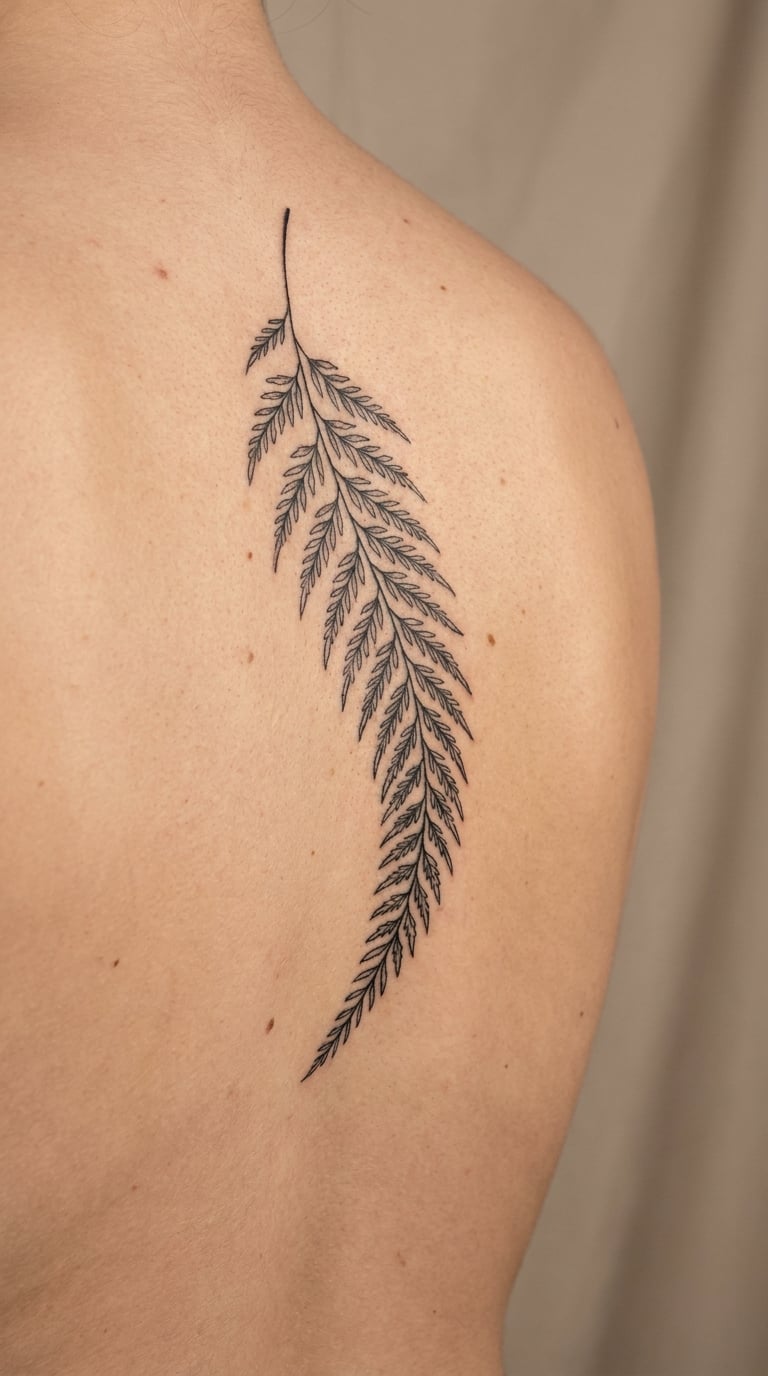
One long stem running down the spine with leaflets getting smaller toward the bottom, so the design tapers into the skin instead of stopping. Some people mirror two fronds either side of the spine.
A spine fern reads as growth that keeps going. It is also the placement people notice least once it has healed.
Placement: upper spine, from the base of the neck down. Size: 7 to 9 inches long (18 to 23 cm), scaled to torso length. Style: fine line, tapered. Pain: high. The spine is bony and the ribs beneath it mean some spots hurt a lot more than others. Fine line over a bony curve is the combination most likely to need a touch-up, so budget for one.
Make it yours: have the stem start higher and stop mid-back with no ending frond, so the piece looks like it continues past the edge of the design.
8. Fern Half-Wreath for the Collarbone
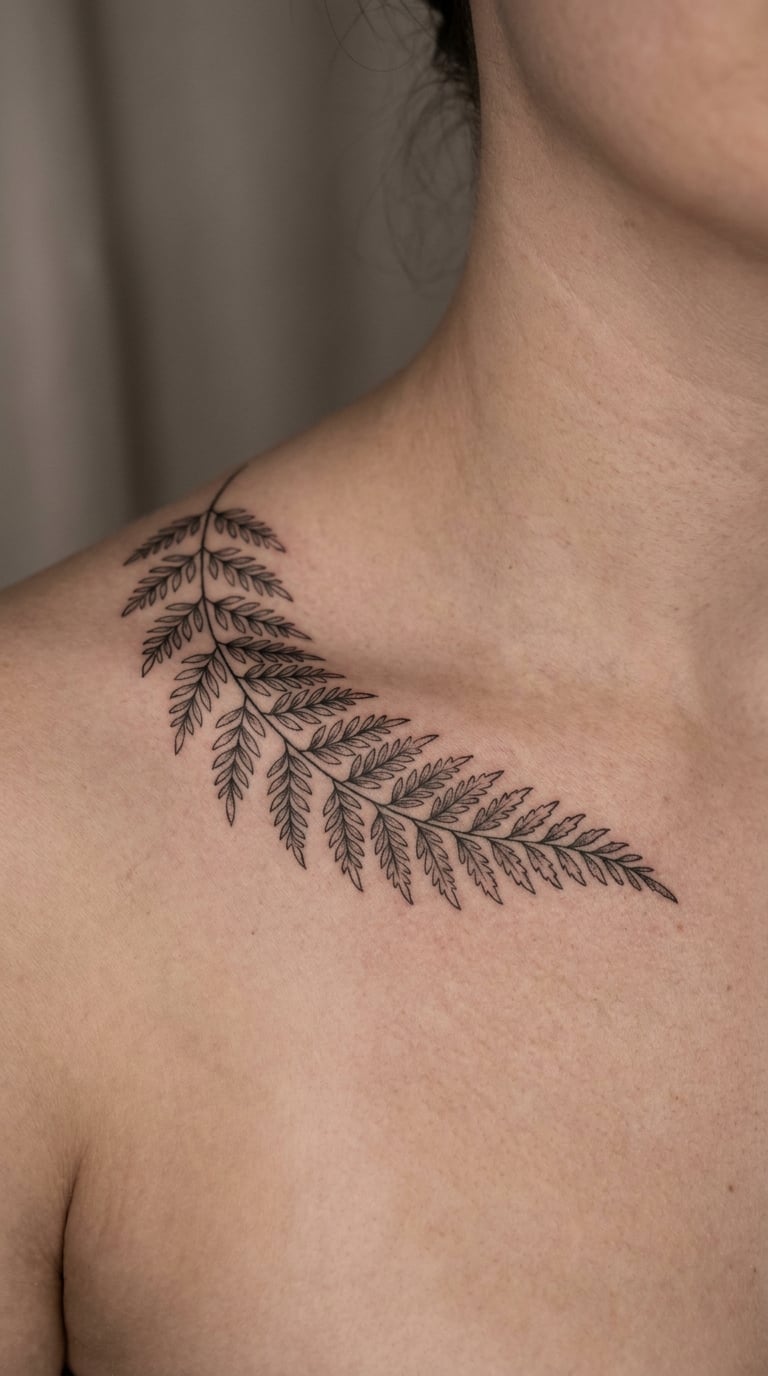
A curved run of three to five fronds following the line of the collarbone, arcing from near the shoulder toward the centre of the chest. Each frond points along the curve rather than radiating outward like a floral wreath.
Because it follows a bone, it looks intentional rather than stuck on. One collarbone or both is a personal call.
Placement: one collarbone, or mirrored across both. Size: 4 inches across (10 cm). Style: fine line with slight line-weight variation. Pain: medium. The hollow above the collarbone catches sun, so colour here fades faster than on the arm. Keep the leaflets larger than feels necessary and it will hold its shape.
Make it yours: run the lowest frond slightly off the bone line so the design follows the curve instead of tracing it exactly.
9. Blue Fern Botanical Study
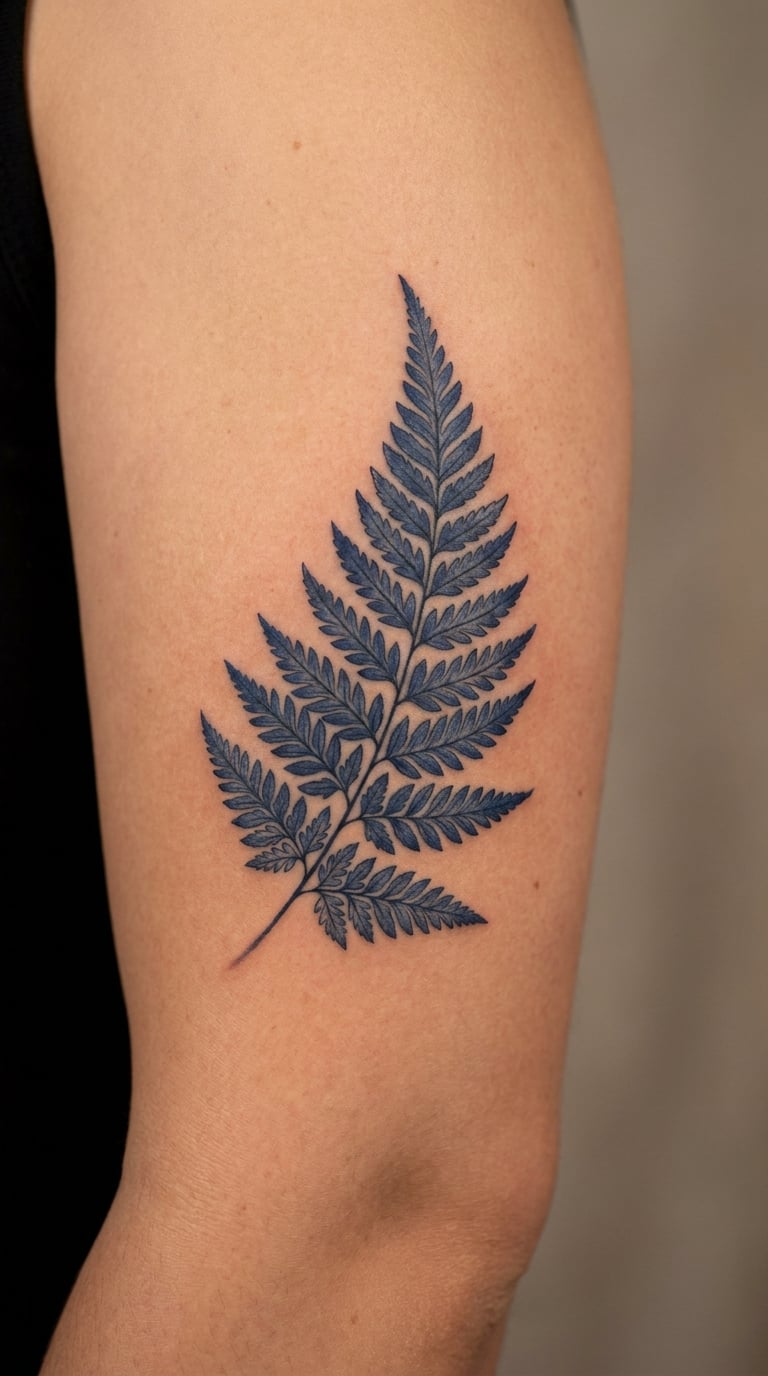
A botanically accurate frond painted in deep cobalt and slate blue, with darker ink built into the shadowed side of each leaflet. The structure stays realistic while the palette does something unusual.
Blue reads as cool and quiet on skin, which makes it a good choice when you want a fern that looks considered rather than decorative. It is also forgiving in summer because it sits well against tan skin.
Placement: upper arm, outer thigh, back of the shoulder. Size: 4 inches tall (10 cm). Style: botanical colour illustration. Pain: medium. Blue ink shows every patchy spot of skin underneath, so an artist will usually build the colour in layers. Cobalt sits in the skin and holds well; lighter slate blue fades within a few years without a refresh.
Make it yours: keep the stem black and shift only the leaflets blue. The contrast makes the structure clearer and the colour reads stronger.
10. Traditional Sword Fern
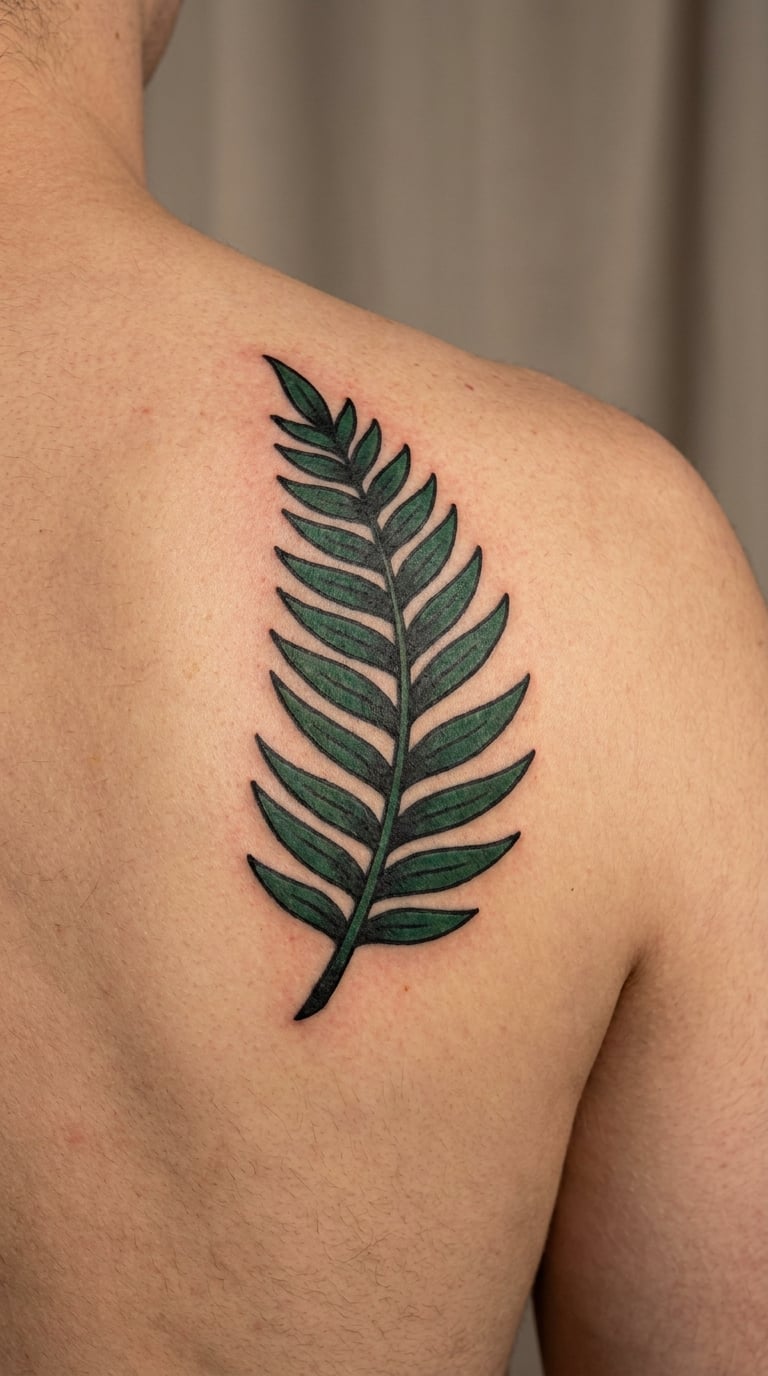
A bold outlined frond with flat deep green fill, yellow-green highlights along the leaflet edges and a few areas of decorative drop shadow. Nothing soft about it; this is the tattoo version of a field-guide plate drawn by hand.
Sword fern is a West Coast plant and a common tattoo subject in that tradition. It suits people who want the fern motif with more contrast and more presence than a realistic study gives.
Placement: shoulder blade, outer upper arm, chest side. Size: 5 inches long (12.5 cm). Style: American traditional with flat colour and shading. Pain: medium. Colour packing takes longer than linework, so expect three to four hours. Bold fill and heavy outline hold their shape better than any fine line piece on this list.
Make it yours: keep the black outline thick and add a second smaller frond beneath it rather than adding more colours.
11. Black-and-Grey Bird’s Nest Fern
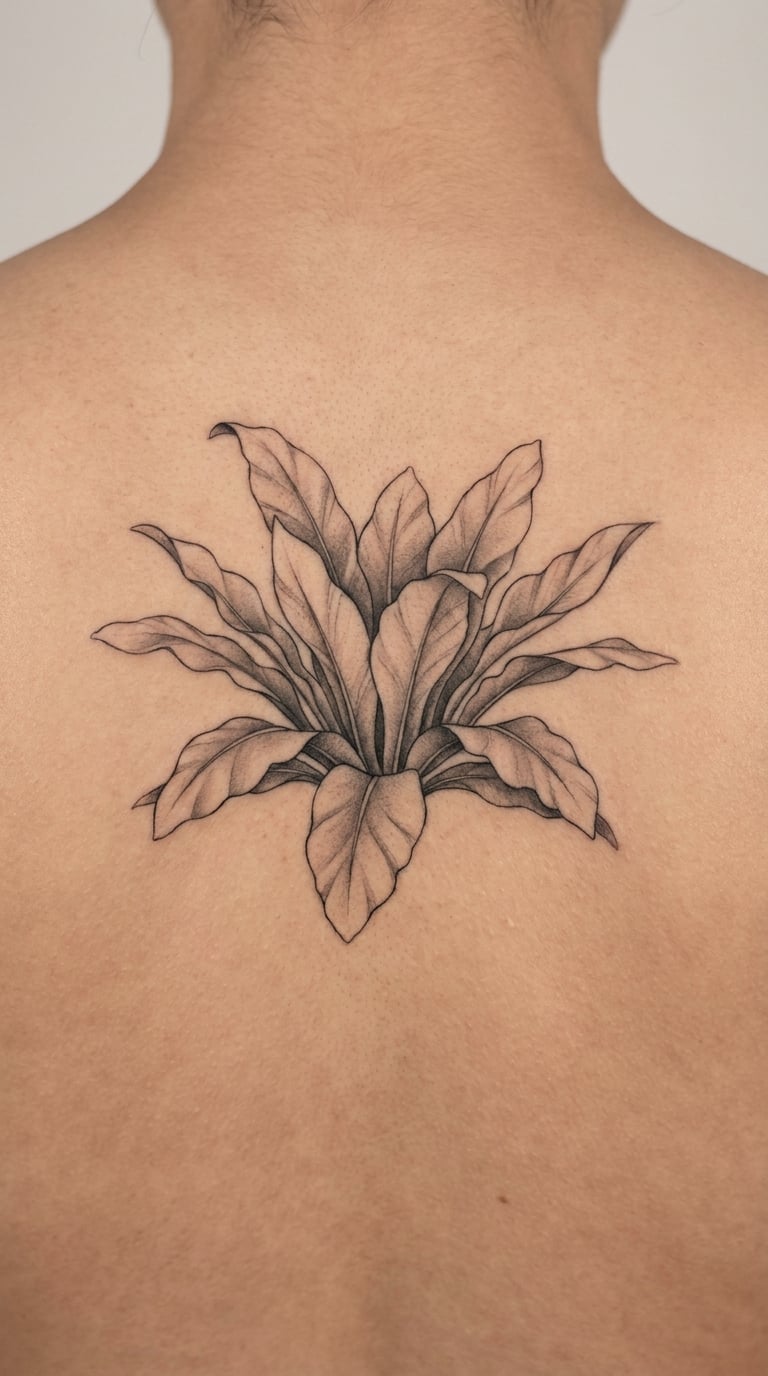
Broad fronds overlapping in a rosette, with grey shading where they cross so the plant reads as three-dimensional rather than flat. It is the one design on this list that shows the whole plant rather than a single frond.
People pick it because it is the closest to how the plant actually grows, a tight nest of wide leaves. Between the shoulder blades gives it room without needing a full back piece.
Placement: upper back between the shoulder blades, or mid-thigh. Size: 4 inches wide (10 cm). Style: black and grey realism. Pain: medium. Overlapping layers mean more passes over the same skin, so budget a long session. Grey shading in a small area is the first thing to blur, so ask for slightly darker, defined edges between leaves.
Make it yours: add a second smaller rosette below it at half scale, offset to one side, to make the back piece feel built up rather than floating.
12. Minimal Single Fern Leaf
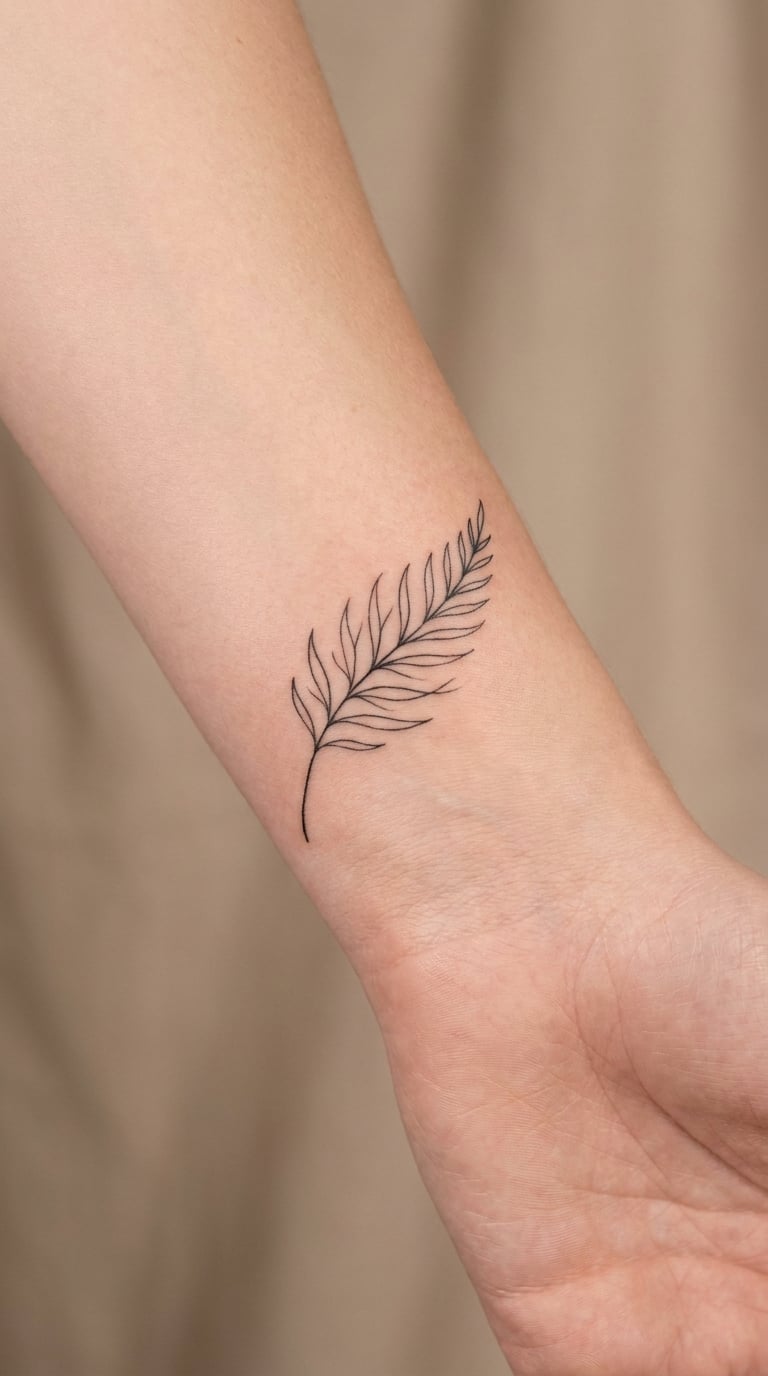
One isolated leaf with a thin stem and a few balanced veins, and honestly very little else. At two inches there is room for three or four leaflets without crowding.
This is the discreet option, the one that stays invisible under a watch band or a sleeve and still means something to you. It is also the easiest fern to heal cleanly.
Placement: inner wrist, ankle bone, behind the ear. Size: 2 inches long (5 cm). Style: minimalist fine line. Pain: low to medium. At this size the whole thing is a quick session. The trade-off is honest: a two-inch leaf has almost no line weight to spare, so it fades faster than anything else here and will need a refresh within five years or so.
Make it yours: keep it single and put a small date or initial on the opposite forearm, so the fern itself stays clean.
13. Cascading Button Fern
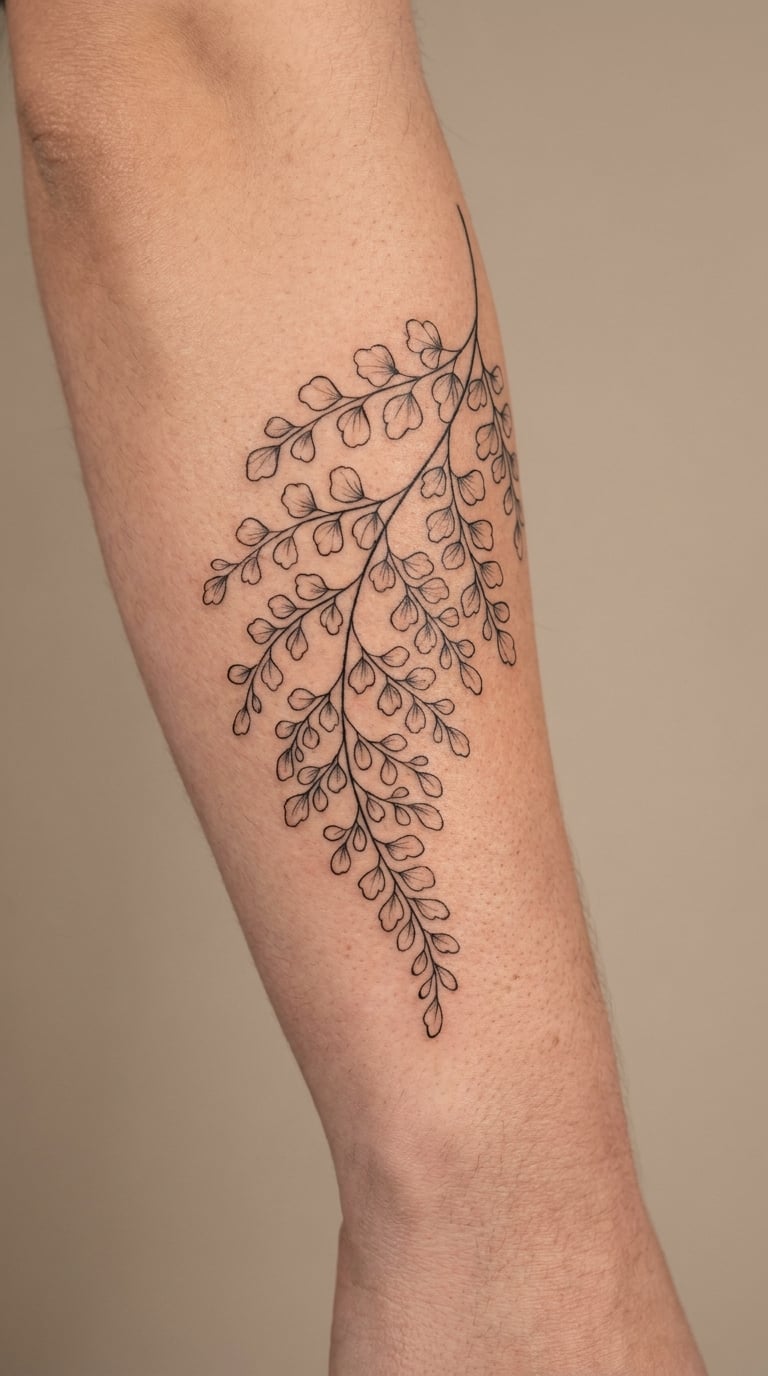
Thin arching stems carrying small round leaflets, arranged so they trail downwards rather than standing upright. The overall shape is airy and slightly loose, with plenty of skin showing between the stems.
Button fern grows in damp, shaded places, and that trailing quality suits the side of an arm or a leg. People like that it looks like it is growing downward along the limb.
Placement: side of the forearm, inner calf, outer thigh. Size: 5 inches long (12.5 cm). Style: fine line with light dotwork on some leaflets. Pain: medium. Many small round leaflets mean many tiny line segments, so this takes longer than its size suggests, around two and a half hours. On the calf and thigh, fine line holds up better than on the wrist.
Make it yours: let one stem trail past the main cluster and fade out, which makes the design feel like it is still growing past the edge.
14. Silver Fern on the Back
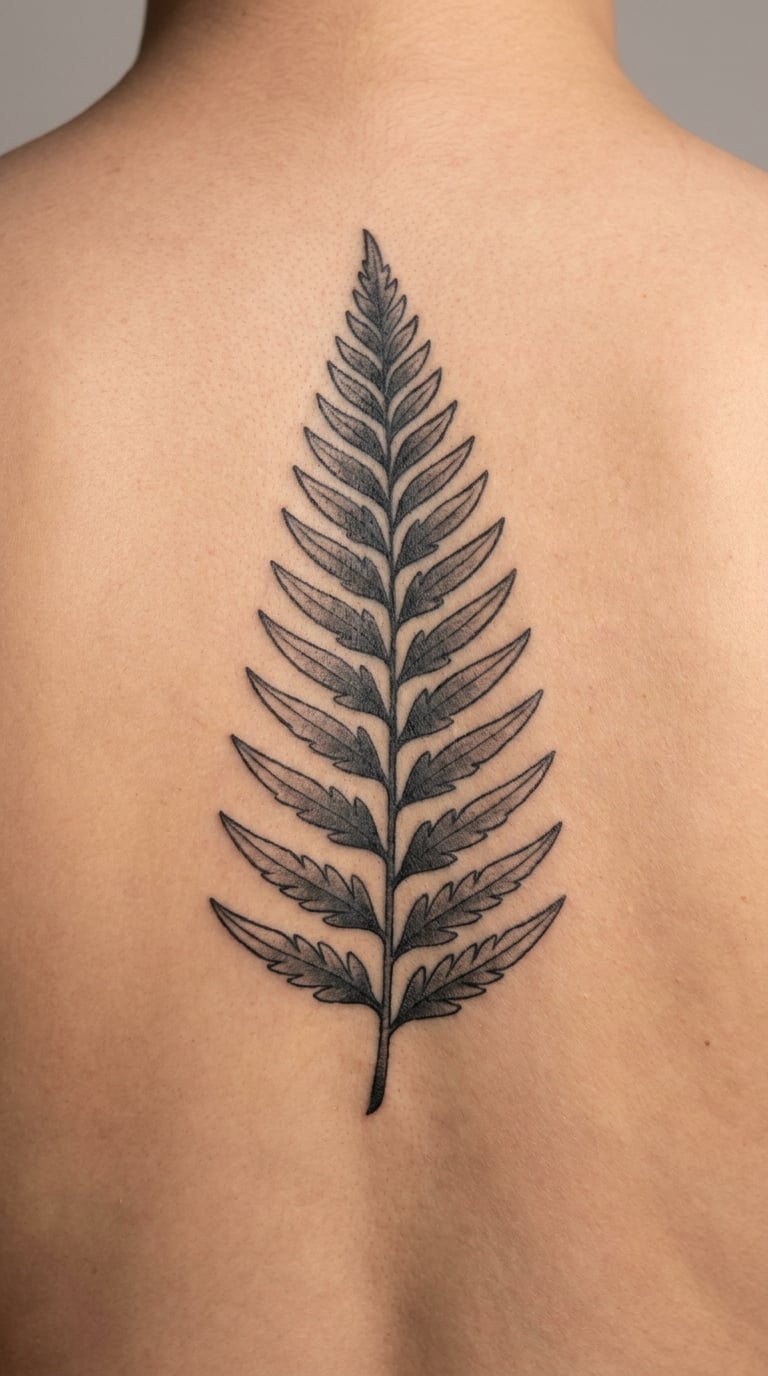
A central stem with sharply defined alternating leaflets on both sides, drawn with clean black outline and grey shading on the underside of each leaflet. It is recognisable without being photoreal.
The silver fern is strongly associated with New Zealand and with Māori culture, where the koru spiral it belongs to carries its own meaning. If you are not connected to that heritage, wear it for the shape and the new-beginnings idea rather than claiming the symbolism.
Placement: upper back, centred between the shoulder blades, or mid-calf. Size: 7 inches long (17.5 cm). Style: black and grey realism. Pain: medium, and the back is a comfortable place to sit through a long session. Alternating leaflets need consistent spacing to avoid looking like a feather, so choose an artist who has done botanical work before.
Make it yours: add a small unfurling fiddlehead at the base of the stem, tying the new-beginnings idea to the design explicitly.
15. Fern Branch Behind the Ear
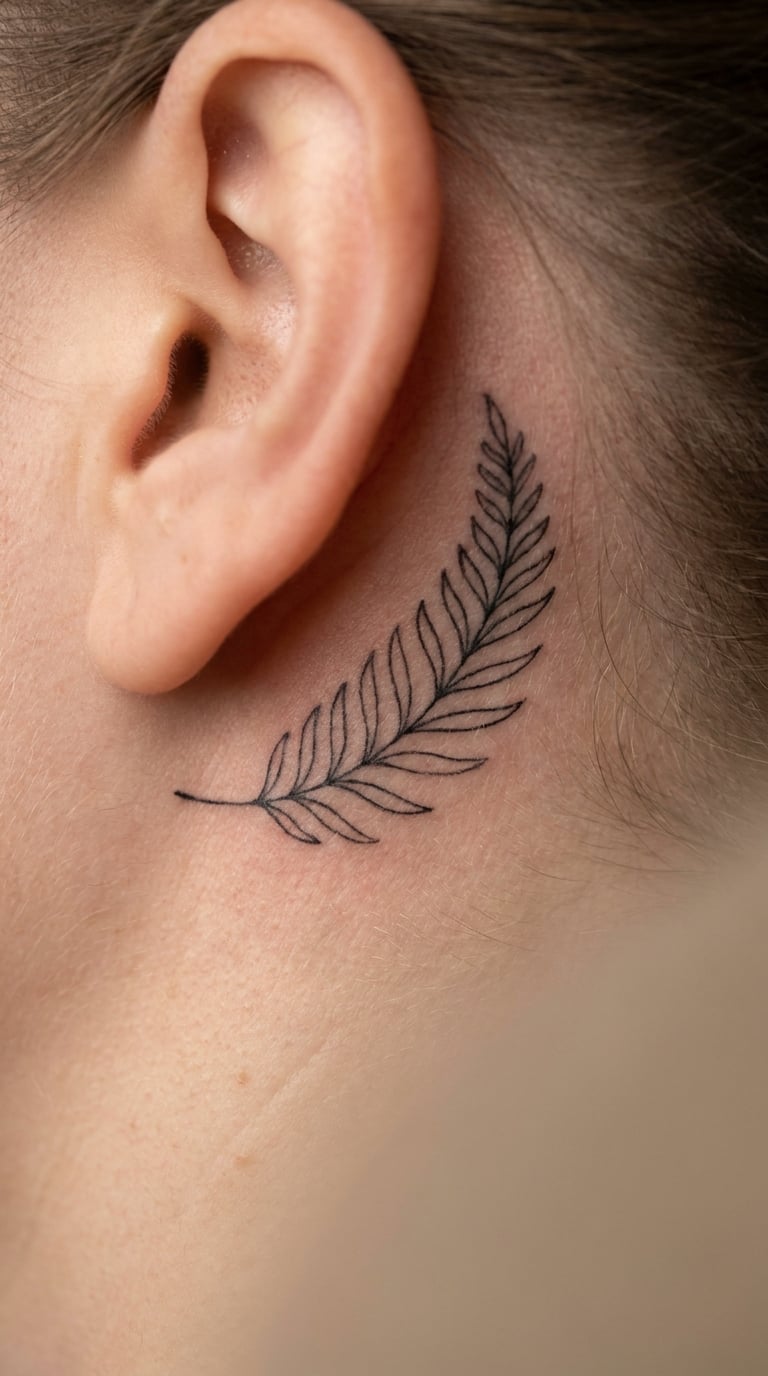
A short branch that curves up from behind the ear, so only the outer edge of the frond shows from the front. The shape has to stay legible without you seeing most of it, which means bigger leaflets and fewer of them.
It works because it is discovered rather than displayed. People tend to get this one for a first tattoo or as an add-on to a larger botanical piece.
Placement: directly behind the ear, curving toward the temple. Size: 2 inches long (5 cm). Style: fine line. Pain: medium, and it is a fiddly position for both artist and client, so the appointment can run long. Skin behind the ear moves constantly when you talk and chew, and fine line there softens faster than anywhere else on this list.
Make it yours: angle the curve so it points slightly upward rather than straight back, which reads better in profile.
16. Geometric Fern Half-Sleeve
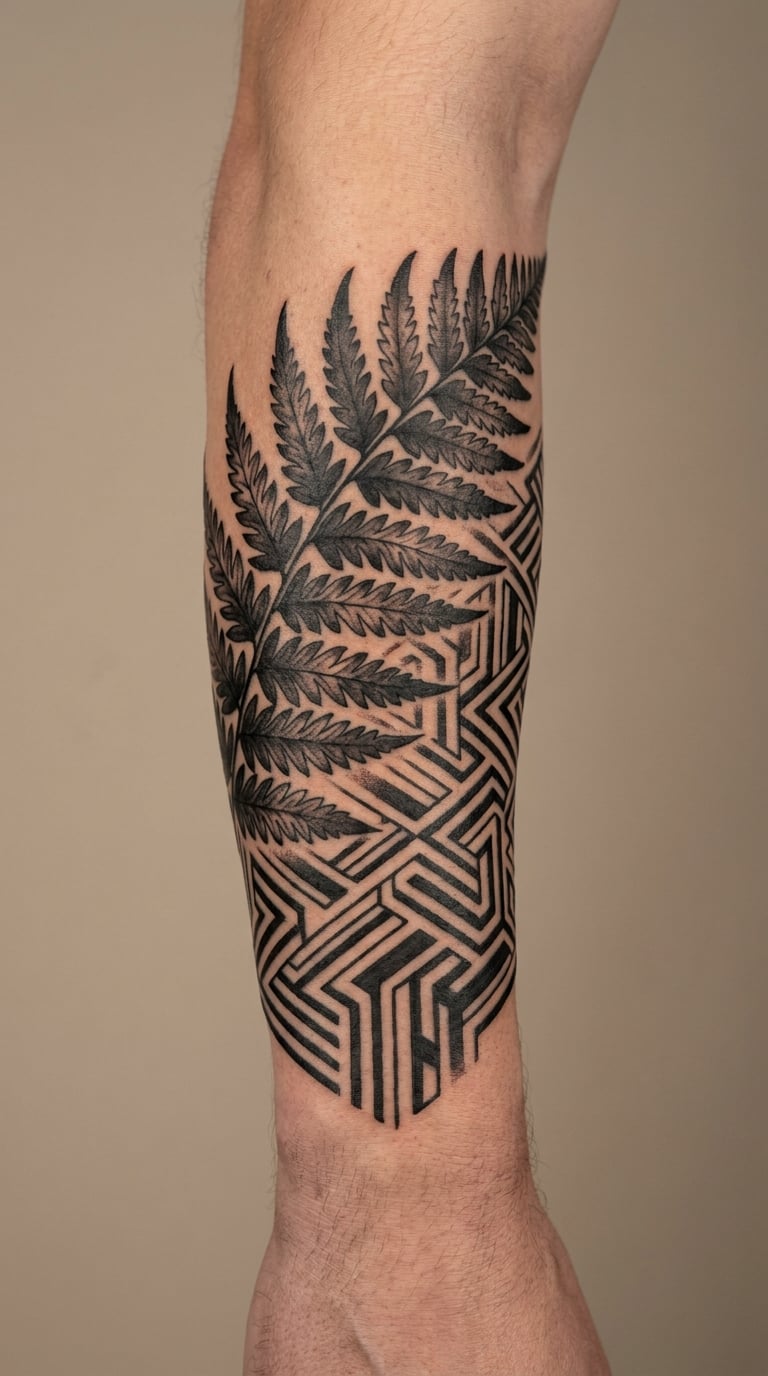
Realistic fronds at one end that transition into angular repeating segments at the other, with a clean line where the styles meet. The geometry does the visual work and the realistic part anchors it.
This is the option for someone who likes ferns and structure both. It is also the point where you need an artist who works in two styles rather than one.
Placement: forearm from wrist toward elbow. Size: 6 inches across, or full forearm for a true half-sleeve. Style: blackwork with geometric patterning. Pain: high. A forearm this size runs three to five hours and may need two sessions, because the elbow area and the wrist crease are both sensitive. The geometry also ages well, which means you are not relying on fine detail to keep this readable.
Make it yours: let the geometric section wrap slightly around the arm rather than sitting flat on the top, which follows the cylinder of the forearm.
17. Soft Coloured Leatherleaf Fern
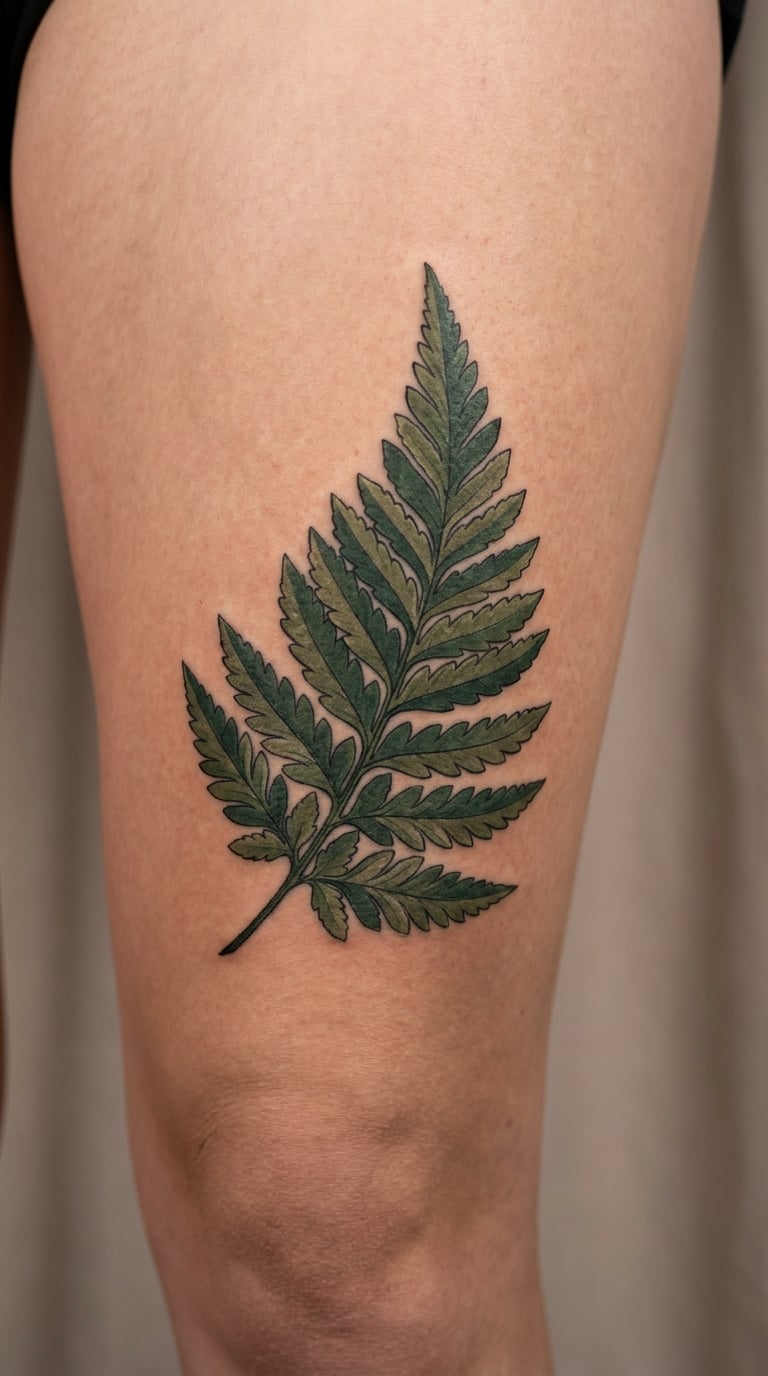
Broad textured fronds with visible surface veining, layered in forest green, olive and a warm shadow tone underneath. The colour is muted rather than bright, which is what keeps it from looking like clip art.
Leatherleaf fern has thick, substantial leaves, so the piece has more visual weight than a fine line fern. It suits a thigh or calf where there is room for that weight.
Placement: outer thigh, calf, lower back. Size: 5 inches tall (12.5 cm). Style: realistic colour botanical. Pain: medium. Full colour work on broad fronds means three to four hours. Greens on skin go yellow-grey with sun over the years, so keep some near-black shadow in the design and it will still look intentional when the green softens.
Make it yours: pick two greens that sit close together rather than a green and a yellow, which keeps the whole piece calm.
18. Minimal Fern on the Hand
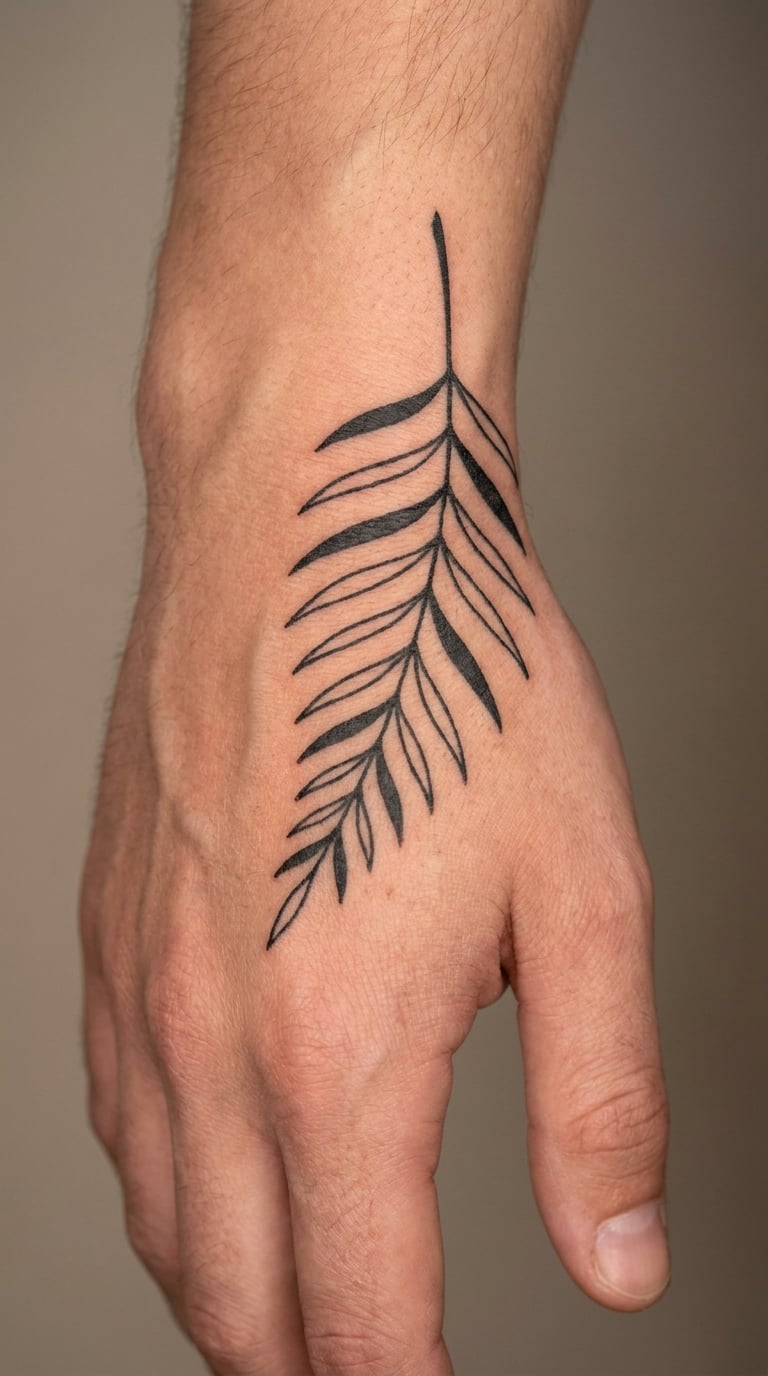
A narrow fern running lengthwise across the back of the hand with simplified leaflets spaced broadly, so the skin between each one stays open. Simplified is the important word here: a detailed frond on a hand fills in fast.
You want this one because you want it visible, and hand tattoos are seen constantly. Just go in knowing the trade-off before you sit down.
Placement: back of the hand, between the knuckles and the wrist, running lengthwise. Size: 3 inches long (7.5 cm). Style: minimalist fine line with thick line weight. Pain: high. There is very little fat between the skin and the bone here, and the back of the hand is one of the more common spots for people to move during a session. Expect substantial fading in three to five years, particularly on the knuckle side.
Make it yours: ask for the heaviest line weight your artist is comfortable with. Thin lines on the hand look great fresh and tired in a year.
19. Sunburst Fern Wrist Tattoo
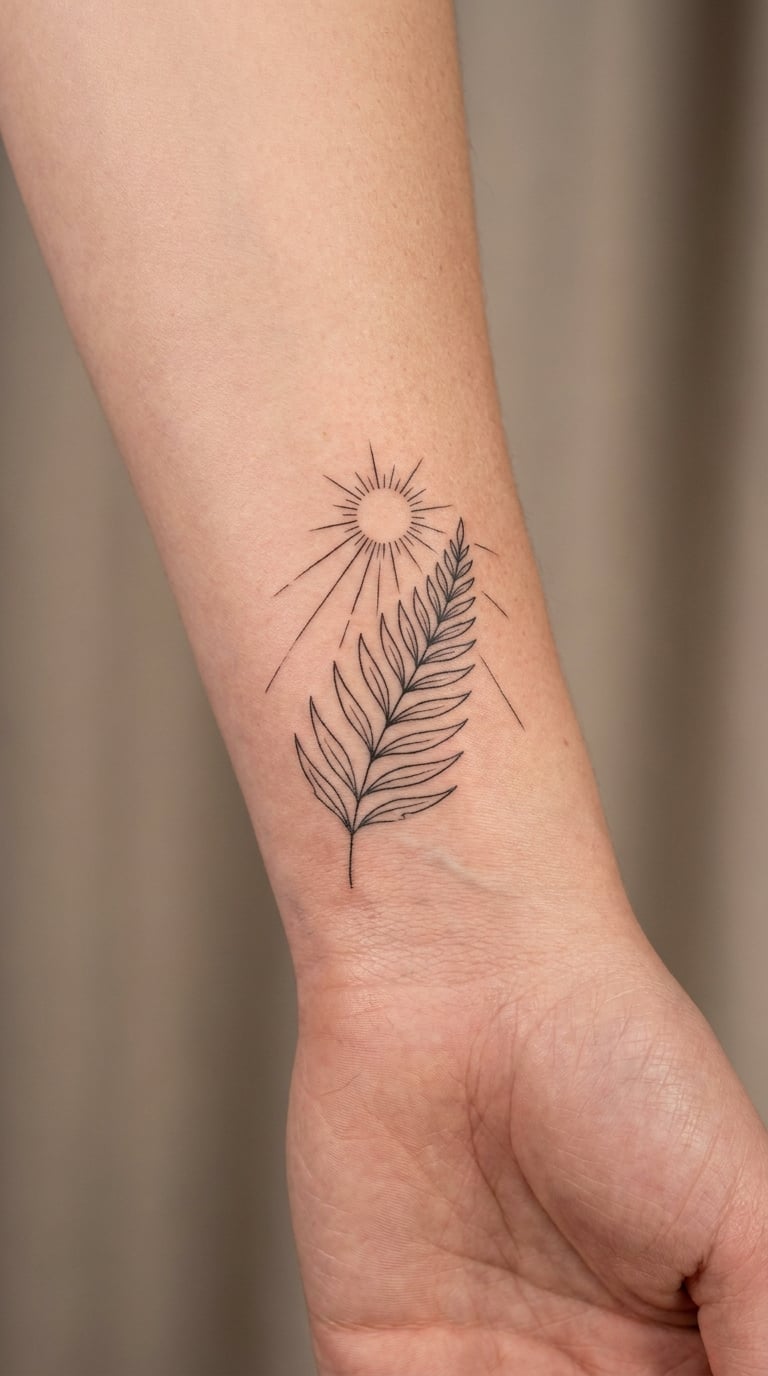
A single fine-line frond with a small sunburst tucked behind one end, the radiating lines kept short and even so the frond stays the focus. The sunburst is an accent, not a second subject.
It adds movement and a bit of warmth to a very spare design without turning it loud. Worth separating the two parts clearly in your brief, because this is where the piece usually goes wrong.
Placement: inside of the wrist, running along the forearm line rather than across it. Size: 3 inches for the frond, sunburst no wider than the frond’s longest leaflet. Style: fine line with restrained radiating accents. Pain: low to medium. Wrist placements fade faster than forearm ones because of sun and movement, and the radiating lines are the first to soften since they run at an angle.
Make it yours: put the sunburst behind the base of the frond rather than above it, so it reads as light coming from behind the plant.
20. Layered Fern Forearm Botanical Panel
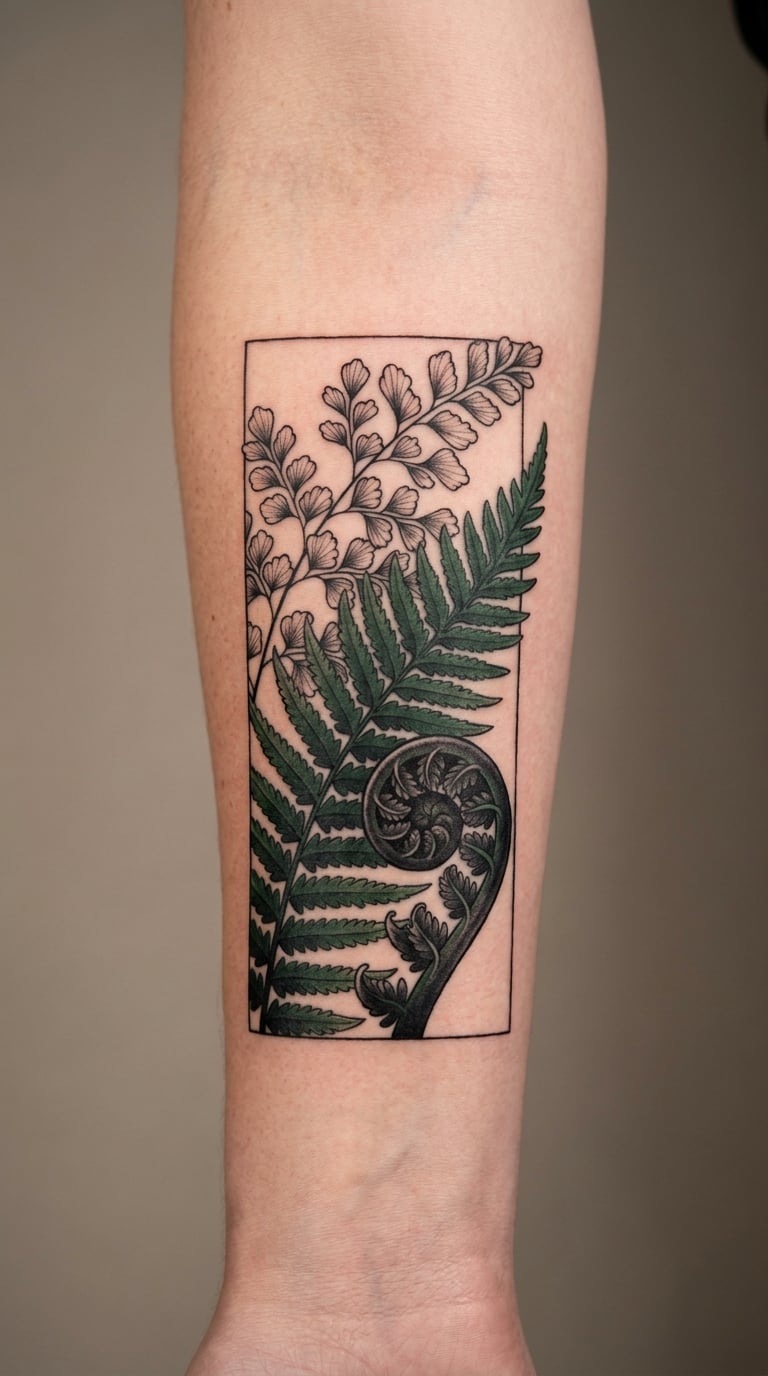
Three different fern forms built as a balanced panel: one realistic black and grey, one in green, one minimal, each separated by enough skin that you can still read them individually. Panels fall apart when everything overlaps into one green mass.
This is the most elaborate option and the one most people add to later. It suits a collector who already has small pieces and wants the arm to start filling in.
Placement: inner or outer forearm. Size: 6 by 4 inches (15 by 10 cm). Style: mixed botanical, black and grey with green accents. Pain: high, and this is not a one-session piece. Expect four to six hours, most likely split across two appointments. Overlapping colour means more passes over already-worked skin, so the later sessions are the ones that test your sit-down tolerance.
Make it yours: fix the position of each fern before the stencil goes on, then resist adding a fourth. Three well-spaced forms read better than five crowded ones.
How to Choose the Right Design
Six things decide whether a fern ages well or turns into a smudge. Work through them before you book, and the species choice mostly makes itself.
- Line density against size. Count the leaflets, then look at how big the whole design is. If you cannot fit at least six leaflets per inch of stem, drop the detail. This is the single most common reason a fine-line fern heals into a grey blur.
- Body contour. A frond has a natural direction and taper, so let it follow a line that already exists: the forearm, the calf, the collarbone, the spine. A fern laid across a joint will stretch and distort as you move.
- Realistic size, not drawing size. Reference photos are usually life size on screen but end up half that on a body. Ask your artist to measure the stencil against your arm or leg before starting.
- How much realism you actually want. Blackwork hides the most and forgives the most. Realism looks best at four inches or larger. Below three inches, minimal or dotwork reads more cleanly than a realistic study.
- Colour maintenance. Green fades toward yellow-grey, blue holds better, black holds best. If you do not want touch-ups every few years, go monochrome and let the shape carry it.
- Long-term detail retention. Fine line, dotwork and micro-realism all soften. Blackwork, traditional and geometric line work do not. That single trade-off decides most of these 20 ideas.
If you want the plant as a symbol rather than a drawing, our guide to tattoo ideas that symbolize growth goes deeper on how people personalise meaning. For darker, heavier work, our black sleeve tattoo ideas cover what a full-commitment blackwork piece looks like.
Cost and Session Time
Fern prices in the US move with size, detail and the hourly rate your artist charges. Shop minimums, artist rates, complexity and location all shift the final number, so treat these as ranges to argue with, not quotes.
- Micro (under 2 inches, minimal or fine line): roughly 80 to 200 dollars, 45 minutes to an hour and a half.
- Small (2 to 3 inches, fine line, dotwork or micro-realism): roughly 200 to 450 dollars, one and a half to three hours.
- Medium (4 to 5 inches, blackwork or single-colour botanical): roughly 400 to 900 dollars, three to five hours.
- Large (6 inches and up, full colour or a forearm panel): roughly 800 to 2000 dollars, five to eight hours, usually split across two sessions.
The most common pricing surprise is the small piece. A two-inch fine line fern looks like twenty minutes of work and is usually booked as a full small-tattoo rate, because the artist is there for the setup, the stencil and the consultation as much as the needling.
Ask for the total before the first line goes in, and ask whether your artist charges by the hour or the piece. If a detailed frond is quoted as “a couple of hours” and it turns into four, you want that conversation early rather than at hour three.
Aftercare Basics
Start with your artist’s written aftercare instructions, because they match the ink and the skin you were tattooed on. Everything below is the general shape of good aftercare, not a replacement for what you were told in the chair.
- Follow your artist’s aftercare instructions first, including any product they specify and any they tell you to avoid.
- Wash gently with clean lukewarm water and a mild unscented soap, then pat dry with a fresh towel or paper. No scrubbing, no washcloths dragged over the line.
- Keep it moisturised with whatever your artist recommends, applied thinly enough that the skin still breathes.
- Do not pick, peel or scratch flakes, even when they are lifting. That is the fastest route to a patchy result and to someone needing a touch-up.
- Avoid swimming pools, hot tubs and lakes while the skin is still healing, and keep the area out of prolonged direct sun. Sun is what fades fine line first, and it never fully comes back.
- Once fully healed, treat a fine-line fern as you would any fine-line tattoo: cover it in high-SPF sunscreen or keep it under a sleeve, and expect a refresh somewhere in year three to five.
One honest note for anyone planning a fine-line fern: healed photos matter more than fresh ones. A fresh tattoo looks sharper than the same piece at three years, and most online galleries only show day one.
Frequently Asked Questions
What does a fern tattoo usually mean?
A fern usually stands for endurance, new beginnings and quiet growth. Because ferns unfurl from a tightly curled fiddlehead, they became a popular symbol for a chapter starting rather than one finished. People also read the plant’s age and shade-dwelling nature as patience and staying power. Meaning is personal though, and plenty of people wear a fern just because the shape is beautiful.
Do fine-line fern tattoos fade quickly?
Faster than most tattoos, yes. Hairline stems, small leaflets and any dotwork soften within three to five years, especially on the wrist, behind the ear and the back of the hand. Blackwork and traditional line work hold their edges far longer. You can slow it down with daily sunscreen on exposed arms, but plan on one refresh if you want a fine-line fern to stay crisp.
Should I choose a coloured or black-and-grey fern tattoo?
Go black and grey if you want the least maintenance. Black holds its line, hides small errors and costs nothing to refresh. Green and blue look beautiful and photograph well, but greens drift toward yellow-grey with sun and light blues fade faster. Colour is worth it when the piece is large enough to read at a distance and you are comfortable booking a colour refresh every few years.
Is a small fern tattoo a good choice for a first tattoo?
It is one of the better first-tattoo subjects. A two to three inch fine-line fern or fiddlehead is quick, sits in a low-pain spot like the inner forearm or upper arm, and heals predictably. The two rules are to keep it minimal and to avoid hands, fingers and spine, where fine line fades fastest and hurts most. Bring references, not a single photo.
Where is the least painful place to get a fern tattoo?
The inner bicep, upper arm, inner forearm and the fleshy part of the calf are the easiest. Wrist, ankle and collarbone sit in between. Spine, ribs, the side of the hand and knuckles hurt noticeably more because there is little fat over the bone. Pain is individual, but choosing an upper-arm placement is the simplest way to make a first session easier.
Conclusion
For a first tattoo, the fine-line fiddlehead or the minimalist fern sprig is the sensible place to start: small, low pain, quick to heal and easy for an artist to get right. If you already collect pieces and want the forearm to look deliberate, the layered fern botanical panel gives you a direction to build towards over years rather than one big decision now.
Whichever of these 20 fern tattoo ideas you pick, choose the placement and the line density for how you want it to look in five years, not on day one. Send your artist the reference set, agree the size with a tape measure, and let the shape follow your body. If you want to see how heavy blackwork reads across a larger area, our black sleeve tattoo ideas are worth a look before you commit to a full colour panel.