
20 Stick and Poke Tattoo Ideas: Best Minimalist (October 2026)
These 20 stick and poke tattoo ideas cover the designs that actually work under a single needle: paper planes, willow branches, crescent moons, cube outlines and single-line waves, each with a real placement, a realistic size and an honest note on how the line will age. A stick and poke tattoo is built dot by dot with a machine-grade needle dipped in ink, so anything that survives a slow, deliberate hand is worth copying.
They suit people who like restraint. Restrained linework, deliberate negative space and confident execution are what separate a hand-poked piece that still looks sharp in ten years from one that turns into a smudge. Bring a reference you actually like, tell your artist how you want the line to feel, and let the slower pace do its job.
20 Stick and Poke Tattoo Ideas: Quick Guide
The table below previews every design in the same order you will read them, so you can scan placements and pain levels before committing to a consultation.
| Idea | Style | Best placement | Size | Pain |
|---|---|---|---|---|
| 1. Fine-Line Paper Plane | Fine line, geometric | Inner forearm | 1-2 inch | Low |
| 2. Single Willow Branch | Botanical line art | Outer forearm | 2-3 inch | Low |
| 3. Minimal Mountain Peaks | Fine line, minimal | Inner wrist | 1.5-2.5 inch | Medium |
| 4. Dotwork Crescent Moon | Dotwork, stippling | Behind the ear | 1-1.5 inch | Medium |
| 5. One-Line Wave | Single line, minimal | Outer wrist | 1-2 inch | Low |
| 6. Tiny Botanical Pomegranate | Botanical, line and dot | Inner upper arm | 1.5-2 inch | Low |
| 7. Geometric Cube Outline | Geometric, blackwork | Forearm, calf | 1.5-2 inch | Low |
| 8. Small Moth Study | Illustrative, stippled | Upper chest, forearm | 1.5-2 inch | Medium |
| 9. Paired Laurel Leaves | Botanical, traditional | Side of forearm | 2-3 inch | Low |
| 10. Minimal Sun with Open Rays | Minimal, folk | Outer upper arm | 1.5-2 inch | Low |
| 11. Tiny Coffee Cup | Minimal, illustrative | Inner wrist | 1-1.5 inch | Low |
| 12. Open-Hand Eye | Fine line, illustrative | Outer hand | 2-3 inch | Medium |
| 13. Simple Turtle Side Profile | Minimal, illustrative | Calf, hip | 1.5-2 inch | Low |
| 14. Dotwork Shooting Star | Dotwork, minimal | Shoulder blade | 1-1.5 inch | Medium |
| 15. Minimal Anchor | Minimal, nautical | Inner forearm | 1.5-2.5 inch | Low |
| 16. Two Botanical Stems | Botanical line art | Inner upper arm | 2-3 inch | Low |
| 17. Broken Diamond | Geometric, abstract | Outer upper arm | 1.5-2 inch | Low |
| 18. Single Rose Outline | Botanical, traditional | Forearm, thigh | 1.5-2.5 inch | Low |
| 19. Freehand Shark Outline | Minimal, illustrative | Forearm, calf | 2-3 inch | Low |
| 20. Abstract Loop Knot | Abstract, single line | Inner upper arm | 1.5-2 inch | Low |
1. Fine-Line Paper Plane
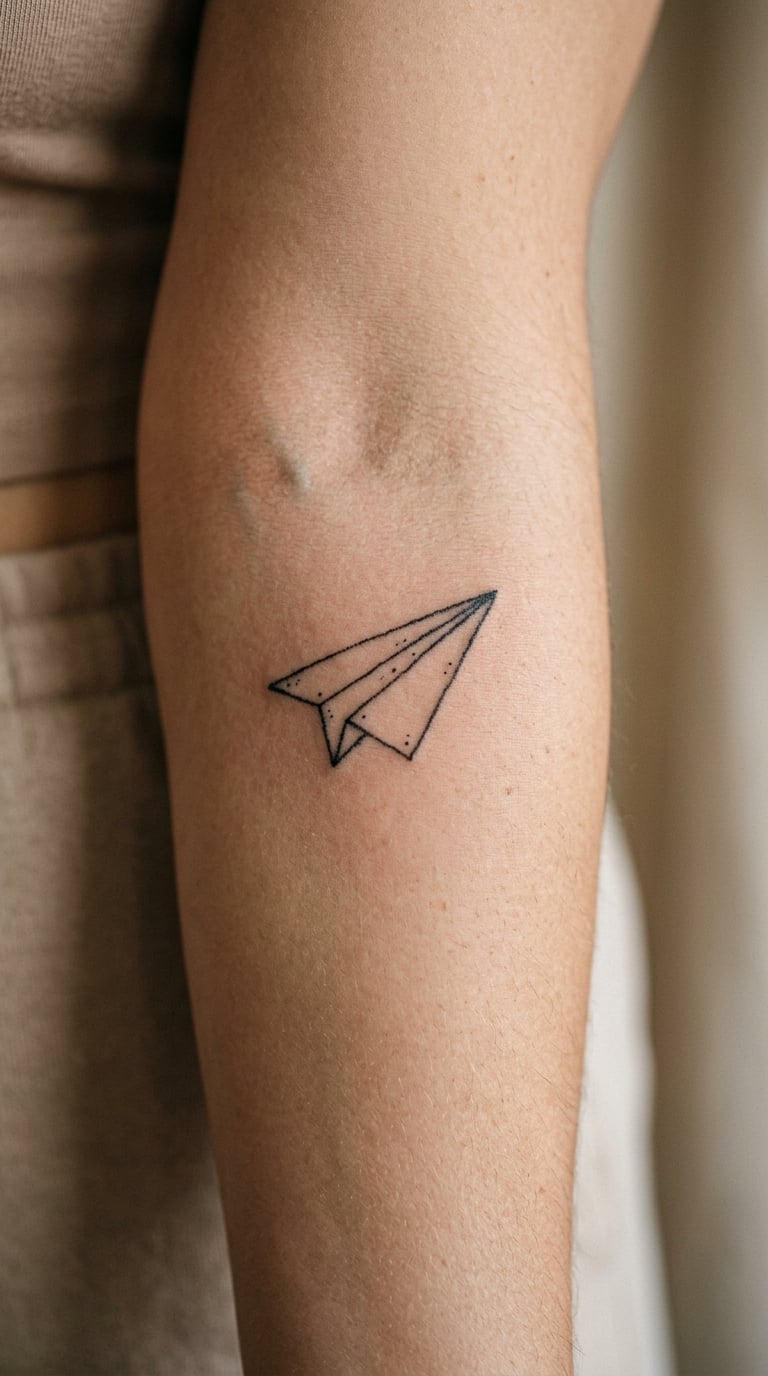
A paper plane is three straight contours and nothing else. The hand-tapped version keeps the folds clean and lets the shape read from the negative space inside the wings rather than from shading. Line weight stays thin and even, which is exactly what a single needle does well.
Most people choose it for travel, a move, or the idea of letting something go without drama. Nobody assigns it a fixed meaning, and that is part of why it works as a first piece.
Placement: inner forearm, outer bicep, or the back of the hand. Size: 1-2 inches (2.5-5 cm) nose to tail. Style: fine line with light blackwork. Pain: low, mostly a scratchy dragging feeling. Fine lines on the inner arm hold well, but the fold intersections blur first, so plan a touch-up at 12 months. Make it yours: add a small dotted trail behind the tail, or tuck a date under the wing.
2. Single Willow Branch
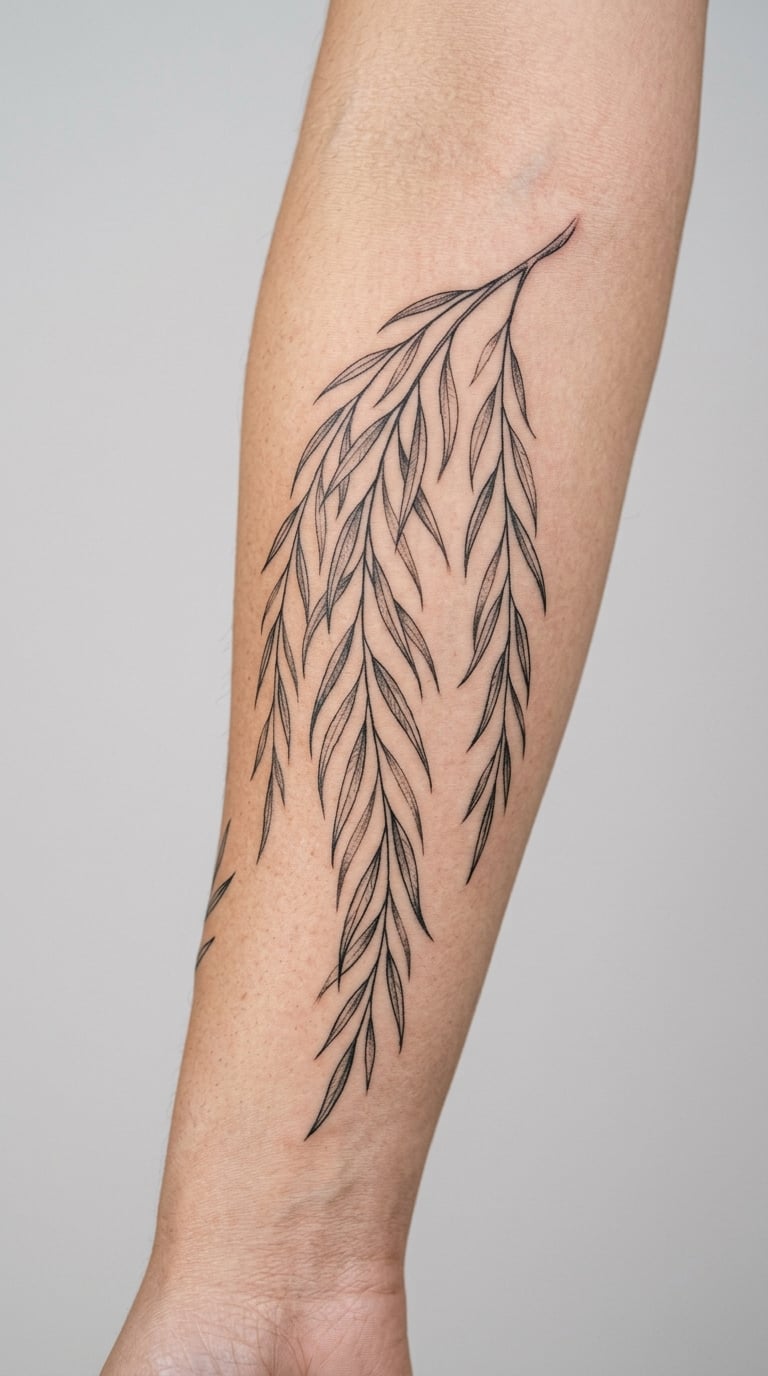
A single stem runs upward and thins as it goes, with slim leaves placed one at a time along it. Because every leaf is a separate few taps, the artist controls the spacing and keeps the center of the stem open instead of filling it in.
Willow is a long-standing botanical subject, so people reach for it when they want something quiet and organic rather than a symbol with a lecture attached. The reasons are personal and worth more than a dictionary entry.
Placement: outer forearm running parallel to the radius, or vertically along the outer arm. Size: 2-3 inches (5-7.5 cm). Style: botanical line art. Pain: low to medium on the outer arm. Leaves are tiny marks, so expect a longer session rather than a harder one. Fine leaf tips soften over time; ask the artist to press slightly deeper at the tips. Make it yours: add two or three seed dots below the lowest leaf, or pair it with a second stem on the opposite arm.
3. Minimal Mountain Peaks
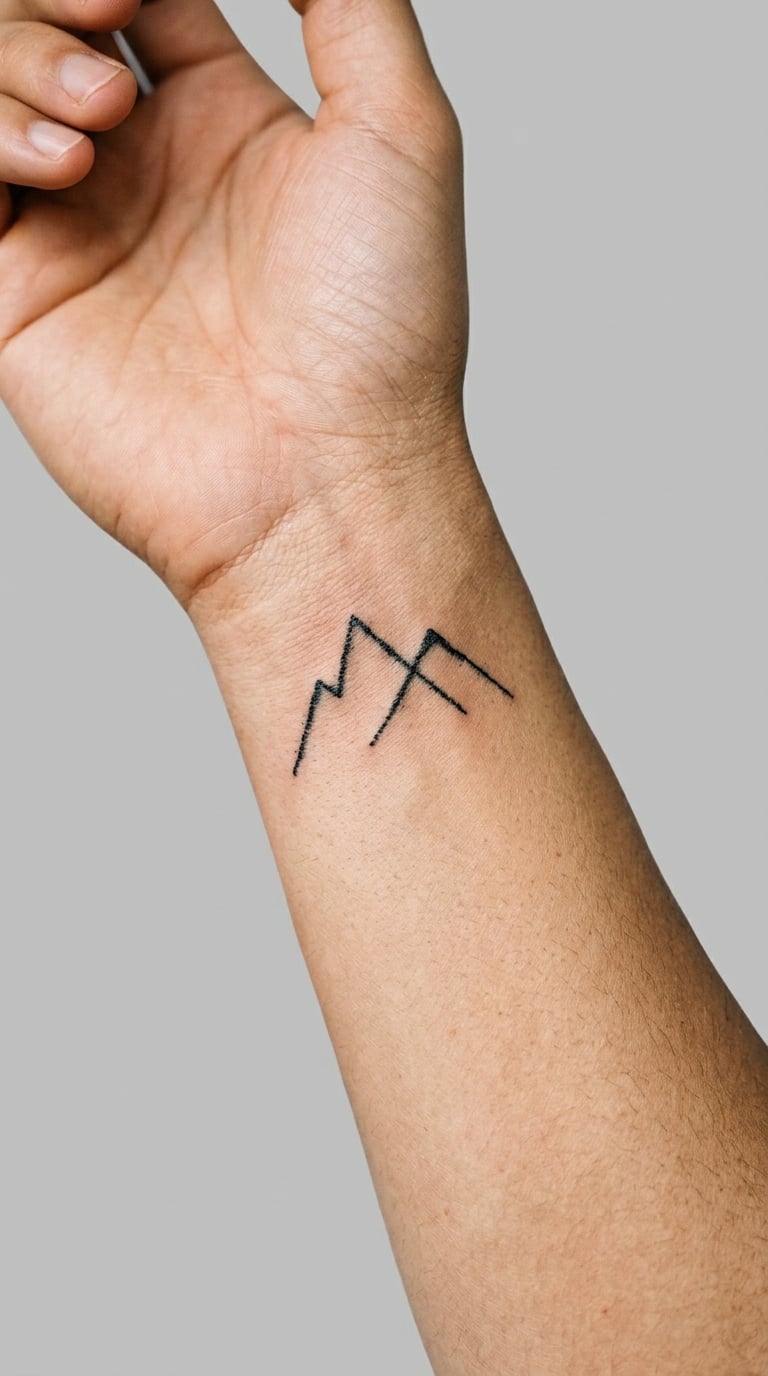
Two ridgelines overlap, each built from a handful of angular strokes, and the sky above them stays completely uninked. That untouched skin is the point: the mountains only read because of the space you did not fill.
People pick this for a hike, a home range, or the first place they felt properly small. Ask your artist to keep the peaks uneven, since two identical triangles look manufactured.
Placement: inner wrist, forearm, or over the collarbone. Size: 1.5-2.5 inches (4-6 cm) across. Style: fine line minimal. Pain: medium on the inner wrist because the skin there is thin and the wrist bends constantly. The sharp peak apexes are the first lines to soften, so keep them slightly heavier than the rest. Make it yours: name the range in a small script line underneath, or add a single pine at the lower corner.
4. Dotwork Crescent Moon
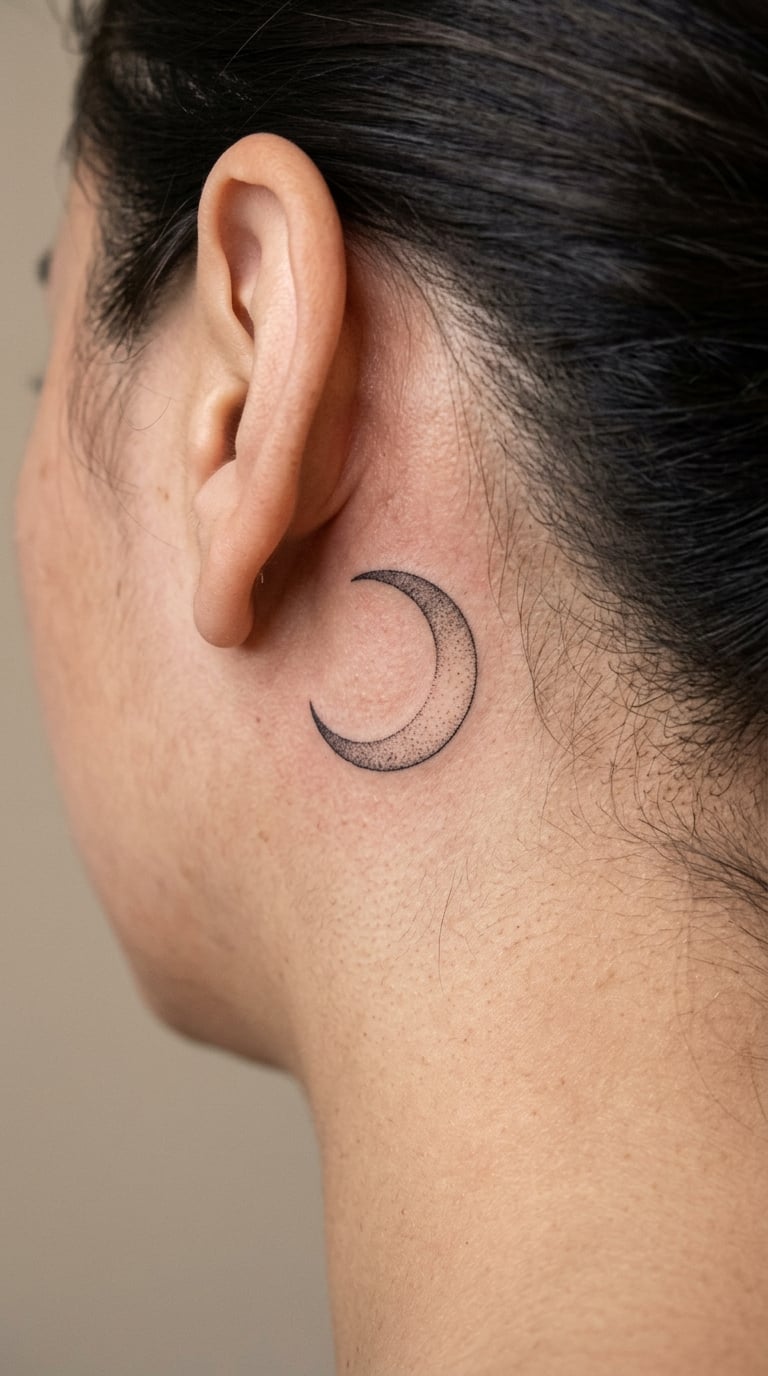
The crescent is defined by two clean contours, and the volume comes from graduated dots that thin out toward the inner curve. Placing each dot by hand gives you a gradient with no grey wash at all, which is the whole appeal of dotwork.
Moons carry long associations with cycles and change, and plenty of people simply like the shape. It suits a collector who wants a compact celestial piece that reads as texture up close and as a clean crescent from across a room.
Placement: behind the ear, inner arm, or the small of the back. Size: 1-1.5 inches (2.5-4 cm) tall. Style: dotwork with stippling. Pain: medium behind the ear, where skin is thin and hair grows through the area. Individual dots blur into a soft patch over the years, so a dotwork touch-up every few years is normal. Make it yours: scatter a few loose dots outside the crescent, or add a second smaller crescent beside it.
5. One-Line Wave
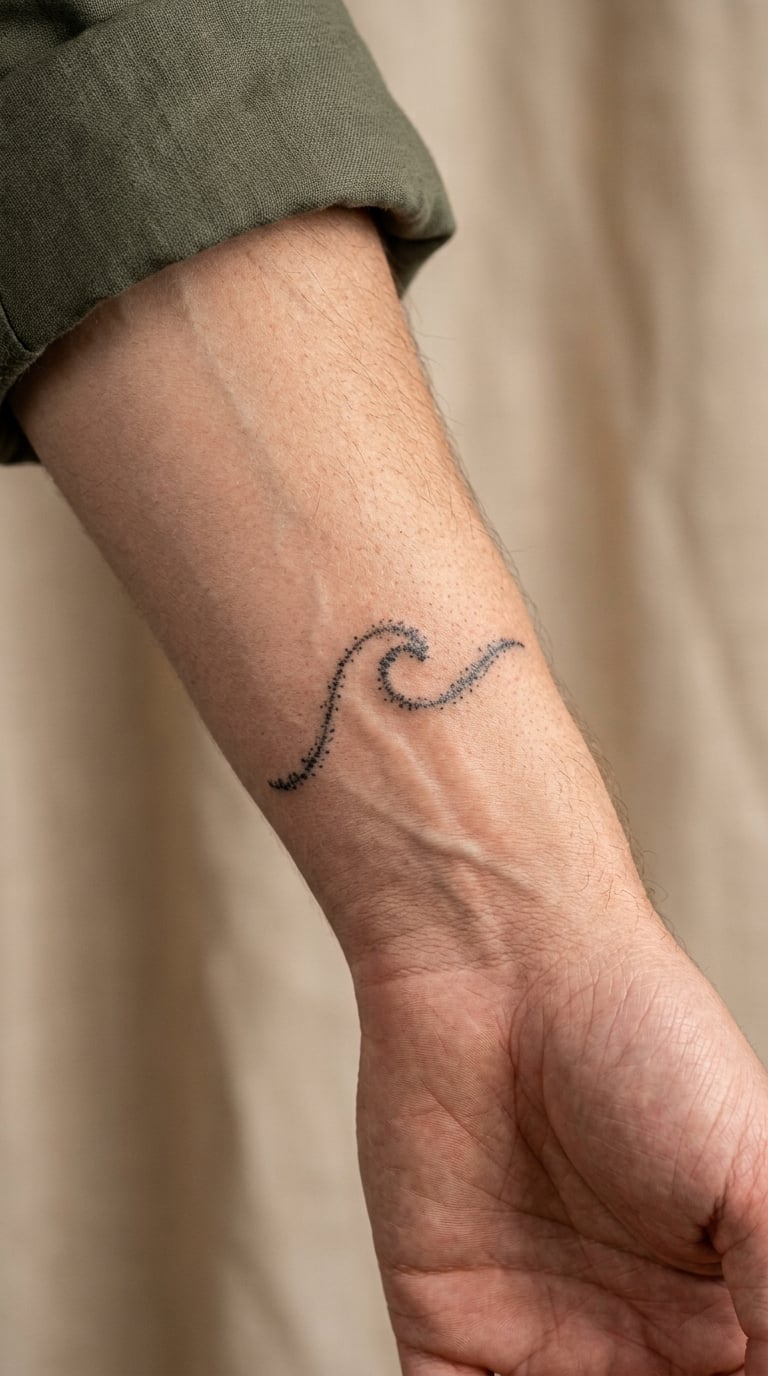
The entire design is one continuous line that rises, curls and falls. Thick and thin marks appear where the artist changes needle pressure and angle, so the wave has movement without any added shading or foam detail.
Surf people choose it for the water; everyone else tends to choose it for the restraint. It is a genuinely hard freehand piece, so the fact that it is one line is a good sign of a confident hand.
Placement: outer wrist, ankle, or along the ribcage. Size: 1-2 inches (2.5-5 cm). Style: single-line minimal. Pain: low on the outer wrist. Exposed placements like the wrist and ankle catch more sun and friction, so plan on a refresh in two or three years. Make it yours: angle it with the bone of the forearm instead of across it, or add a second, smaller wave below at a different scale.
6. Tiny Botanical Pomegranate
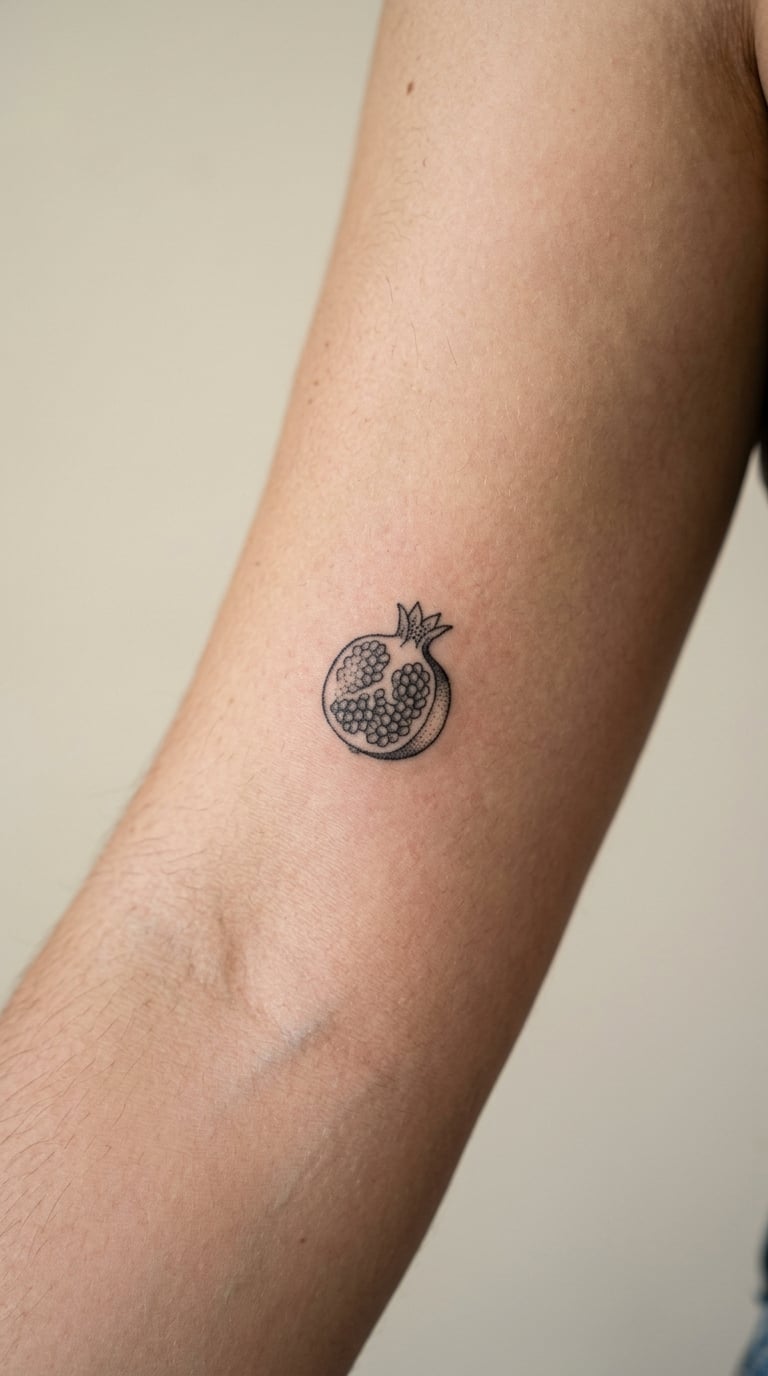
The fruit is a simple rounded silhouette topped with a small crown, and the interior is suggested with a cluster of dots for seeds. No cross-section realism, no highlight work, just enough interior detail to stop the shape reading as a plain circle.
Pomegranates show up in old botanical illustration and Mediterranean kitchen tiles, so the form already carries visual associations before anyone assigns it a meaning. Keep the crown crisp, since that is what makes it recognisable at small size.
Placement: inner upper arm, hip, or below the collarbone. Size: 1.5-2 inches (4-5 cm). Style: botanical line and dot. Pain: low, since the inner upper arm has good flesh under it. The dot cluster fills in slightly as ink spreads in the first weeks, which is normal. Make it yours: split the fruit open so the seeds spill downward as a falling trail, or add a single cut leaf beside the crown.
7. Geometric Cube Outline
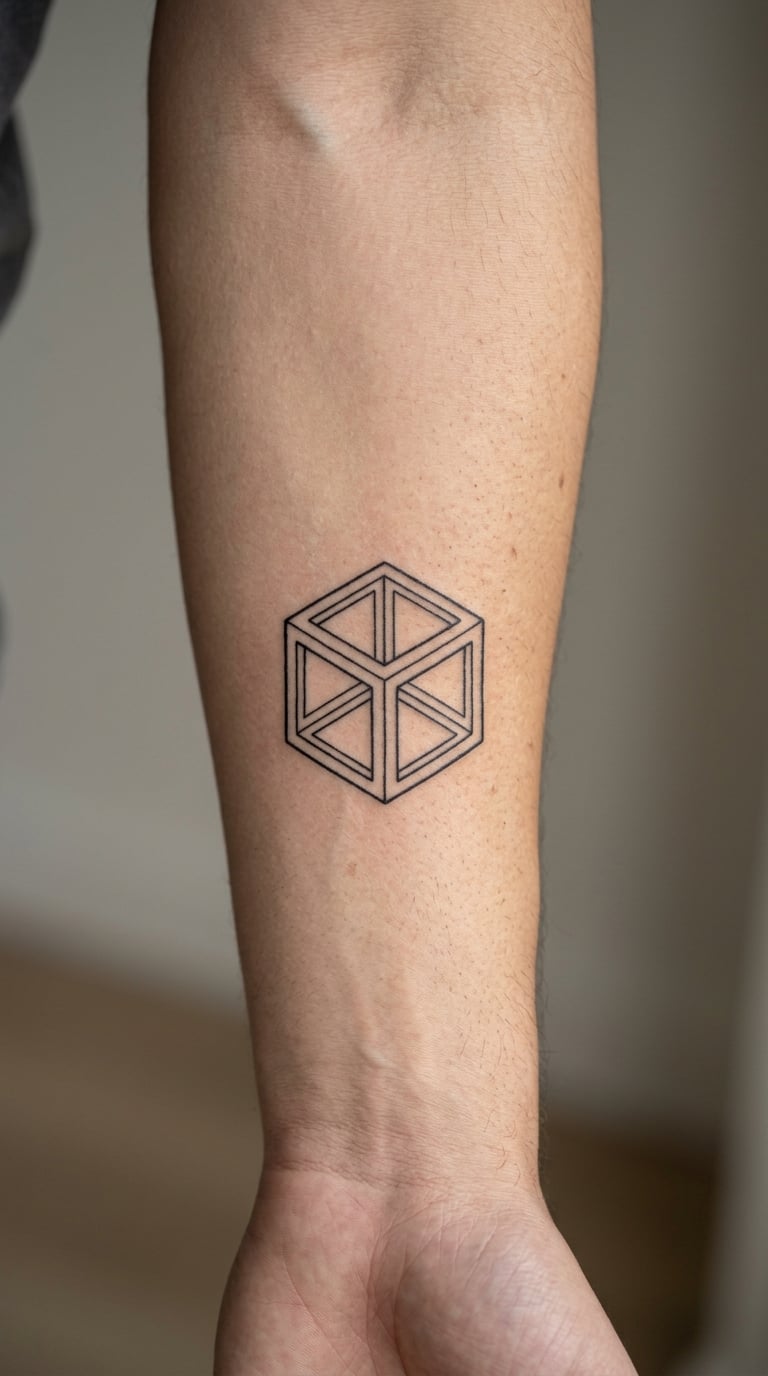
Three quadrilateral faces meet at a single corner, with one or two internal edges drawn and the rest kept as open space. The negative space is doing the work of the hidden faces, which is why the design looks complete even with very few lines.
Pick this if you like structure more than illustration. It reads as a symbol rather than a picture, and it sits comfortably next to other geometric work without fighting it.
Placement: forearm, calf, or the flat of the upper arm. Size: 1.5-2 inches (4-5 cm) tall. Style: geometric blackwork with clean linework. Pain: low on the arm or leg. Straight lines are quick to place but the corner intersections need care, and those corners are where a rushed handpoke softens first. Make it yours: extend one edge into a long line that trails off the body, or add a second smaller cube intersecting the first.
8. Small Moth Study
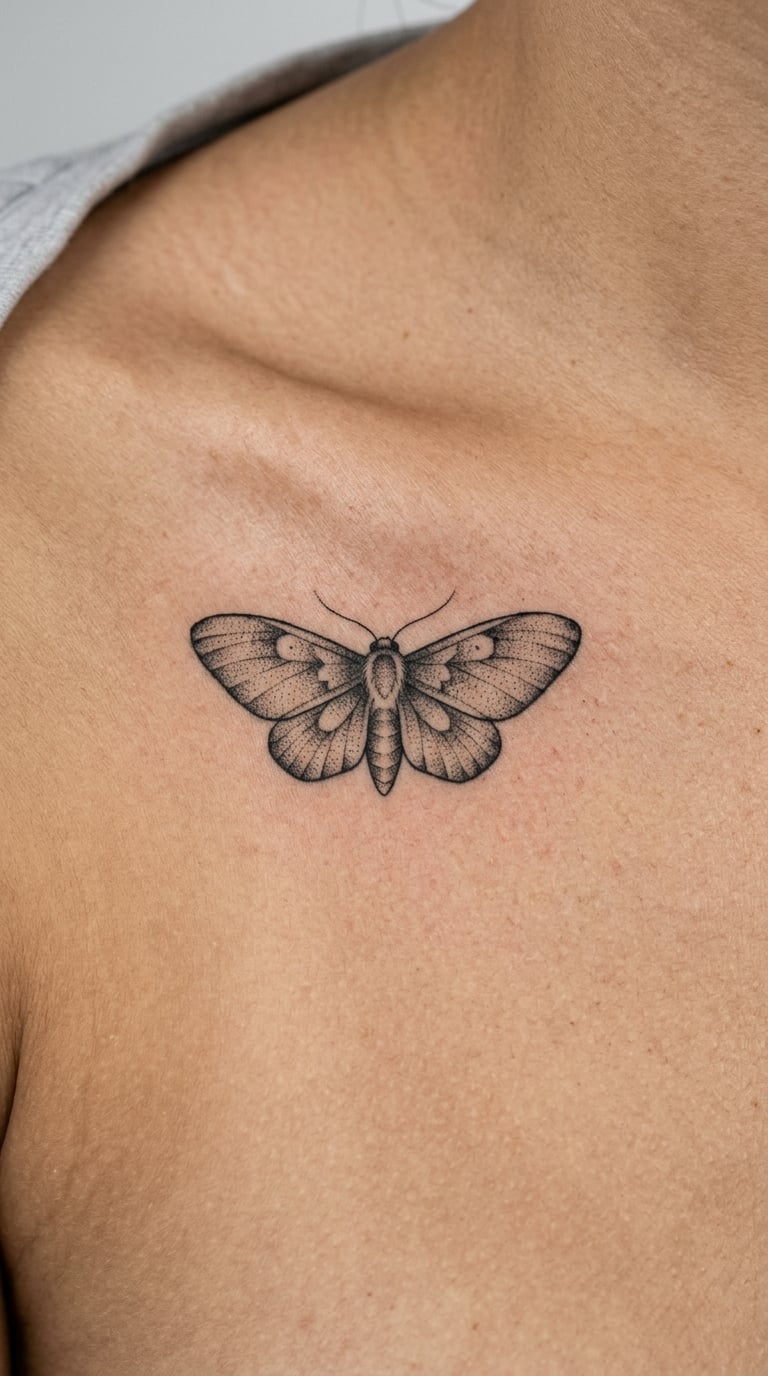
The moth is drawn as a pair of symmetrical wings with a minimal segmented body and two fine antennae. Shading is selective: light stippling across the upper wing only, leaving the lower wing open so the whole thing stays readable at small scale.
Moths pull people in for different reasons, including light, night, and the idea of being drawn to something fragile. Symmetry is what sells it; ask the artist to check both wings against each other before the session ends.
Placement: upper chest near the collarbone, forearm, or behind the ear. Size: 1.5-2 inches (4-5 cm) wide. Style: illustrative with stippling. Pain: medium on the chest because the skin is thin and the ribs shift. Fine antennae and stippled detail blur noticeably over time, so budget for a refresh every few years. Make it yours: add a tiny crescent above the wings, or place it directly over a healed spot scar.
9. Paired Laurel Leaves
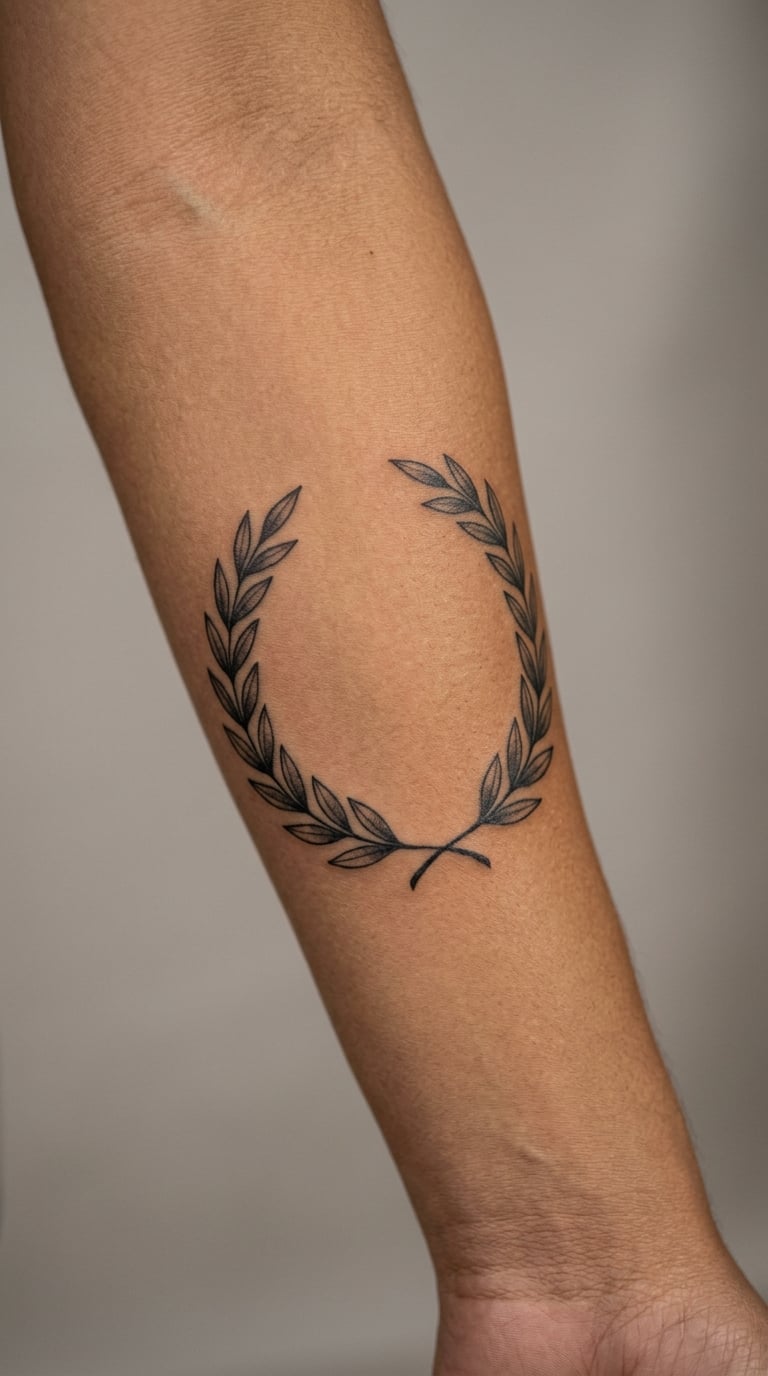
Two curved stems arc away from each other with leaves alternating along their length, and the center stays open rather than being filled with a ribbon or a cross. The leaves vary slightly in angle so the pair looks grown instead of printed.
Laurel wreaths are a very old way of marking achievement, and most people choosing this design know the association without wanting it to be the whole point. Sometimes it simply fills a gap between existing pieces nicely.
Placement: side of the forearm, above the elbow, or on the outer thigh. Size: 2-3 inches (5-7.5 cm) wide. Style: botanical with a traditional hand. Pain: low, and the side of the forearm is an easy place to sit still. The open center helps: a dense filled-in wreath would need far more passes to hold saturation. Make it yours: add a small initial at the bottom of the arc, or shorten one branch so the pair is deliberately uneven.
10. Minimal Sun with Open Rays
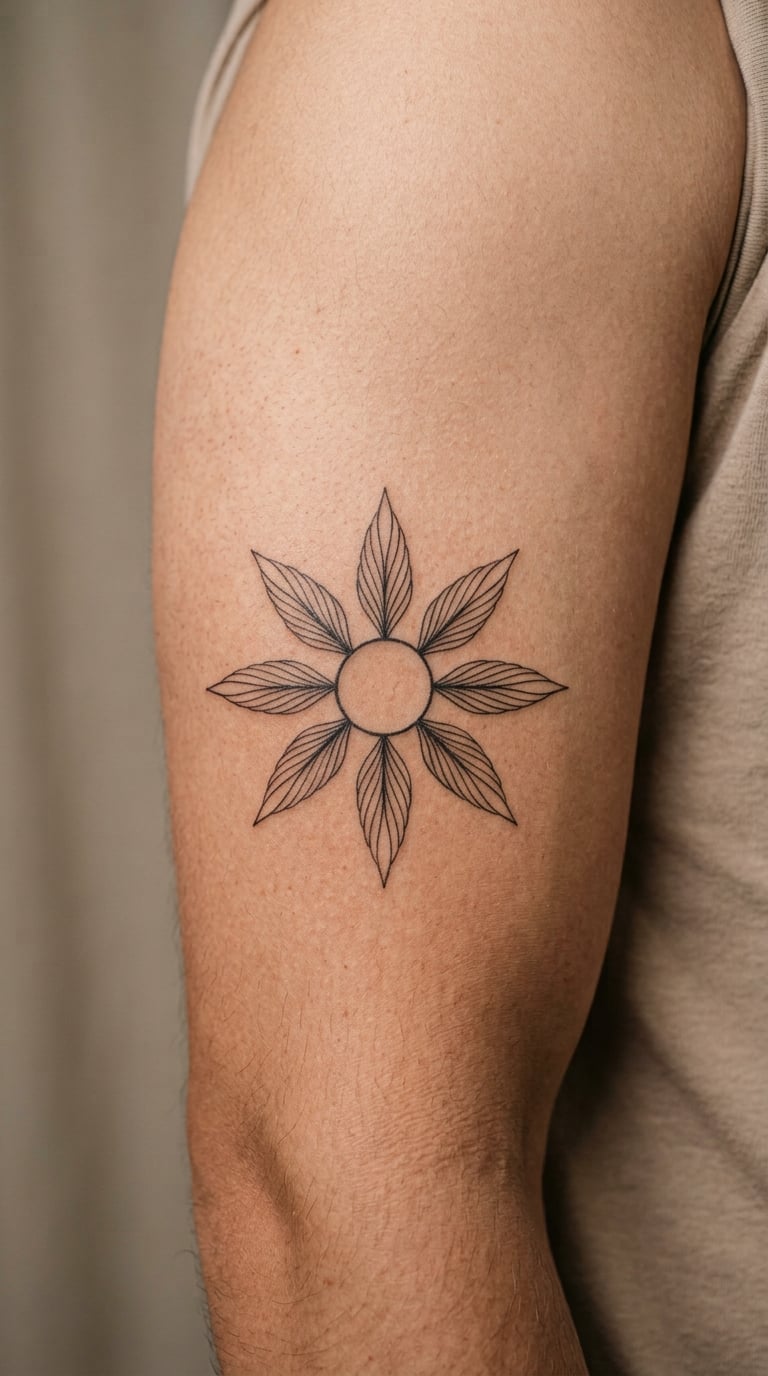
A plain circle sits in the middle with eight tapered rays spaced unevenly around it. The uneven spacing is intentional; it is the difference between a handcrafted sun and a clip-art one. Nothing goes inside the circle.
Some people tie it to a specific summer, a place, or a person they met in a hot month. Others just like a shape that reads well from any angle and never needs a background.
Placement: outer upper arm, calf, or the small of the back. Size: 1.5-2 inches (4-5 cm) across. Style: minimal with a folk influence. Pain: low on the upper arm. The ray tips are the first part to fade because they are the thinnest marks, so ask for them to be laid slightly deeper. Make it yours: change the ray count to match a date or a birth month, or leave the center empty for a colour accent later.
11. Tiny Coffee Cup
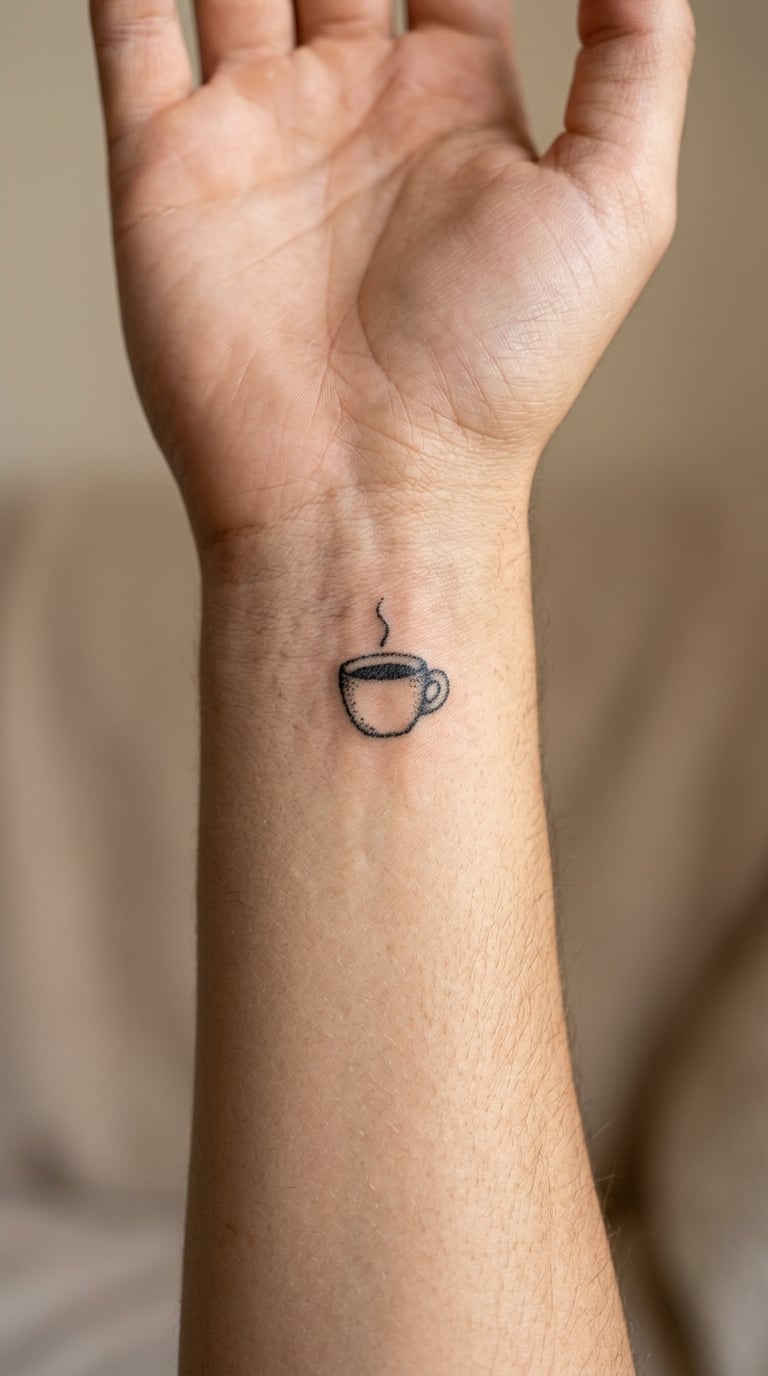
The cup is a simple trapezoid outline with one curved handle and a thin saucer line beneath it. A single steam line rising above the rim is the only extra element, and dropping it still leaves a readable design.
This is a straight personal-reference piece. It usually sits alongside a partner’s design, or marks a specific place where somebody drinks the same order every morning.
Placement: inner wrist, back of the hand, or behind the ear. Size: 1-1.5 inches (2.5-4 cm) wide. Style: minimal illustrative. Pain: low on the inner wrist. At one inch, the handle junction and the saucer line are the fragile parts, so keep those two strokes a touch heavier and the steam line light. Make it yours: add a second cup facing it at a smaller scale, or tuck a small initial onto the saucer.
12. Open-Hand Eye
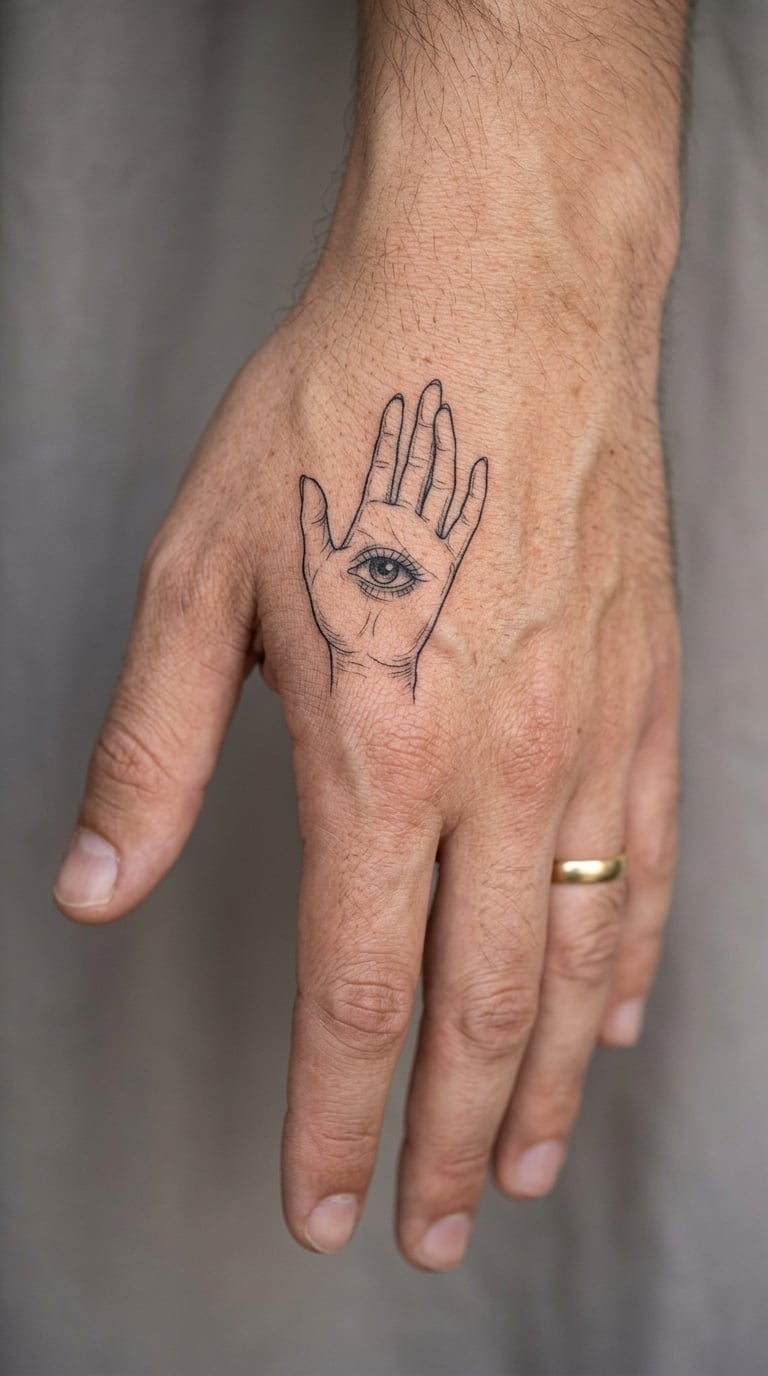
The hand is drawn with clean finger contours and open negative space, and a small eye with a minimally shaded iris sits in the centre of the palm. The palm detail is placed first, then the fingers are worked around it, so ask your artist which order they prefer.
People tend to read this one as watchfulness, protection, or simply a striking hand piece. It is worth being clear with yourself about that reading before a permanent piece lands on skin you use every day.
Placement: outer hand, inner wrist, or the back of the hand. Size: 2-3 inches (5-7.5 cm) tall. Style: fine line illustrative. Pain: medium; hands have thin skin over bone and plenty of nerve endings. This is one of the first areas to need touch-ups, especially on the fingers, so plan for that honestly. Make it yours: keep the fingers slightly apart in your reference so there is room for the linework, or add a small line at the wrist like a bracelet edge.
13. Simple Turtle Side Profile
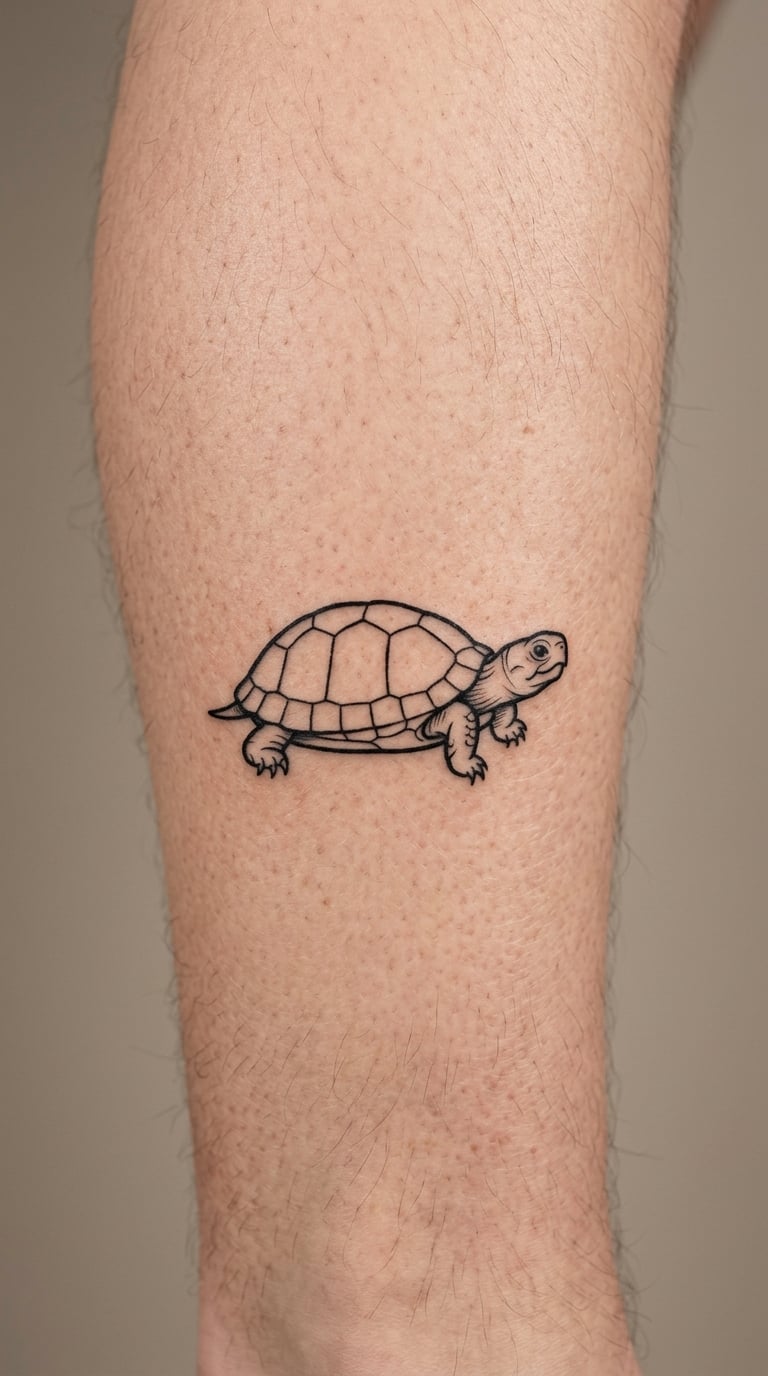
The turtle is a low side profile: a domed shell, a short head on a stubby neck, one flipper line and a simple hexagonal segment pattern across the shell. Keep the pattern to a few clean divisions rather than a full grid.
Turtles carry long-standing associations with longevity and with carrying a home, and that history shows up in the motif across many traditions. The drawing is still yours to make plain or detailed.
Placement: calf, hip, or along the ribs. Size: 1.5-2 inches (4-5 cm) long. Style: minimal illustrative. Pain: low on the calf, medium over the ribs. Shell segments are small enclosed shapes where ink pools, so a slow hand keeps the interior lines from filling in. Make it yours: add a small wave line beneath the flipper, or simplify the shell to three segments for a more graphic version.
14. Dotwork Shooting Star
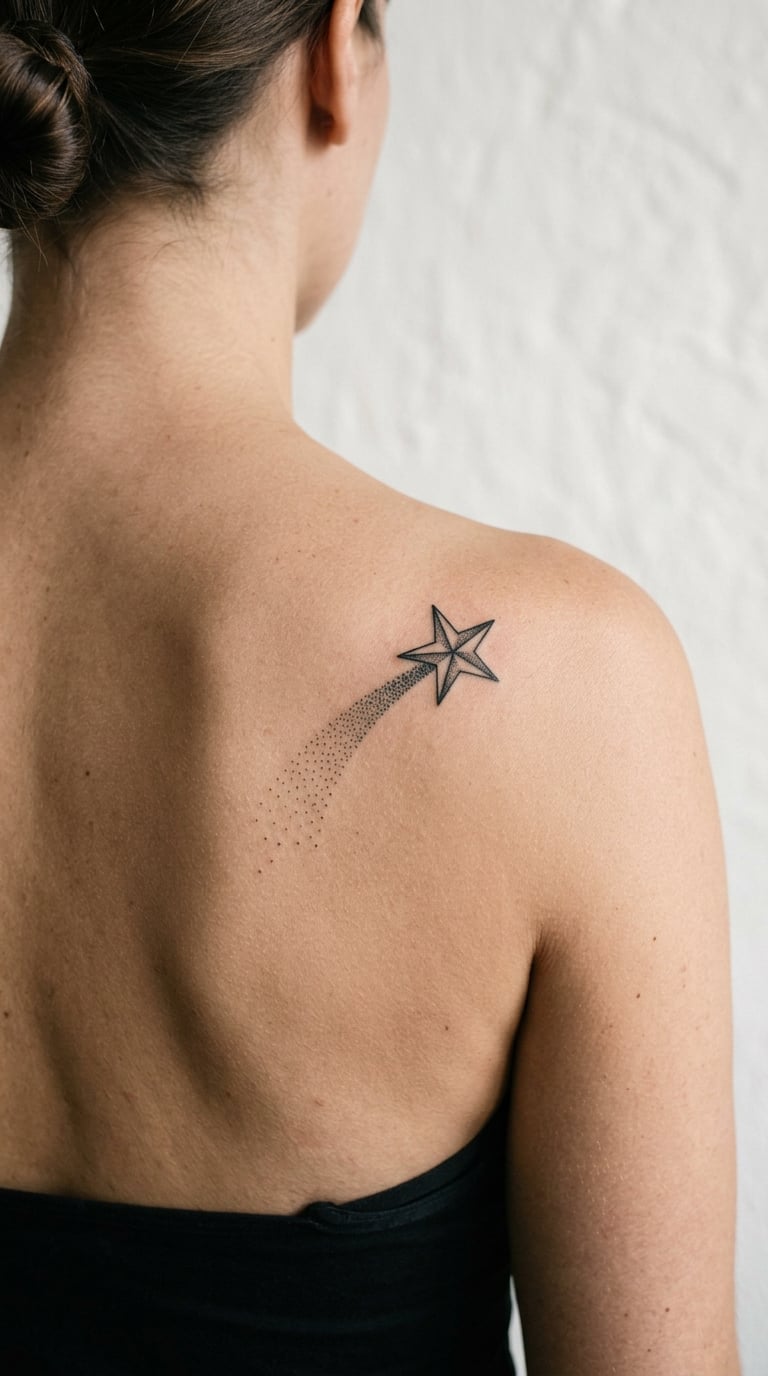
The star is five straight points with a tapered trail behind it, and the trail dissolves into dots that thin out and stop. Using a fading dot field instead of a solid streak gives you motion without any conventional shading.
Some people want a small wish, a lucky streak, or a mark of a night that mattered. The trail is an easy place to hide a number or a date in dot form.
Placement: shoulder blade, hip, or the small of the back. Size: 1-1.5 inches (2.5-4 cm) wide. Style: dotwork minimal. Pain: medium on the shoulder blade, which is bony and moves with every arm motion. The star points are sharp tips that soften early, so keep them full rather than tapered. Make it yours: shape the trail into an arc, or scatter three detached dots far behind it so the motion travels further.
15. Minimal Anchor
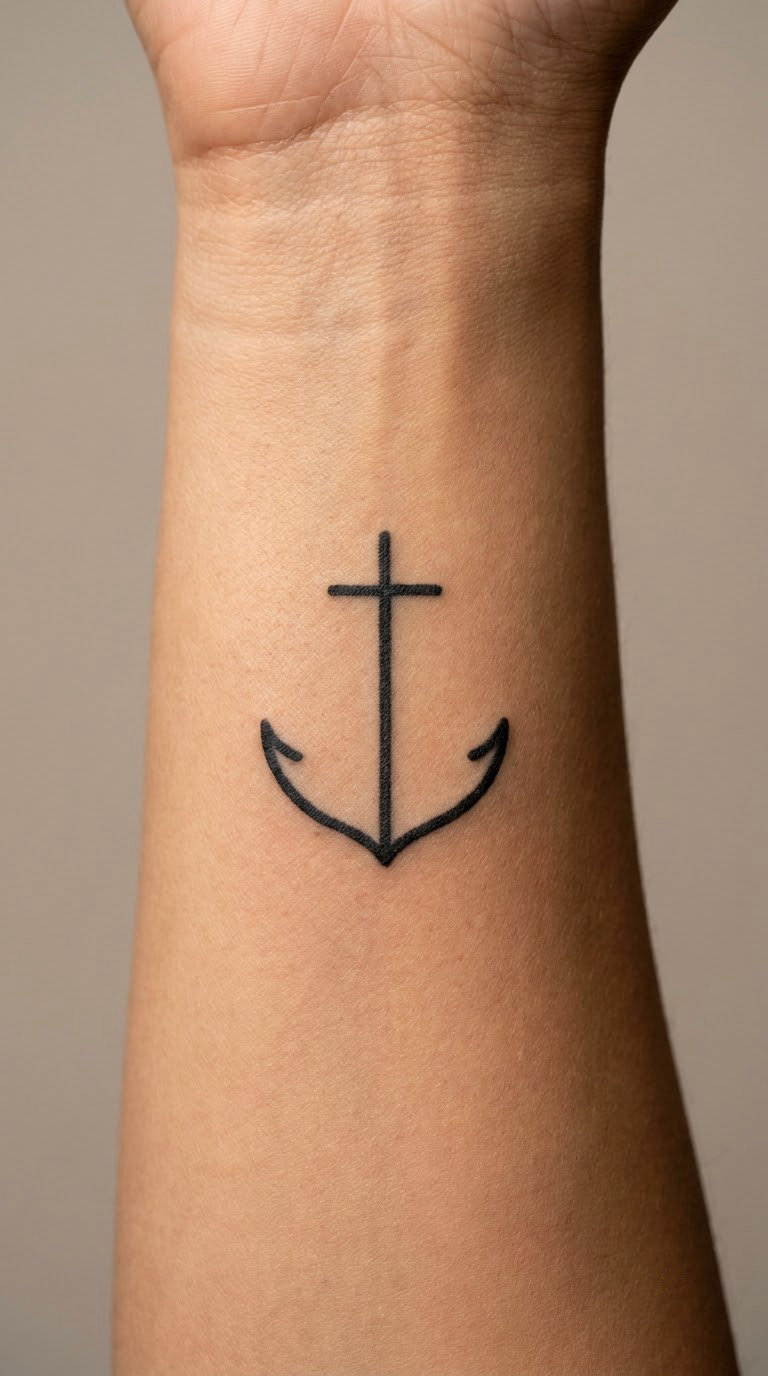
The anchor is stripped to a straight shank, a short crossbar and two curved arms with simple pointed flukes. No rope, no banner, no shading, which keeps it firmly in minimalist territory rather than traditional nautical flash.
Stability, staying put, being the person other people rely on, and a link to someone in the navy are the reasons that come up most. Any of those is a fine reason on its own.
Placement: inner forearm, calf, or the outer arm. Size: 1.5-2.5 inches (4-6 cm) tall. Style: minimal nautical. Pain: low on the forearm. The arm curve and the ring at the top are the spots that lose definition first, so keep those strokes confident and slightly heavier. Make it yours: add a small memento mori or hourglass shape where the rope would go, or wrap the shank once with a thin band.
16. Two Botanical Stems
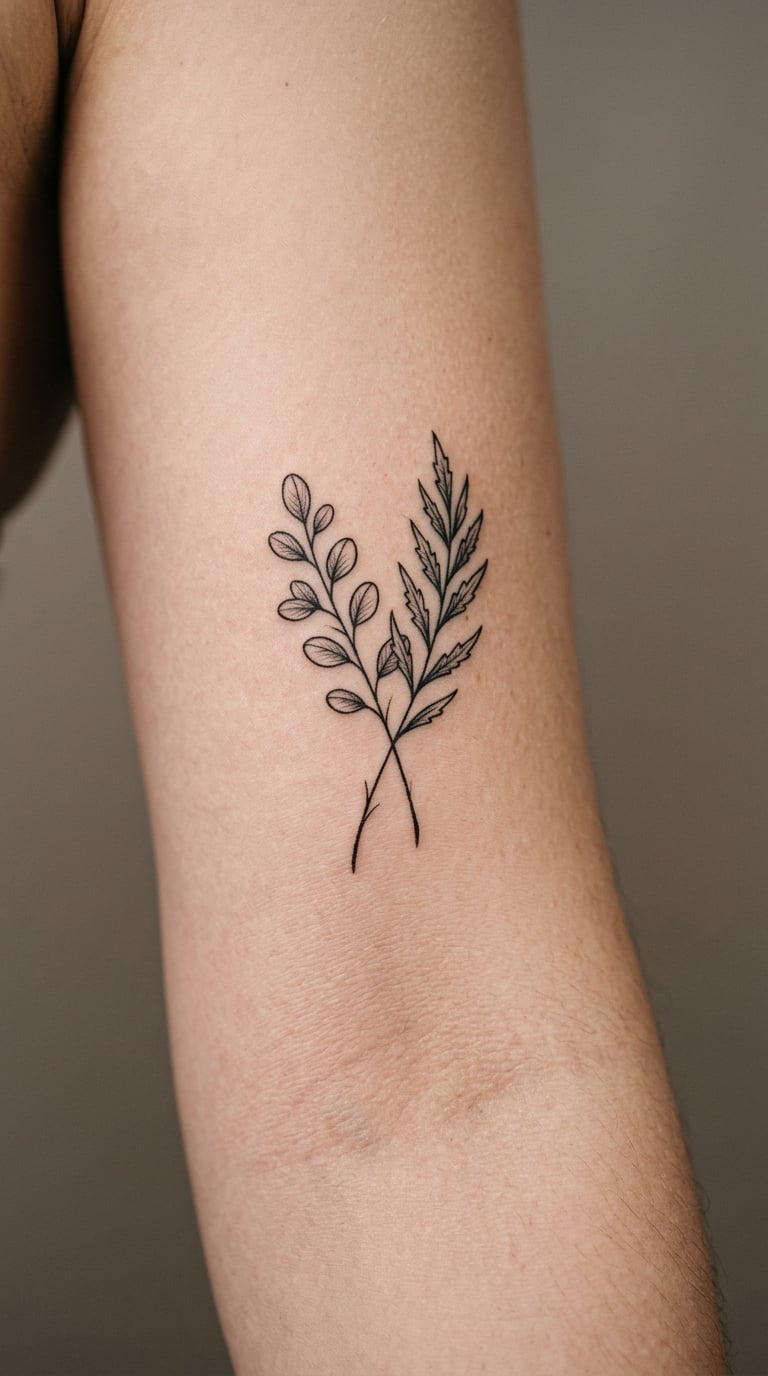
Two stems of contrasting plants cross each other once and stop. Balance comes from the leaf shapes rather than matching them: rounded leaves on one stem, narrow pointed leaves on the other, and open air where they overlap.
Pick two plants that already mean something in your life, or two that just look right together. Whatever meaning is attached to the individual plants stays intact; the pairing is what is personal.
Placement: inner upper arm, outer arm, or along the ribcage. Size: 2-3 inches (5-7.5 cm) tall. Style: botanical line art. Pain: low on the arm. The crossing point is the one spot where two sets of lines meet, and it is the spot most likely to turn into a dark blob without a steady hand. Make it yours: add a tiny date at the base, or send one stem upward and let the other trail downward past it.
17. Broken Diamond
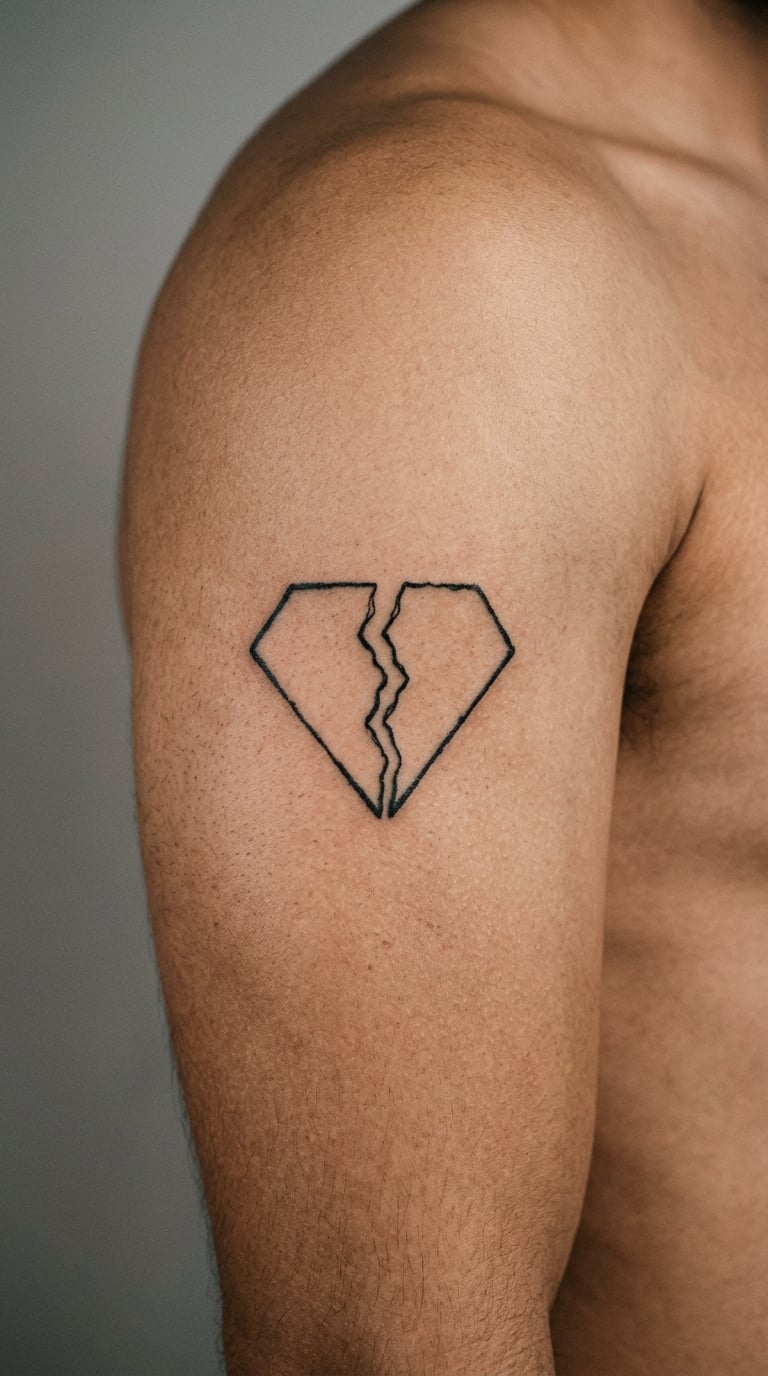
A diamond outline is cut by a jagged line through the middle, and one corner is simply absent from the outline. The missing section is not filled or shaded, so the fracture is created purely by absence, which is a nice trick to watch an artist plan.
This is an abstract piece for someone who likes minimal or geometric work and does not need a story attached. It also slots neatly into an existing geometric arrangement because the line weight is consistent with a cube or a loop knot.
Placement: outer upper arm, forearm, or the chest. Size: 1.5-2 inches (4-5 cm) wide. Style: geometric abstract. Pain: low to medium depending on the area. The sharp lower point is a thin convergence of lines and fades early, so a slightly heavier pass there pays off later. Make it yours: move the break line to sit off-centre, or add a second fracture so the piece reads as a shattered shape.
18. Single Rose Outline
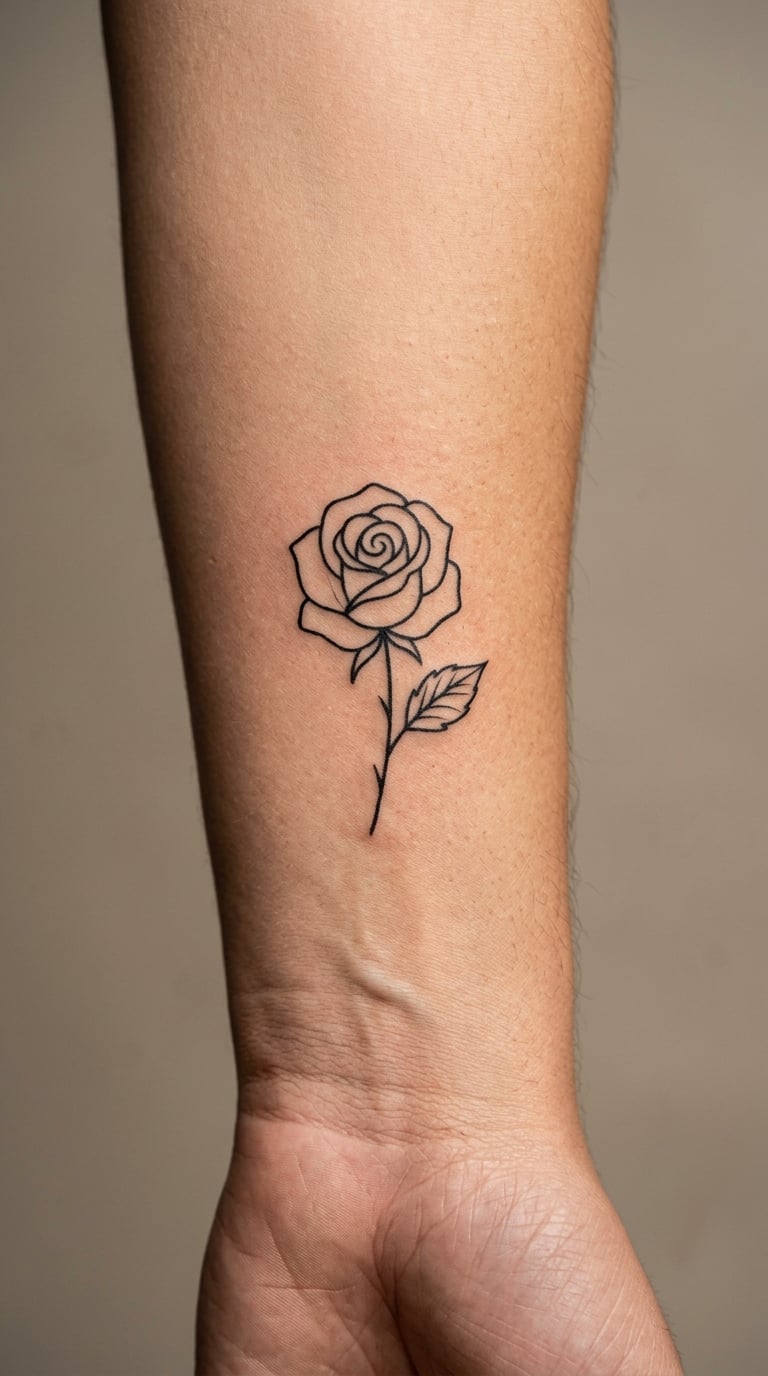
The bloom is built from a spiral centre, four or five outer petals and a short stem with one leaf. That economy is what makes a rose work in hand-tapped form; add more petals and the shape starts to collapse into a blob.
Roses are one of the most tattooed flowers in the world, and choosing a single outline version is often a deliberate move away from the crowded, fully shaded rose. Love is the usual association, though plenty of people just like the form.
Placement: forearm, wrist, or the outer thigh. Size: 1.5-2.5 inches (4-6 cm) tall. Style: botanical traditional outline. Pain: low. The spiral centre is the only dense part, and it needs enough passes to hold black without bleeding into the petal lines around it. Make it yours: add a single thorn on the stem side, or leave the bloom unclosed so the outline continues as an open curve.
19. Freehand Shark Outline
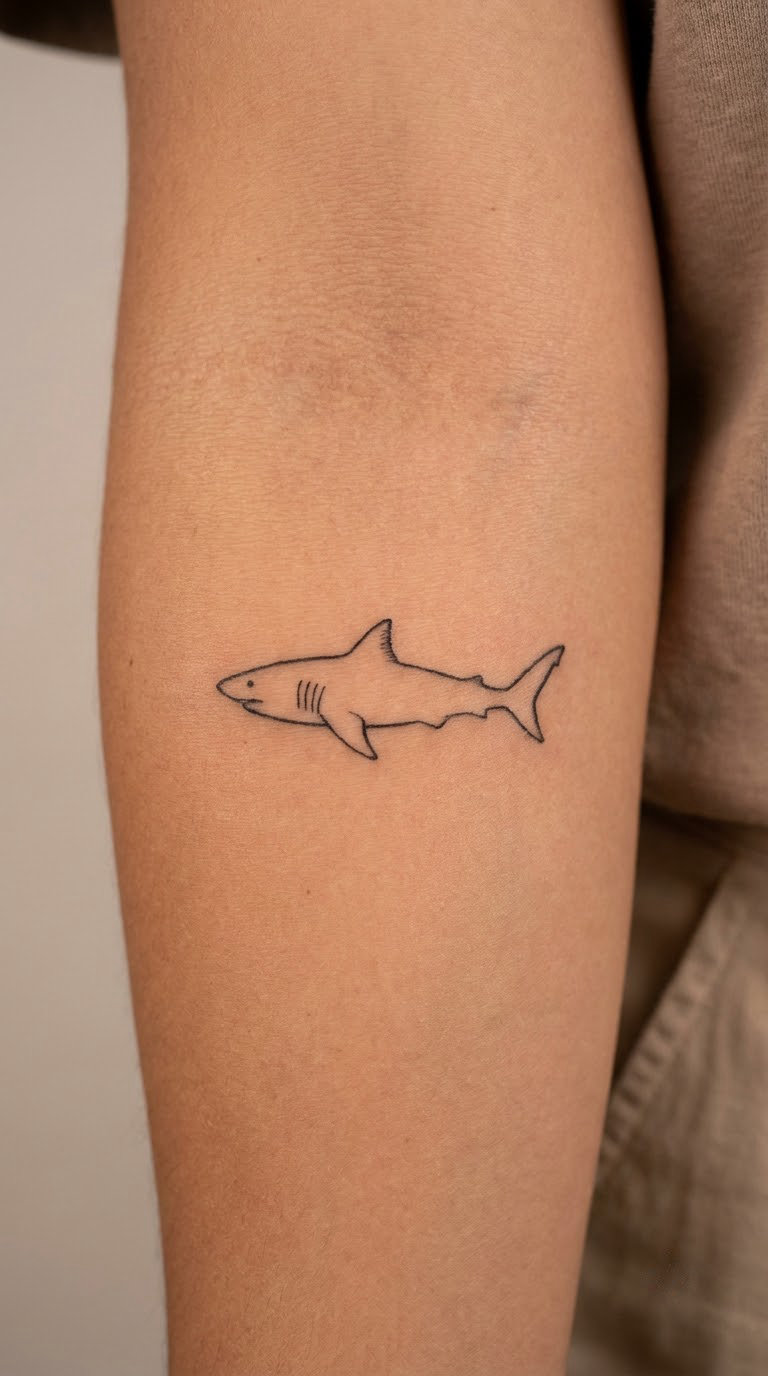
The shark is a long economical contour with one triangular dorsal fin, a curved belly line and a single gill mark. No teeth, no water, no texture, which leaves a design that still looks deliberate without any of the extra passes a fully rendered shark would need.
Sharks get chosen for the ocean, for the way they read as calm rather than aggressive, and for the freehand quality of the drawing. The horizontal body line sits well along a forearm or a calf.
Placement: forearm, calf, or the outer arm. Size: 2-3 inches (5-7.5 cm) long. Style: minimal illustrative. Pain: low. Fine-line pieces on the forearm need maintenance every couple of years, and the tail and gill mark fade before the body does. Make it yours: angle it upward so the tail sits higher than the head, or add a few dot bubbles trailing off the nose.
20. Abstract Loop Knot
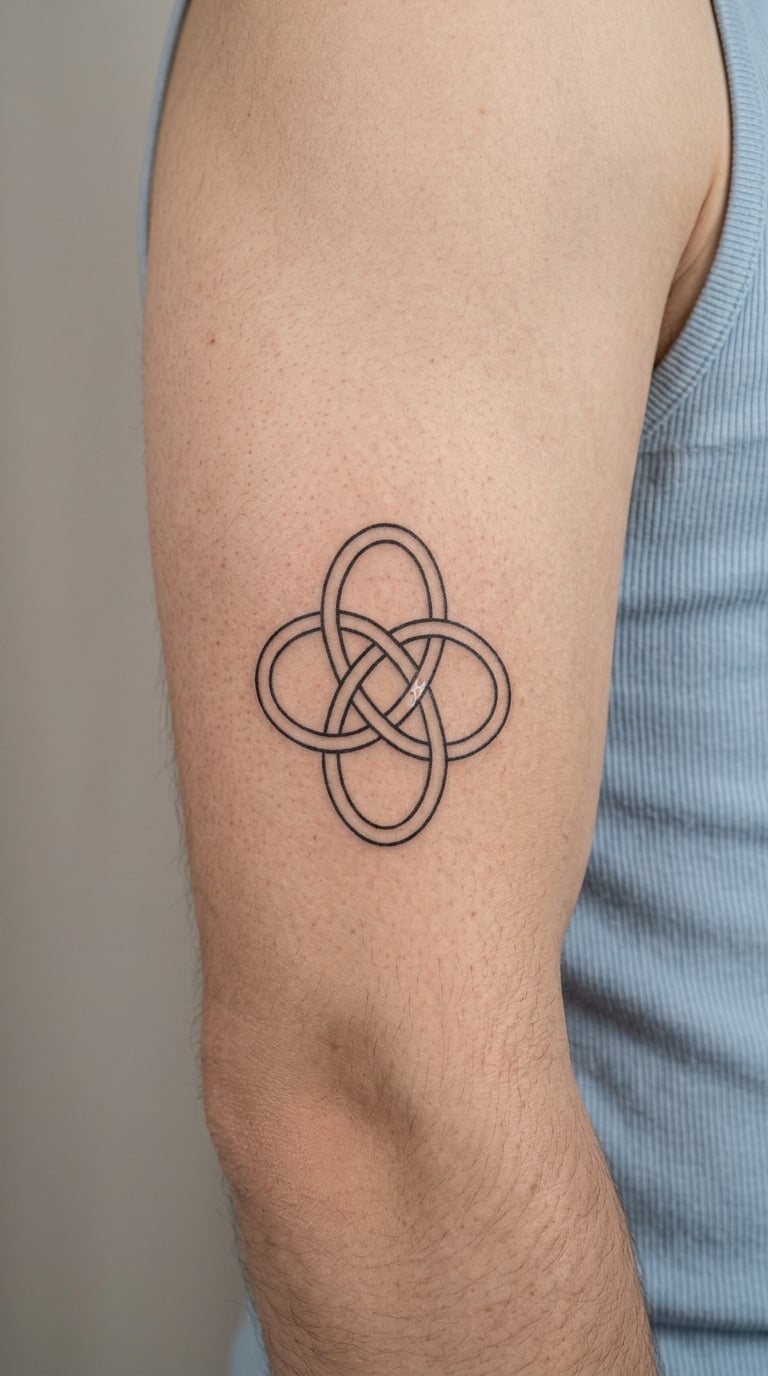
The line loops, crosses itself once and closes back on the starting point. That single overlap is the whole trick: it tells the eye which strand passes over which, and the rest is balanced negative space with no subject at all.
Choose this if you want a tattoo that is about the drawing rather than the picture. It is the hardest thing on this list to freehand well and the one people most often end up adding to later, which is a useful sign of how it wears.
Placement: inner upper arm, forearm, or the back of the hand. Size: 1.5-2 inches (4-5 cm) wide. Style: abstract single line. Pain: low on the arm, medium on the hand. The crossing point is the only place where the line doubles up, so it is the place to check at the end of the session. Make it yours: add a second smaller loop that shares a strand with the first, or anchor it with a short line dropping toward the elbow.
How to Choose the Right Design
Ask the artist to show you healed work, not the day-one photos. Fresh handpokes look softer and slightly patchy before they settle, and healed samples tell you what the line will actually look like in two years. This is the one question I would put at the top of any consultation list.
What to check before you commit to these stick and poke tattoo ideas
- Line visibility: can you read the design clearly at arm’s length? If the artist has to describe it to you, it is too small or too faint.
- Size versus placement: a design under three inches is the most common starting point, and it suits a forearm, wrist or upper arm. Chest, ribs and back can take more.
- Skin texture and movement: knuckle, finger and joint placements stretch with movement and wear fastest. Ask how the artist plans for that.
- Portfolio fit: look for a healed portfolio of the specific style you want. A strong botanical handpoke hand does not automatically do good dotwork.
- Balance with existing work: match the line weight of what you already have rather than the size. A small piece beside a bold one can look deliberate if the line holds.
- Realistic longevity: a hand poke done by a skilled artist at a consistent depth lasts a lifetime. The areas that need the most touch-ups are fingers, hands, knuckles and anything in constant sun.
Cost and Session Time
Most shops price hand-poked work by size or by the hour, and the range you pay depends on where you are, what the shop minimum is and how many sessions the design takes. A micro design of under one inch is usually booked as a short single appointment. Anything from one to two inches commonly needs an hour to an hour and a half. Two to three inches pushes toward a two-hour block, and larger or very detailed pieces are often split across two appointments.
Freehand stick and poke work takes longer than the same design would with a machine. There is no stencil transfer to follow, so the artist is building each line and checking the spacing as they go. If you are bringing one of these stick and poke tattoo ideas as a custom piece rather than picking from flash, book a consultation first and ask for a time estimate in writing.
A few things move the total: the artist’s hourly rate, the studio minimum, the city you are in, how much detail your design carries, whether you need travel, and whether the piece returns for a free touch-up window. Ask what the touch-up window is before you book, because that policy varies widely.
Aftercare Basics
- Follow your artist’s aftercare instructions first. They know exactly how deep they worked, and their advice overrides anything general you read online, including this list.
- Wash the area gently with lukewarm water and unscented soap, then pat it dry with clean hands or a paper towel rather than rubbing it.
- Keep it protected. Loose clothing over the tattoo for the first few days is better than anything tight or rubbing against it.
- Skip swimming, soaking, saunas and heavy direct sun while the skin is healing. Showers are fine once the initial weeping has stopped.
- Replace a damp or loose dressing with a fresh clean one rather than leaving it in place, and wash your hands before you touch anything.
- Do not pick, itch or scratch at flaking skin. When a handpoke line looks patchy in week two, that is normal shedding, not fading.
Frequently Asked Questions
What is stick and poke tattooing?
Stick and poke tattooing, also called a hand poke or hand-poked tattoo, is made by pushing a single machine-grade needle dipped in ink into the skin by hand, one poke at a time, with no electric tattoo machine involved. The design builds dot by dot and line by line, which is slower than machine work and produces a softer, more organic line.
Is stick and poke more painful than machine tattoos?
Most people describe a single-needle hand poke as a constant scratchy or burning dragging feeling rather than the repeated buzzing of a machine. It is easier to sit through in the short term, but hand poke sessions are usually longer, so discomfort builds up over time. Placement matters far more than technique, and ribs, hands and the inner elbow will hurt either way.
How long do stick and poke tattoos take to heal?
A hand poke done by a professional is a permanent tattoo, and with consistent ink depth it lasts a lifetime. Surface healing usually completes in two to three weeks, where the skin flakes and sheds, while the deeper layers keep settling for a few months. How well a line ages depends mostly on artist skill and aftercare, not on the technique itself.
Do fine-line stick and poke tattoos fade quickly?
Fine lines soften faster than bold blackwork, but that is a matter of line weight, not method. A thin line placed at a shallow depth loses definition sooner, while a deeper single-needle line can stay crisp for decades. Hands, fingers, knuckles and heavily sun-exposed placements wear earliest, so plan a refresh every few years if you go fine there.
Can I request a custom design for a stick and poke tattoo?
Yes, and custom work is the norm rather than the exception for hand pokes. Bring a clear reference, ideally at actual size, and tell your artist how much of it you want kept versus simplified. Good custom references are simple, high-contrast images with obvious outlines. Avoid importing another artist’s existing tattoo design, since a good artist will decline it.
Which Stick and Poke Idea Should You Choose?
For a first tattoo, the paper plane, single willow branch and minimal mountain peaks are the easiest to commit to. Each is small, readable and forgiving if a line wobbles slightly, which is the part most first-timers underestimate.
For someone already collecting, the small moth study, the open-hand eye and the abstract loop knot reward a steadier hand and a longer booking. They hold more detail and show more of what hand poking actually is.
Collect references you like, choose a placement that suits how the design sits on your body, and talk to an artist before you book. Ask to see healed work, not day-one photos, and get a time estimate. From what I have seen people get right, that conversation decides more about the finished result than the reference image does.