
22 Mountain Range Tattoo Ideas With Sizes & Placements (2026)
Twenty-two mountain range tattoo ideas, each with the body placement, realistic size, style and pain level that suit it best, plus one way to make the design your own. Mountain range tattoos suit hikers, skiers, climbers, van-life people, anyone marking a hometown skyline, and first-timers who want something clean that still reads at arm’s length.
What makes a range design work on skin is the ridgeline. One connected silhouette, each peak stepping down into the next valley, reads as distance and scale in a way a single peak never does. Pick your composition in autumn, book 30 to 45 days ahead, and give the artist your reference range before the stencil goes on.
22 Mountain Range Tattoo Ideas: Quick Guide
| Idea | Style | Best placement | Size | Pain |
|---|---|---|---|---|
| 1. Fine-Line Alpine Ridge | Fine line | Inner forearm | 2.5-3 in | Low |
| 2. Dotwork Mountain Panorama | Dotwork | Outer upper arm | 4-5 in | Medium |
| 3. Blackwork Sierra Silhouette | Blackwork | Outer forearm | 5-6 in | Medium |
| 4. Watercolor Cascades and Peaks | Watercolor | Shoulder blade | 4 in | Medium |
| 5. Minimal Triangular Range | Minimalist | Above the wrist | 1.5-2 in | Medium |
| 6. Snow-Capped Range in One Line | Continuous line | Outer wrist | 3 in | Medium |
| 7. Traditional Japanese Scene | Traditional | Upper arm | 6 in | High |
| 8. Micro-Realism Dolomite Peaks | Micro-realism | Side of the calf | 2.5 in tall | Medium |
| 9. Geometric Folded Range | Geometric | Inner bicep | 3.5-4 in | Medium |
| 10. Rocky Mountain Sunrise | Colour realism | Shoulder | 4.5 in | High |
| 11. Collarbone Range | Black and grey | Above the collarbone | 4 in | High |
| 12. Tiny Peaks Behind the Ear | Fine line | Behind the ear | 1.5 in | Medium |
| 13. Full-Back Rocky Mountain Atlas | Blackwork | Upper back | 14-18 in | High |
| 14. Cascading Forearm Layers | Black and grey | Forearm, wrist to mid | 7 in long | Medium |
| 15. White Ink Snow Ridge | White ink | Outer upper arm | 3 in | Medium |
| 16. Matching Compass and Range | Fine line | Opposite inner forearms | 1.5 in each | Low |
| 17. Storm Clouds Over Spires | Blackwork | Outer thigh | 5 in tall | Medium |
| 18. Mountain and River Map | Fine line | Calf | 4 in tall | Medium |
| 19. Sleeve Panorama, Valley to Summit | Blackwork | Outer arm | 10-14 in | High |
| 20. Minimal Range on the Sternum | Fine line | Sternum | 3.5 in | High |
| 21. Bright Rainbow Ridge | Colour illustrative | Side of the ribcage | 3 in | High |
| 22. Home Range With Coordinates | Fine line | Inner forearm | 3 in | Low |
1. Fine-Line Alpine Ridge on the Inner Forearm
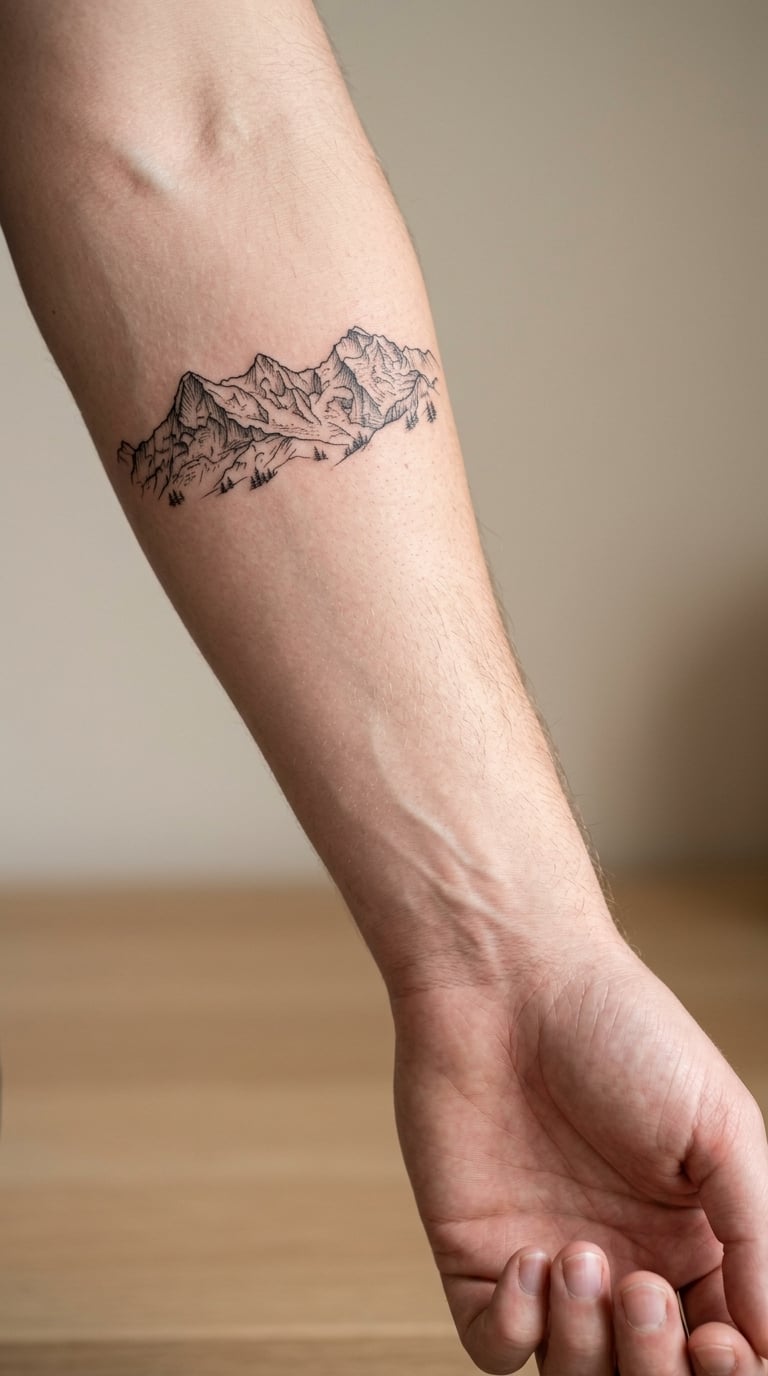
A fine-line alpine ridge is one continuous black ridgeline, single-needle weight, with the highest peak set slightly off centre so the eye travels rather than lands. It is the easiest mountain range tattoo to wear quietly, and the one most first-timers end up with.
Most people choose it for a specific place, a range walked or driven past for years, or for the sense of steady forward movement the line gives. Placed on the inner forearm, it sits where you can see it and where a sleeve can grow around it later.
Placement: Inner forearm, outer forearm or along the ribs. Size: 2.5 to 3 inches (6 to 7.5 cm) wide, no taller than an inch. Style: Fine line. Pain: Low on the inner forearm, though the wrist crease stings. Expect slight line spread over the years, so ask for a slightly heavier needle than looks comfortable in the drawing. Make it yours: Ask the artist to match the skyline of the range you grew up near rather than a generic peak.
2. Dotwork Mountain Panorama on the Outer Upper Arm
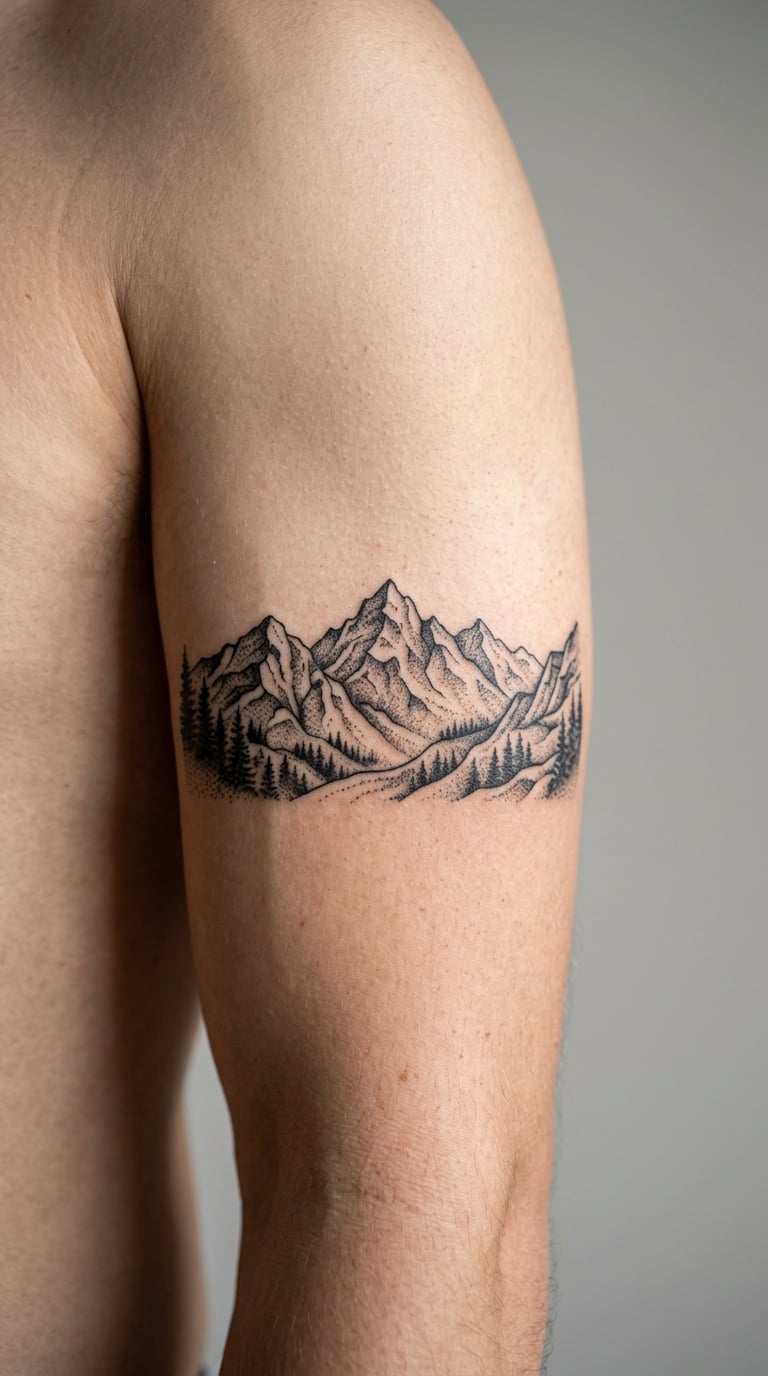
Dotwork builds a whole range out of carefully spaced dots, with the near ridge darkest and the far peaks fading into open skin. The negative space between dot bands is doing as much work as the ink, so the piece breathes.
It reads as understated rather than loud, which is why it suits people who want a whole range without a scene. A lower-contrast style also sits quietly under a shirt collar or a jacket sleeve.
Placement: Outer upper arm as a band, or the outer thigh. Size: 4 to 5 inches (10 to 13 cm) wide, 1.5 to 2 inches tall. Style: Dotwork. Pain: Medium, and the deeper dot passes in the shadow band hurt more than the outline. Fine dot detail can soften and blur into a grey haze over time, so treat touch-ups as part of the deal. Make it yours: Add a tiny pine at one end as a scale marker, and leave the rest clean.
3. Blackwork Sierra Silhouette on the Outer Forearm
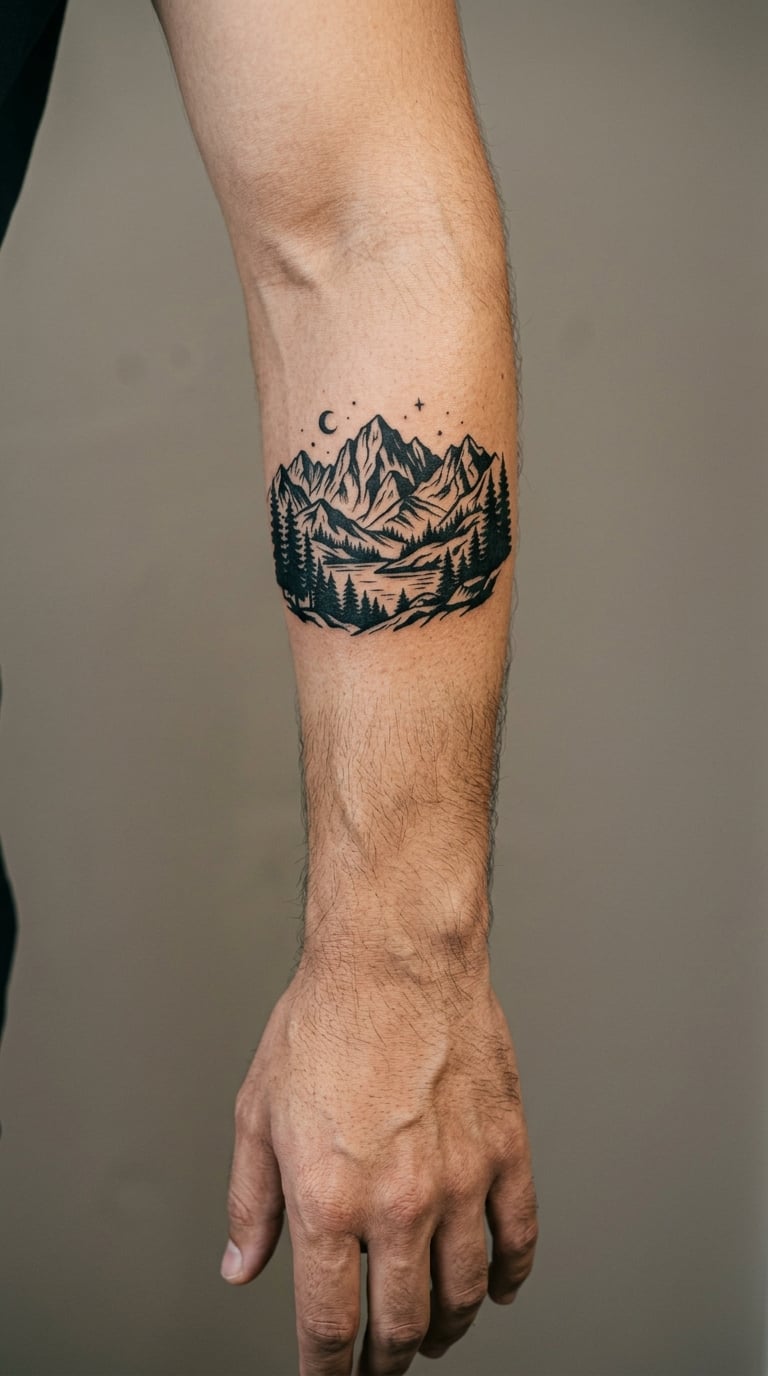
A blackwork Sierra silhouette is a solid, fully packed black shape with two or three peaks layered so the closest ridge cuts into the one behind it. No shading inside the shape. All the depth comes from the overlap and from a hard horizon line below.
This is the one people pick when they want the range to be unmistakable from across a room. Solid black also holds its shape better than any other technique in this list, which matters over a decade of sun and weather.
Placement: Outer forearm reads best, with the peak pointing toward the elbow. Size: 5 to 6 inches (13 to 15 cm) wide. Style: Blackwork. Pain: Medium, mostly the long solid pass. Pack solid black only where the skin has some give, since it stretches and the shape distorts on a hard flat surface. Make it yours: Have the artist cut the skyline to your named range, then add a single gap of white at the highest summit for snow.
4. Watercolor Cascades and Peaks on the Shoulder Blade
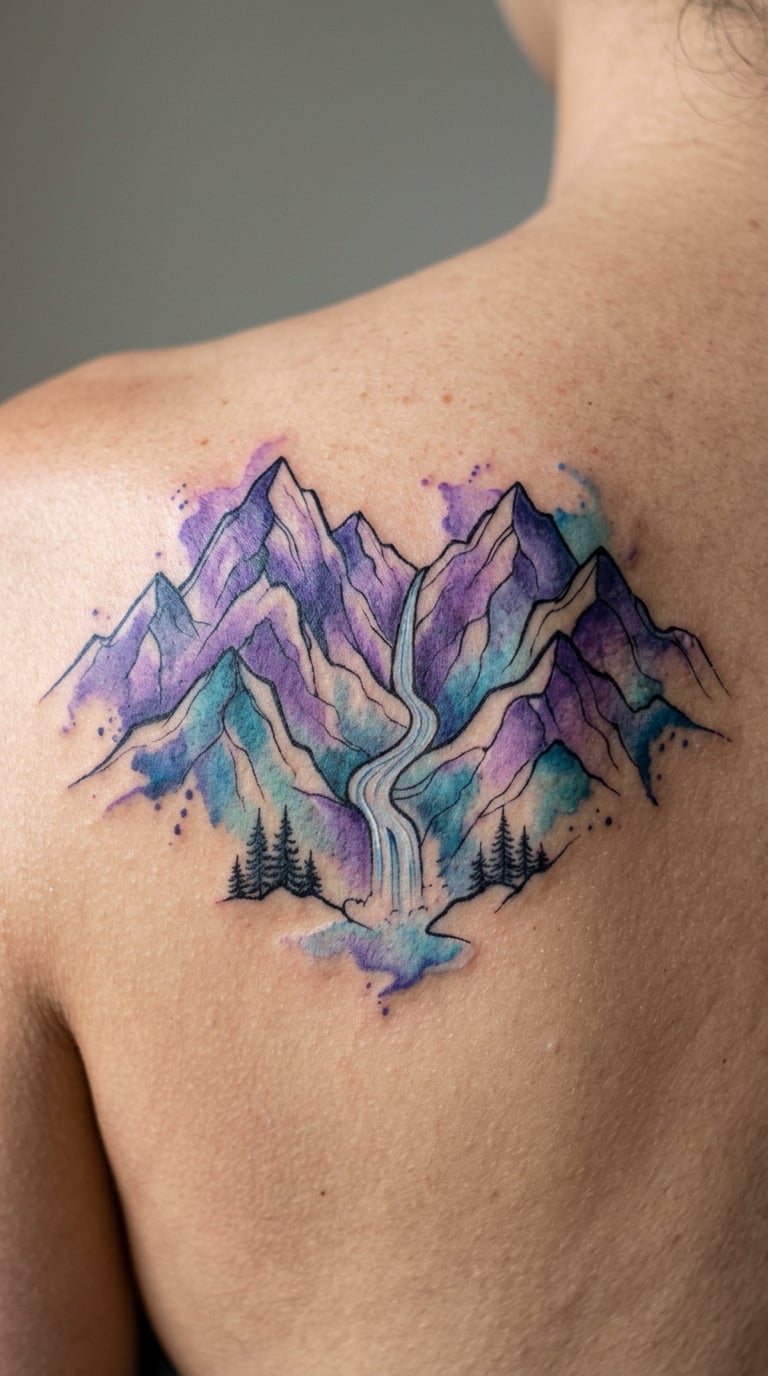
A watercolor range uses soft violet, blue and grey washes bleeding into each other, with a narrow white waterfall dropping between two peaks. Edges stay loose, and the artist leaves gaps where the wash thins out so the colour looks like it ran rather than was placed.
It usually comes from a trip someone wants to keep visible but not formal, a colour palette lifted from a real view. Colour is the whole point here, so this is not a style to convert to black and grey later.
Placement: Shoulder blade, upper back or outer thigh, where there is flat skin and some give. Size: 4 inches (10 cm) wide works; go bigger if you want the washes to layer. Style: Watercolor. Pain: Medium on the back, higher on the shoulder blade. Colour tattoos need more sessions and a colour-boost touch-up as the saturation settles, usually within the first year. Make it yours: Bring a photo of your range at the time of day you actually remember it, and match the wash colours to it.
5. Minimal Triangular Mountain Range Above the Wrist
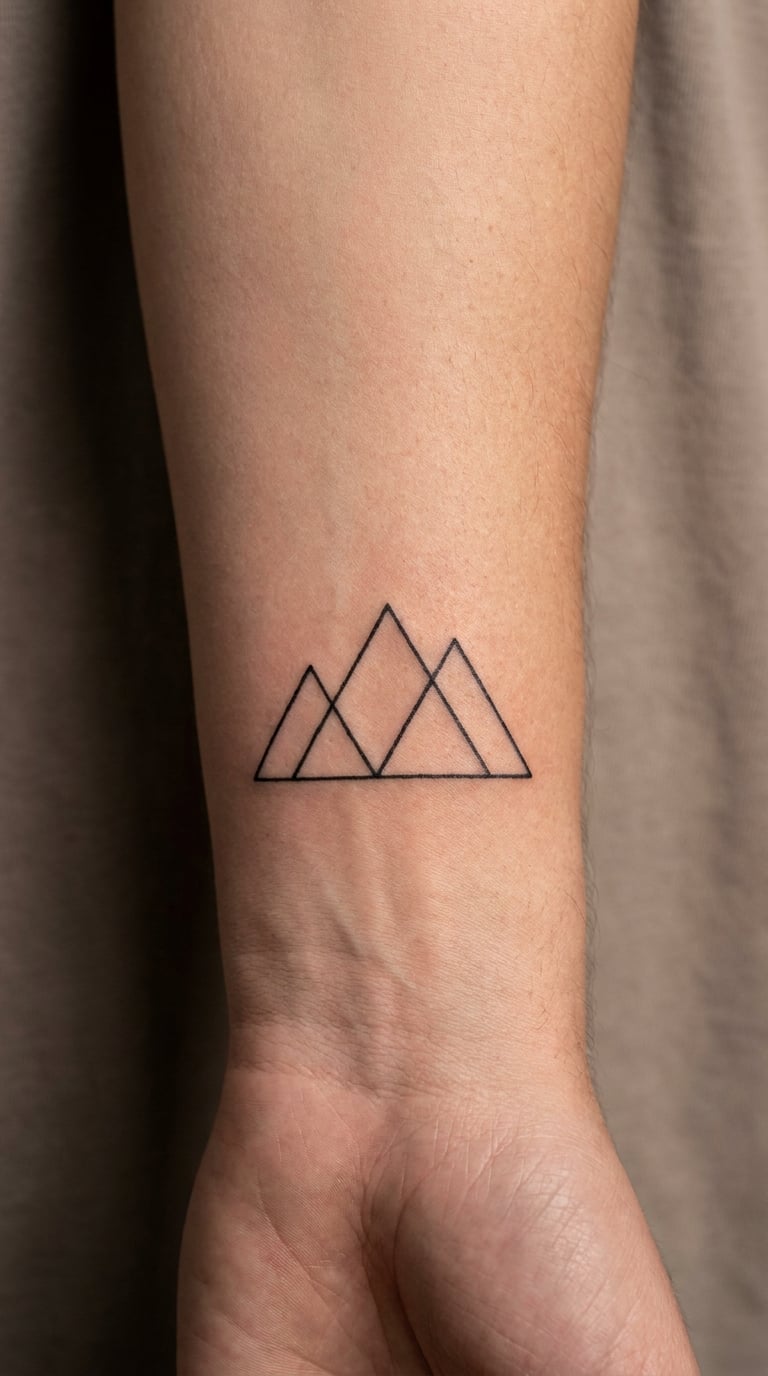
Three overlapping triangles, each peak a little shorter than the one before it, is the whole design. No shading, no line variation, nothing else competing. Minimalist mountain tattoos like this one are about proportion: the spacing between the peaks does the interesting work.
People choose it when they want a first tattoo that looks deliberate rather than youthful. It also sets up a sleeve later, since a plain geometric band leaves clean skin to add to.
Placement: Above the wrist on the inner forearm, or the outer wrist. Size: 1.5 to 2 inches (4 to 5 cm) wide. Style: Minimalist blackwork. Pain: Medium, higher near the wrist bone. Honest warning: at this size the internal edges between triangles can blur together over the years, so keep the gaps generous at the sketch stage. Make it yours: Add one small filled circle low in the valley as a sun or moon, sized so it stays distinct.
6. Snow-Capped Range in One Line on the Outer Wrist
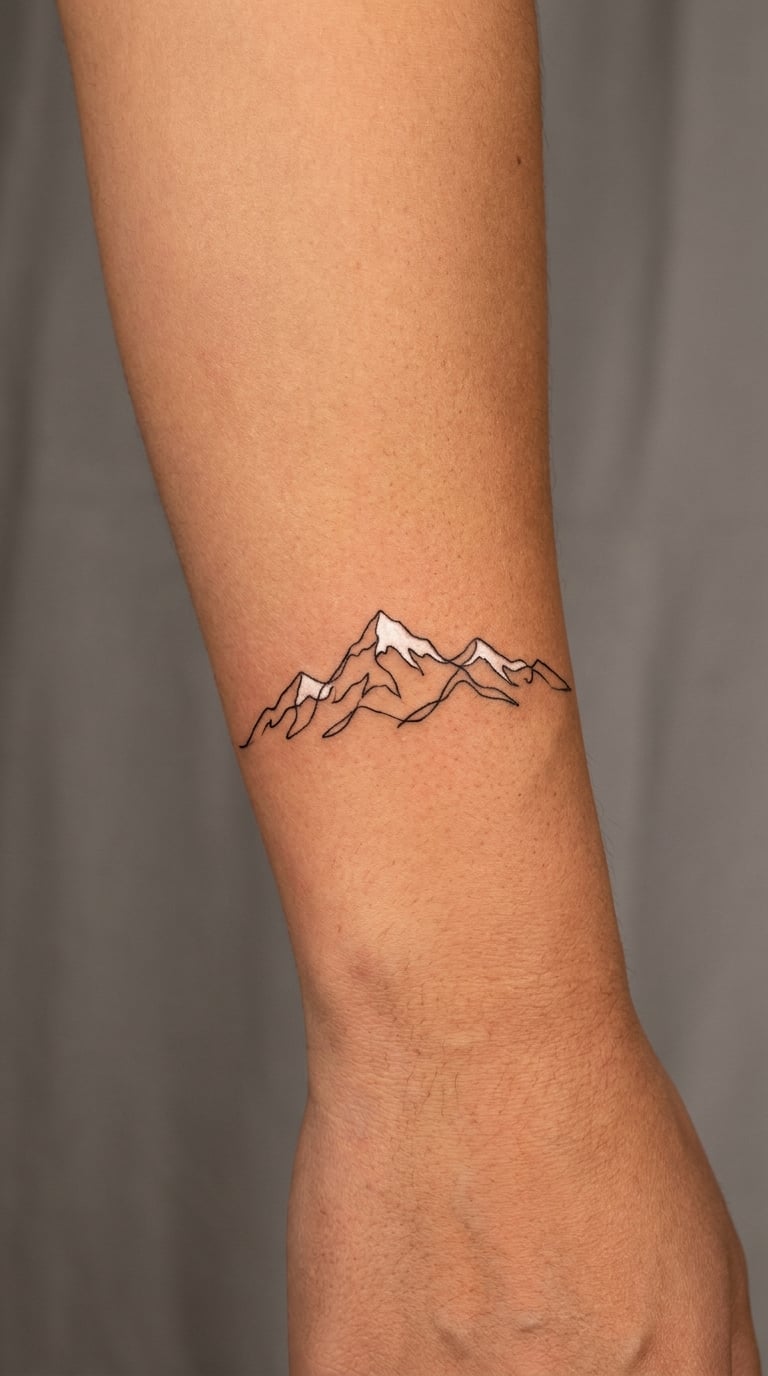
A one-line snow-capped range keeps the entire ridgeline in a single unbroken stroke, with the snow line picked out as small filled notches along the upper edges. Because nothing overlaps, the design stays flat and graphic.
It usually marks a winter identity or a place first seen in the cold, snow country up north or a season that mattered. A single continuous stroke also reads as one unbroken thing, which is a lot of what people are after.
Placement: Outer wrist, ankle or the side of the hand. Size: 3 inches (7.5 cm) wide. Style: Continuous line. Pain: Medium to high on the outer wrist, where the skin is thin over bone. Hands, wrists and fingers get more sun, more washing and more movement, so single-needle work there softens faster than anywhere else on the body. Make it yours: Have the artist add a second thinner line running underneath as a valley shadow, kept just light enough to survive ageing.
7. Traditional Japanese Mountain Scene on the Upper Arm
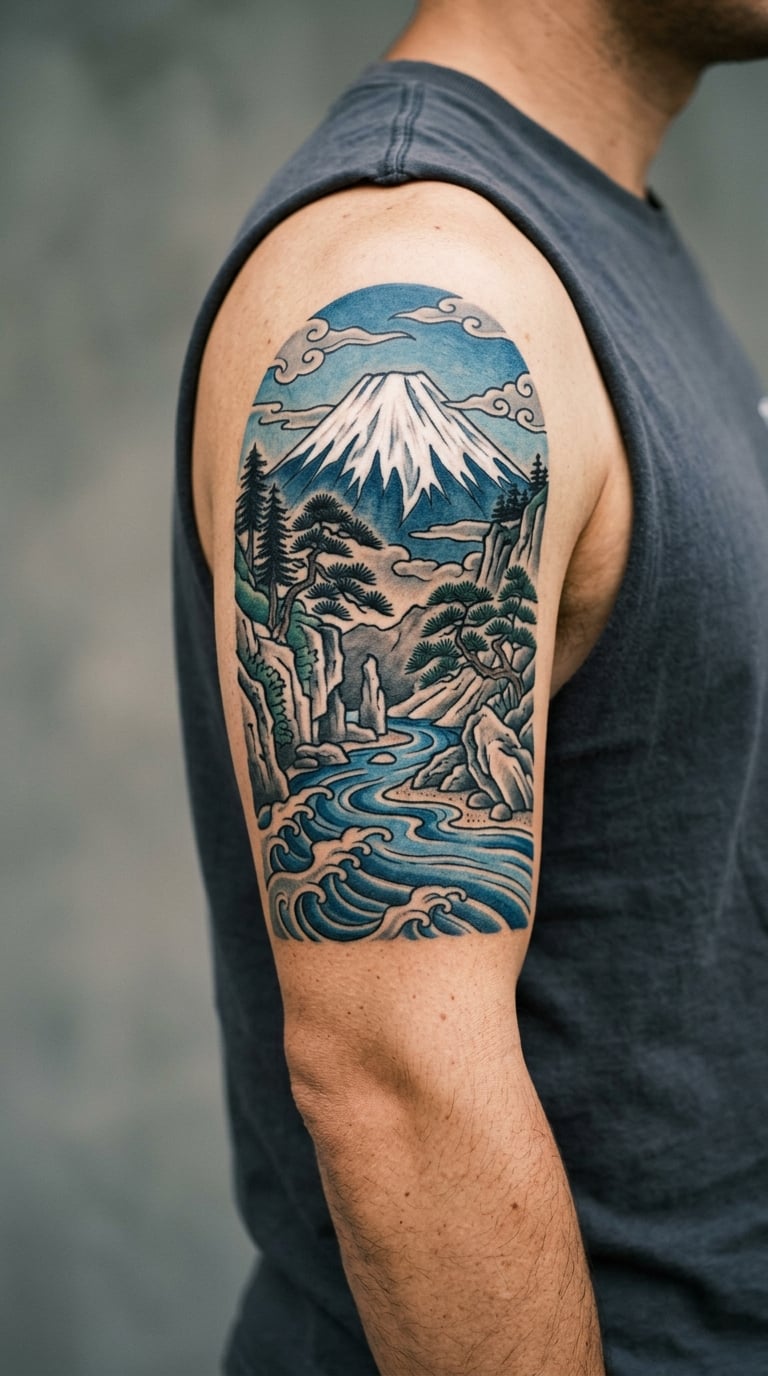
A traditional-style scene puts a large snow-capped peak at the centre, pine trees and stylised clouds around it, and flat blue water below. The forms are bold and the outlines heavy, closer to an old printed illustration than to a photograph.
Most people pick it for the calm, ordered feel of the composition rather than for any fixed reading. If a particular peak matters to you, that is worth saying out loud in the consult, and worth researching carefully beforehand too.
Placement: Upper arm, thigh or lower back. Size: 6 inches (15 cm) wide or larger; traditional style needs room or the pines and clouds turn to mush. Style: Traditional. Pain: High on the upper arm over a long session. Colour fills and the blue water take the most passes. Fine interior detail flattens as skin ages, so ask for bolder shapes. Make it yours: Add a red seal-style mark near the base, and consider researching any sacred or culturally specific peak before committing to it.
8. Micro-Realism Dolomite Peaks on the Side of the Calf
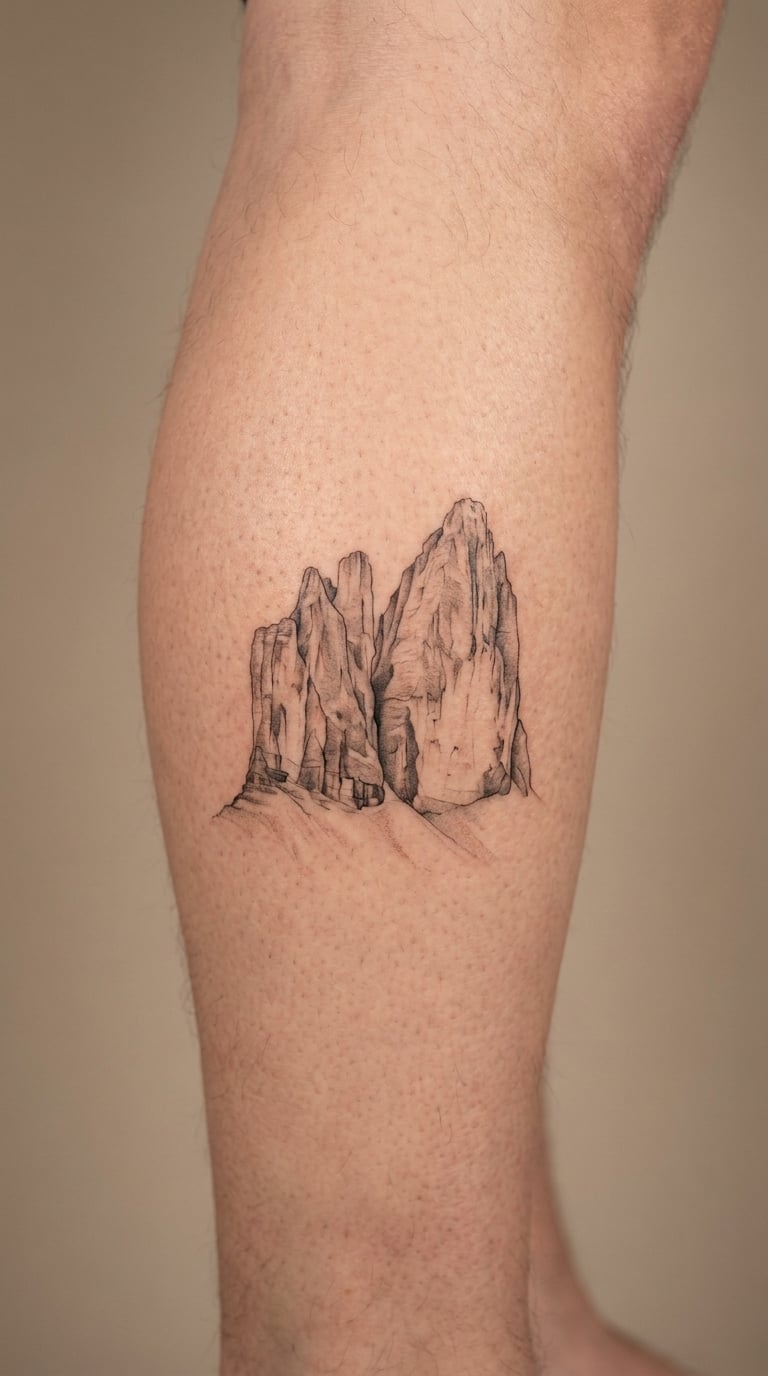
Micro-realism here means pale cliffs rendered in soft greys and warm off-whites, with cracks and shadow pockets in fine shading and a couple of sharp edges to catch the light. It looks like a photograph until you notice the size.
It usually comes from a place that mattered, terrain someone actually stood under. A range you know by name carries more weight than any generic skyline, and that specificity is usually the whole brief.
Placement: Side of the calf, inner forearm or the back of the upper arm. Size: 2.5 inches (6.5 cm) tall minimum, and bigger is safer. Style: Micro-realism. Pain: Medium on the calf, where the muscle works hard under the needle. Geological detail needs scale; under 2 inches the cracks turn into grey noise within a few years. Make it yours: Bring a photograph taken at the same time of day you first saw those cliffs, and ask the artist to follow its light.
9. Geometric Folded Mountain Range on the Inner Bicep
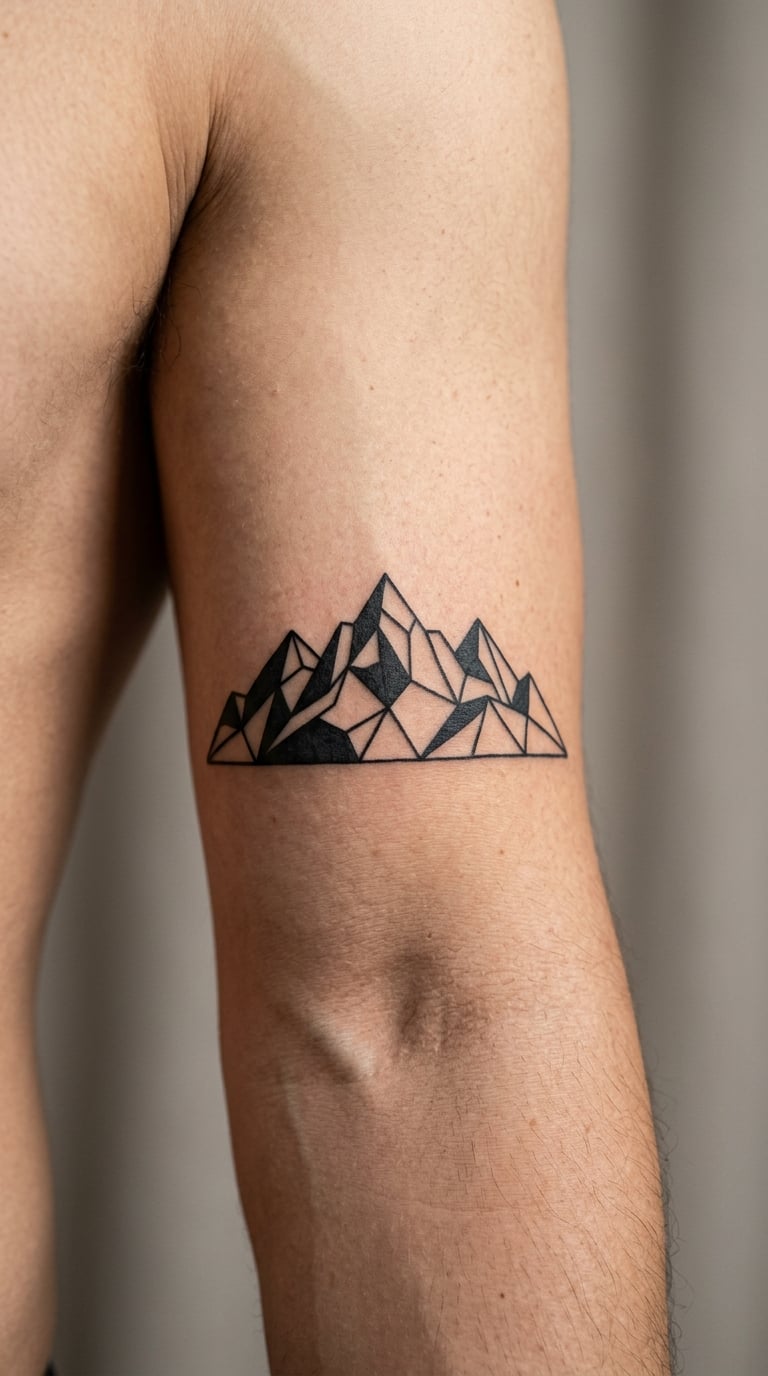
A geometric range is built from triangular facets, each shaded at a different angle, so the peaks look folded from paper or cut metal. Straight edges run from summit to valley and the whole thing sits in a strict rhythm.
It appeals to people who already collect angular body art and want a piece that holds its own next to other geometry. Nothing about it is naturalistic, and that is the point.
Placement: Inner bicep, outer thigh or the forearm. Size: 3.5 to 4 inches (9 to 10 cm) wide. Style: Geometric. Pain: Medium; the inner bicep is sensitive but well padded. Facet shading means several passes over the same area, so expect a longer sitting. Straight lines read badly if they wobble, so check the stencil placement before the first pass. Make it yours: Give the artist three peaks instead of five, which leaves room for the facets to stay clean at a smaller size.
10. Rocky Mountain Sunrise on the Shoulder
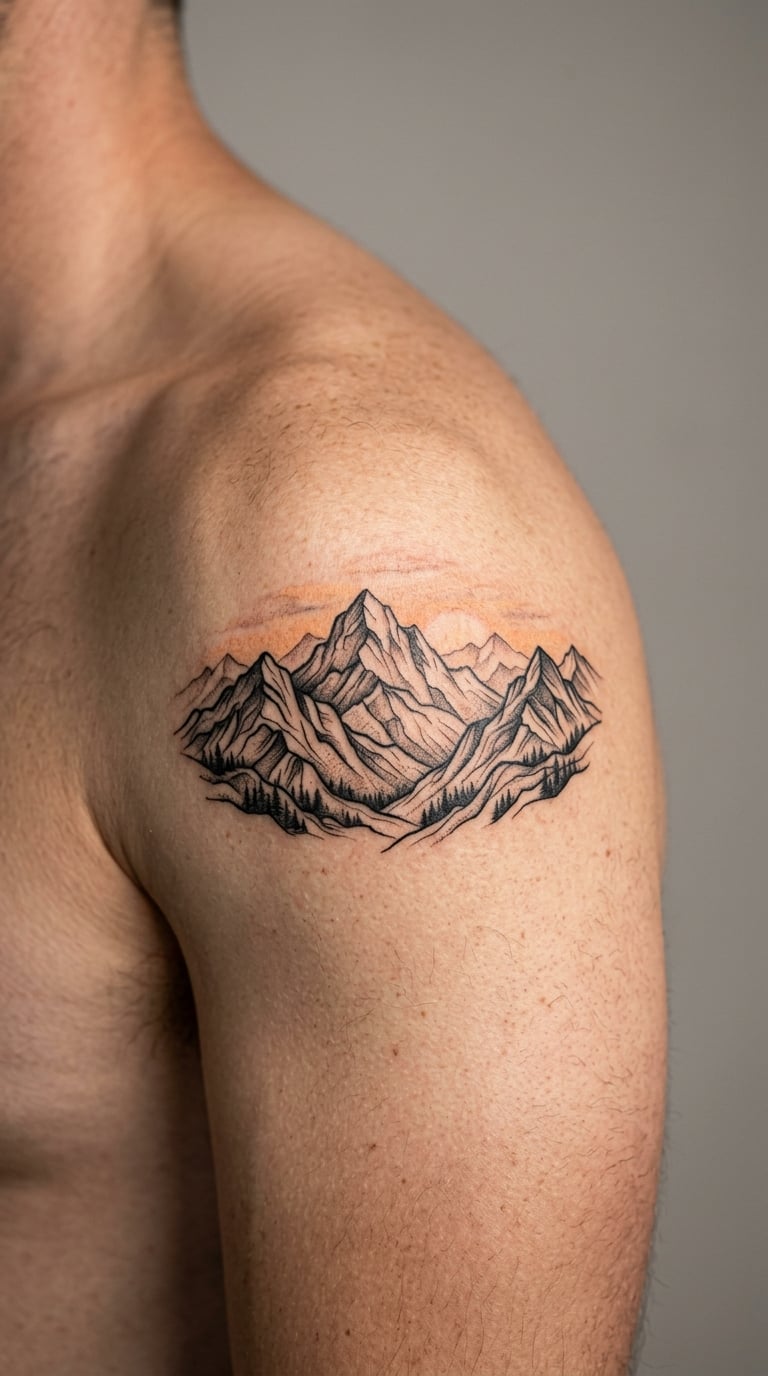
A sunrise range layers three or four ridgelines in receding greys, with a muted orange and yellow glow sitting behind the highest summit. The sun is usually a clean half-disc rather than a full circle, and the ridges in front of it are near-black.
It suits people who think of mountains as the first thing they see, not the thing they overcame. Morning light rather than a dramatic sunset keeps the whole piece calmer.
Placement: Shoulder or upper back. Size: 4.5 inches (11.5 cm) wide. Style: Colour realism. Pain: High over the shoulder cap, one of the more sensitive spots after ribs and sternum. The warm glows in the sky fade faster than the dark ridges, so plan on a colour refresh rather than a full redraw. Make it yours: Use the actual sunrise colour from the day you were there, even if it is a washed-out peach rather than bright orange.
11. Mountain Range Following the Collarbone
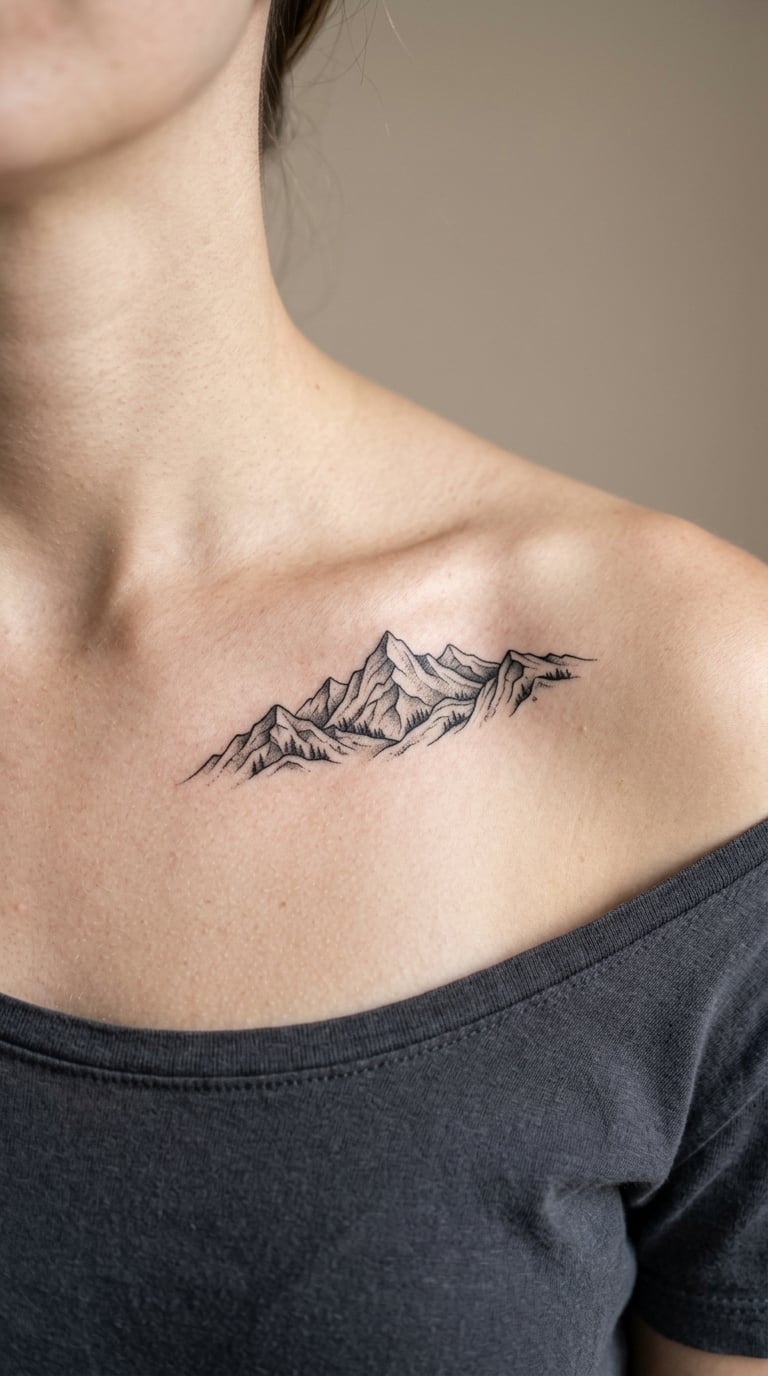
A collarbone range is a shallow panorama in black and grey, thin enough to sit in the hollow above the bone rather than on top of it. Ridgelines follow the line of the collarbone so the design looks like it grew out of the anatomy.
It is a good first piece for anyone who wants something visible but not loud, and it hides easily under a shirt. Symmetrical versions across both collarbones are popular too, though the body is never quite symmetrical.
Placement: Above the collarbone, or centred across the upper chest. Size: 4 inches (10 cm) across, 1 inch tall at the tallest peak. Style: Black and grey. Pain: High. Bone sits right under the skin here, and movement over the collarbone pulls the skin constantly. Keep detail low; the shallow height is a real limit on how much ridge you can fit. Make it yours: Have the artist tune the range to the natural curve of your own collarbone rather than a straight baseline.
12. Tiny Alpine Peaks Behind the Ear
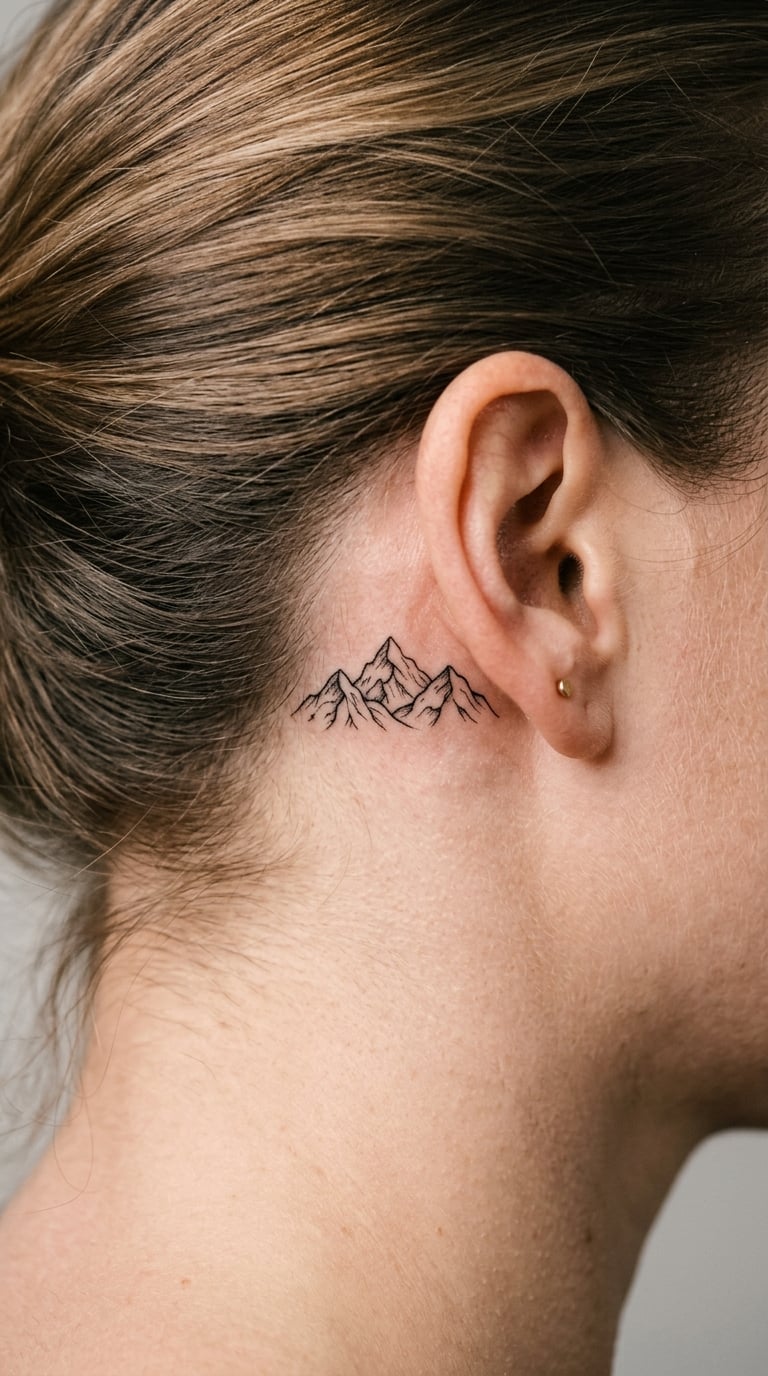
Tiny peaks behind the ear are three small fine-line summits, often curving slightly with the line of the ear itself so part of the range disappears from view. It is subtle by design and mostly seen in a mirror or from the side.
It usually stands for a destination, a person, or a period of life you keep close without announcing. A placement this discreet works for people with office jobs who would rather not explain the piece at work.
Placement: Behind the ear, or just under the earlobe. Size: 1.5 inches (4 cm) wide. Style: Fine line. Pain: Medium to high; the skin behind the ear is thin and the cartilage area is close to bone. The head moves constantly, and hair and sun exposure both wear the line down, so this placement needs the most touch-ups over the years. Make it yours: Use two peaks instead of three and add a small date on the neck below, kept to a hairline weight that can be re-lined later.
13. Full-Back Rocky Mountain Atlas on the Upper Back
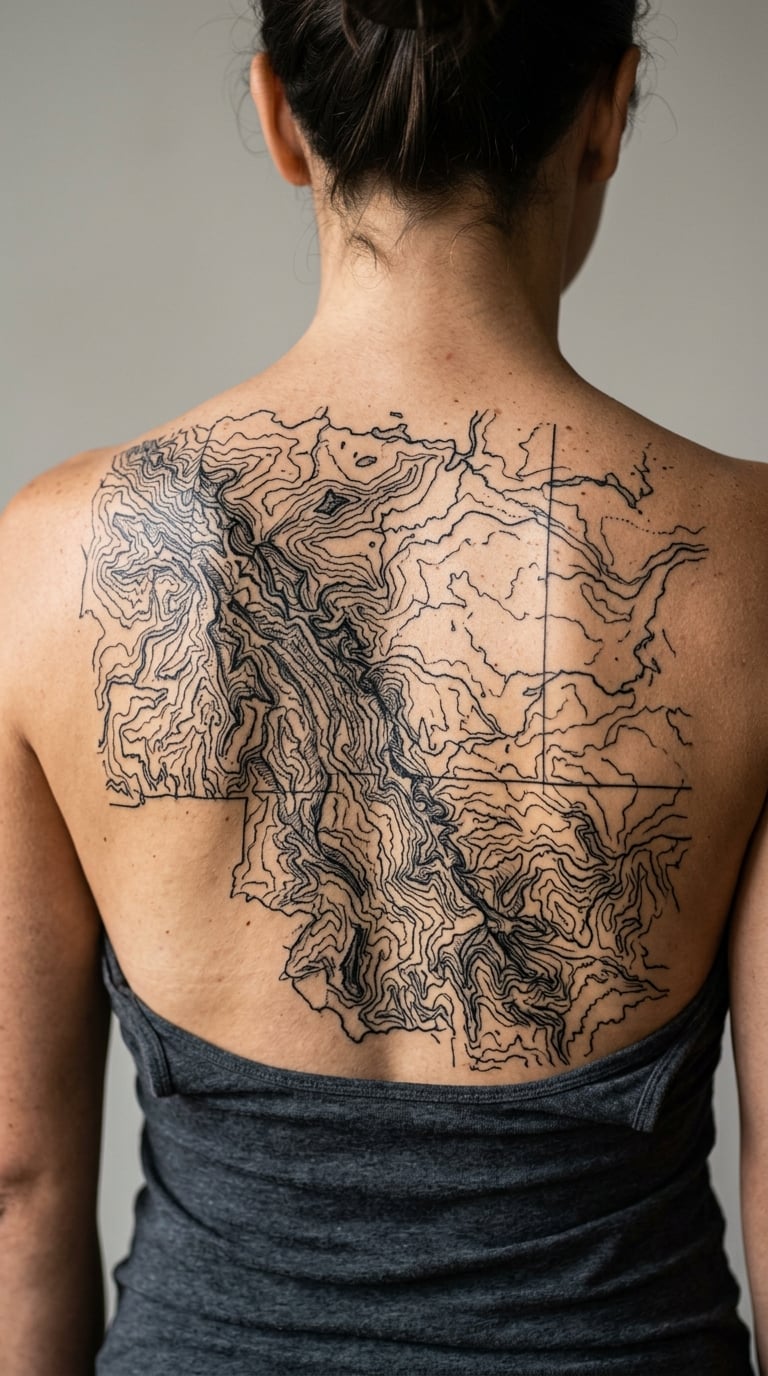
A full-back atlas is a blackwork map: several distinct ranges, valleys between them, and contour lines running across the whole field like a topographic sheet. The pieces overlap and interlock so no part of the back is left bare.
It is for experienced collectors, not a first small piece. You are committing to a piece that takes planning, several sittings and a long-term commitment to skin that changes shape across the back.
Placement: Across the upper and mid back. Size: 14 to 18 inches (35 to 45 cm) wide. Style: Blackwork with illustrative map detail. Pain: High, spread across many hours. Contour lines are thin and numerous, so the work is more about endurance than about any single spot. Map edges soften fastest, so expect touch-ups along the contour work. Make it yours: Use an actual topographic map of your chosen range as the stencil source, and plan the design so future additions have empty valleys to grow into.
14. Cascading Layers on the Forearm
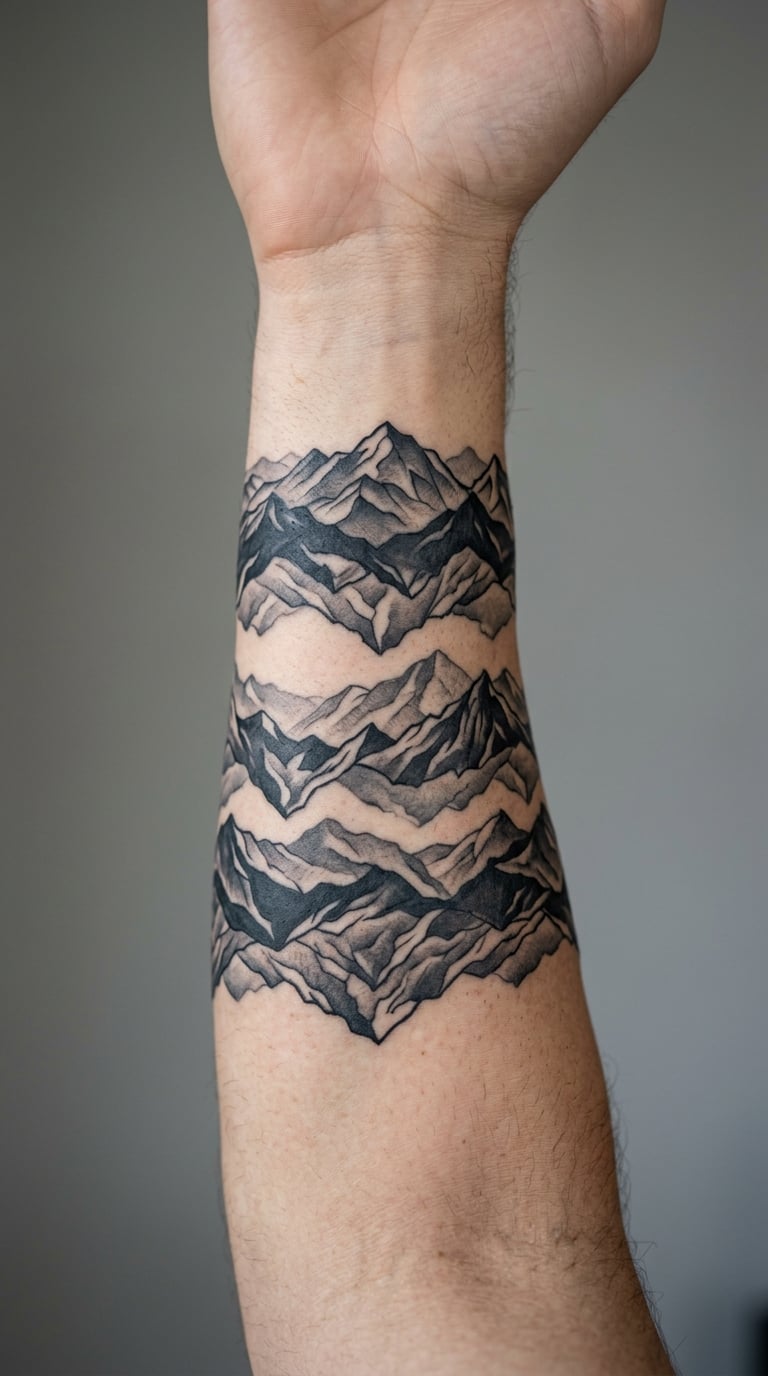
Cascading layers are stacked ridgeline bands in black and grey, each one lighter than the one in front, wrapping visually around the forearm from wrist to mid-forearm. The overlap creates depth without any shading inside the shapes.
It usually comes from a person who wants a range to feel like it continues past the edges of the design. The bands read as distance, receding one ridge at a time.
Placement: Forearm, from wrist to mid-forearm. Size: 7 inches (18 cm) long, 2 to 2.5 inches tall. Style: Black and grey. Pain: Medium on the forearm, rising near the wrist crease. Curvature matters more than size here: bands placed on a round forearm can distort as the arm bends, so ask the artist to plan for that. Make it yours: Add a fine-line hiker on the highest band, sized no bigger than a grain of rice, as a detail only you will notice.
15. White Ink Snow Ridge on the Outer Upper Arm
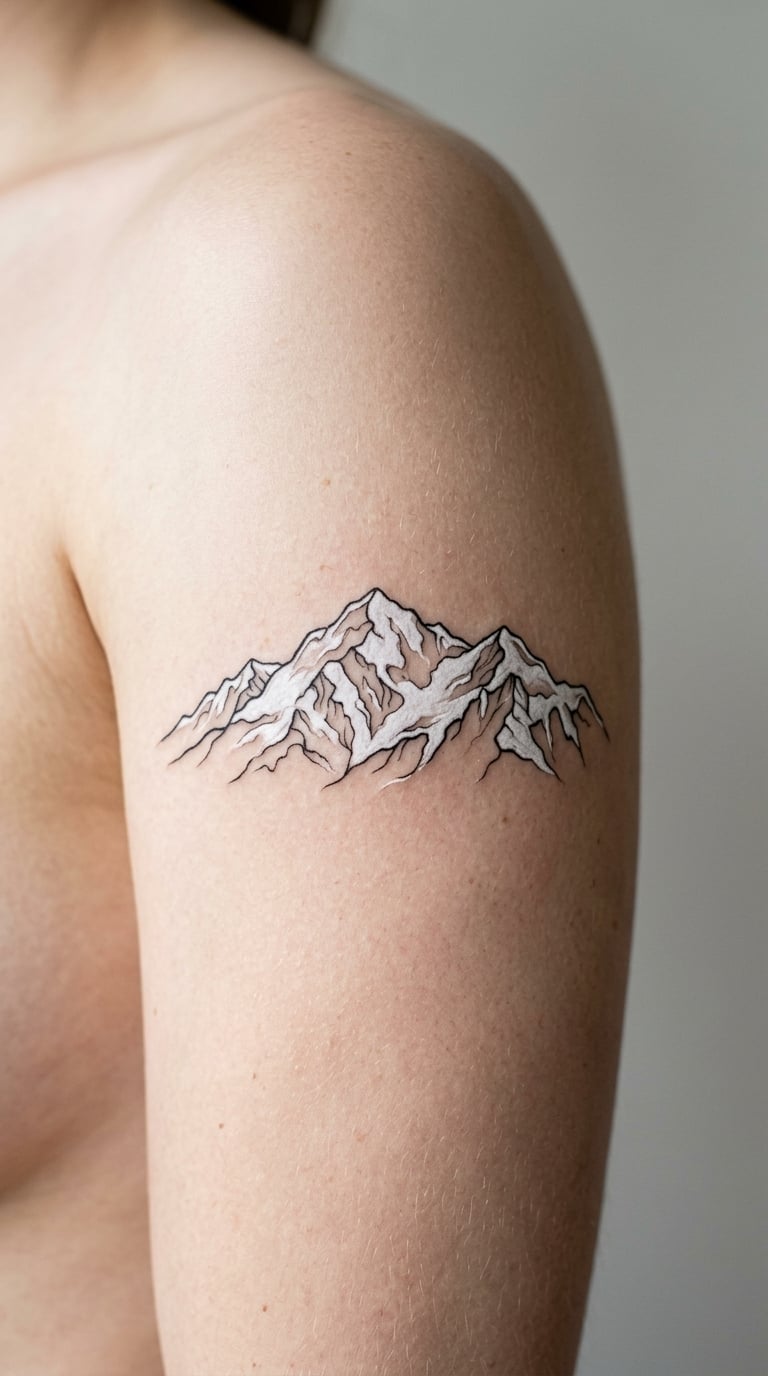
A white ink snow ridge uses pale, semi-opaque white to lay snow onto skin that is already light, with sparse black outlines only where the ridge needs definition. Almost the whole design lives in the skin colour itself.
It tends to come from a winter identity, seasons spent somewhere cold, or simply a preference for pieces that look like nothing under a long sleeve. It is the least tattoo-like entry in this list at a glance.
Placement: Outer upper arm, or anywhere with firm, pale skin. Size: 3 inches (7.5 cm) wide. Style: White ink with black line. Pain: Medium. White ink is a technical request, so book an artist who works with it regularly rather than a generalist. The practical limit is skin tone: on tanned or deeper skin the white simply will not show, and sun exposure gradually flattens it. Make it yours: Add a single thin black pine at the base as the only hard edge, so the piece still reads when the white has faded.
16. Matching Compass and Mountain Pair on Opposite Inner Forearms
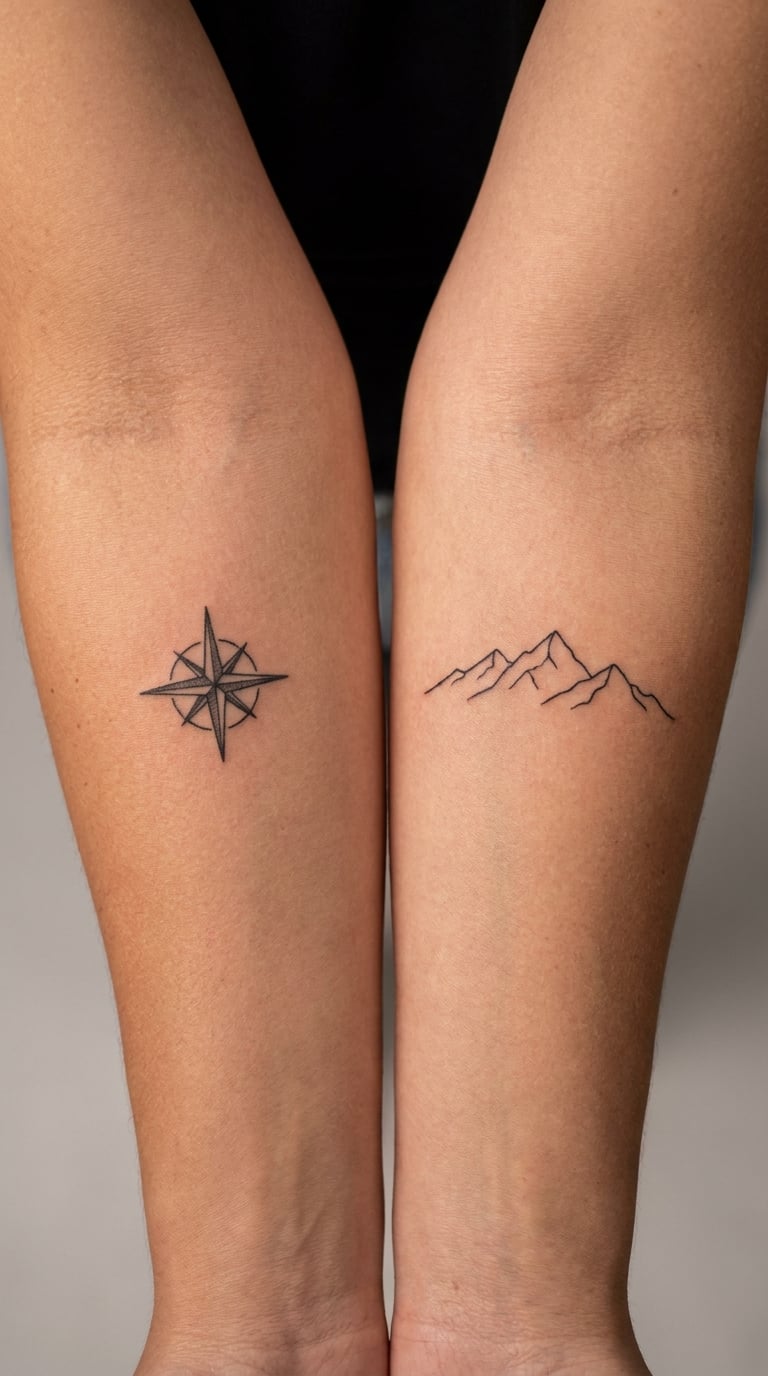
A matching set pairs a simple four-point compass rose with a separate minimal range, one on each inner forearm, drawn in the same line weight and spacing. They read as a pair without being identical, which is what makes the set feel designed rather than duplicated.
Matching mountain range tattoos usually come from shared trips, siblings, or couples, and from people who want the connection without a name or a date on skin. The compass on one side, the range on the other, gives each person one half of the idea.
Placement: Opposite inner forearms, or both on the same side at matching heights. Size: 1.5 inches (4 cm) each. Style: Fine line. Pain: Low on the inner forearm. Matched pieces on two arms will never age at exactly the same rate, so expect a small difference within a few years. Make it yours: Give each person their own peak in the range, so the two halves together form one range nobody else has.
17. Storm Clouds Over Mountain Spires on the Outer Thigh
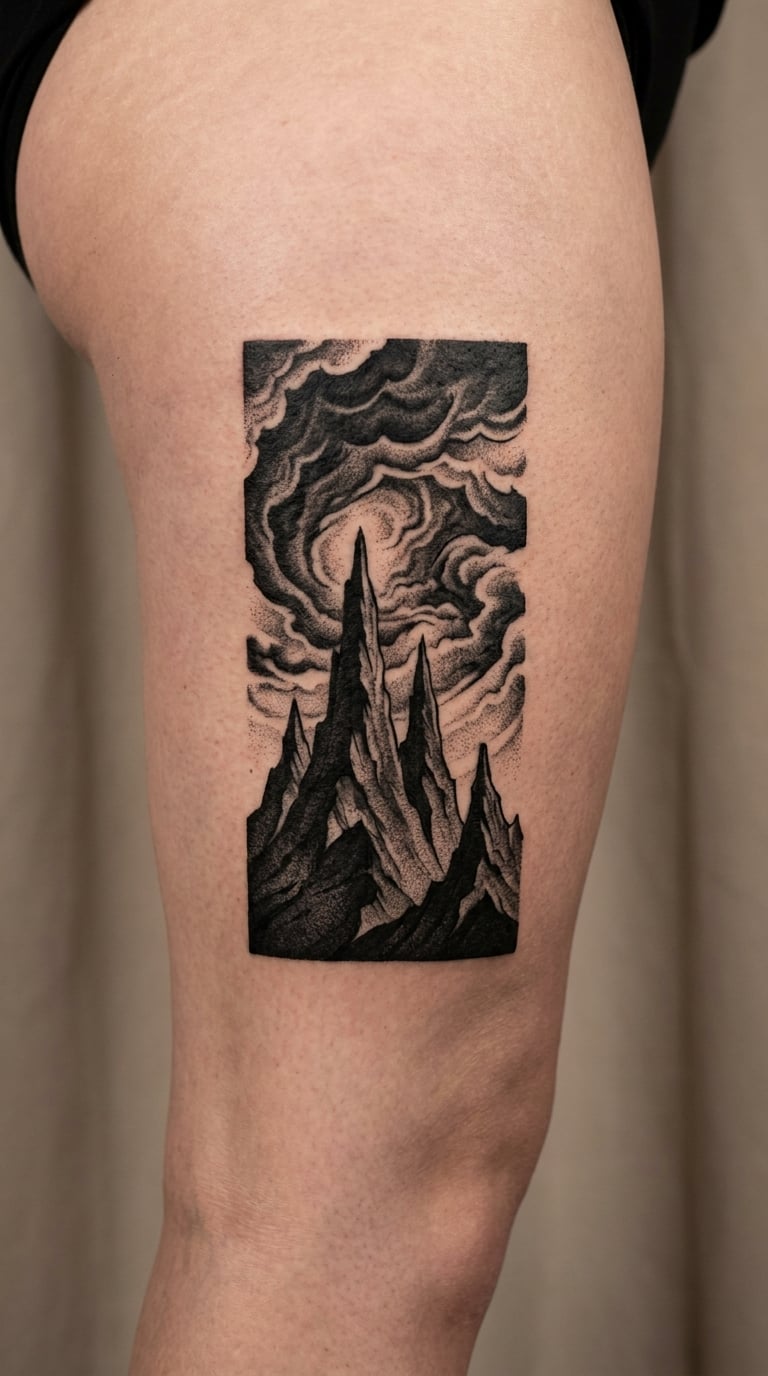
Spires under storm clouds puts hard, tall rock forms at the bottom of the composition and heavy textured cloud mass above them, all in blackwork with hatched shading in the cloud edges. The contrast between the two textures is what makes it work.
It suits people drawn to moodier scenery, and it carries the same sense of a hard climb that the summit means without needing any figure in the scene. It is one of the more dramatic designs here and the least casual.
Placement: Outer thigh, upper arm or the back. Size: 5 inches (13 cm) tall. Style: Blackwork. Pain: Medium to high on the outer thigh, which is fleshy but sensitive in places. Hatched cloud texture needs a big canvas; compress it below 4 inches and the clouds turn into a flat grey block within a few years. Make it yours: Ask for the cloud edge to break and spill over one spire, which stops the composition looking like two stacked objects.
18. Mountain and River Map on the Calf
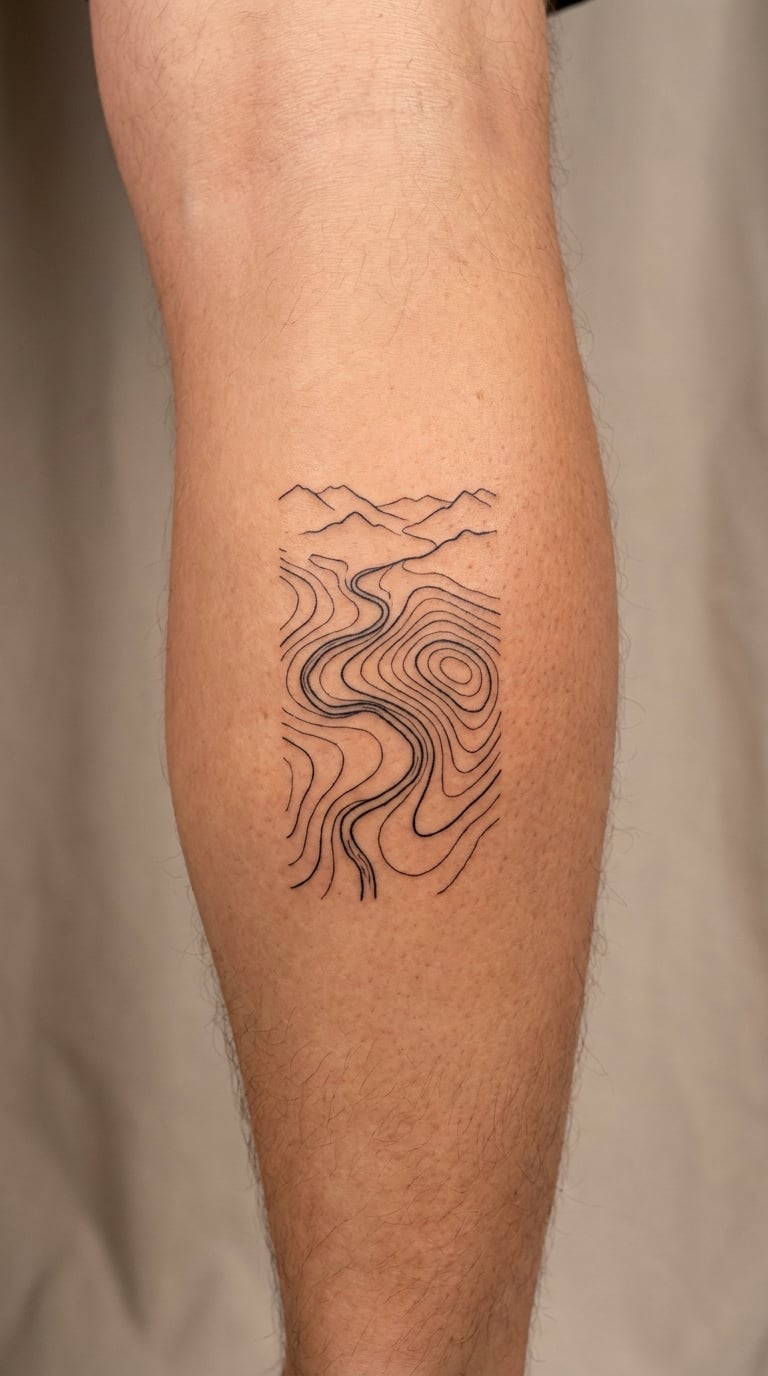
A mountain and river map combines a route drawn in fine line, a river running through it, scattered contour lines and a distant range along the top edge. The whole thing reads as a page from a field guide rather than as a picture of scenery.
It is chosen as a record of a specific trip, a route someone actually walked, often to mark a first long hike or a season of doing it properly. Bringing a map or a phone screenshot of the route is the whole brief, and it is the easiest design here to make genuinely personal.
Placement: Calf, forearm or the inner arm. Size: 4 inches (10 cm) tall. Style: Fine line with cartographic detail. Pain: Medium on the calf. Curved placement needs planning, since a map design has a natural upright orientation and the calf has almost no flat area. Fine contour lines blur first, so keep them sparse and deliberate. Make it yours: Add the date of the hike in small plain type along the bottom edge, and nothing else.
19. Sleeve Panorama from Valley to Summit on the Outer Arm
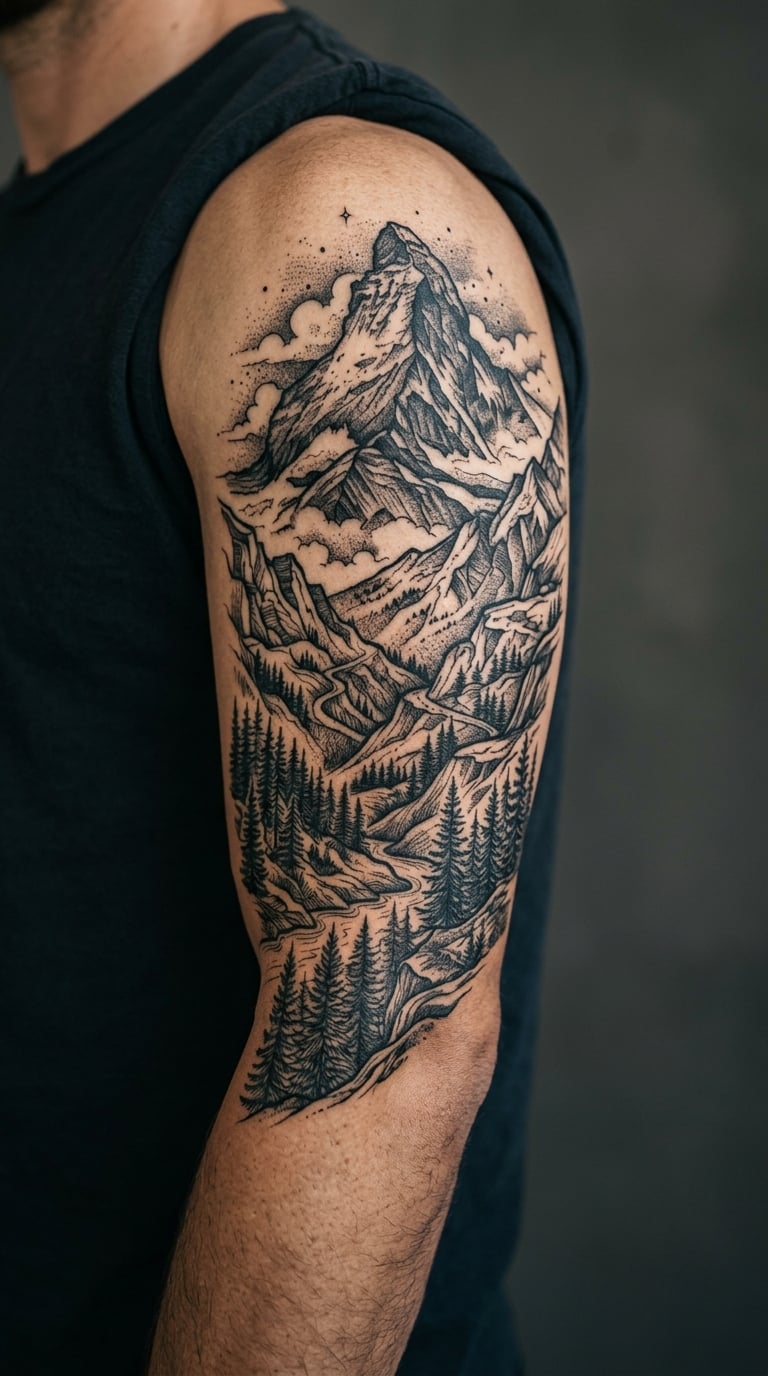
A valley-to-summit panorama moves up the arm in a fixed order: valley and forest low, foothills in the middle, a rough summit high. The eye follows the climb, and the story only works if the bands are in that sequence.
It has real emotional pull for people who see a climb as a way of thinking about a hard year, not just about a mountain. That emotional weight is also why the execution has to be good; a weak summit makes the whole thing feel flat.
Placement: Outer arm, from above the elbow down to the wrist, or full sleeve to the shoulder. Size: 10 to 14 inches (25 to 35 cm) long. Style: Blackwork illustrative. Pain: High, usually split across two to four sittings of three to five hours. Small foreground details fade out first, so plan the composition so the trees and rocks are bigger than feels necessary. Make it yours: Add a small marker at the valley floor, a hut, a bridge or a car, so the start of the story has one human detail.
20. Minimal Range on the Sternum
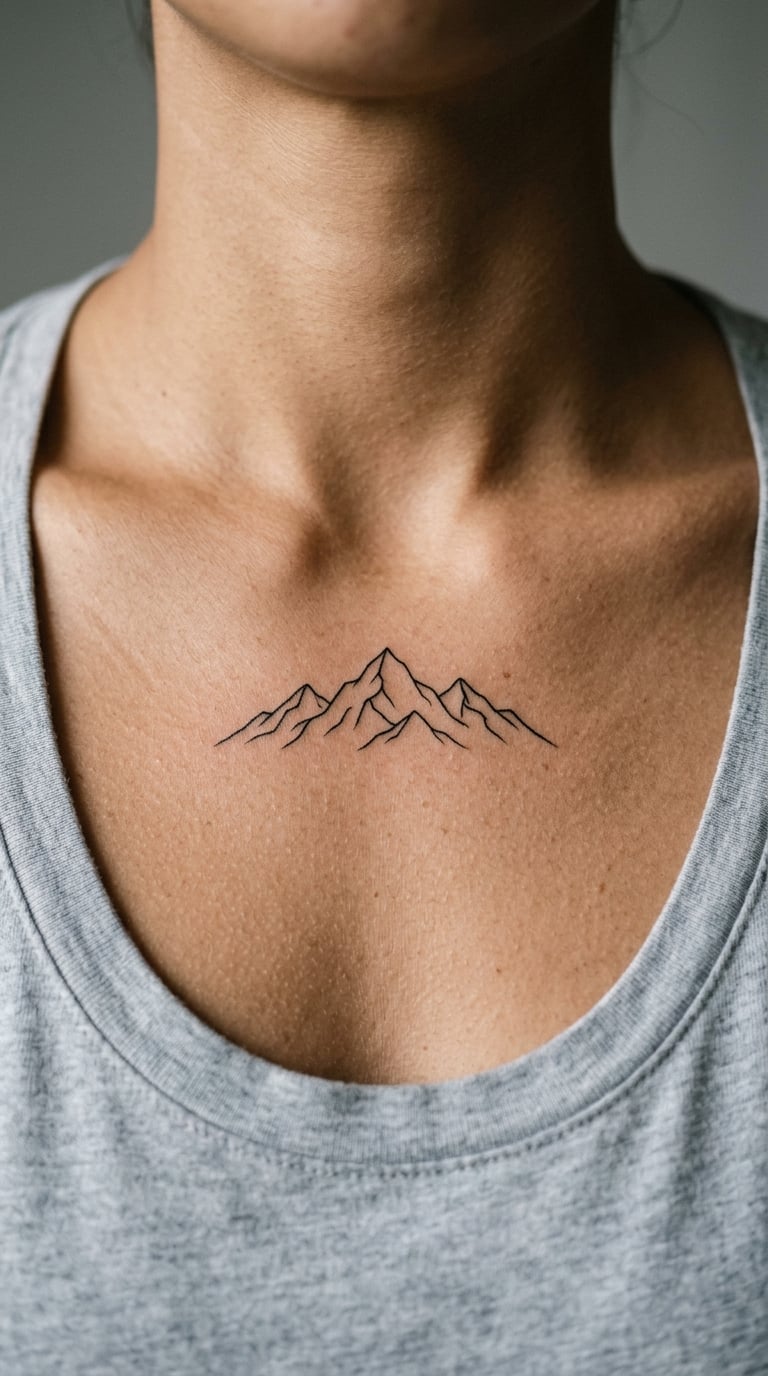
A minimal sternum range is a short horizontal line of peaks centred along the breastbone, fine black line, with the tallest summit in the middle so the design is symmetrical and sits level between the collarbones.
People choose a central placement for the visual balance of it, the same reason a sternum piece gets noticed in a plain shirt. It reads as deliberate rather than hidden.
Placement: Along the sternum, between the collarbones. Size: 3.5 inches (9 cm) wide, kept shallow. Style: Fine line, minimalist. Pain: High, and it is the highest-pain entry in this list. Bone is directly under the skin, breathing moves the skin constantly, and the nerve endings there are close. Symmetry is hard work: expect the artist to mark and adjust the stencil while you stand. Make it yours: Add a single small peak offset slightly off centre, so it reads as a real skyline rather than a symmetrical shape.
21. Bright Rainbow Ridge on the Side of the Ribcage
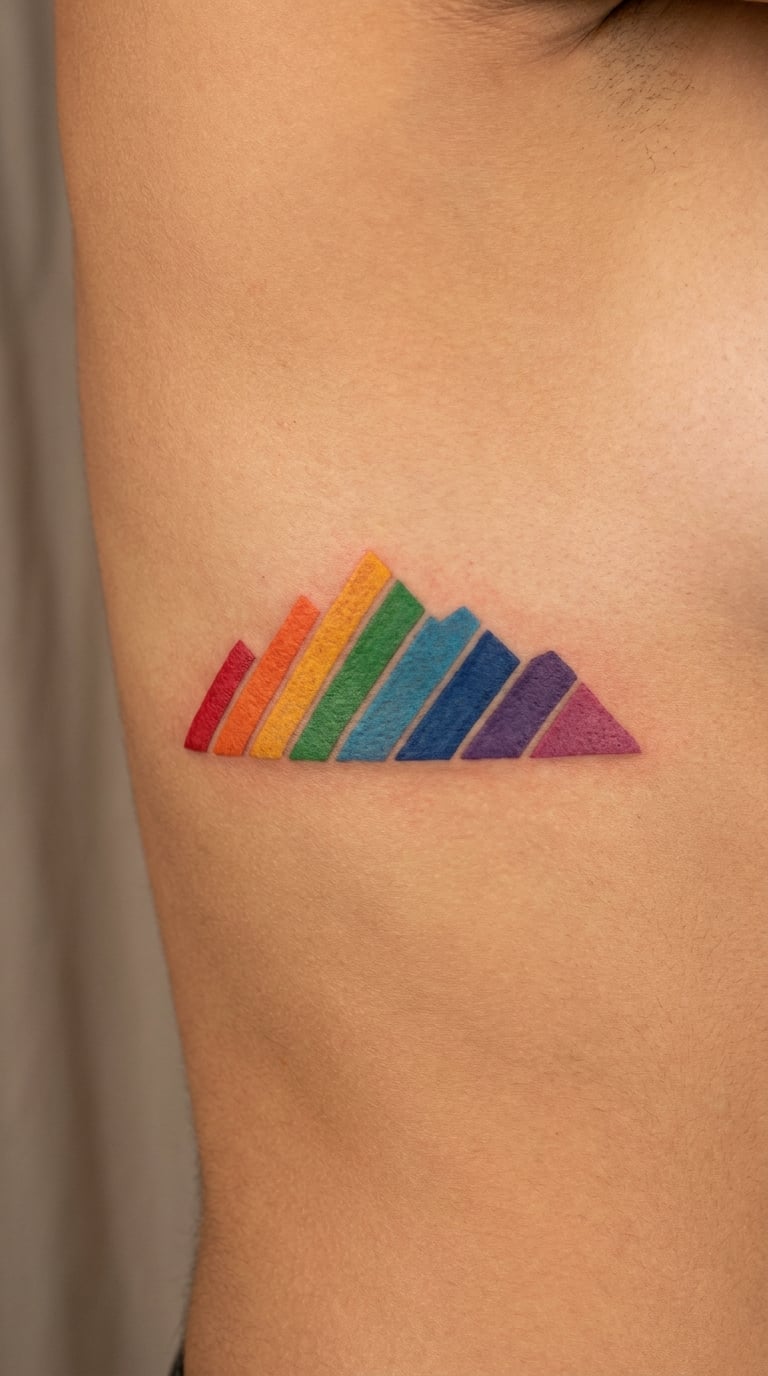
A rainbow ridge paints a range in a controlled spectrum, with each band a defined colour rather than a blended wash, and hard edges where the colour changes. Clean colour blocking, not a soft gradient, is what keeps it readable.
It suits people who already have colour tattoos and want one more, and who like a design that is obviously playful. It is the opposite of the fine-line entries above, and the choice says more about personality than about terrain.
Placement: Side of the ribcage, or the outer arm. Size: 3 inches (7.5 cm) wide, taller if the bands need room. Style: Colour illustrative. Pain: High on the ribs, the second most sensitive placement in this list. Saturation is the weak point: bright yellows and oranges lose punch first and usually want a refresh within a few years. Deep skin tones hold colour better, so let the artist adjust the palette to your skin rather than forcing a spectrum. Make it yours: Drop one band entirely and replace it with a warm grey, which makes the remaining colours read as deliberate rather than automatic.
22. Family Home Range Coordinates on the Inner Forearm
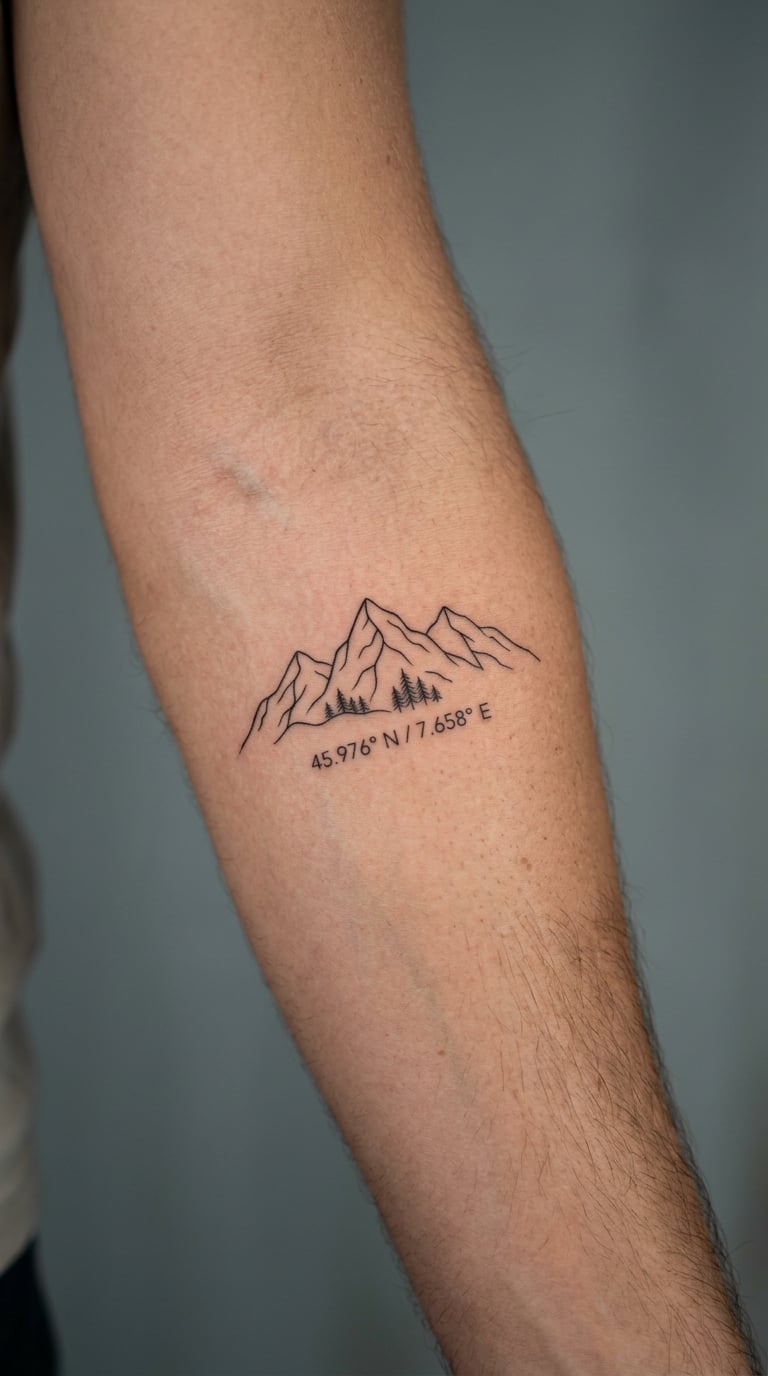
A home range with coordinates puts a fine-line skyline of the mountains near where a family lives, with a small line of latitude and longitude numbers set beneath the peaks in plain tiny type. The numbers are the quiet part; most people show them to nobody.
It is chosen for a place rather than an achievement, a home town, a grandparents’ valley, somewhere everyone in the family can place on the map. It is also the design people most often add to later, growing a small foreground detail around the coordinates over a second session.
Placement: Inner forearm, inner bicep or the ribs. Size: 3 inches (7.5 cm) wide, with room for the number line underneath. Style: Fine line. Pain: Low on the inner forearm. The coordinates are the legibility problem: at 3 inches, each number gets about a millimetre, so ask the artist to check the sizing on a printed stencil and simplify rather than cramming. Make it yours: Consider leaving the numbers off, or placing them on a body part only you see, if the coordinates are not something you want out in the world.
How to Choose the Right Design
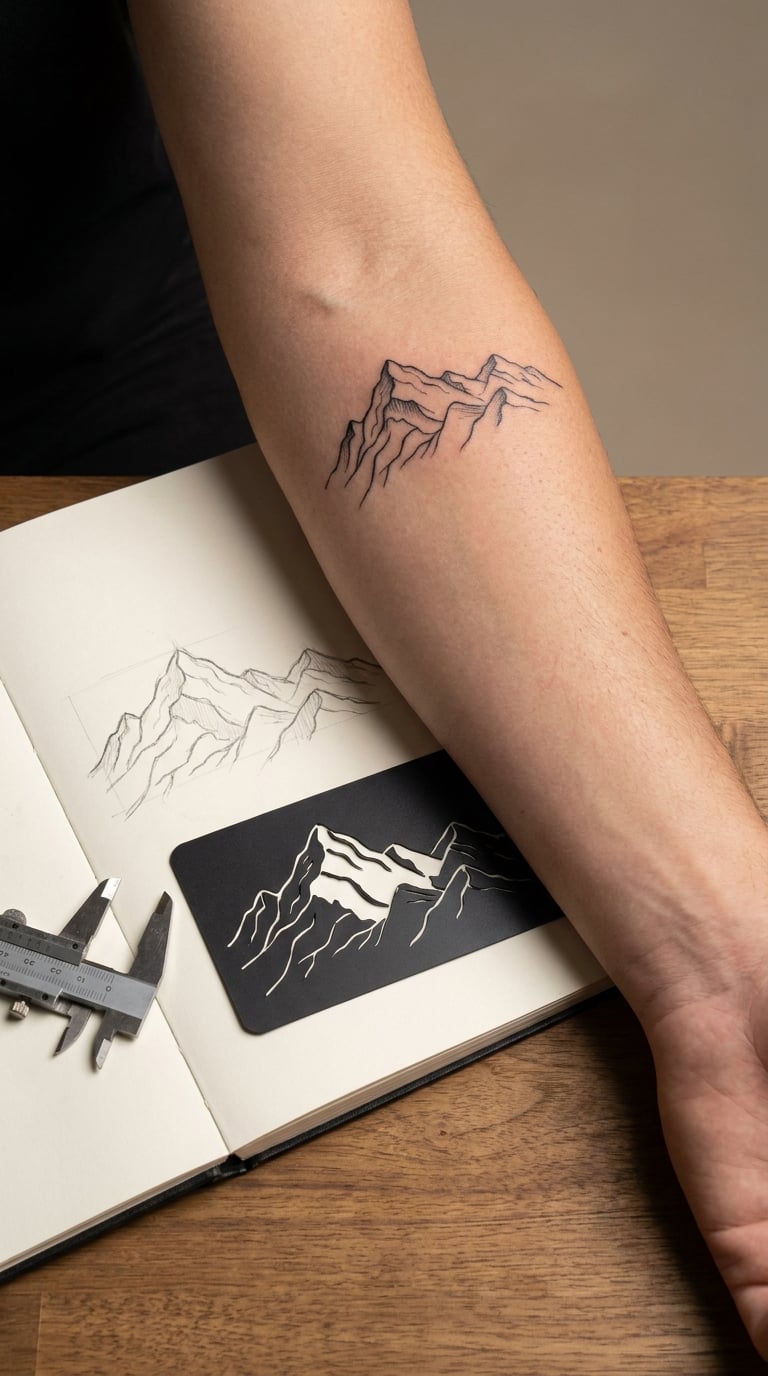
Most people choose the wrong mountain range tattoo by picking the picture before picking the canvas. Work through these six questions and the design choice gets much easier.
- Start from placement, not the image. Inner forearm, outer upper arm, calf, ribs and shoulder blade all give a range a different shape. Pick the spot you can live with, then find the design that fits it.
- Match the scale to the area. A 1.5 inch piece on a large back looks lost; a 6 inch scene on a small wrist cannot wrap. Draw a rough outline of the placement on paper first.
- Decide how loud you want it. Solid blackwork and colour read from a distance. Fine line, dotwork and one-line work read up close and fade sooner.
- Check line weight against the size. Anything under 2 inches needs few internal edges, or they blur. Ask your artist what needle they would use at that size.
- Use colour only if you want colour later. If you might want to add to this piece in five years, a black and grey or blackwork base is far easier to extend.
- Know whether it is a first tattoo or a collection piece. First tattoos reward simple compositions and forgiving placements. Collection pieces reward a clear idea of what sits around it.
Choosing 22 Mountain Range Tattoo Ideas for Curved Skin
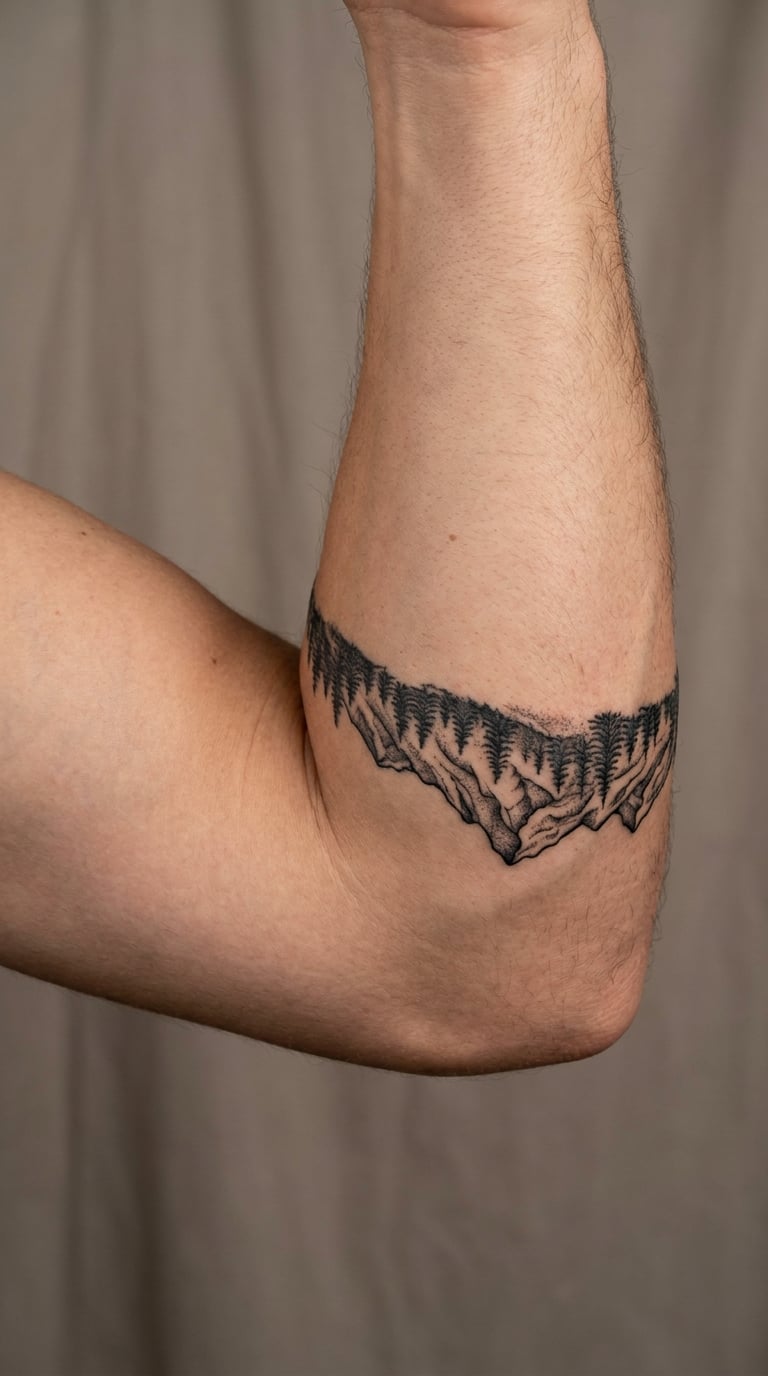
A ridgeline is a straight-line drawing, and almost none of the body is straight. The forearm tapers, the calf is convex, the ribs curve in and the sternum moves with every breath, so the same 4 inch design sits completely differently on each of them.
Ask your artist to place the stencil and then stand and turn the arm, so you can see how the peaks sit when the muscle is relaxed and when it is flexed. On the forearm, a range drawn parallel to the bone can tilt as the wrist bends. On the calf, a straight horizon line curves away and the far peaks shrink. On the sternum, the centre peak shifts every time you breathe.
Two fixes cover most of it. First, curve the baseline slightly to follow the body rather than fighting it. Second, choose a composition that tolerates distortion, layered or wrapped designs over one with a single central summit, since a summit that wanders off centre looks like a mistake.
Cost and Session Time
Most studios bill by the hour, and most set a shop minimum, so cost tracks hours more than it tracks size. A shop minimum means a tiny piece and a small piece cost closer together than the inch count suggests.
- Tiny, 1 to 1.5 inches: often a single short sitting of well under an hour, but many shops will not take a booking that short.
- Small, 2 to 3 inches: one sitting, roughly one to two hours.
- Medium, 3.5 to 5 inches: one to three hours, more if it is colour or heavily shaded.
- Large, 6 to 8 inches: two to four hours, frequently split across two sittings.
- Sleeve and back scale, 10 inches and up: multi-session, usually three to five sittings of several hours each.
Two things move the total more than size does. Colour and watercolor need more passes per area, and adding elements like trees, clouds, contour lines or coordinates to a fine-line design can double the hours. Ask for a total estimate for the whole design, not per session, and ask what a touch-up costs if you go back inside a year.
Aftercare Basics
- Follow your artist’s aftercare instructions first. They know what they did in your session. If anything here conflicts with what you were told, follow them.
- Wash gently, twice a day, with clean lukewarm water and unscented soap. Pat dry with a clean towel or paper. Loose skin coming away is normal, and picking at it is what causes problems.
- Protect it for the first couple of weeks. Loose clothing over the area, no swimming pools or hot tubs, no saunas, and no shaving over the tattoo. Sun is the big one: keep covered or use sunscreen once healed.
- Use a plain moisturiser. Nothing fragranced, nothing medicated unless your artist told you to. A thick ointment is for the first days at most, then switch to a light lotion.
- Expect the first fortnight to look worse than the last. Redness, swelling, flaking and itching during days three to seven are part of healing. Tattoo flu, a mild flu-like tiredness, happens to some people and passes.
- Contact the studio if you see spreading redness, heat, swelling that worsens after a few days, yellow-green discharge, or pain that climbs instead of easing. Do not wait it out, and do not treat it yourself.
Frequently Asked Questions
What is the best mountain range tattoo for a first-tattoo client?
A fine-line or minimalist range of two to five peaks, 2 to 3 inches wide on the inner forearm or outer upper arm, is the safest first choice. It has few internal details to lose, sits on a forgiving area, and heals predictably. Ask for a slightly heavier line than the drawing looks, because fine work softens over time. Avoid a first piece with a full colour scene or a hand placement.
Where should a small mountain range tattoo be placed?
The inner forearm, outer upper arm and outer calf are the easiest places to live with a small range. The inner forearm lets you see it, sits flat, and takes single-needle work well. The outer upper arm hides under a sleeve. The calf works for larger panoramas. The wrist, ankle, sternum and ribs all hurt more and stretch more, so save them for a second piece.
Do fine-line mountain tattoos fade quickly?
Faster than blackwork, yes, and much faster on the hands, fingers and behind the ear. Single-needle lines in thin skin spread slightly and lose their crisp edge within several years, and hand and finger tattoos can blur noticeably sooner. Solid blackwork and heavily packed geometric work hold their shape far longer. Ask for a needle gauge one step heavier than the drawing suggests, and budget for a line touch-up.
How much does a mountain range tattoo cost in the US?
It depends on the artist’s hourly rate, the shop minimum and how many hours your design needs, not on the number of ideas you have. A small 2 to 3 inch range is usually a single sitting of one to two hours. A 6 inch coloured range is three to four hours. Sleeve and back-scale work is multi-session and quoted as a project. Always ask for a total estimate including any touch-up.
Should a mountain tattoo be blackwork, colour or watercolor?
Blackwork if you want the strongest, longest-lasting shape and plan to add to it later. Black and grey realism if you want a specific range to be recognisable by its skyline. Watercolor if the memory you are keeping is about light and colour, accepting that it needs colour refreshes sooner. Colour illustrative, like a rainbow ridge, if you already collect colour work and want it to read across a room.
Can mountain range tattoos be made into matching pieces?
Yes, and it is a straightforward design job. Two matching ranges, one person each, need the same line weight, the same number of peaks and the same height on the body so they read as a pair. A nicer version gives each person a different peak from the same range, so the two tattoos together form a single skyline nobody else has. Opposite inner forearms wear well and are easy to compare side by side.
Conclusion
If this is your first tattoo, go with the fine-line alpine ridge on the inner forearm at 2.5 inches. It is the least demanding design here, it heals quickly, and it leaves clean skin for whatever you add next.
If you already collect work and want something with real presence, the blackwork Sierra silhouette or a valley-to-summit panorama will hold up better than anything fine-lined on the same skin. Either way, take your reference range to the consult, check the stencil on your actual body before the first line goes in, and ask the artist to size the composition for the spot rather than for the picture.