
20 Tattoo Placement Ideas for First Timers (October 2026)
For a first tattoo, the safest bet is the outer upper arm, the outer forearm or the outer thigh. Those three areas are fleshy rather than bony, sit under clothing when you need them to, and heal without much drama. Everything else below is a step away from that comfort zone, arranged so you can judge the trade-offs yourself.
These 20 tattoo placement ideas for first timers are paired with the design that suits the spot, a realistic size, and an honest note on pain and how the piece ages. Most people asking this question are not short of inspiration. They are trying to work out where a design will actually live on their body without looking lost or blotchy in ten years.
One warning before we start. The advice most often repeated in r/tattoos threads is to skip the “so small nobody notices it” instinct. Very fine lines on a very small design soften faster than beginners expect, and a piece you cannot see clearly at six months is a disappointing first one. Aim for a compact design with confident line weight instead.
If you are still narrowing the design itself, start with simple tattoo ideas made for beginners, then come back here once you know what you want to place.
20 Tattoo Placement Ideas for First Timers: Quick Guide
| Idea | Style | Best Placement | Size | Pain |
|---|---|---|---|---|
| Fine-line botanical sprig | Fine line | Inner forearm | 2-3 inch (5-7.5 cm) | Medium |
| Line-art house | Minimal line art | Outer upper arm | 2 inch (5 cm) wide | Low |
| Paper plane | Geometric fine line | Behind the ear | 1-1.5 inch (2.5-4 cm) | Medium |
| Three-peak mountain range | Single-weight line | Outer calf | 3 inch (7.5 cm) tall | Medium |
| Open spiral | Fine line | Inner wrist | 1.5-2 inch (4-5 cm) | High |
| Three-petal flower | Minimal outline | Collarbone | 2 inch (5 cm) across | Medium |
| Crescent moon and one star | Blackwork fine line | Outer ankle | 2 inch (5 cm) wide | Medium |
| Open book | Line art | Side of the wrist | 2-2.5 inch (5-6 cm) wide | High |
| Pair of cherries | Simple outline | Inner forearm | 2 inch (5 cm) tall | Medium |
| Four-point compass rose | Fine line geometric | Upper chest | 2 inch (5 cm) diameter | Medium |
| Abstract loop | Single-line blackwork | Side of the hip | 3 inch (7.5 cm) tall | Low |
| Semicircular sunburst | Minimal line work | Outer shoulder | 2 inch (5 cm) wide | Low |
| Watercolor butterfly | Watercolor | Behind the ear | 2 inch (5 cm) wide | Medium |
| Single palm leaf | Minimal line art | Side of the ribs | 3-4 inch (7.5-10 cm) long | High |
| Moon phase sequence | Dotwork | Nape below the hairline | 2-2.5 inch (5-6 cm) wide | Medium |
| Bird in flight | Fine line realism | Outer foot near the ankle | 1.5-2 inch (4-5 cm) wide | High |
| Single shell | Micro-realism | Back of the hand | 1.5 inch (4 cm) long | High |
| Layered peony | Black and grey floral | Inner bicep | 3 inch (7.5 cm) across | Low |
| Stippled diamond | Dotwork geometric | Side of one finger | 1 inch (2.5 cm) across | High |
| Outline globe | Minimal line art | Side of the neck | 2 inch (5 cm) wide | Medium |
The pain column rates the placement itself, not your tolerance. Low means you could watch a film through it. Medium means a steady scratch you have to breathe through. High means bone, thin skin or a tendon is involved, and the artist will usually suggest a break halfway through.
1. Fine-Line Botanical Sprig on the Inner Forearm
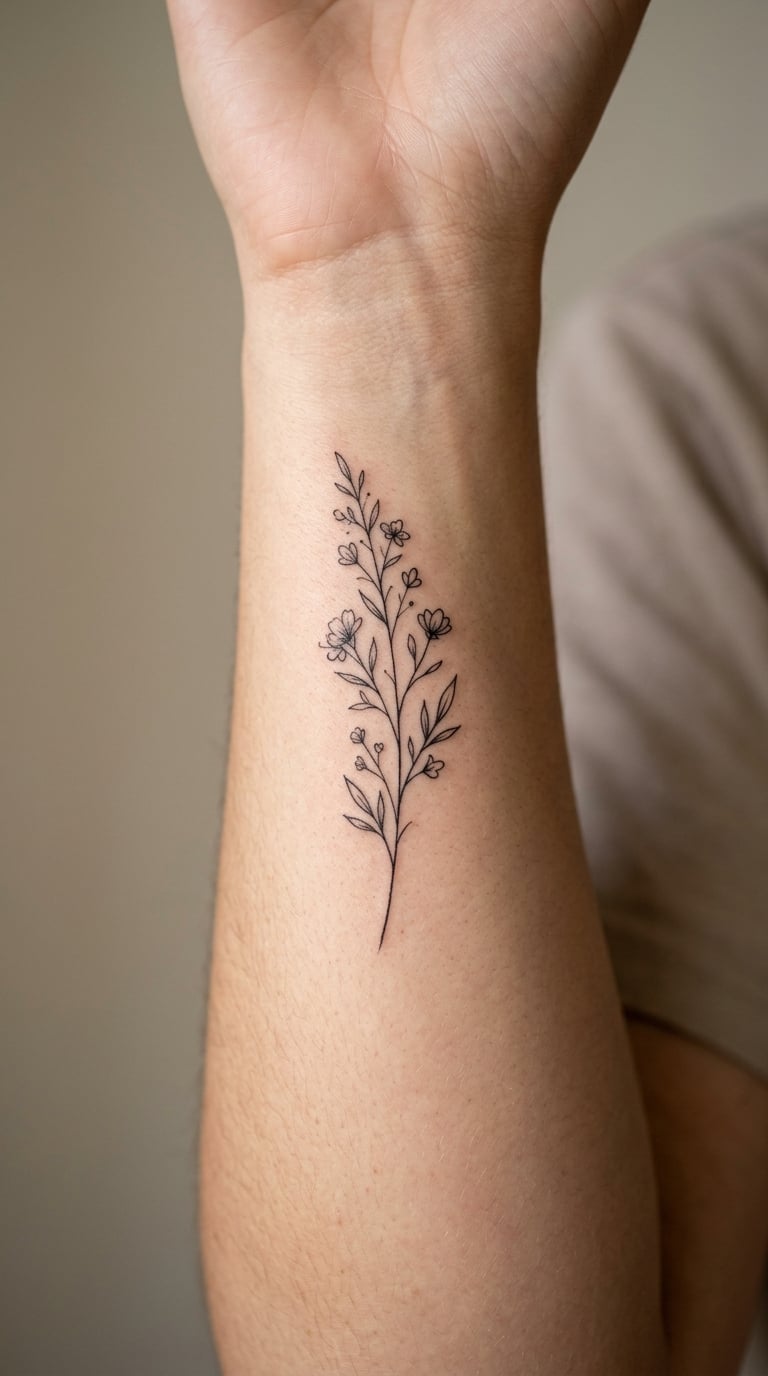
A sprig is one stem with a handful of leaves, drawn as a single unbroken line that thins toward the tip. No shading, no outline around the leaves, no filled-in colour. The whole thing should read as one confident stroke that happens to have branches on it.
People choose it because it is legible without being loud, and because a plant you recognise beats a symbol with a dictionary definition attached. What it means to you is the only thing that counts here.
Placement: Inner forearm, roughly halfway between the elbow and the wrist, on the flat inner surface. Size: 2-3 inch (5-7.5 cm) along the arm. Style: Fine line. Pain: Medium, around 4 out of 10, and it builds because the skin is soft and close to the bone.
Ageing note: The inner forearm is visible constantly, so sun exposure is the main enemy. Fine lines on a frequently exposed area soften noticeably faster than a bolder piece. Make it yours: Add one small bud at the end that is about to open, or swap in a leaf shape from a plant that actually grew near you.
2. Minimal Line-Art House on the Upper Arm
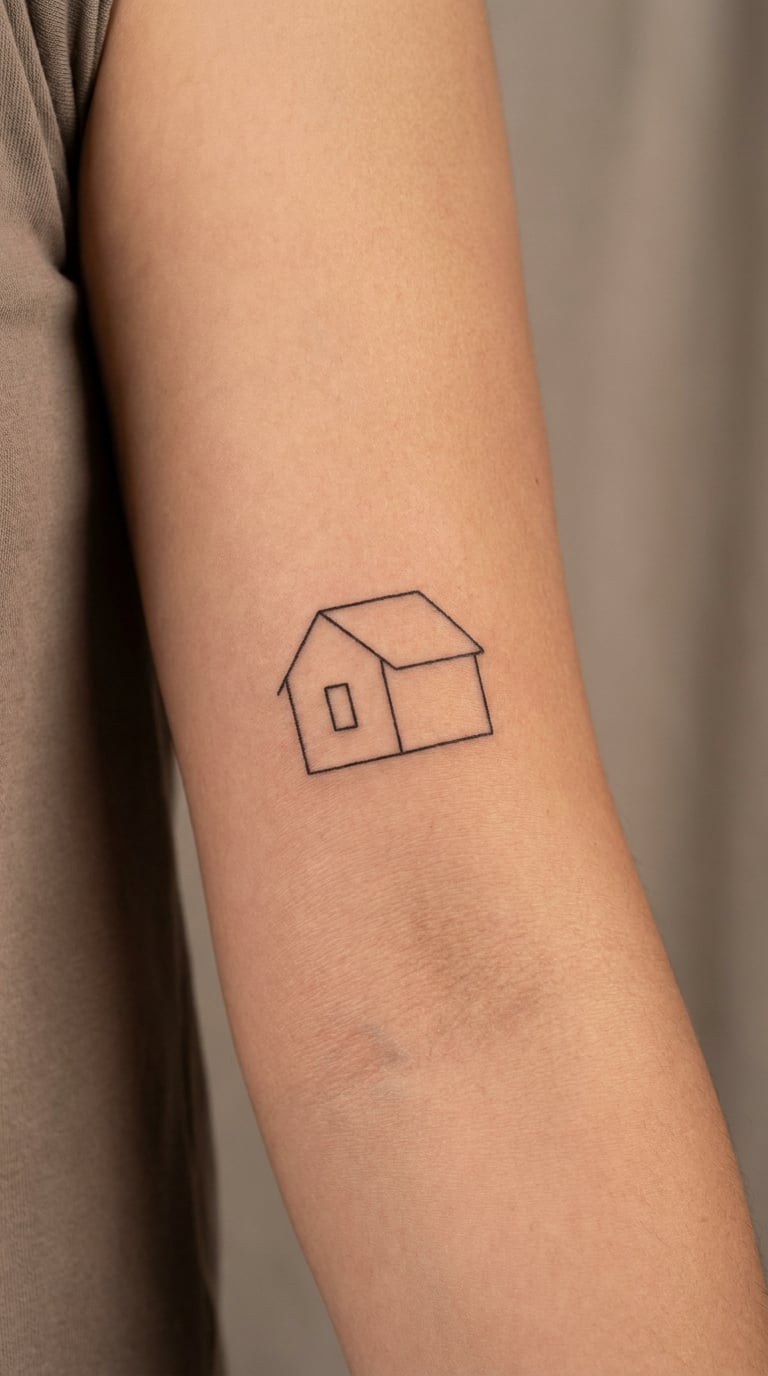
Two straight walls, a pitched roof, one square window. That is the whole design. Drawn with restrained outlines of even weight, it looks like a small drawing of a building rather than an illustration, which is exactly why it holds together at a small size.
Most people who book it are tied to a particular building, a hometown or a first home. The interpretation is personal, and you will get a different answer from every person wearing one.
Placement: Outer upper arm, on the deltoid or just below it. Size: About 2 inch (5 cm) wide. Style: Minimal line art. Pain: Low, around 3 out of 10, since the upper arm is meaty and easy to work on.
Make it yours: Add the year the house mattered, tucked under the roofline in the same line weight so it reads as part of the drawing, not a caption.
3. Tiny Paper Plane Behind the Ear
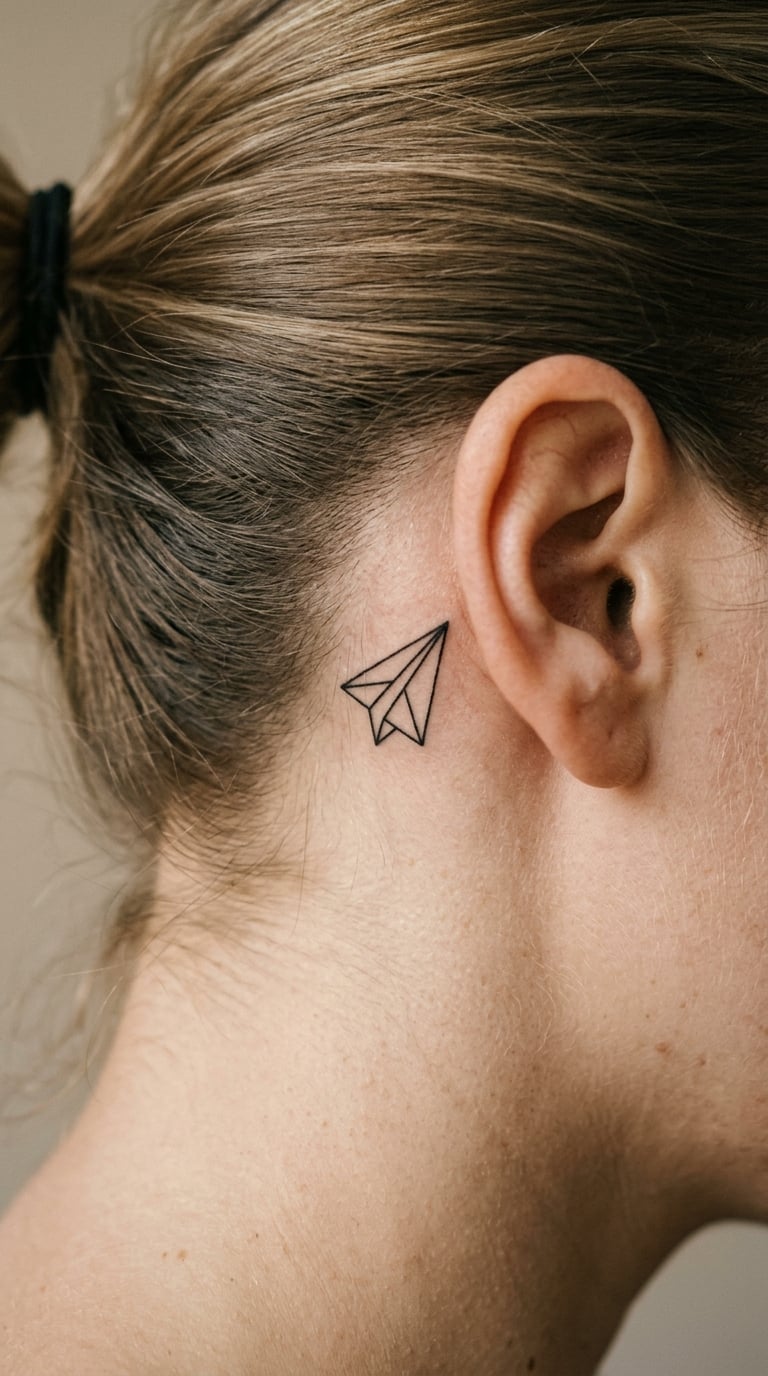
A paper plane is pure geometry: a long triangle split by two fold lines, drawn with crisp black outlines and nothing else. There is no perspective and no shading, so it works as a small silhouette rather than a picture of an object.
It suits people who like the idea of leaving, arriving, or moving on, and it is one of the easiest designs to hide. Hair covers it, a high collar covers it, and you decide when anyone sees it.
Placement: Just behind the ear, or an inch below the earlobe on the neck. Size: 1-1.5 inch (2.5-4 cm) wide. Style: Geometric fine line. Pain: Medium, around 4 out of 10.
Ageing note: Facial and neck detail blurs over the years, and this design has only two or three internal lines to lose. Make it yours: Draw it banked slightly upward instead of level, as though it has just taken off.
4. Single-Handed Mountain Range on the Calf
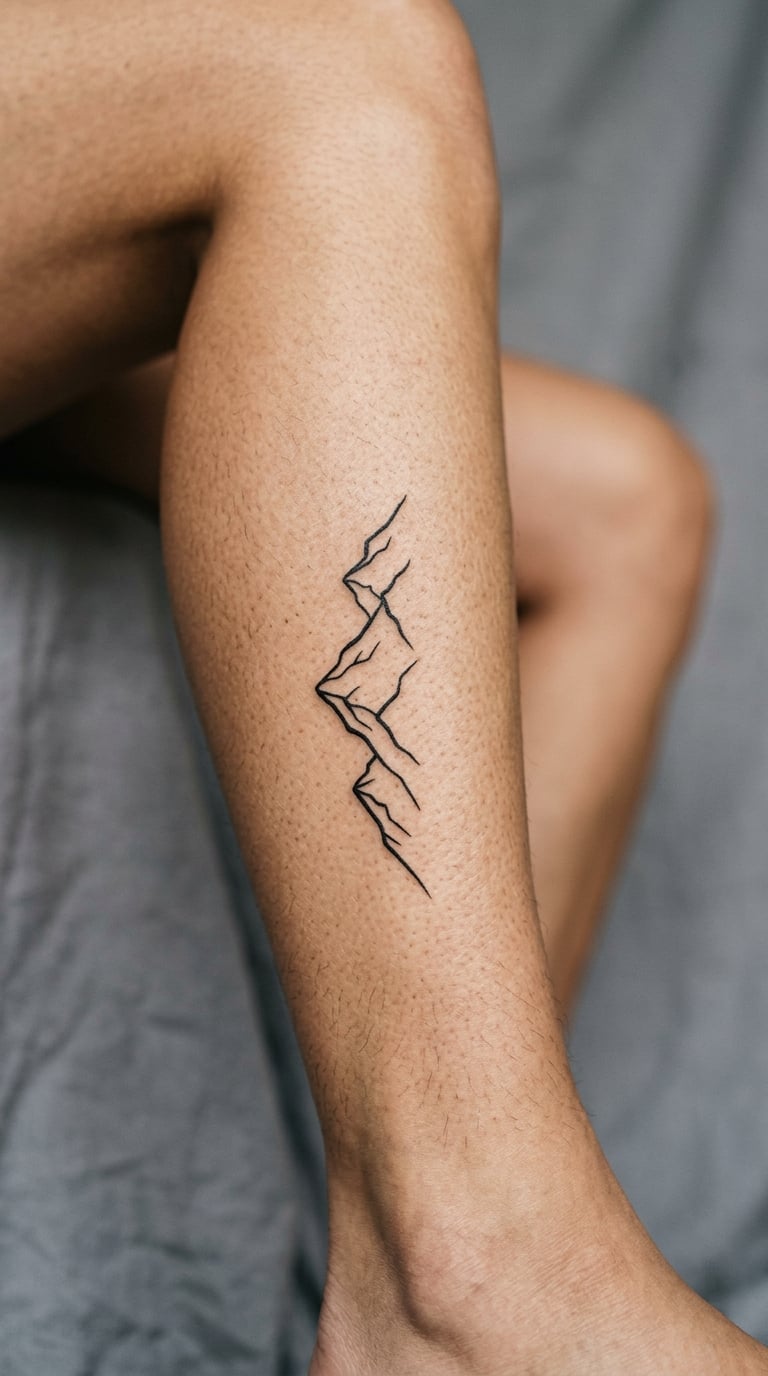
Three peaks in a row, each an outline with a couple of interior contour lines, and generous empty space between them. The negative space does the work: what you leave out is what makes it look like mountains rather than a scribble.
Mountain work appeals to first-timers because it looks considered without being busy, and it translates cleanly to almost any body shape. If you have a place you keep returning to, that is usually the reason.
Placement: Outer calf, running vertically between knee and ankle. Size: 3 inch (7.5 cm) tall. Style: Single-weight line work. Pain: Medium, around 4 out of 10, and the curve of the calf means the outer line needs a stretch.
Make it yours: Redraw the centre peak to match the actual ridgeline of somewhere you have hiked, keeping the outer two generic.
5. Small Spiral on the Inner Wrist
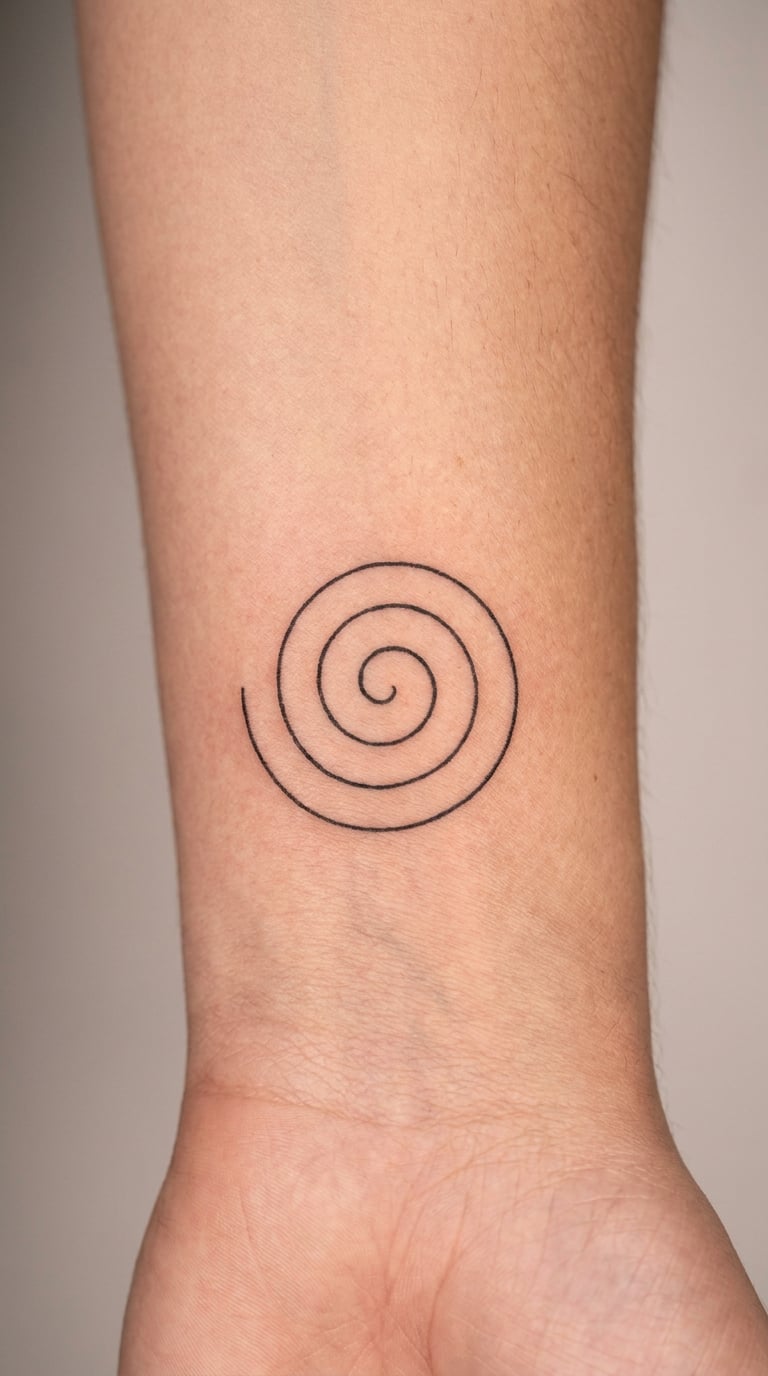
One open circle that coils inward for about two and a half turns, drawn with a line weight the artist keeps consistent from start to finish. The line never touches itself, so there is a clean band of skin between every loop.
There is no agreed meaning to it, which is part of the appeal. People tend to pick a spiral because the shape is calm and the drawing is simple enough to be done properly.
Placement: Inner wrist, above the wrist crease. Size: 1.5-2 inch (4-5 cm) across. Style: Fine line. Pain: High, around 6 out of 10, because the inner wrist is thin-skinned and full of nerves.
Ageing note: The inner wrist gets washed more than anywhere else on the body, and fine line fades fastest in that zone. Make it yours: Leave the outer end open and let it trail into a short line that thins away.
6. Three-Petal Flower on the Collarbone
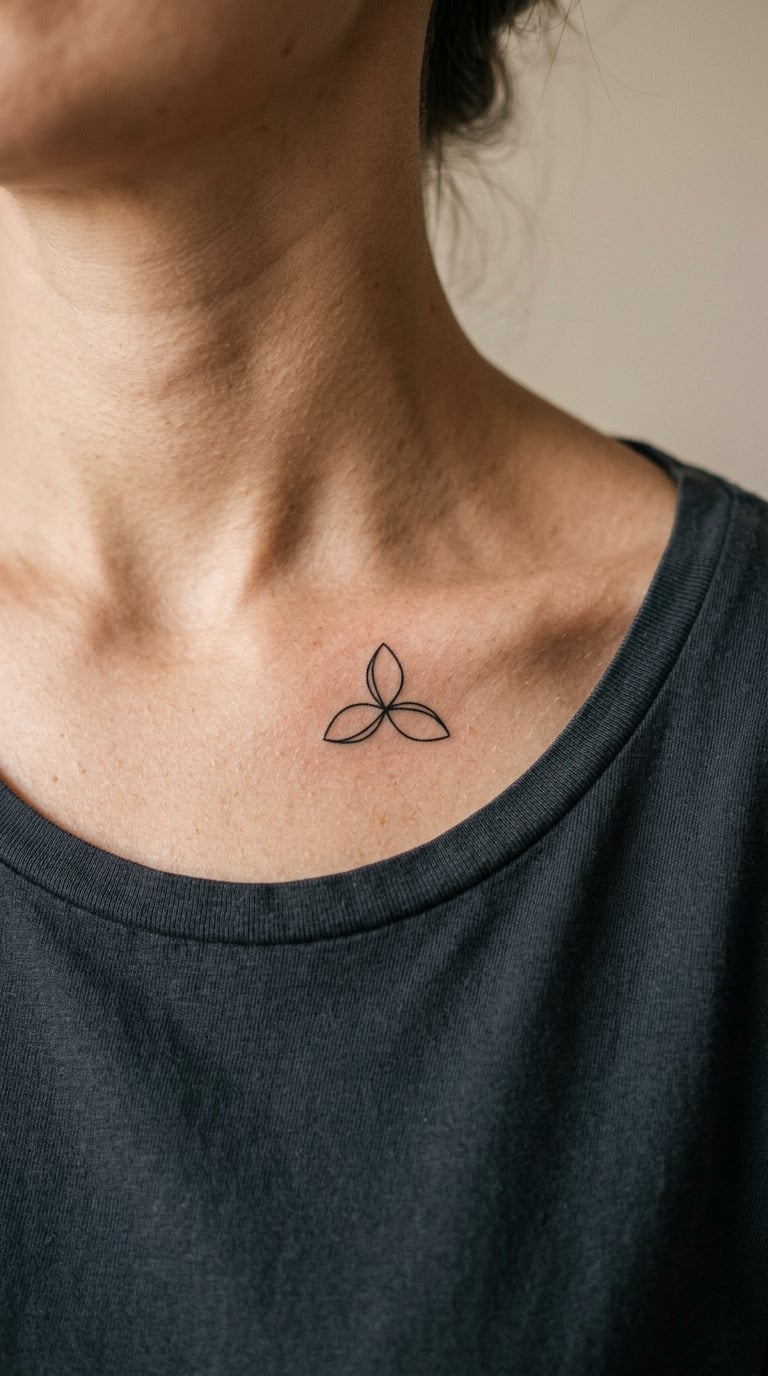
Three simple outlined petals around a small solid centre dot. No shading, no stem unless you want one, and a lot of open skin inside the shape so it never looks solid from a distance.
Three petals read more like a mark than a botanical study, which is what makes it sit well on a collarbone. Most people are choosing the arrangement, not the flower.
Placement: Just above the collarbone, or centred in the hollow between them. Size: 2 inch (5 cm) across. Style: Minimal outline. Pain: Medium, around 4 out of 10, and you will feel the collarbone shift under the needle.
Make it yours: Turn one petal into a slightly different shape, or add a single short stem running toward the shoulder.
7. Crescent Moon and One Star on the Ankle
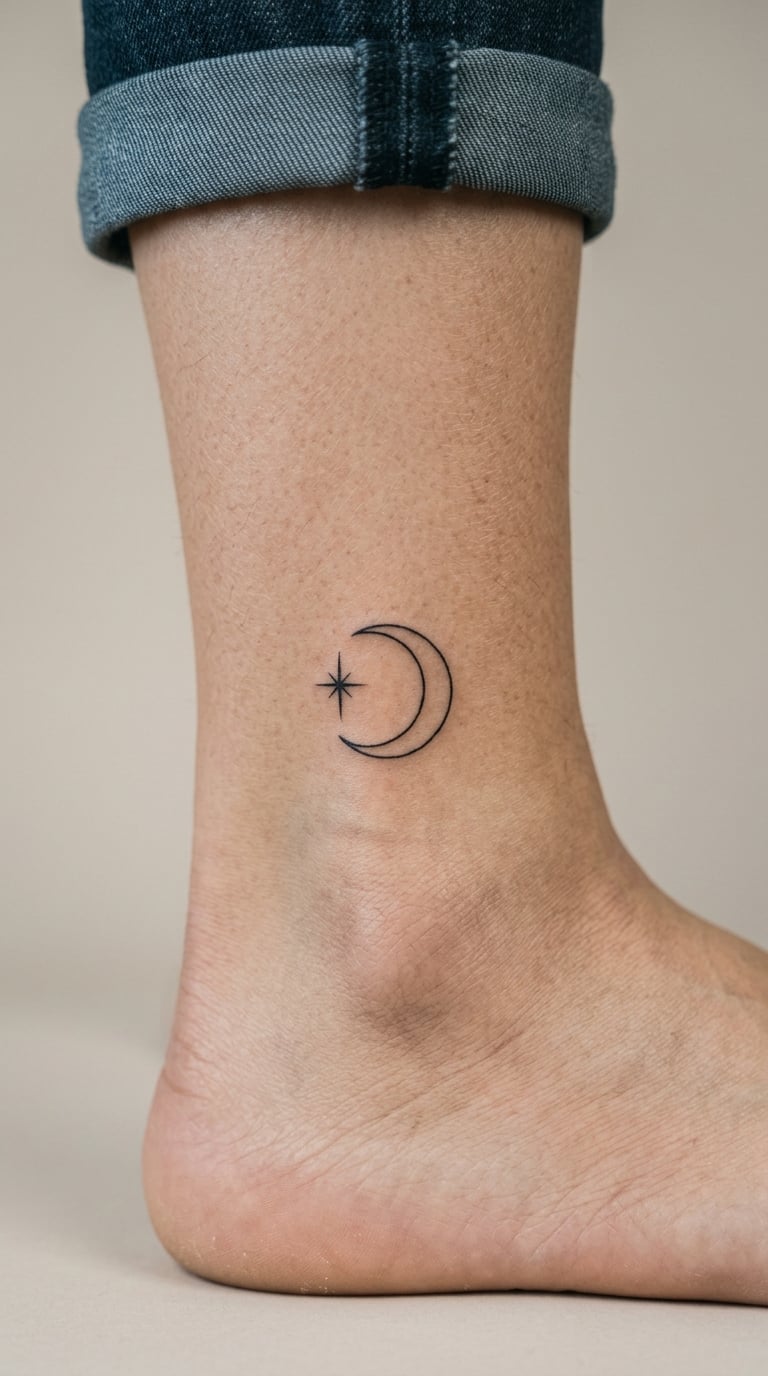
A narrow crescent drawn with two clean arcs, and beside it one four-point star with straight tapering points. The trick is the gap between them: leave enough space that the two shapes breathe instead of crowding each other.
Night-sky motifs get chosen for their look, and this pairing is one of the easiest to keep symmetrical at a small scale. Meaning, if there is one, is entirely yours to define.
Placement: Outer ankle, just above the bone. Size: 2 inch (5 cm) wide across both shapes. Style: Blackwork fine line. Pain: Medium, around 5 out of 10, and ankle skin is thinner than most people expect.
Ageing note: The ankle is exposed year round, so fading is faster here than on a covered arm. Make it yours: Angle the crescent as a waxing shape rather than a symmetrical one, and set the star a little higher than its midpoint.
8. Tiny Open-Book Design on the Side of the Wrist
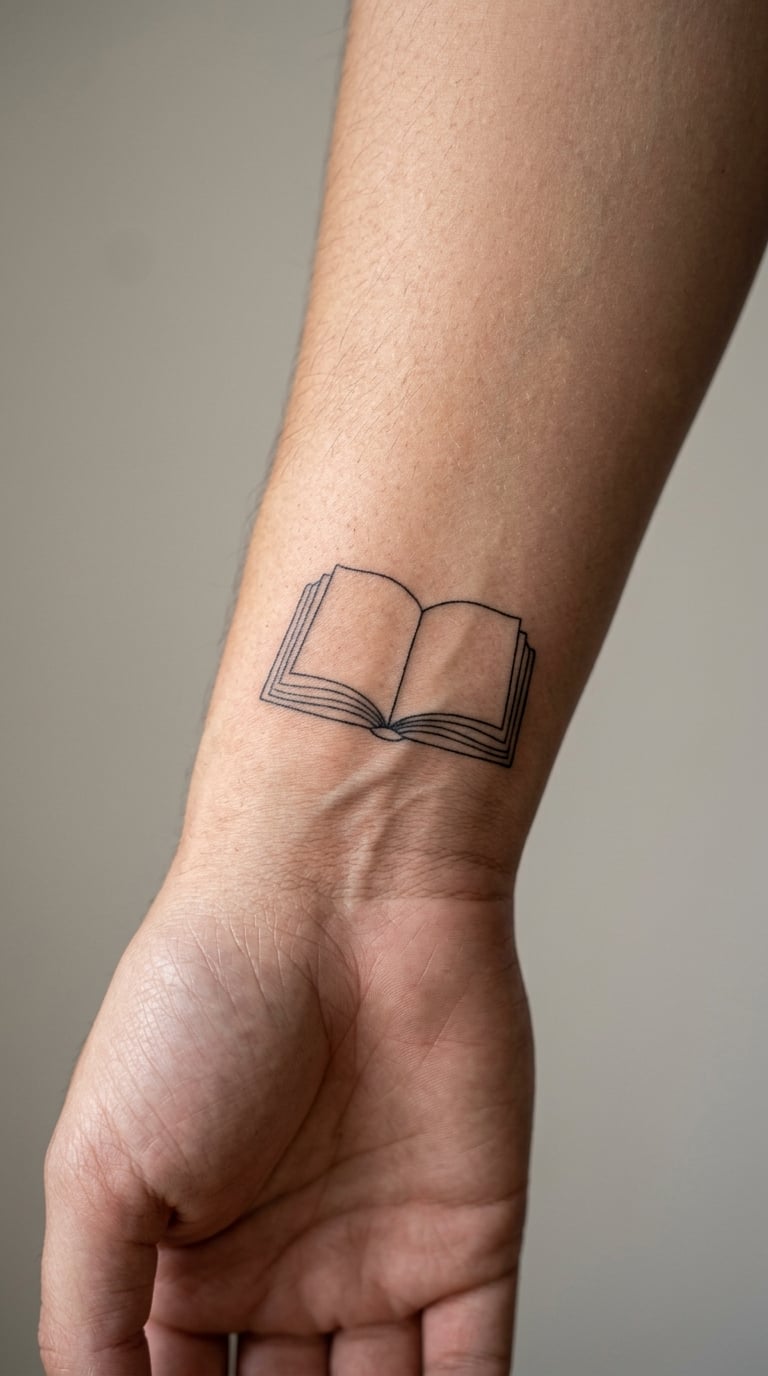
An open book seen from slightly above: a shallow V shape with a line down the centre for the spine and three or four short horizontal lines suggesting pages. Sparse on purpose, because page detail at this scale turns to mush.
It is a personal-reference piece. Most people book it for a book that mattered to them, and they rarely explain it to anyone who asks.
Placement: Side of the wrist, running along the forearm rather than across the wrist crease. Size: 2-2.5 inch (5-6 cm) wide. Style: Line art. Pain: High, around 6 out of 10.
Ageing note: Hands and wrists see constant water and movement, so a detailed design here will need more touch-ups than the same design on an upper arm. Make it yours: Open it to a wider angle and put one short line of your own words on the page rather than ruled lines.
9. Small Cherry Pair on the Forearm
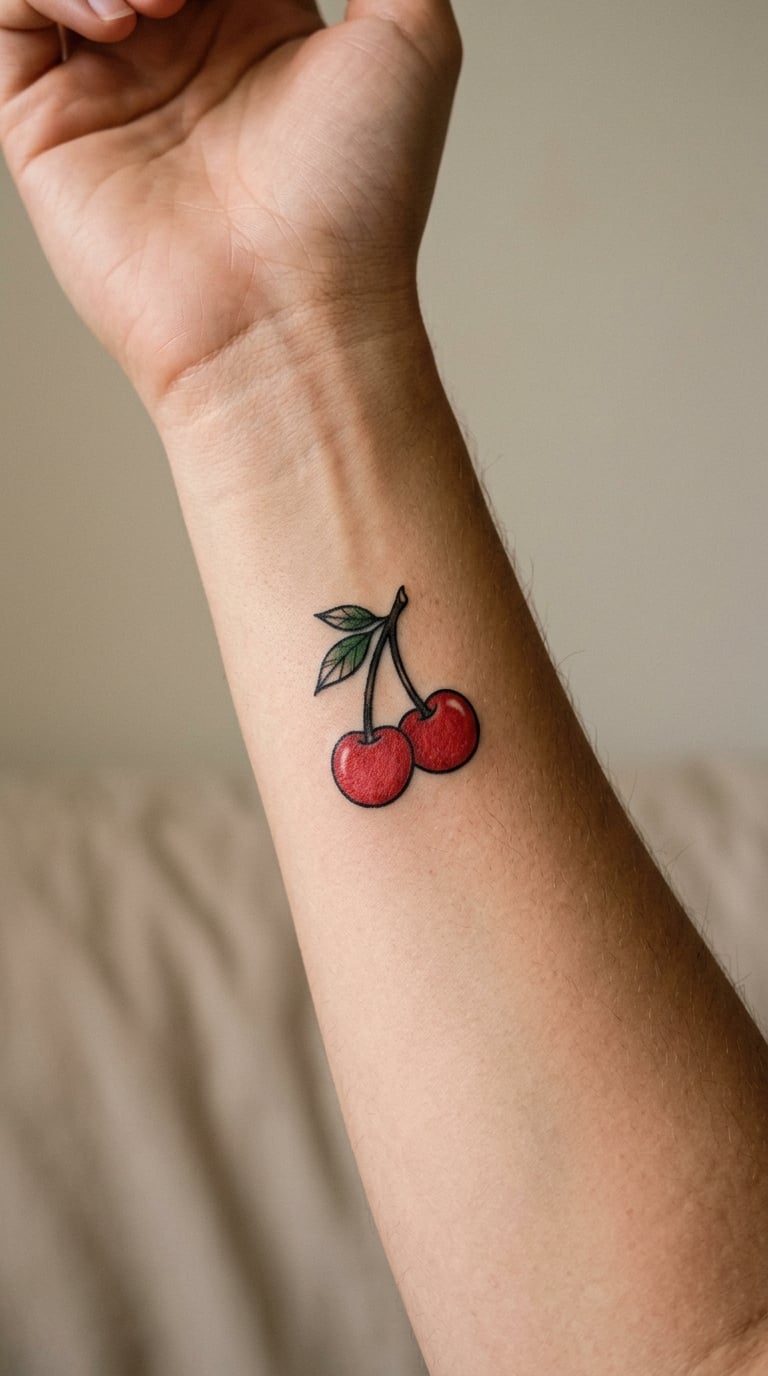
Two round fruit shapes outlined in black, joined by stems that meet above them and curl once. A little shading inside each fruit gives it dimension without filling the shape. The tone is playful rather than solemn.
It reads as a small, cheerful thing you can explain in one sentence, which is a useful quality for a first tattoo. Keep whatever meaning you want out of it.
Placement: Inner forearm, a few inches above the wrist. Size: 2 inch (5 cm) tall including the stems. Style: Simple outline with light shading. Pain: Medium, around 4 out of 10.
Ageing note: Round outlines on soft, moving skin can develop a slightly wobbly edge as the design settles. Make it yours: Make it two of something rather than fruit, keeping the same round silhouette and joined stems.
10. Mini Compass Rose on the Chest
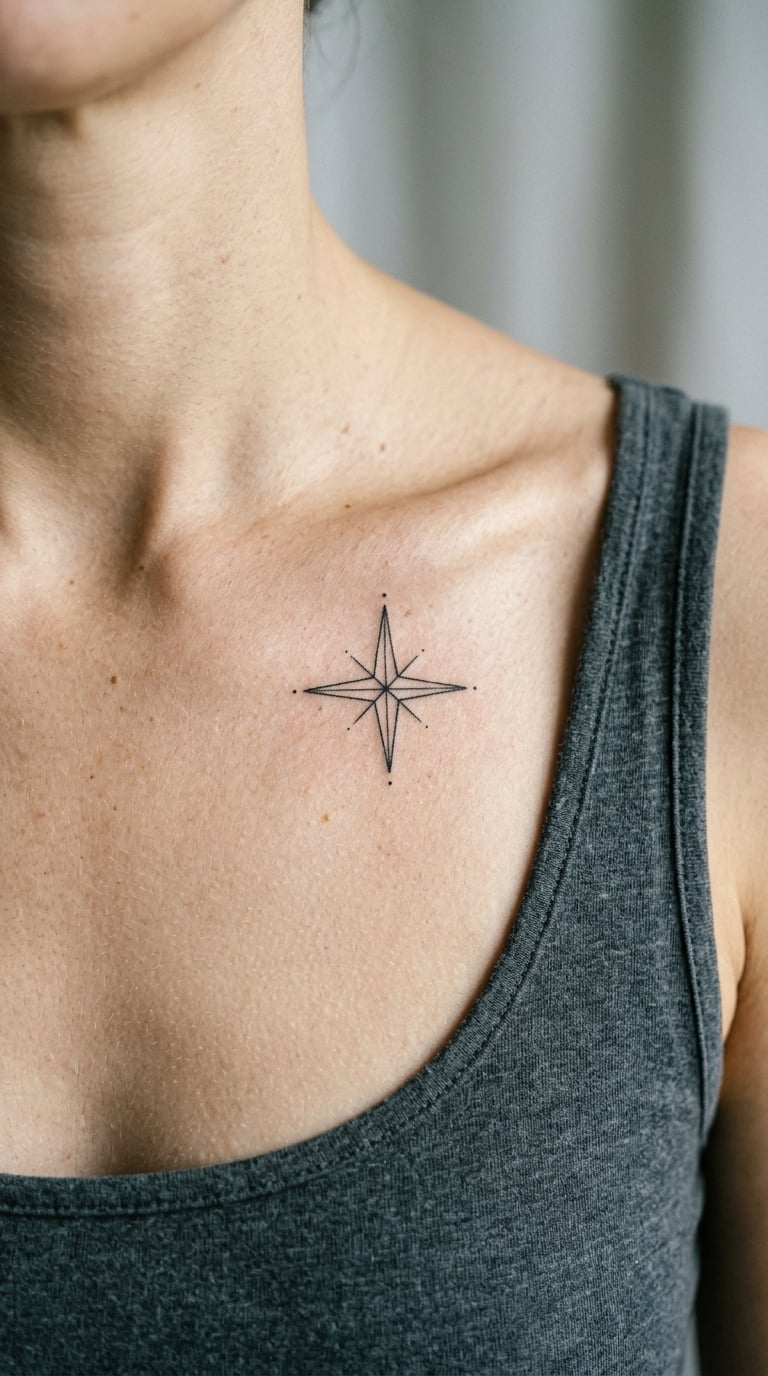
A four-point star with long thin points, a small circle around it, and maybe a tick mark at each cardinal direction. Detail stays restrained because at two inches across anything extra becomes noise.
Navigation imagery tends to get chosen by people with a recurring relationship to travel, direction or a particular route. There is no single accepted reading.
Placement: Upper chest to one side of the sternum, or the side of the chest below the armpit. Size: 2 inch (5 cm) diameter. Style: Fine line geometric. Pain: Medium, around 4 out of 10.
Make it yours: Set the north point slightly off-centre so the rose looks hand-drawn rather than machine-stamped.
11. Abstract Loop on the Side of the Hip
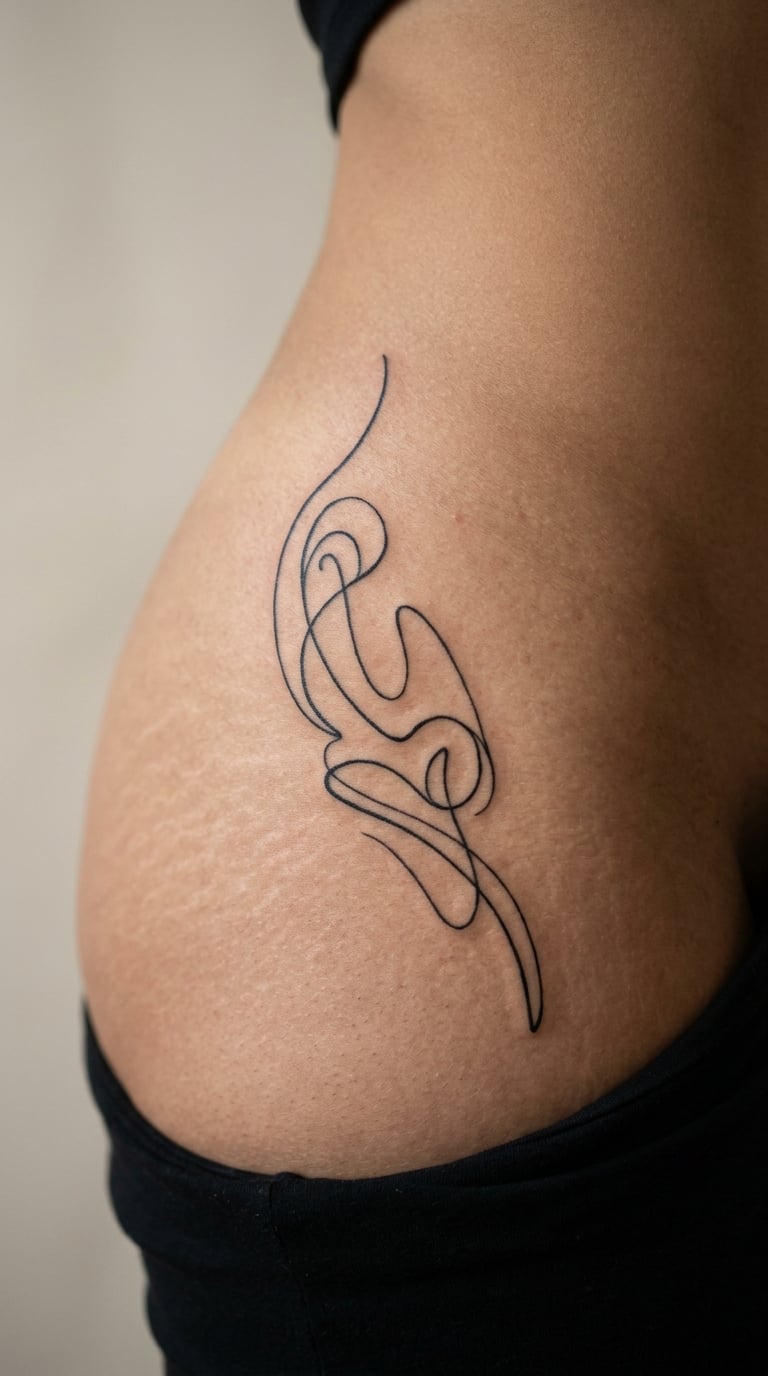
One continuous line that loops, crosses itself and closes back in, with no imagery inside or outside the shape. It is the design equivalent of a doodle, and it works because the empty space inside the loop is treated as part of the picture.
Abstract pieces get chosen when the person wants a tattoo that looks considered without carrying a story anyone else can read. It sits close to the body and follows its curve.
Placement: Side of the hip, following the curve above the hip bone. Size: 3 inch (7.5 cm) tall. Style: Single-line blackwork. Pain: Low, around 3 out of 10.
Make it yours: Ask the artist to vary the line weight slightly at the crossing points so the overlaps read as two passes of the same line.
12. Small Sunburst on the Shoulder
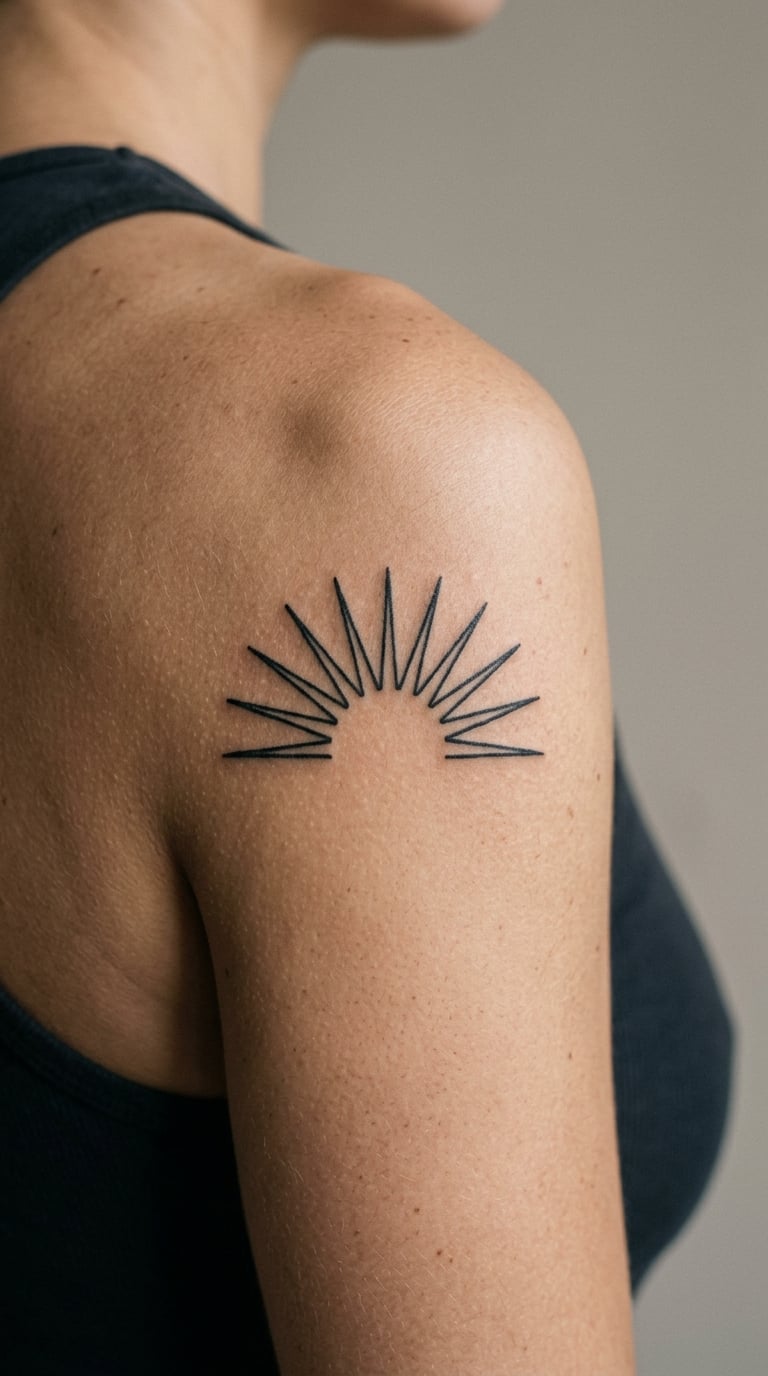
A half circle with evenly spaced straight rays of the same length fanning out from the curve. A semicircle rather than a full sun keeps it graphic and leaves a clean flat edge to sit against the shoulder line.
It is one of the few designs that still reads clearly from across a room, which some people like. Others just like that it is upbeat without being a slogan.
Placement: Outer shoulder, on the deltoid cap. Size: 2 inch (5 cm) wide. Style: Minimal line work. Pain: Low, around 3 out of 10.
Make it yours: Give each ray a slightly different length by a fraction, so it looks drawn rather than measured.
13. Watercolor Butterfly Behind the Ear
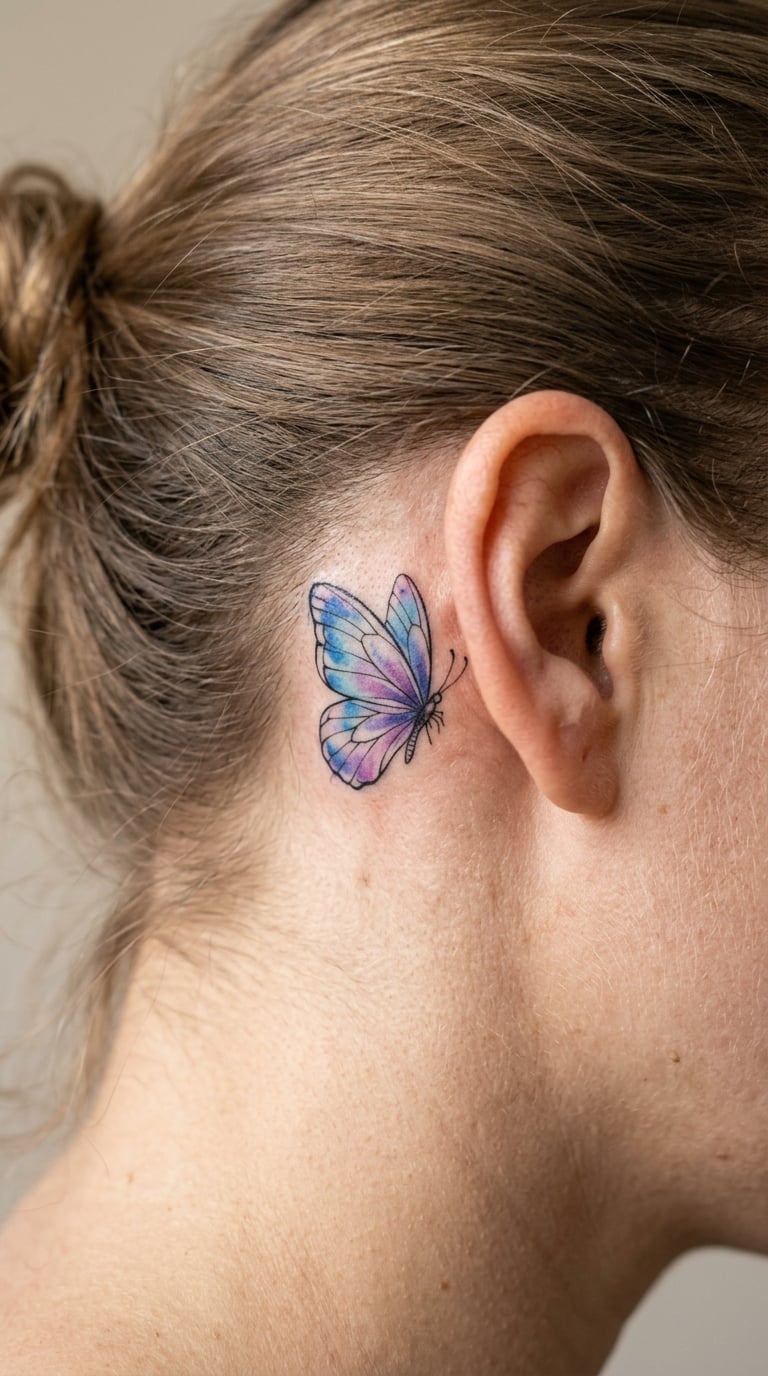
Loose black outlines define the wings and a slim body, then translucent blue and violet washes bleed just past the linework. Nothing is filled in solidly, so the piece stays light while still reading as colour.
This suits someone who wants colour without committing to a filled design or a large colourful piece. The edges stay deliberately soft, which also makes it forgiving as the tattoo ages.
Placement: Behind the ear, slightly below the lobe so the wash does not disappear under hair. Size: 2 inch (5 cm) wide. Style: Watercolor. Pain: Medium, around 4 out of 10.
Ageing note: Soft colour washes fade unevenly first, and blue tones lose depth sooner than black line work. Make it yours: Ask for one small area of saturated colour inside a wing, so there is a single point of focus.
14. Minimal Palm Leaf on the Rib
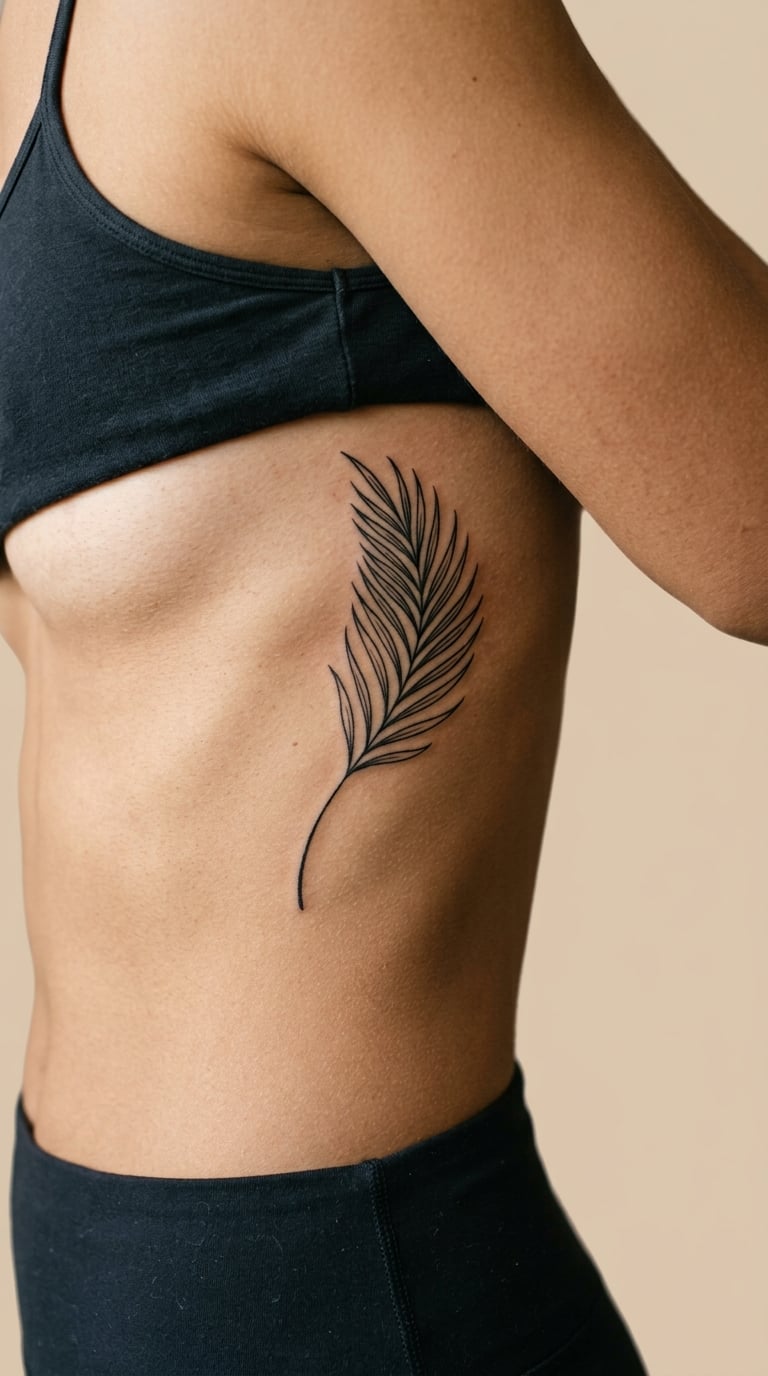
One stem curving along the rib line with a handful of narrow leaflets branching off it. The leaflets get shorter toward the tip, and the line work stays single-weight throughout.
Following the ribcage’s natural arc is the whole point of this placement. A design that ignores the contour usually looks like it was stuck on rather than drawn into the body.
Placement: One side of the ribs, following the curve between the last rib and the waist. Size: 3-4 inch (7.5-10 cm) long. Style: Minimal line art. Pain: High, around 7 out of 10.
Ageing note: Rib skin stretches with breathing and movement, so the stem can bow slightly over the years. Make it yours: Use a stem that curves with your rib line rather than against it, which keeps the piece from looking bent.
15. Dotwork Moon Phase on the Nape
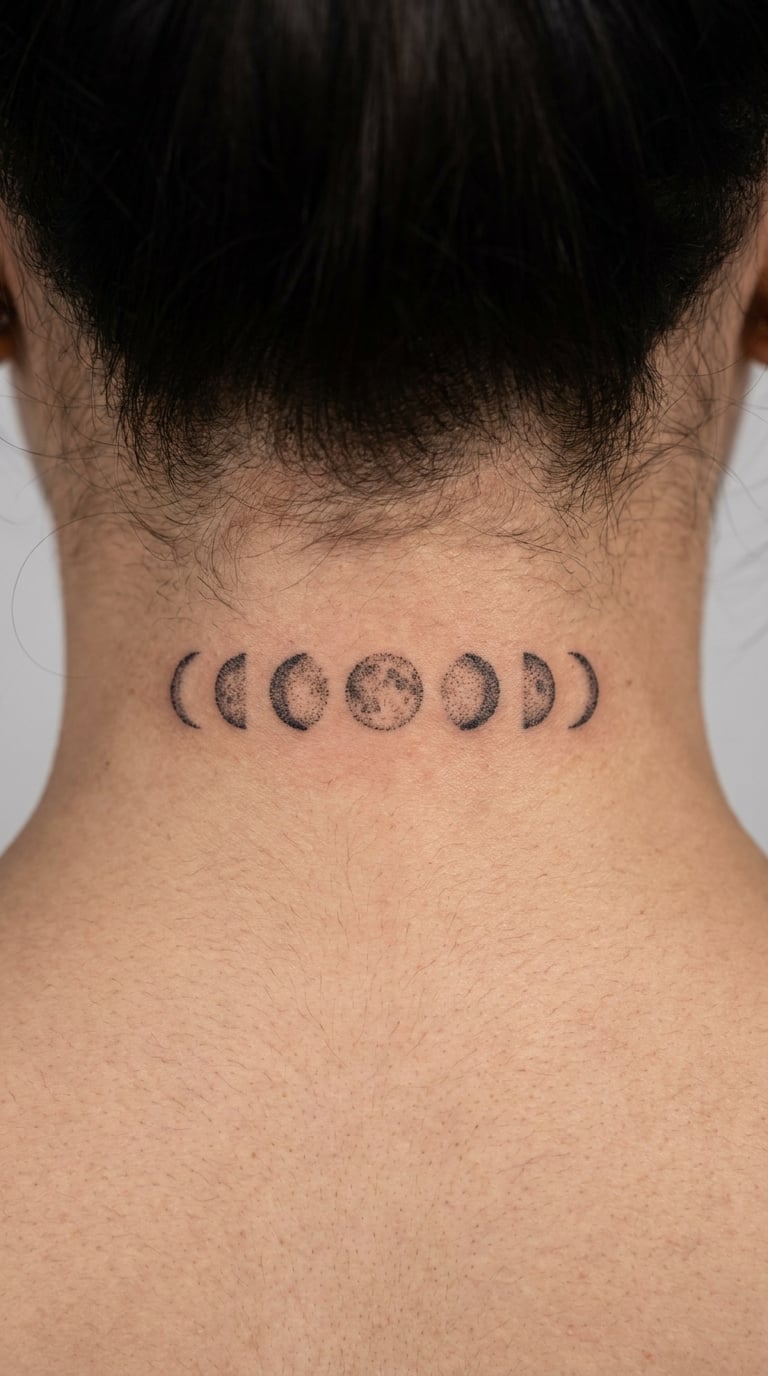
A row of small shapes: a dot, a crescent, a half circle, a full circle, then the same sequence reversed. Each phase is built from stippling or a solid fill, and the sizes are matched so the row reads as one band.
The visual rhythm is what sells it, more than any single shape. People pick it as a quiet piece that only they know is there.
Placement: Nape of the neck, centred a little below the hairline. Size: 2-2.5 inch (5-6 cm) wide. Style: Dotwork. Pain: Medium, around 4 out of 10, and a neck session goes fast.
Ageing note: Individual stipple dots blur together over time, so a dotwork row tends to read softer than solid black in the same spot. Make it yours: Add one extra dot at either end so the sequence does not begin and end on the same phase.
16. Tiny Bird in Flight on the Foot
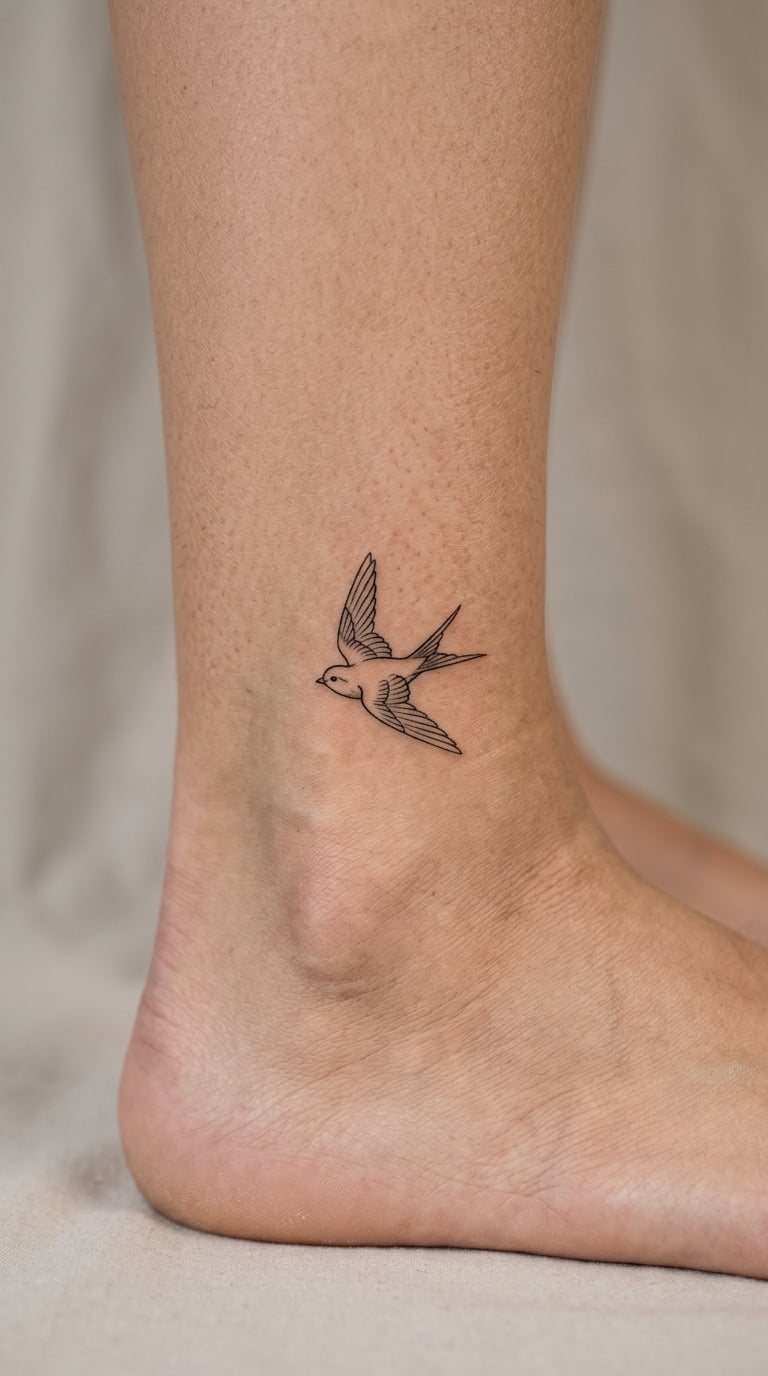
A side view of a bird with one wing lifted, drawn as a short economical outline with a few interior lines for the wing. At small scale the silhouette does all the work, so the artist keeps detail to a minimum.
Simple animal silhouettes are popular with first-timers because they look intentional even when they are tiny. Whether yours means freedom, a person or nothing in particular is your business.
Placement: Outer foot, just above the ankle bone. Size: 1.5-2 inch (4-5 cm) wide. Style: Fine line. Pain: High, around 6 out of 10.
Ageing note: Foot and hand ink wears and fades faster than most placements, and the foot sees more rubbing from shoes. Make it yours: Have the wing angle set slightly lower so the bird reads as gliding rather than mid-takeoff.
17. Micro-Realism Shell on the Back of the Hand
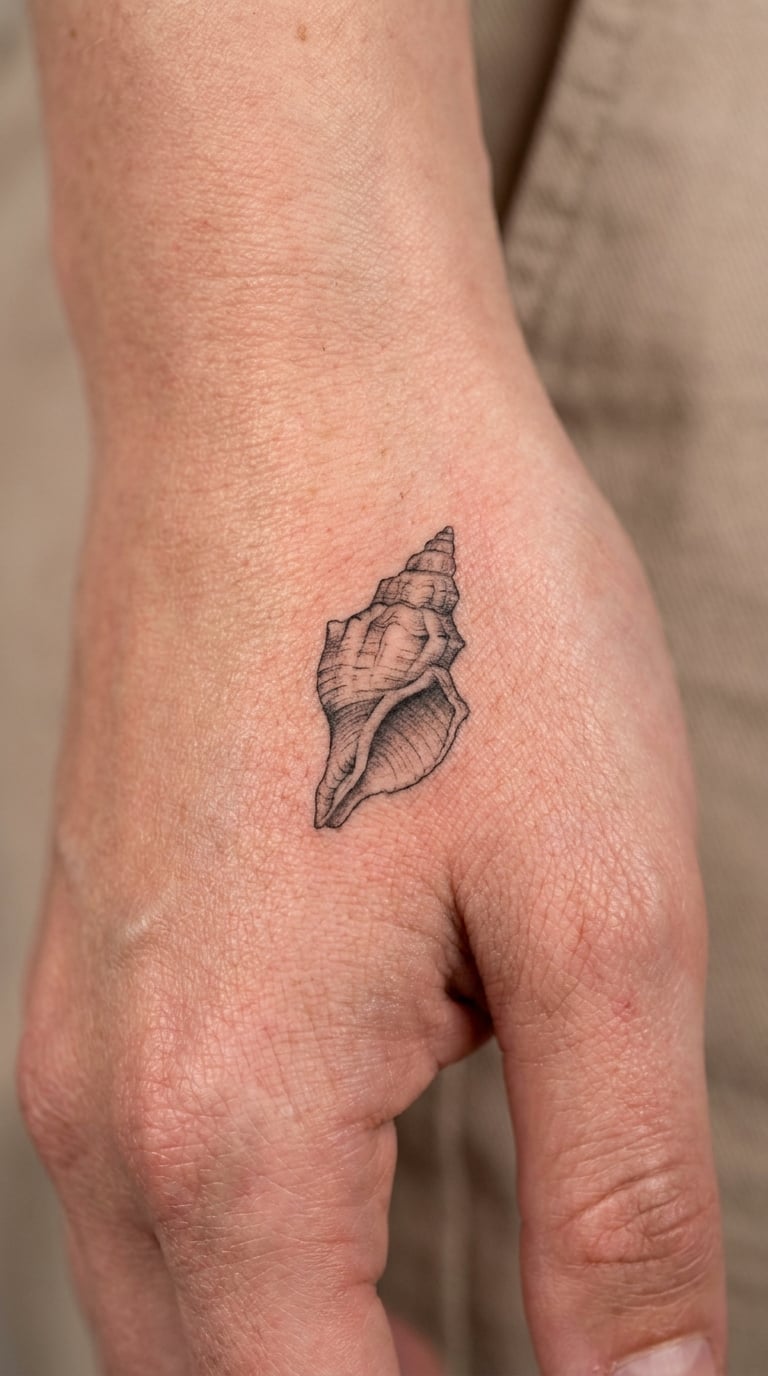
One shell, rendered with black-and-grey shading in a very small space. The form has to be built almost entirely from value changes rather than outlines, which is the whole skill involved in micro-realism.
The appeal is that a realistic object is something people genuinely want on skin, and the shell is a form that stays recognisable when it is small. No symbolic reading is required.
Placement: Back of the hand, between the knuckles. Size: 1.5 inch (4 cm) long. Style: Micro-realism. Pain: High, around 6 out of 10, and the knuckles and tendons make the skin move under the needle.
Ageing note: Fine shading on the hand is among the first things to soften. This one needs more touch-ups than most. Make it yours: Add a single drop of colour to the shadow side, which keeps the realism and makes it unmistakably yours.
18. Simple Peony on the Inner Bicep
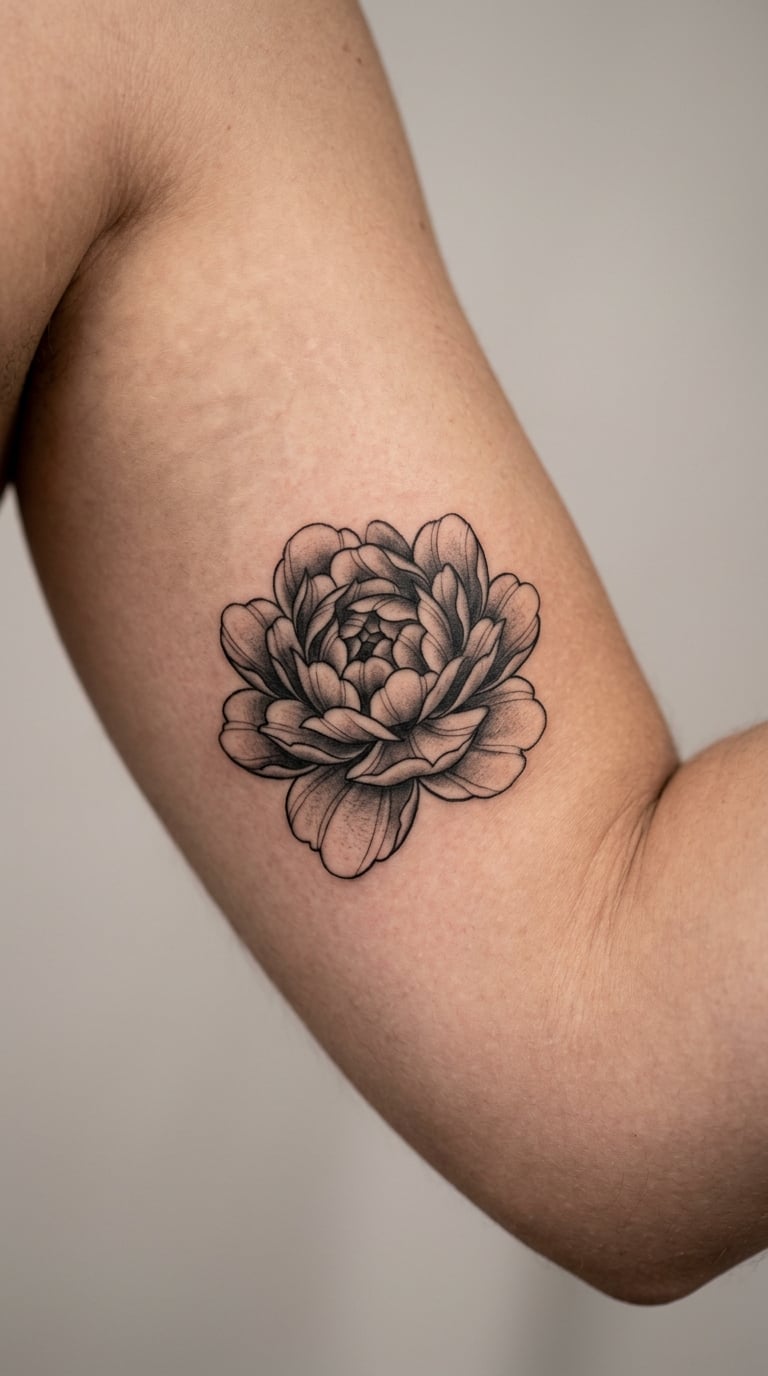
A peony drawn as overlapping petal layers in black line, with grey shading kept to the inner folds so the flower has depth. Layered rather than outlined, which gives it weight without filling the whole shape.
It reads as a detailed piece but stays far away from a sleeve, so it works for someone who wants a real tattoo without a commitment. The inner bicep holds colour reasonably well and hides well under a sleeve.
Placement: Inner bicep, above the elbow. Size: 3 inch (7.5 cm) across. Style: Black and grey floral. Pain: Low, around 3 out of 10.
Ageing note: Petal line work loses definition as it softens, so a peony reads more like a grey bloom over time than a sharp flower. Make it yours: Add one loose petal falling away from the bloom, falling toward the elbow.
19. Dotwork Diamond on the Finger
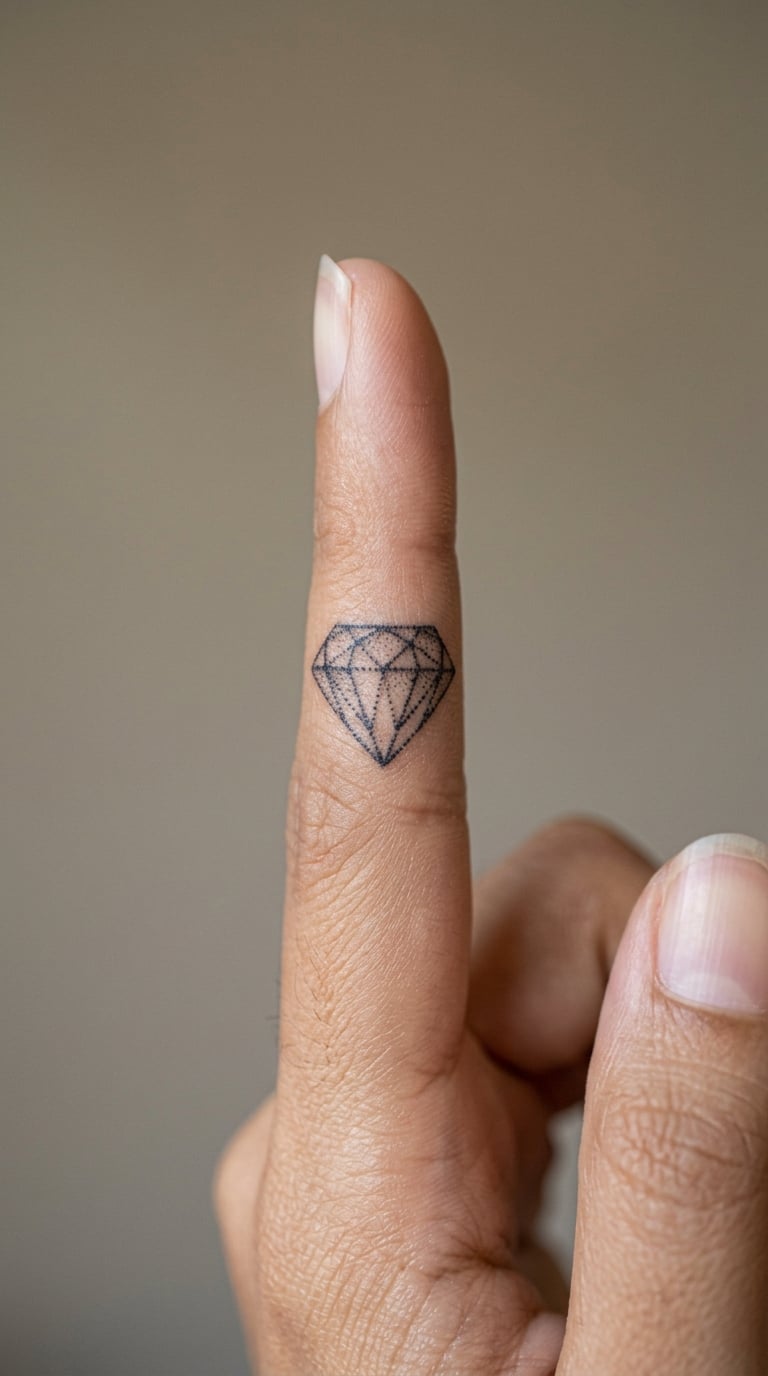
A small geometric diamond outlined with a fine line and filled with evenly spaced stippling. The density of the dots creates the shading, so the edges stay sharp and the centre stays light.
It is a genuinely minimal design that still shows control, which appeals to people who want something small and precise. The interpretation is open; plenty of people simply like the shape.
Placement: Side of one finger, between the knuckles. Size: 1 inch (2.5 cm) across. Style: Dotwork geometric. Pain: High, around 7 out of 10, because the skin over the sides of the fingers is thin and the bone is right underneath.
Ageing note: This is the fastest-fading placement on the list. Hands get washed, sun-exposed and rubbed constantly, and finger detail often needs a touch-up every year or so. Make it yours: Set it at a slight angle to the finger rather than straight, so it reads as a design rather than a marking.
20. Small Outline Globe on the Neck
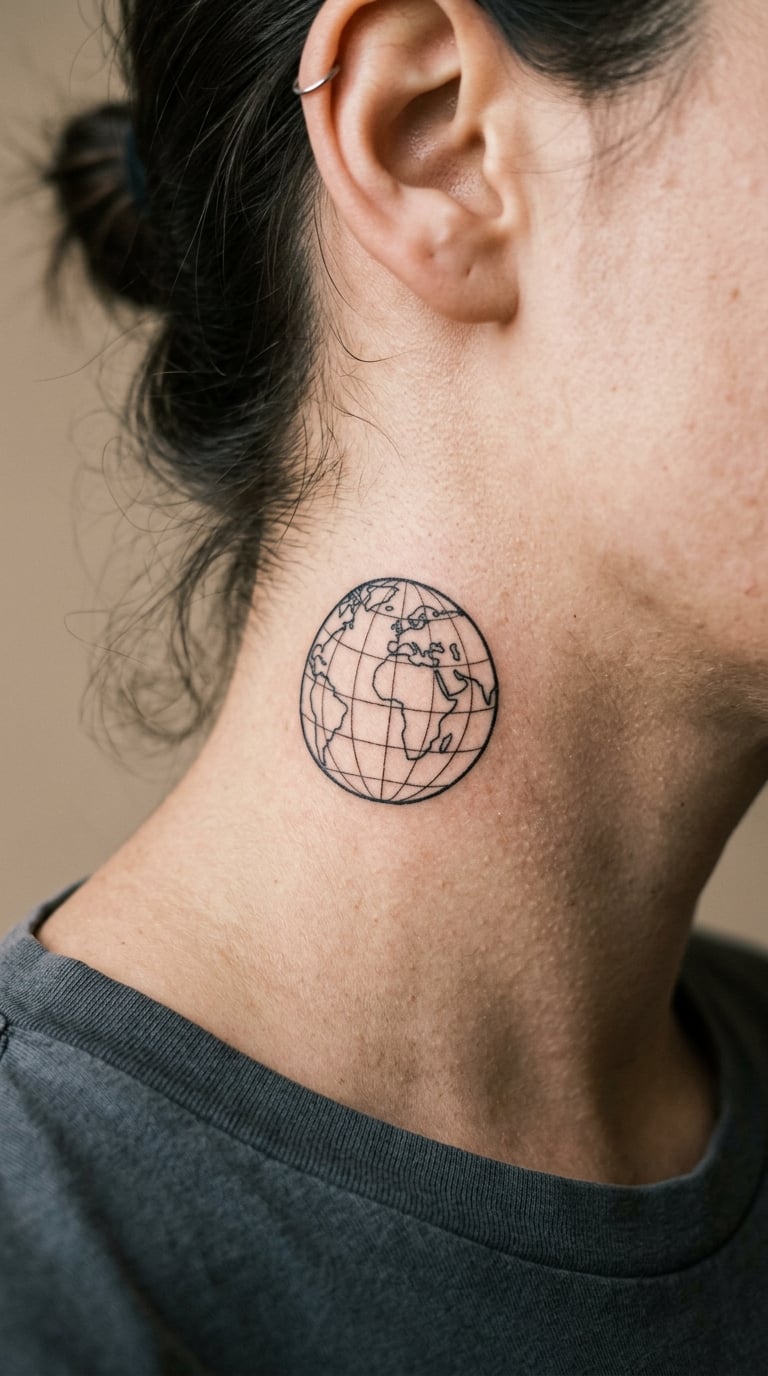
A circle with a straight equator line, one or two curved latitude lines and a couple of simple longitude curves. No continents, no shading inside the sphere, nothing that would need to be accurate.
Travel and personal history are the usual reasons people choose it. A globe can also just be a pleasant object to look at, and both are fine.
Placement: Side of the neck, below the earlobe and clear of the jaw. Size: 2 inch (5 cm) wide. Style: Minimal line art. Pain: Medium, around 5 out of 10, and the neck is a spot people cannot hide a reaction on.
Ageing note: Neck skin gets sun exposure even under a collar, and the curved grid lines are exactly the kind of detail that softens first. Make it yours: Add a single coordinate line or one small marker point on the sphere, which is enough to personalise it without crowding the design.
How to Choose the Right Design
Work through these five checks before you book, and most of the uncertainty about placement disappears.
- Style before size. Fine line, dotwork and micro-realism all need more room than a bold blackwork piece to stay readable. Deciding the style first tells you the size you actually need.
- Match size to the area, not to your nervousness. A two inch design on a thigh or a back looks stranded, because the surrounding space is huge. On a forearm or collarbone the same design looks deliberate. This is the single most common first-timer mistake, and it comes up constantly in beginner threads.
- Count your existing tattoos. If you already have work nearby, decide now whether this piece is part of a group, a matching set, or a standalone. People with several small tattoos often cluster them in one visible spot rather than scattering them.
- Decide how much detail you want to keep visible in ten years. Bold outlines age best. Hairlines, stipple and tiny interior lines are the first things to soften. If long-term crispness matters to you, ask for heavier lines now.
- Preview it before you commit. Ask the artist to stencil the design in place, or tape a printed reference to your skin and check it in a mirror in normal light. A design that looks right flat on a screen often looks different on a curved area.
Book a consultation before finalising anything. An artist who works in that style every day will tell you in a few minutes whether your body can hold the design properly, and that answer is worth more than a week of online reading.
If you want more design options before you get set on placement, these are worth a look: tattoo ideas about growth and toe tattoo ideas with sizing notes.
Cost and Session Time
No two first tattoos cost the same, and the number that surprises people most is that the session length has very little to do with how big the design looks. Size matters, but so do the line weight, the amount of shading, and whether the artist charges hourly or per piece.
| Finished size | What it looks like | Typical session time | What pushes the time up |
|---|---|---|---|
| Tiny | Under 1 inch, a few simple lines | 15-30 minutes | Waiting on a shop minimum rather than the drawing itself |
| Small | 1-3 inches, a simple motif | 30-90 minutes | Fine line detail, or several small pieces in one sitting |
| Medium | 3-5 inches, layered or shaded | 1.5-3 hours | Greyscale shading, dotwork, or a busy outline |
| Larger | Over 5 inches | 3-6 hours | Colour work, realism, and long sessions on sensitive spots |
Artists rate their time in one of two ways. Hourly means you pay for the time the session takes, which makes extra detail cost more. Flat fee per piece means the artist has already costed the design, and adding detail to a drawing you agreed on usually means renegotiating. Either model is normal; the awkward part is not knowing which one you are in, so ask before the stencil goes on.
Shop minimums are the other thing nobody mentions until the quote arrives. A studio that charges by the hour still has a floor, so a tiny design can carry the same bill as a much larger one. Local rates, travel and how booked-up the artist is all move the final number, and artists quote your specific design rather than a standard price list, so the only real figure is the one you get in a message before you commit.
Ask what the artist charges for a consultation and whether it comes off the final cost. Many do, and it saves you booking a full session for a design that turns out to suit the placement badly.
Aftercare Basics
Whatever your placement, start here: follow your artist’s aftercare instructions, because they know how that specific design was tattooed and what it needs.
- Wash it gently with clean water and a mild, unscented soap, then pat it dry with something disposable rather than a towel you use on your face.
- Keep it out of swimming pools, hot tubs and open water while the surface is still healing, and keep long, direct sun off it once the tattoo is exposed.
- Do not pick, scratch or flake at it. The flakes that appear in the first week are part of healing, and pulling them is how people end up with patchy ink.
- Use the product your artist recommends, and use it as often as they say. Over-moisturising a fresh tattoo is a common mistake too.
- Follow their guidance on touch-ups and when to come back for them. Fine line on hands, fingers and ankles usually needs an earlier review than a bold piece on an upper arm.
Frequently Asked Questions
Where should a beginner get their first tattoo?
The outer upper arm, outer forearm and outer thigh are the easiest first placements. All three are muscular rather than bony, score low on pain, sit under a shirt when you need them to, and heal without much difficulty. If you want your first tattoo visible, the outer forearm or the outer bicep works well. If you need it discreet for work, the upper arm or the outer thigh is the better bet.
What are some good places to place a small tattoo?
For a small design, aim for areas with enough flat surface to hold it: the inner forearm, the outer upper arm, the collarbone and the outer calf all work at two to three inches. Avoid putting a very small piece on a very large area such as the thigh, the back or the ribs, where it looks stranded. The inner forearm is popular because it is easy to cover and easy to show.
Where can I place a small tattoo that isn’t visible?
The upper arm and outer thigh hide under short sleeves and are the simplest options. The upper back between the shoulder blades, the chest, the side of the hip and the inner forearm are also coverable with ordinary clothing. If you need it invisible at work, test the placement with a shirt before you book, since sleeve length and collar height vary a lot between workplaces.
What is the most painful spot to get a tattoo?
The ribs, the side of the neck, the inner arm near the armpit, the spine and the sides of the fingers rate highest, mostly because bone sits close to the surface and the skin there moves. The outer upper arm, outer thigh, calf and hip are the easiest. Most artists will offer a break on a difficult spot, and taking one does not affect the result.
How long should I wait before getting another tattoo?
Wait until the first tattoo is fully healed, which is usually two to three weeks for the surface and closer to six weeks for the deeper layers, with no flaking or raised texture left. Rushing a second piece next to a fresh one can affect how both settle. If you already know you want more, talk to your artist at the first session so the placements are planned together.
Conclusion: Where to Begin
If you want an uncomplicated first tattoo, a botanical sprig on the inner forearm or a line-art house on the upper arm is hard to go wrong. Both are simple to draw well, easy to cover, and forgiving of an imperfect result.
If you are already building a collection and want something with more presence, a fine-line bird, a small butterfly or a black-and-grey peony gives you a piece that holds its own alongside later work without committing you to anything large.
Pick one idea from the twenty, collect references of the style you want, confirm the final size in inches with your artist, and book a consultation before anything else. That last step is the one that saves people the most regret.